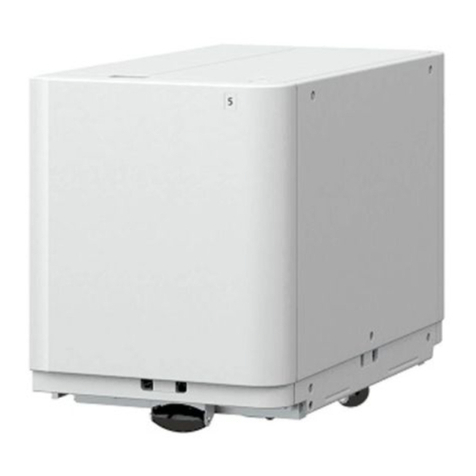
Canon Puncher Unit-L1 User manual

SERVICE
MANUAL
Paper Folding
Unit-L1
Canon
December 6,2022
Rev. 2
COPYRIGHT
©
2022 CANON INC.
CANON Paper Folding Unit-L1Rev. 2PRINTED IN U.S.A.

Important Notices
Application
Canon Inc. has issued this manual for qualified persons to learn technical theory, installation, maintenance, and repair of products.
This manual covers all localities where the products are sold. For this reason, this manual may contain information that does not
apply to your locality.
Following "Trademarks" and "Copyright" are not applicable if they are not supported by laws and regulations in the country or
region that this document and products are used in.
Corrections
This manual may contain technical inaccuracies or typographical errors due to improvements or changes in products.
When changes occur in applicable products or in the contents of this manual, Canon will release technical information as the
need arises. In the event of major changes in the contents of this manual over a long or short period, Canon will issue a new
edition of this manual.
Trademarks
• The Bluetooth word mark and logos are registered trademarks owned by Bluetooth SIG, Inc. and any use of such marks by
Canon is under license.
• Mopria®, the Mopria® Logo and the Mopria® Alliance logo are registered trademarks and service marks of Mopria Alliance,
Inc. in the United States and other countries. Unauthorized use is strictly prohibited.
• Apple, AppleTalk, Bonjour, iPad, iPhone, iPod touch, Mac, OS X and Safari are trademarks of Apple Inc.
• Microsoft, Windows, Windows Vista, Windows Server, Internet Explorer, Microsoft Edge, Excel and PowerPoint are either
registered trademarks or trademarks of Microsoft Corporation in the United States and/or other countries.
• Google Cloud Print, Google Chrome and Android are either registered trademarks or trademarks of Google Inc.
• iHQC™ compression technology by I.R.I.S., copyright 2007-2015, All Rights Reserved.
• PDF-iHQC™, XPS-iHQC™ technology by I.R.I.S., copyright 2007-2015, All rights Reserved.
• Java is a registered trademark of Oracle and/or its affiliates.
• Adobe is a registered trademark of Adobe Systems Incorporated.
• Command WorkStation, EFI, Fiery, FreeForm, Spot-On, and WebTools are trademarks of Electronics For Imaging, Inc. and/
or its wholly owned subsidiaries in the U.S. and/or certain other countries.
• TORX® is a registered trademark of Acument Intellectual Properties, LLC in the United States.
• Matrox is a registered trademark of Matrox Corporation in the Canada.
• Other product names and other names in this document are generally registered trademarks or trademarks of the companies.
Copyright
The copyright of this document belongs to Canon Inc. This document may not be copied, reproduced or translated into another
language, in whole or in part, without the prior consent of Canon Inc.
Copyright CANON INC. 2022
Caution
Use of this manual should be strictly supervised to avoid disclosure of confidential information.
Important Notices

Explanation of Symbols
The following symbols are used throughout this Service Manual.
Symbols Explanation Symbols Explanation
Check.
1x
Remove the claw.
Check visually.
1x
Insert the claw.
Check a sound. Push the part.
1x
Disconnect the connector. Connect the power cable.
1x
Connect the connector. Disconnect the power cable.
1x
Remove the cable/wire from the
cable guide or wire saddle.
Turn on the power.
1x
Install the cable/wire to the cable
guide or wire saddle.
Turn off the power.
1x
Remove the screw.
1x
Loosen the screw.
1x
Install the screw.
1x
Tighten the screw.
Cleaning is needed. Measurement is needed.
The following rules apply throughout this Service Manual:
1. Each chapter contains sections explaining the purpose of specific functions and the relationship between electrical and
mechanical systems with reference to the timing of operation.
In the diagrams, represents the path of mechanical drive; where a signal name accompanies the symbol, the arrow
indicates the direction of the electric signal.
The expression "turn on the power" means flipping on the power switch, closing the front door, and closing the delivery unit
door, which results in supplying the machine with power.
Important Notices

2. In the digital circuits, '1' is used to indicate that the voltage level of a given signal is "High", while '0' is used to indicate "Low".
(The voltage value, however, differs from circuit to circuit.) In addition, the asterisk (*) as in "DRMD*" indicates that the DRMD
signal goes on when '0'.
In practically all cases, the internal mechanisms of a microprocessor cannot be checked in the field. Therefore, the operations
of the microprocessors used in the machines are not discussed: they are explained in terms of from sensors to the input of
the DC controller PCB and from the output of the DC controller PCB to the loads.
The descriptions in this Service Manual are subject to change without notice for product improvement or other purposes, and
major changes will be communicated in the form of Service Information bulletins.
All service persons are expected to have a good understanding of the contents of this Service Manual and all relevant Service
Information bulletins and be able to identify and isolate faults in the machine.
Important Notices

Contents
Safety Precautions...............................................................................................1
Points to Note Before Servicing.......................................................................................................... 2
Points to Note at Cleaning...................................................................................................................2
Notes on Assembly/Disassembly........................................................................................................2
Handling of packaging materials......................................................................................................... 2
1. Product Overview.............................................................................................4
Features.............................................................................................................................................. 5
Features...............................................................................................................................................5
Specifications...................................................................................................................................... 6
Specifications....................................................................................................................................... 6
Z-fold Position ......................................................................................................................................6
Name of Parts..................................................................................................................................... 8
External View........................................................................................................................................8
Cross Section....................................................................................................................................... 9
2. Technical Explanation................................................................................... 11
Basic Configuration........................................................................................................................... 12
Functional Configuration......................................................................................................................12
Overview of Electrical Circuitry.............................................................................................................12
Component Configuration.................................................................................................................... 13
Drive Configuration..............................................................................................................................14
Controls.............................................................................................................................................15
Controls..............................................................................................................................................15
Basic Operation ................................................................................................................................16
Outline............................................................................................................................................... 16
Through-feed Operation...................................................................................................................... 16
Z-fold Operation..................................................................................................................................17
Inlet Unit............................................................................................................................................ 22
Fold Unit............................................................................................................................................23
Fold-enhancing Unit.......................................................................................................................... 25
Jam Detection................................................................................................................................... 27
Outline............................................................................................................................................... 27
Jam Type........................................................................................................................................... 27
Power Supply.................................................................................................................................... 28
Power Supply Route............................................................................................................................28
Protection Function............................................................................................................................. 28
Upgrading..........................................................................................................................................29
Upgrading...........................................................................................................................................29
3. Periodical Service.......................................................................................... 30
List of Work for Scheduled Servicing................................................................................................ 31
Contents
i

4. Parts Replacement and Cleaning................................................................. 32
Removing this Machine from the Host Machine................................................................................33
Removing the Paper Folding Unit.........................................................................................................33
List of Parts....................................................................................................................................... 39
External Covers.................................................................................................................................. 39
Main Units.......................................................................................................................................... 40
Consumable Parts Requiring Periodic Replacement and Cleaning Points............................................... 41
List of Motors/PCB.............................................................................................................................. 42
List of Sensors/Switch......................................................................................................................... 43
Other Parts.........................................................................................................................................44
External Cover...................................................................................................................................45
Removing the Rear Cover....................................................................................................................45
Removing the Front Cover...................................................................................................................46
Main Unit........................................................................................................................................... 47
Removing the Upper Cover Unit...........................................................................................................47
Removing the Fold-enhancing Unit.......................................................................................................48
Removing the Motor Unit..................................................................................................................... 53
Periodic Replacing Parts, Durable Parts, Cleaning Parts................................................................. 54
Cleaning the Registration Roller (Upper)...............................................................................................54
Cleaning the Folding Roller..................................................................................................................54
Motor................................................................................................................................................. 56
Removing the Registration Motor (M1)..................................................................................................56
Removing the Fold Motor (M2).............................................................................................................56
Removing the Pushing Plate Motor (M3)...............................................................................................57
Removing the Fold-enhancing Motor (M4)............................................................................................ 58
Sensor...............................................................................................................................................60
Removing the Pre-registration Sensor (PS1).........................................................................................60
Removing the Pushing Plate HP Sensor (PS2)......................................................................................61
Removing the Fold-enhancing HP Sensor (PS3)................................................................................... 62
Removing the Fold-enhancing Motor Clock Sensor (PS4)......................................................................63
Removing the Registration Disengagement HP Sensor (PS5)................................................................ 64
Removing the Post-fold Sensor (PS6).................................................................................................. 64
PCB...................................................................................................................................................66
Removing the Paper Folding Unit Controller PCB..................................................................................66
Other Parts........................................................................................................................................68
Removing the Registration Roller (Upper).............................................................................................68
Removing the Folding Roller (Upper)....................................................................................................68
Removing the Folding Roller (Lower)....................................................................................................71
Removing the Pushing Plate................................................................................................................72
Removing the Buffer Pass Unit Connecting Plate.................................................................................. 73
5. Adjustment..................................................................................................... 75
Overview........................................................................................................................................... 76
Service Mode......................................................................................................................................76
Adjustments When Replacing Parts......................................................................................................77
Basic Adjustment...............................................................................................................................78
Adjustment of the Z-fold Position..........................................................................................................78
Adjustment of the Tab Length of Z-fold................................................................................................. 79
Adjustment when Replacing the Parts.............................................................................................. 80
Contents
ii

Handling When Replacing the Paper Folding Unit Controller PCB ......................................................... 80
Handling When Replacing the Upper Cover Unit .................................................................................. 81
Adjustment When Replacing the Fold-enhancing Unit............................................................................81
Handling When Replacing the Pushing Plate HP Sensor (PS2) ............................................................. 85
Handling When Replacing the Post-fold Sensor (PS6) .......................................................................... 85
Handling When Replacing the Fold-enhancing Motor (M4).....................................................................85
Service Label.....................................................................................................................................86
Back-up of Service Mode.....................................................................................................................86
Service Label......................................................................................................................................86
APPENDICES......................................................................................................87
Service Tools.....................................................................................................................................88
Solvents and Oils................................................................................................................................ 88
Special Tools...................................................................................................................................... 88
General Circuit Diagram....................................................................................................................89
General Circuit Diagram...................................................................................................................... 89
Contents
iii

Points to Note Before Servicing
• At servicing, be sure to turn OFF the power source according to the specified steps and disconnect the power plug.
• At the time of assembly and disassembly, be sure to place a sheet of paper under the parts to prevent them from being soiled
or foreign matter from entering the parts.
• Before installing the parts to the host machine, ensure that they are free of foreign matter.
• Be careful not to be injured by burrs of edges, sharp corners or protrusions.
CAUTION:
Hazardous area such as corners, edges, springs and other sharp sections may be remaining on products. Always be
aware of the presence of hazardous area to avoid injury caused by contacting and/or striking those area, by not over-
concentrating on service work.
Points to Note at Cleaning
When performing cleaning using organic solvent such as alcohol, be sure to check that the component of solvent is vaporized
completely before assembling.
Notes on Assembly/Disassembly
Follow the items below to assemble/disassemble the device.
1. Disconnect the power plug to avoid any potential dangers during assembling/disassembling works.
2. If not specially instructed, reverse the order of disassembly to reinstall.
3. Ensure to use the right screw type (length, diameter, etc.) at the right position when assembling.
4. To keep electric conduction, binding screws with washers are used to attach the grounding wire and the varistor. Ensure to
use the right screw type when assembling.
5. Unless it is specially needed, do not operate the device with some parts removed.
6. Never remove the paint-locked screws when disassembling.
CAUTION:
English
CAUTION
The fuse may be in the neutral, and that the mains shall be disconnected to de-energize the phase conductors.
German
ACHTUNG
Die Sicherung kann sich im Nullleiter befinden und das Hauptnetz muss abgetrennt werden, um die Phasenleiter
stromlos zu machen.
Handling of packaging materials
When packaging materials for products and service parts are disposed of, they must be disposed of in accordance with local
government rules.
For Italy, Environmental labelling:
For proper recycling of the packaging of our products and articles, please visit.
https://www.canon-europe.com/sustainability/approach/packaging/
Per l'Italia , Etichettatura ambientale :
per il corretto riciclo degli imballaggi dei nostri prodotti e articoli , visita il sito.
Safety Precautions
2

Features
Features
• This unit is able to fold each sheet of paper in a Z-fold.
Paper size: A3, B4, A4R, 11X17, LGL, LTRR
Paper weight: Non coated paper (52 g/m2 to 105 g/m2)
1. Product Overview
5

Specifications
Specifications
Item Specifications Remarks
Folding method 2 rollers pushing plate fold-enhancing method
Folding mode Z-fold
Paper type Z-fold Thin, plain, recycled, bond, color
Through-pass Paper available for the host machine
Paper size Z-fold A3, B4, A4R, 11X17, LGL, LTRR
Through-pass Width direction: 98.0 to 320.0 mm
Feed direction: 139.7 to 457.2 mm
Paper weight Z-fold Non coated paper: 52 g/m2 to 105 g/m2
Through-pass Non coated paper: 52 g/m2 to 300 g/m2
Coated paper: 120 g/m2 to 250 g/m2
Different depending on the host
machine.
Stack tray None Stacking to the downstream finisher
Dimensions W: 201 mm × D: 579 mm x H: 896 mm (Including the lower cover)
Weight Approx. 12 kg
Power supply Supplied from the host machine: DC24V, DC12V
Max. power consump-
tion
Z-fold: 254 W or less Including the finisher, buffer path
unit and puncher unit
Z-fold Position
D1 D2
L0
A
H
Z1
Feed Direction
Front Side
Rear Side
Paper size Z1 fold L0 overall length (reference)
A3 109.5 ± 2.0 mm 210.0 mm
B4 95.5 ± 2.0 mm 182.0 mm
A4R 78.75 ± 2.0 mm 148.5 mm
11x17 112.45 ± 2.0 mm 215.9 mm
1. Product Overview
6

Paper size Z1 fold L0 overall length (reference)
LGL 93.4 ± 2.0 mm 177.8 mm
LTRR 74.35 ± 2.0 mm 139.7 mm
Item Standard *1 Remarks
A tab 4.5 ± 1.0 mm
D1 oblique fold ±1.0 mm or less
D2 oblique fold ±1.0 mm or less
H fold height A3: 15 mm
A4R: 25 mm
Equivalent of 68 g/m2 paper.
*1: For A zone (15 to 27.5 deg C, 25 to 75% RH)
1. Product Overview
7

Name of Parts
External View
■ Front
Lower Front Cover
Upper Cover
Front Cover
1. Product Overview
8

■ Rear
Rear Cover
Lower Rear Cover
Cross Section
[1]
[2]
[3]
[4]
[6]
[5]
No. Name No. Name
[1] Registration Roller (upper) [2] Registration Roller (lower)
[3] Folding Roller (lower) [4] Fold-enhancing Roller
1. Product Overview
9

No. Name No. Name
[5] Folding Roller (upper) [6] Pushing Plate
1. Product Overview
10

Technical
Explanation
2
Basic Configuration.............................12
Controls...............................................15
Basic Operation ..................................16
Inlet Unit..............................................22
Fold Unit..............................................23
Fold-enhancing Unit............................25
Jam Detection..................................... 27
Power Supply......................................28
Upgrading............................................29

Basic Configuration
Functional Configuration
This equipment is organized into 3 major blocks: Inlet Unit, Fold Unit and Fold-enhancing Unit.
Inlet Unit
Fold Unit
Fold-enhancing Unit
Overview of Electrical Circuitry
This machine's sequence of the operation is controlled by the Paper Folding Unit Controller PCB.
Main control/functions of the Paper Folding Unit Controller PCB
• Communicates to the Finisher.
• The CPU on the Paper Folding Unit Controller PCB contains a ROM for storing the operating sequence program.
• The Paper Folding Unit Controller PCB receives various commands through the communication cable from the Finisher to
drive the motors
• It also sends sensor and switch information to the Finisher through the communication cable.
Finisher
Paper Folding Unit
Controller PCB
Motor
Switch
Sensor
CPU
<Related service mode>
• Display of Paper Folding Unit ROM version:
COPIER > DISPLAY > VERSION > FOLD
• Controller PCB backup data write:
SORTER > FUNCTION > FLD-BK-W
• Controller PCB backup data read:
SORTER > FUNCTION > FLD-BK-R
2. Technical Explanation
12

<Related error code>
• E503-0091: Error in communication between the Finisher and Paper Folding Unit
• E503-0092: Error in communication between the Finisher and Paper Folding Unit
• E505-0007: Paper Folding Unit data error
Component Configuration
■ Roller Layout
[1]
[2]
[3]
[4]
[5]
No. Name No. Name
[1] Registration Roller (upper) [2] Registration Roller (lower)
[3] Folding Roller (lower) [4] Fold-enhancing Roller
[5] Folding Roller (upper)
■ Sensor Layout
It describes only sensors on the feed path.
PS1
PS6
2. Technical Explanation
13
Other manuals for Puncher Unit-L1
3
Table of contents
Other Canon Office Equipment manuals

Canon
Canon Two-Knife Booklet Trimmer-A1 User manual

Canon
Canon Puncher Unit-BE1 User manual

Canon
Canon Finisher-R1 User manual

Canon
Canon Paper Deck Unit-F1 User manual

Canon
Canon CLC 5100 User manual

Canon
Canon imageCLASS MF8380Cdw Safety guide

Canon
Canon K1 User manual

Canon
Canon imageCLASS MF9170c User manual

Canon
Canon ColorPASS-Z5000 User manual

Canon
Canon Inner Finisher-A1 User manual