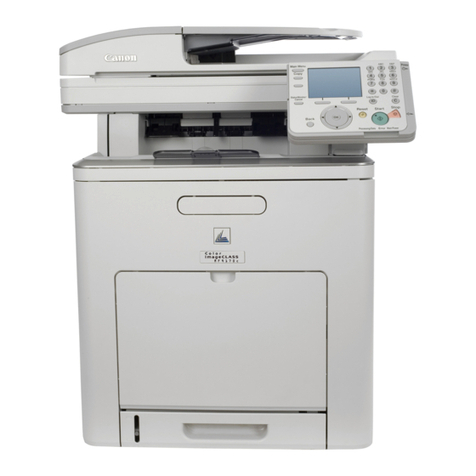
Canon imageCLASS MF8380Cdw Safety guide

Starter Guide
Please read this guide before operating this product.
After you nish reading this guide, store it in a safe place for future reference.
Open the next page.
Read this guide first.
Setting Up the Machine to Suit Your Needs ..................................................1
Available Features .........................................................................1
About the Supplied Manuals ...............................................................2
Connecting the Power Cord ................................................................3
Turning ON the Machine and Specifying the Initial Settings . . . . . . . . . . . . . . . . . . . . . . . . . . . . . . . . . . 3
Setting the Paper Size and Type ............................................................6
Specifying Initial Settings for the Fax Functions and Connecting the Telephone Cable . . . . . . . . . . 7
Selecting a Method for Connecting to the Machine . . . . . . . . . . . . . . . . . . . . . . . . . . . . . . . . . . . . . . . . .10
Connecting to Wired LAN .................................................................11
Installing the Driver/Software .............................................................12
Appendix ................................................................................13
Perform Useful Tasks ......................................................................13
Clearing Paper Jams ......................................................................15
Replacing Toner Cartridges ................................................................16

1-4
* The above label is not provided
with the machine depending on
your country or region.
1327 mm
674 mm
100 mm
100 mm
100
mm
100
mm
851 mm
100 mm Feeder
Paper
cassette Feeder cover
Rear cover
Notes on wireless LAN
• This product is designed for indoor use at a distance of 50 m or less from an access point (the distance may vary depending on the
communication speed or environmental conditions). Keep it at an appropriate distance.
•
Check whether or not anything is blocking communication. The signal may be degraded when passing through walls or floors. Install accordingly.
•
Radio wave interference may occur if any radio wave emitting equipment (i.e. microwave oven) is located near the product and its radio waves are in
the same frequency band as the radio waves used by the wireless LAN. Keep the product as far as possible from sources of radio wave interference.

1-5
1
Carry the machine to the installation site.
2
(A)
(2)
(1)
Remove the packing materials.
(2)
(1)
* Do not remove the cap (A) on
the USB port at this stage. Uncap
when making a USB connection.
Next Page

1-6
Did you remove all the packing materials?
X 11
Check!

1-7
3Prepare the toner cartridges.
Did you remove all the packing materials?
Check!

1-8
4
LGL
(2)
(1)
(2)
(1)
(2)
(1)
(1)
(2)
Load the paper.
Check!
Up to here

1-9
5Install the handset (optional).
Use only the parts which are used in the following procedure. You do not need to use
unnecessary parts.
Connect the modular cable for the handset in “Specifying Initial Settings for the Fax
Functions and Connecting the Telephone Cable.”

1
Setting Up the Machine to Suit Your Needs
Specify settings related to the Copy, Print, Fax, PC Fax, Scan, Remote UI and Media Printing functions. Follow the steps in
the flowchart below.
: available
Copy (2-Sided) Print (2-Sided) Fax (PC Fax) Scan Send to E-mail/Store to Shared Folder Remote UI ADF (2-Sided) Wireless LAN
MF8380Cdw
Start Settings.
Registering the Sender Information P. 7
Fax Settings
Selecting the Receive Mode P. 8
Connecting a Telephone Line P. 9
Installing the Software P. 12
Connecting to Wired LAN/Wireless LAN P. 10
Settings in a Computer
Copy
Media Print Fax
Settings from
a Computer
Print
Scan
PC Fax
Print
Scan
PC Fax
Connecting the Power Cord P. 3
Turning ON the Machine and
Specifying the Initial Settings
Country and Region Settings Time Zone SettingsLanguage Settings
Current Time Settings Color Correction
P. 3
Required Operations
Remote
UI
Network
Connection
USB
Connection
Settings are now complete.
Available Features
The machine offers the following features.

2
Preface
1
Installing the Machine
2
Configuring and Connecting the Fax
3
Connecting to a Computer and
Installing the Drivers
4
Appendix
Read this manual first.
This manual describes the settings
for setting up the machine and
installing the software. Be sure to
read this manual before using the
machine.
Starter Guide
• Preface
• Installing the Machine
• Configuring and Connecting the Fax
• Connecting to a Computer and Installing the Drivers
• Appendix
Read this manual with the
Starter Guide.
This manual describes wireless LAN
setup procedures. Be sure to read
this manual when connecting the
machine to a wireless LAN.
Wireless LAN Setting Guide
• Setting the wireless LAN
• Appendix
About the Supplied Manuals
This manual
MF Driver Installation Guide
Read this manual when
installing the software.
• User Software CD-ROM
• Selecting the Driver to Be Installed
• Installing the Driver/Software
• Installing the MF Drivers and MF
Toolbox
• Installing the MF Drivers via the
WSD Network
• How to Use the Online Help
• Appendix
* The MF Driver Installation Guide is
included in the User Software CD-ROM.
Send Setting Guide
Read this manual for how
to set Send features.
This manual describes setting for
sending scanned data to E-mail and/
or file servers.
• Send to E-mail Function
• Store to Shared Folder Function
Displaying the e-Manual directly from the CD-ROM
Insert the User Software CD-ROM in your
computer.
Click [Display Manuals].
Click [ ] for [e-Manual].
* Depending on the operating system you are using, a
security protection message is displayed.
Allow the contents to be displayed.
Page configuration of
the e-Manual
Click a button for
the function
which you want
to use or desired
information.
Click when referring to the contents,
glossary, and how to use the e-Manual.
Enter a keyword
which you want to
search, and then
click the right
button.
Click when
performing
troubleshooting or
maintenance of
the machine.
e-Manual
Read the desired chapter
to suit your needs.
The e-Manual is categorized by
subject to find desired information
easily.
• Important Safety
Instructions
• Basic Operation
• Copy
• Fax
• Print
• Scan
• Network Settings
• Security
• Setting and
Managing from
Computer
• Troubleshooting
• Maintenance
• Setting Menu List
• Specifications
* The e-Manual is included in the User
Software CD-ROM.
* The Send Setting Guide is included in
the User Software CD-ROM.

3
Connecting the Power Cord
Turning ON the Machine and Specifying the
Initial Settings
Do not connect the USB cable. Connect the USB cable when installing the software.
Make sure that the machine is switched OFF. Plug the power cord into the power socket.
Plug the power cord into an AC power outlet.
1. Turn ON the machine.
The machine enters the Sleep mode to conserve energy
when no operations are performed for a certain period
of time. To cancel the Sleep mode, press the [ ] (Energy
Saver) key on the operation panel.

4
2. Specify initial settings.
Press [ ] or [ ] to select, and
then press [OK].
Press [ ] or [ ] to select, and
then press [OK].
Language
English
Japanese
French
Spanish
Select Country/Region
Australia (AU)
New Zealand (NZ)
Other (Australia)
Preface
1
Installing the Machine
2
Configuring and Connecting the Fax
3
Connecting to a Computer and
Installing the Drivers
4
Appendix
Enter the date and time, and then
press [OK].
Press [OK]. The initial screen appears when
the initial setup is complete.
Press [ ] or [ ] to select, and
then press [OK].
• Move the cursor with [ ] or [ ].
• Press [ ] or [ ] to select the number or switch
to <AM> or <PM>.
Read the messages, and then press [OK].
Open back cover; see
if orange packing
material is removed.
Check that tabs/tape
are removed from
toner cartridge.
Check that paper is
loaded in Drawer 1.
Next NextNext
Time Zone Settings
GMT 0:00
GMT+1:00
GMT+2:00
GMT+3:00
Copy: Press Start
100% A4
Density: 0
Original Type: Text
...
2-Sided: Off
1
+
-
1
Current Time Settings
01/01 2011 12:52 AM
• You can perform color correction by
selecting <Yes> to obtain optimum copy
results or printout results. For details
on the procedure, see the following
“Performing Color Correction.”
Adjust image to
reproduce original
color?
Yes No
* The screen may differ depending on the country or region where you are using the machine.

5
Performing Color Correction
Make sure that paper is
loaded, and then press [OK].
Confirm the procedure for the color correction, and
then press [OK].
Open the feeder.
Place the test chart on the platen glass with the
print side face down.
Place the paper so that the black stripe is at the back
side of the machine.
Close the feeder.
A test chart (adjustment image) is printed.
Press [ ] (Start).
Remove the test chart (adjustment image) placed
on the platen glass in Step .
Check the temperature of the installation site
If the room temperature is low, correction may not be performed properly.
If <Adjustment failed.> appears
• Is the paper loaded correctly?
→Load plain paper or recycled paper of A4/Letter size in the paper cassette.
• Is the test chart placed on the platen glass correctly?
→Place the test chart with the print side face down and the black stripe toward the
back of the machine.
• Has a paper jam occurred?
→Remove the jammed paper.
If you want to perform color correction again, press [ ] (Menu), and then
select the following settings in the following order.
→<Adjustment/Maintenance> → <Auto Gradation Adjustment> → <Copy Image
Adjustment>
Color correction takes approximately 165
seconds.
Supported Paper:
Size: A4, LTR, 16K
Type: Plain, Rec
OK
Steps (Start:Press OK)
1. Print Adj. Image
2. Scan Adj. Image
Step 1
Printing adjustment
image...
Place adjustment
image on the glass
with black side
toward the back.
Press Color to start.
Copy Image Adjustment
Step 2
Scanning adjustment
image...

6
Setting the Paper Size and Type
Press [ ]
(Select Paper/Settings). Press [ ] or [ ] to select, and
then press [OK].
Press [ ] or [ ] to select, and
then press [OK].
Press [ ] or [ ] to select, and
then press [OK].
Press [ ] or [ ] to select, and
then press [OK]. Press [ ] (Reset) to return to
the standby mode.
Select Paper
MP Tray
A4:Plain 2
Paper Settings
1
Paper Settings
Multi-Purpose Tray
Drawer 1
Register Custom Paper
Paper Size
A4
A5
B5
LTR
Paper Type
Plain 2 (70-90 g/m2)
Recycled
Color
Heavy 1 (86-119 g/m2)
Preface
1
Installing the Machine
2
Configuring and Connecting the Fax
3
Connecting to a Computer and
Installing the Drivers
4
Appendix

7
Specifying Initial Settings for the Fax Functions
and Connecting the Telephone Cable
1. Register the fax number and unit name.
Enter information (text, symbols, and numbers)
using the following keys.
# C
Numeric
keys
OK
Entering text, symbols, and numbers
Enter using the numeric keys or [ ] (SYMBOLS).
Key Entry mode: <A> Entry mode: <a> Entry mode: <12>
@ . - _ / 1
ABC abc 2
DEF def 3
GHI ghi 4
JKL jkl 5
MNO mno 6
PQRS pqrs 7
TUV tuv 8
WXYZ wxyz 9
(Not available) 0
(space) @ . / - _ ! ? & $ % # ( ) [ ]{ } < > * + = "
, ; : ' ^ ` | \ ˜
(Not available)
Deleting text, symbols, numbers
To delete text, numbers, or symbols, press [ ] (Clear).
To delete all text, numbers, or symbols, press and hold [ ] (Clear).
Press [ ]. Press [ ] or [ ] to select,
and then press [OK].
Display “Fax Setup Guide” with the following operations to perform
the settings or connections if selecting <Set up Later>.
[ ] (Menu) → <Fax Settings> → <Fax Setup Guide>.
Press [OK]. Enter.
Press [ ] or [ ] to select
<Apply>, and then press
[OK].
Press [OK]. Enter.
Press [ ] or [ ] to select
<Apply>, and then press [OK].
Entering Text
Changing the entry mode
Press [ ] to select <Entry Mode>, and then press
[OK]. You can also press [ ] (Tone) to change
the entry mode.
Entry mode
Text that can be entered
<A>
Alphabet (capital letters) and symbols
<a>
Alphabet (small letters) and symbols
<12> Numbers
Moving the cursor (Entering a space)
Move the cursor by pressing [ ] or [ ]. To enter a space,
move the cursor to the end of the text, and then press [ ].
Perform Fax Setup?
Set up Now
Set up Later
Register the unit
telephone number for
this machine.
*Next Screen: Press OK
Register Unit Tel No.
031234567
<Apply>
+
Register unit name.
(Sender name,
company name, etc.)
*Next Screen: Press OK
Register Unit Name
ABC
<Apply>
Entry Mode: A
What happens with the unit name
Once the information has been registered, it is printed at the
top of each page that you are sending.
Sending Date/Time
Fax/Telephone Number
(FAX No.)
Page Number
Sender Name
(Unit Name)
Telephone Number
Mark
01/01 2011 02:07 PM FAX 123XXXXXXX CANON P.0001
Operate the machine following the on-screen instructions and perform the following settings and connection.
• Registering the fax number and unit name
• Setting the fax receive mode
• Connecting a telephone line
If you are using pulse dialing, change the line type after specifying the settings.

8
2. Select the fax receive mode.
The receive mode is set to <Auto>.
→ Proceed to Step 3.
• Receives a fax automatically.
• Does not use the telephone or optional handset.*
* If connecting with the telephone or optional handset in auto receive
mode, the incoming ring sounds when receiving a fax or telephone
call. You can answer the telephone while the incoming ring is
sounding. To configure so that the incoming ring does not sound, see
“Incoming Ring” in the e-Manual.
Do you want to use
this machine for fax
only (no telephone)?
Yes
No
Do you want to auto-
receive faxes and
answer phone manually?
Yes
No
Do you want to use
an answering machine
to answer the phone?
Yes
No
The receive mode is set to <Fax/Tel Auto Switch>.
→ Proceed to Step 3.
• Receives a fax automatically.*
• Responds to a telephone call by
picking up the handset.
* An incoming ring sounds. To configure so that the incoming ring does
not sound, see “Incoming Ring” in the e-Manual.
The receive mode is set to <Answering Machine>.
→ Proceed to Step 3.
• Receives a fax automatically.
• Responds to a telephone call with
the built-in answering machine.
• Rings when receiving a call or fax.
The receive mode is set to <Manual>.
→ Proceed to Step 3.
• Responds to both a telephone
call and fax with handset
pickup.
• Rings when receiving a call
or fax.
You can specify how the machine should operate for a fax call or telephone call.
By answering the prompts that appear on the display, the machine will be set to one of the following four operation modes.
<Auto><Fax/Tel Auto Switch><Answering Machine><Manual>
* You can set a receive mode other than the above manually depending on your country or region. For details on the setting procedure, see “Receiving Faxes” in the e-Manual.
Yes
Yes
Yes
No
No
No
Preface
1
Installing the Machine
2
Configuring and Connecting the Fax
3
Connecting to a Computer and
Installing the Drivers
4
Appendix

9
3. Connect the telephone line.
Press [OK].
The displayed screen varies depending on the specified
receive mode.
Connect the telephone line to the machine as needed.
Press [ ] to select, and then press [OK].When connecting is
finished, press [OK].
Fax settings and connections have been completed.
End Fax Setup
Guide?
NoYes
Restart the machine to activate the settings.
Turn OFF the machine and wait for at least 10 seconds before turning it ON again.
* <Select Line Type> may be unavailable depending on the country where you are using the machine.
Press [OK].
Turn the main power
OFF and ON to apply
settings.
OK
If you want to connect an external telephone with fax functions
Configure the external telephone so that it does not receive faxes
automatically (receives faxes manually) to invalidate the automatic
fax receiving function.
4. Change the line type.
By default, the telephone line type on the machine is set to tone dialing. If you use tone dialing, skip the following procedure.
If you use pulse dialing, follow the procedure below and change the telephone line type setting on the machine to pulse
dialing.
If you do not know the type of telephone line you use, contact your local telephone company.
Press [ ] (Menu). Press [ ] or [ ] to select <Fax
Settings>, and then press [OK].
Press [ ] or [ ] to select <Basic
Settings>, and then press [OK].
Press [ ] or [ ] to select
<Select Line Type>, and
then press [OK].
Press [ ] or [ ] to select the line type
you are using, and then press [OK].
<Pulse>: Pulse dialing
<Tone>: Tone dialing (Default)
Press [ ] (Menu) to close the
menu screen.
Connect phone line.
Follow illustrations
on the next screen:
Connect line to A.
*Next : Press OK
Connect phone line.
Follow illustrations
on the next screen
to make connections:
1. Phone line to A
Telephone line
connector
Telephone
(C)
(B)
(A)
Handset
(optional)

10
Selecting a Method for Connecting to the
Machine
Select from the following three methods, depending on your environment and devices.
Preface
1
Installing the Machine
2
Configuring and Connecting the Fax
3
Connecting to a Computer and
Installing the Drivers
4
Appendix
If you are not sure whether the router or access point you are using supports wireless LAN or wired LAN, see the
instruction manual provided with the network device you are using, or contact the manufacturer.
Installing the Driver/Software P. 12
Connecting via a USB Cable
Connect them using a USB cable.
USB cable
You need this
Connecting to Wired LAN P. 11
* Check to make sure that there is a free port for connecting the machine or the
computer you use to the router or hub.
* Use a Category 5 or higher twisted pair cable for the LAN.
Wired LAN
Connect them using a LAN cable.
You need this
Router
or
hub
LAN cable
Connecting to Wireless LAN
For details, see the separate Wireless LAN Setting Guide.
* A wireless LAN or access point that supports IEEE802.11 (b/g or n) is required.
Wireless LAN
Connect using wireless communication (radio frequency)
without using a cable.
You need this
Wireless LAN router
or
access point
Explanation of Terminology
• LAN (Local Area Network)
It is a system that enables the sharing of information by connecting multiple devices such as computers that are within a limited area, such as a single room
or inside the same building, using cables or wireless communication (radio waves).
• Wireless LAN
It is a network that connects multiple devices using wireless communication (radio waves) without using cables. Generally, it connects to the network using
a relay device called a wireless LAN router or access point.

11
Connecting to Wired LAN
Before adding the machine to a wired LAN
Precautions when connecting to a wired LAN
The computer and router/hub need to be connected using LAN
cables and the network settings need to be complete.
• For more information, see the instruction manual for the network device you are
using, or contact the networking device manufacturer.
• If the network has not been set up properly, you will not be able to use the machine
on the wired LAN network even if you perform the procedure described below.
• The configuration of your computer or networked device, as well as the router functions, setting methods and security settings, vary depending
on your environment.
• You can connect the machine to either a wireless LAN or wired LAN, but you cannot use both at the same time.
• If using the machine in your office, consult with your network administrator.
Internet
Router
or
hub
LAN cable
1. Connect the LAN cable.
2. The machine sets the IP address automatically. Wait approximately
two minutes.
About the LAN cable
• The machine does not come with a LAN cable,
router, or hub. Have them ready as needed.
• Use a Category 5 or higher twisted pair cable for
the LAN.
If you want to set the IP address manually, see the following.
e-Manual “Setting the IPv4 Address”
e-Manual “Setting the IPv6 Address”
Installing the Driver/Software P. 12
Connect the cable. Make sure that the
green indicator of
the LAN port is on.
If the indicator is not on
Check the following.
•Whether the machine and router/hub are
connected using a LAN cable
•Whether the power of the machine is turned
ON

12
Preface
1
Installing the Machine
2
Configuring and Connecting the Fax
3
Connecting to a Computer and
Installing the Drivers
4
Appendix
Installing the Driver/Software
Use the supplied User Software CD-ROM to install the drivers and software.
The details of the installation is not described in this manual, see the MF Driver Installation Guide.
Insert the CD-ROM. Click.
Click when referring to the MF Driver
Installation Guide.
Click.

13
Perform Useful Tasks
• Enlarged/Reduced Copies
You can enlarge or reduce standard size documents to copy on standard
size paper or specify the copy ratio in percentage.
• 2-Sided Copying
You can copy 1-sided documents on both sides of paper.
• Collating
You can sort copies into sets arranged in page order.
• Copying ID Card
You can make a copy of a 2-sided card onto one side of paper.
• Reduced Layout
You can reduce multiple documents to copy them onto one sheet.
• Paper Save Copy
You can choose the desired copy settings from the options displayed
when you select [ ] (Paper Save Copy) on the operation panel.
This machine comes equipped with a network interface that you can construct a network environment easily. You can connect to the network using the
wireless LAN. Also you can print a document, use the PC fax, and use the network scan from all computers which are connected with the machine. The
machine supports to increase work efficiency as a shared machine in the office.
You can understand the condition of the machine from the computers on the network.
You can access the machine and manage jobs or specify various settings via network.
• Sending a Document Directly from a Computer (PC Fax)
In addition to the normal sending and receiving faxes, you can use the
PC fax.
• Sending
You can register fax destinations in the address book. You can specify the
destinations using various methods, enabling you to send documents
quickly and easily.
• Destination search
• Favorites list
• Coded dialing
• Destination Group
• Specifying from the sending history
• Sequential broadcast
• Receiving
• Receiving in the memory
You can store the received documents in the memory. You can print the
stored documents at any time or if you do not need them, you can delete
them.
• Remote Receiving
If an external telephone is connected, you can switch to the fax receiving
mode immediately by dialing the ID number for fax receiving using the dial
buttons of the telephone during a phone call.
Copy
Fax
Network Settings
Remote UI
2 on 1 4 on 1
Appendix
Other manuals for imageCLASS MF8380Cdw
4
Table of contents
Other Canon Office Equipment manuals

Canon
Canon ColorPASS-Z5000 User manual

Canon
Canon K1 User manual

Canon
Canon Puncher Unit-L1 User manual

Canon
Canon Paper Deck Unit-F1 User manual

Canon
Canon Finisher-R1 User manual

Canon
Canon CLC 5100 User manual

Canon
Canon Inner Finisher-A1 User manual

Canon
Canon Two-Knife Booklet Trimmer-A1 User manual

Canon
Canon Puncher Unit-BE1 User manual

Canon
Canon imageCLASS MF9170c User manual