WA0295E_WSD12T-IIDR_User Manual_R05
V4.6
CAPETTI ELETTRONICA s.r.l. - Strada Stratta 57
10090 CASTIGLIONE TORINESE - TORINO - ITALY
VAT 04837130014 - Phone 011.981.98.11 - Fax 011.981.98.210
2. Configuration.
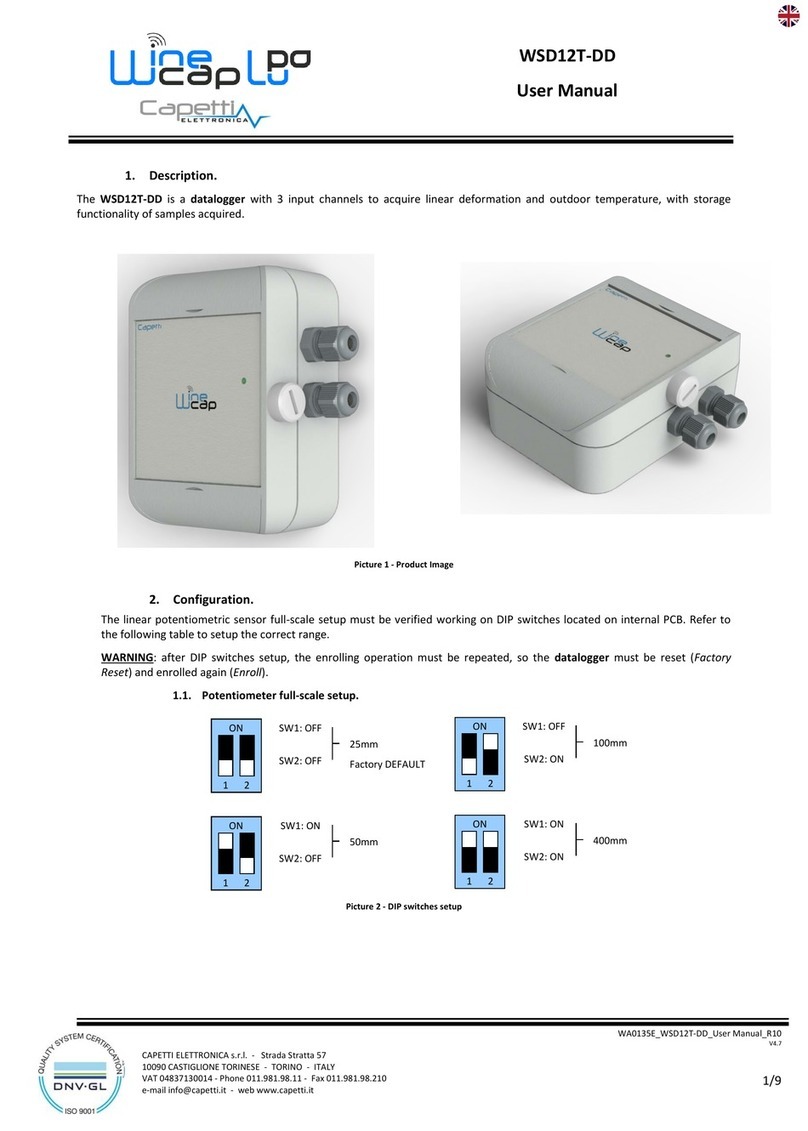
Fix the transducers with two dowels using holes located on the clamp.
Perform the zero regulation rotating the transducer using the slotted hole.
At the end of the zeroing procedure, clamp the dowel’s screws.
a. “ELECTRONIC LEVEL”feature.
Activate the axis reset procedure for channel 2 placing the WineCapKey in the upper left corner and counting 6 amber flashes.
Led will flash based on the measured tilt.
RED flashes or GREEN flashes indicates an off-axis position in one of the two directions.
The flashing rate increases in proximity of the zero point.
Operating on fine tune screws, the zero point can be approached until alternate RED and GREEN flashes are shown. In this
condition, the device is within a range of +/-0.1°.
The electronic level stops automatically after a 2 minutes timeout, or it can be stopped manually with the command 1.
Alternatively, repeat command 6 when the alignment has been reached, thus resetting the instrument to the current position
(refer to paragraph “RESET READING” Feature”).
b. “RESET READING” Feature
Issue command 6 twice in a row to activate the measure reset process.
The first command activates the ELECTRONIC LEVEL function, useful in order to improve the tool's position, meanwhile the
second instance of the command stores the current position as initial offset.
In case of an unintentional reset, it is always possible to place again the tool near the mechanical zero (using “ELECTRONIC LEVEL”
function), and repeat the reset process.
WineCapManager software shows and if necessary reset the offset stored in the device using a remote radio command.
ELECTRONIC LEVEL and RESET READING features are available and works the same for the second tilt channel (channel 3).
Issue command 7 to use these features on channel 3: the first time for the ELECTRONIC LEVEL, twice for RESET READING.
3. Device preset and use mode.
a. Wireless Mode:
No setup operation is needed. Typically the system is configured from factory so the device is already associated to the system
basestation. The device is in STANDBY mode (refer to Picture 6 - Status table - Radio signal quality) for which is necessary to start it
with the TEST command (refer to Installation procedure.).
Otherwise, in case the device is in FACTORY RESET mode (refer to Picture 6 - Status table - Radio signal quality), that means it's ready
for connecting to an existing system, in order to associate it, make reference to the “WineCap System - User Manual R29”software
manual. Is necessary to use the "WineCapManager" software on the PC connected to the basestation that will be coupled with
the device.
b. USB Logger Mode:
For this operation mode, stand-alone with data downloads through USB, the connection with the PC and the
“WineCapManager” running on it is necessary in order to modify the device 's operation mode. The sampling interval must be
set with the device in "STAND-ALONE" (refer to Stand-alone USB datalogger installation.) mode and automatically, the device 's clock
is aligned with the PC's clock, in order to assure the temporal reference of the sample.
Sampling operations start may be selected disconnecting the USB cable or giving the proper command with the magnetic key.
(refer to Stand-alone USB datalogger installation.). More details on device 's connection/disconnection through the USB cable are
available on the WineCap System - User Manual R29 manual.


