Carefree Installation Manual FREEDOM WM
052563-001r2 5
INSTALLATION USING AN AWNING RAIL
The awning may be mounted using an existing awning rail. Awning rails are not furnished with the awning.
1. Determine the optimum positioning of the awning.
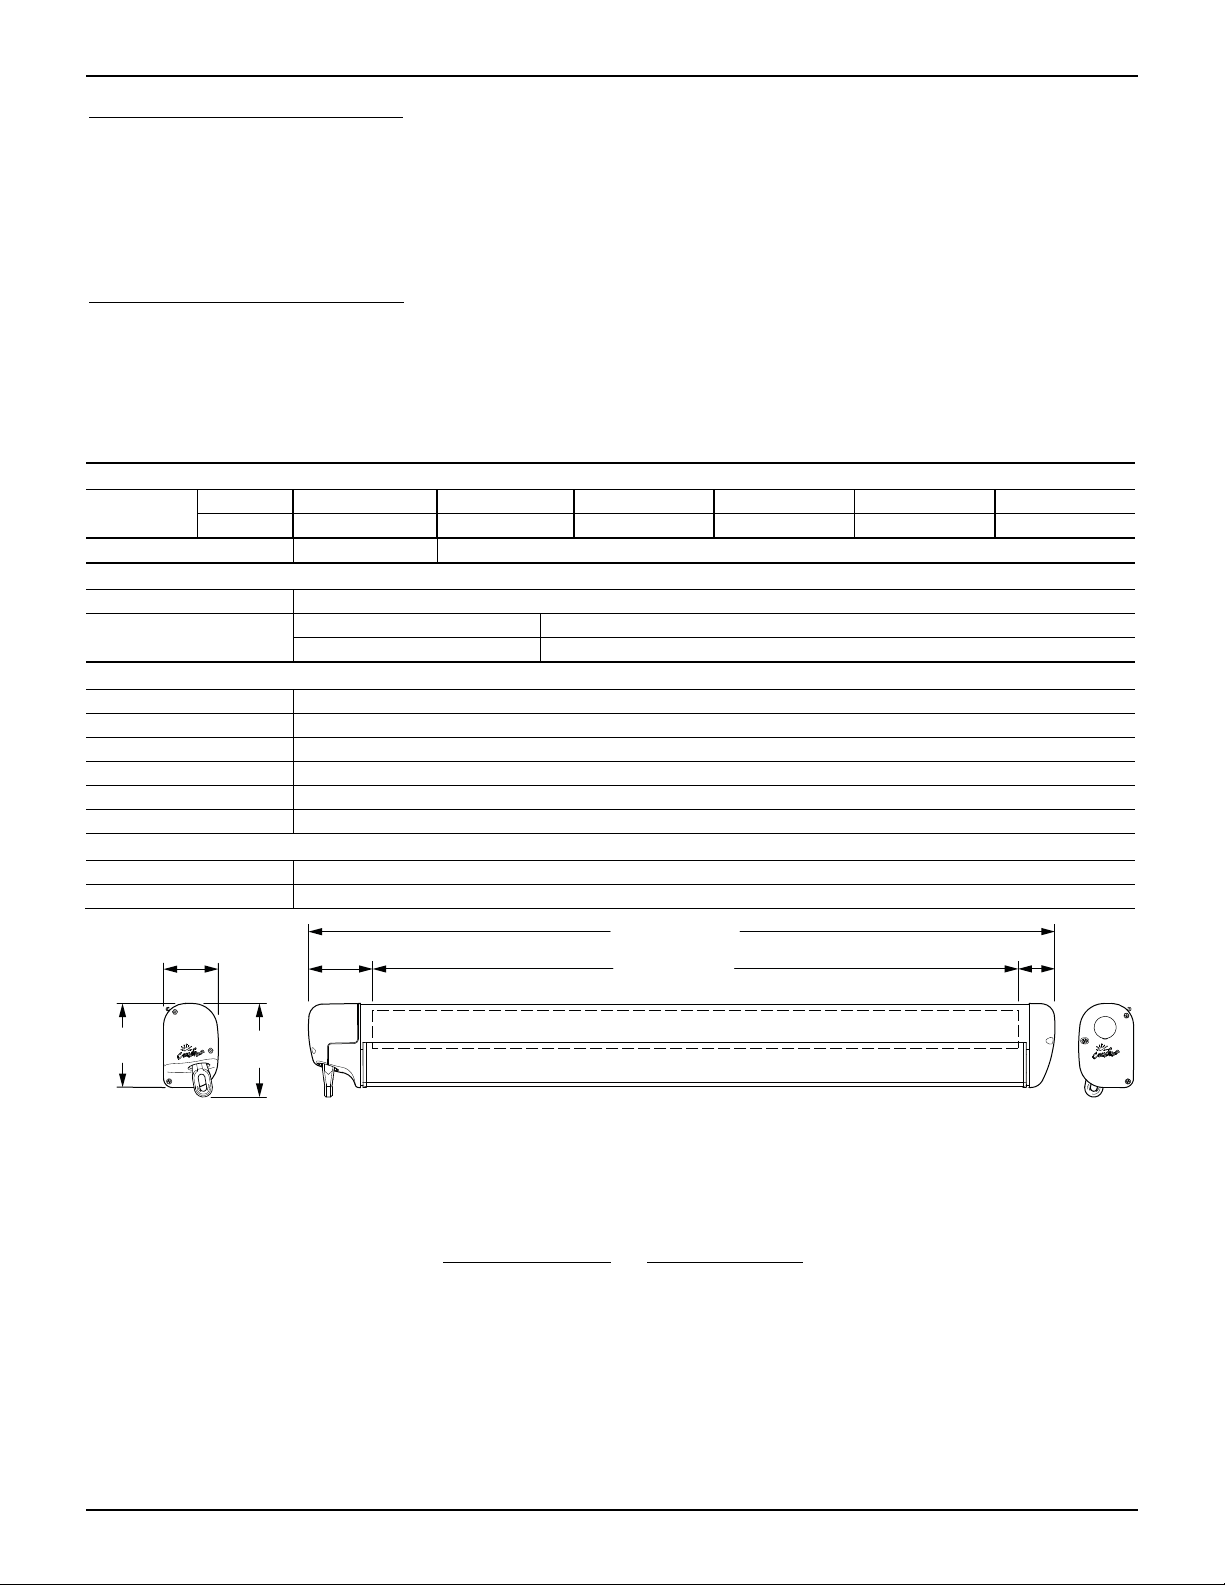
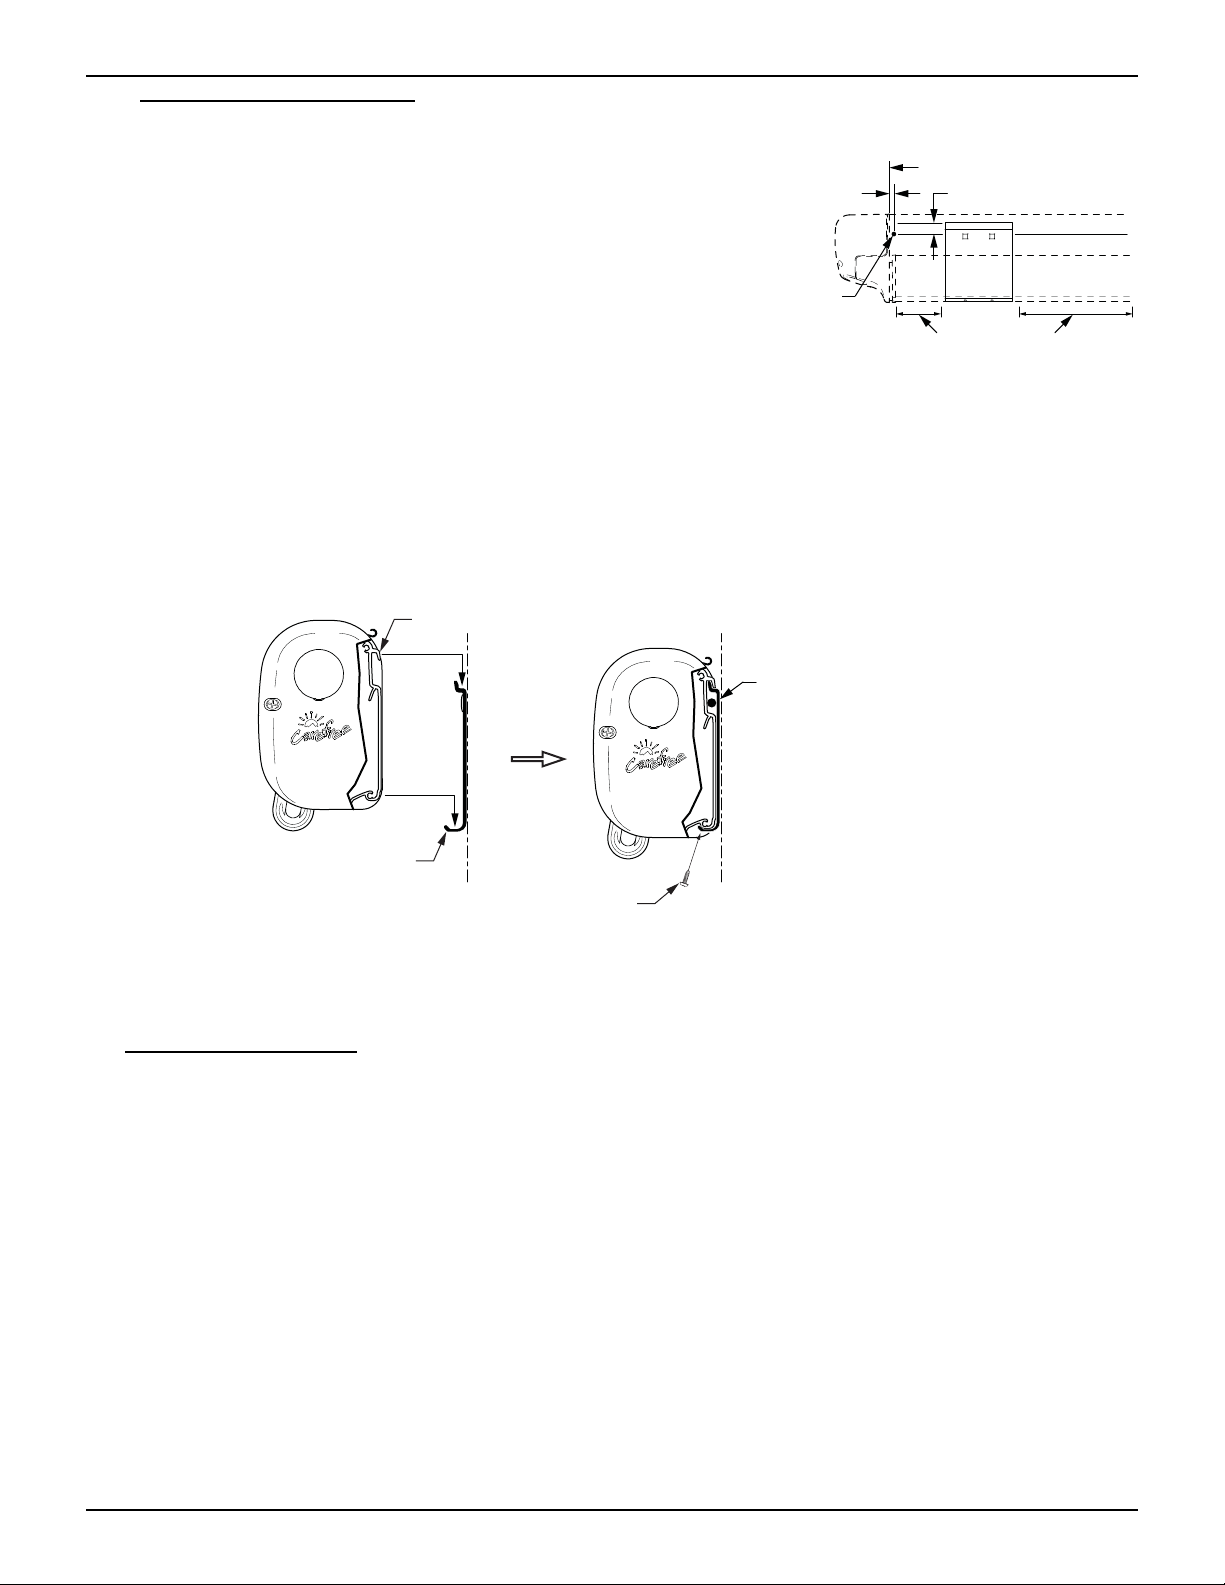
When installed, the bottom of the awning case is 13.3cm [5 1/4”] from the centerline of the awning
rail. The rail must be mounted a minimum of 18cm [7”] above openings to avoid interference.
The centerline of the awning fabric is offset from the centerline of the awning assembly. To align
the center of the fabric, use the backplate of the awning assembly for measurements.
2. Lightly spray the inside track of the awning rail with
a silicone lubricant.
3. Using a minimum of two people, lift the awning up
and tilt as shown.
4. Hook the mounting rail into the awning rail and roll
down.
5. Adjust the position of the awning horizontally as
required. It may be necessary to lift the awning so
that it will slide in the awning rail.
6. For the motorized awning only:
Lift the awning upward slightly. On the coach wall, mark the location of where the motor wires exit
the awning case.
Measure and drill one 8mm hole through the outer wall at the mark.
NOTES: Adjust the location as required. Measure to avoid any interior framing, cabinets,
electrical components etc. that could be damaged or interfere with the hole
location.
Ensure that the motor cables are accessible after routing in the next step.
This is a preliminary step, the wire and switch installation are completed after the
awning is secured.
Route the motor wires through the hole and seal with silicone sealant.
10. Rotate the awning down.
11. Open the awning to allow access to the back plate. 35 - 45cm [14"-18"].
NOTE: To open the motorized awning, momentarily connect the motor wires to a 9-18VDC drill
battery or car battery. If the motor runs in the reverse direction, reverse the leads.
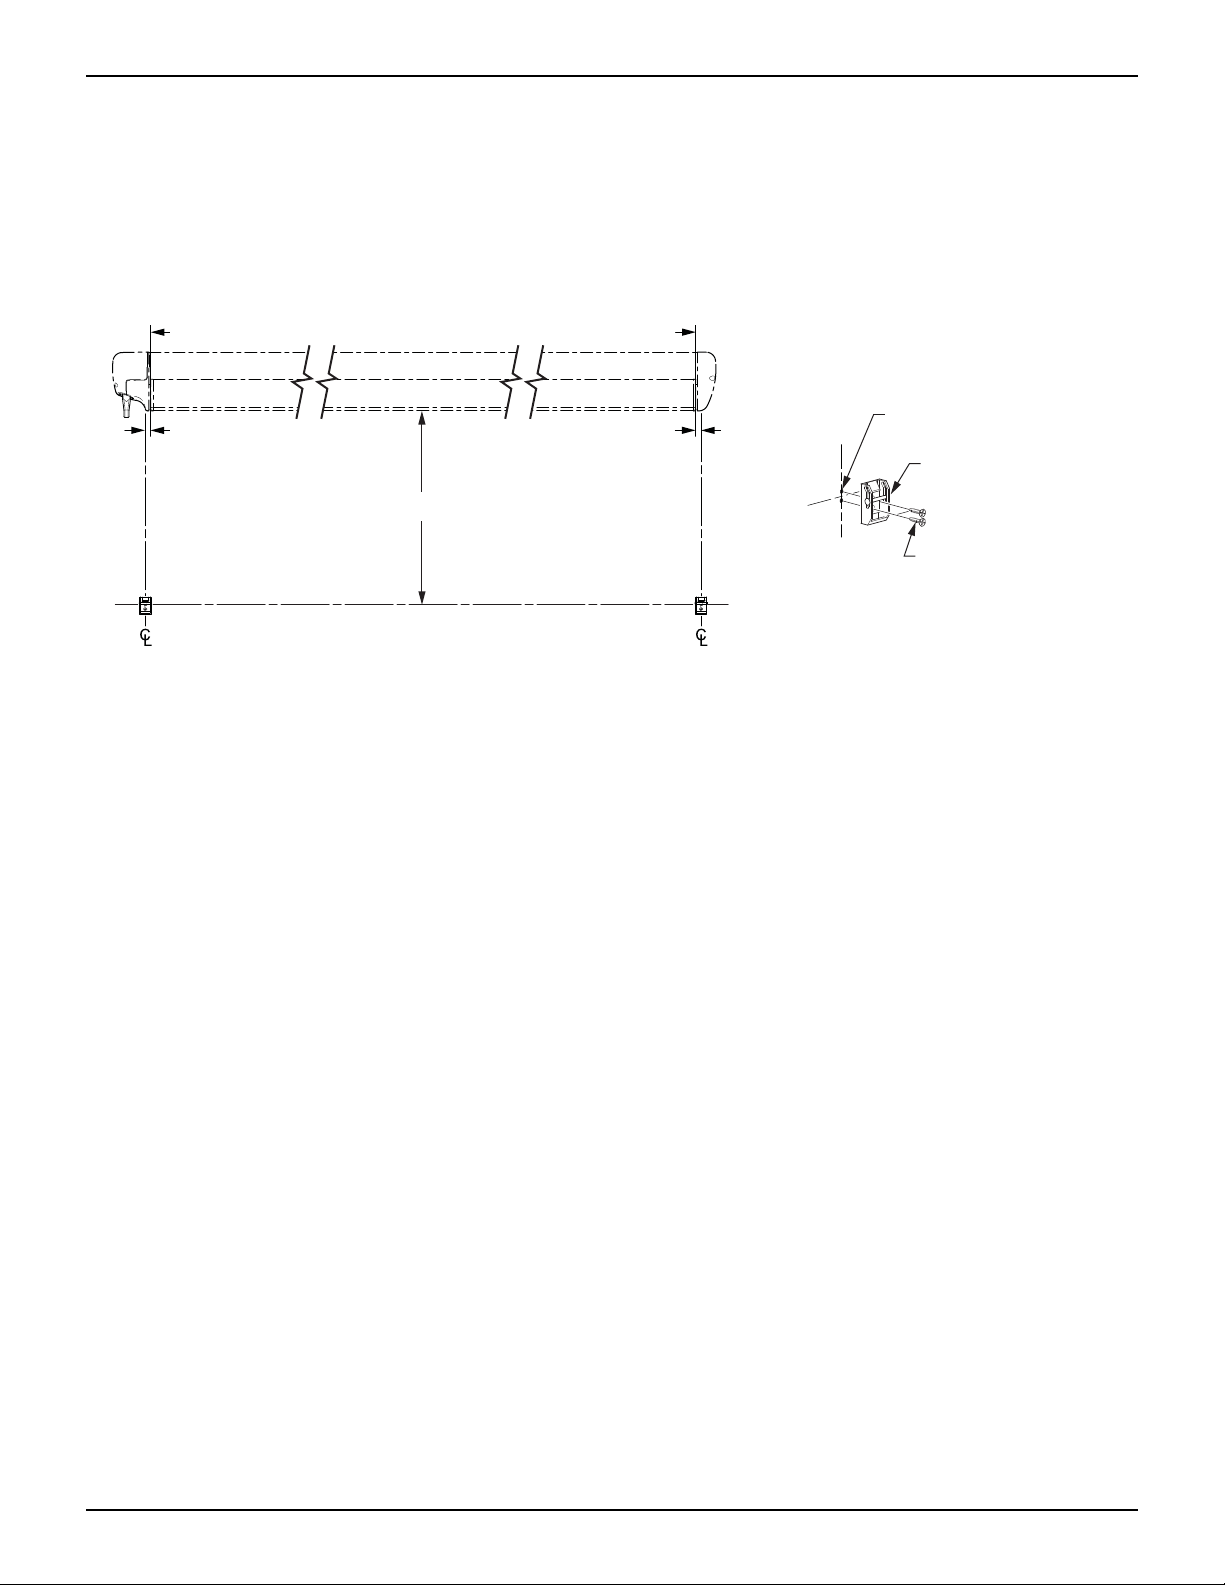
12. Drill three (3) 4.8mm [3/16"]
holes through the back of the
case into the mounting surface
and into the structure. Use care
to not drill through the inner wall.
13. In the awning case, ream out the
4.8mm [3/16”] holes to 8mm
[5/16”]. Do not allow the drill to
extend into the wall.
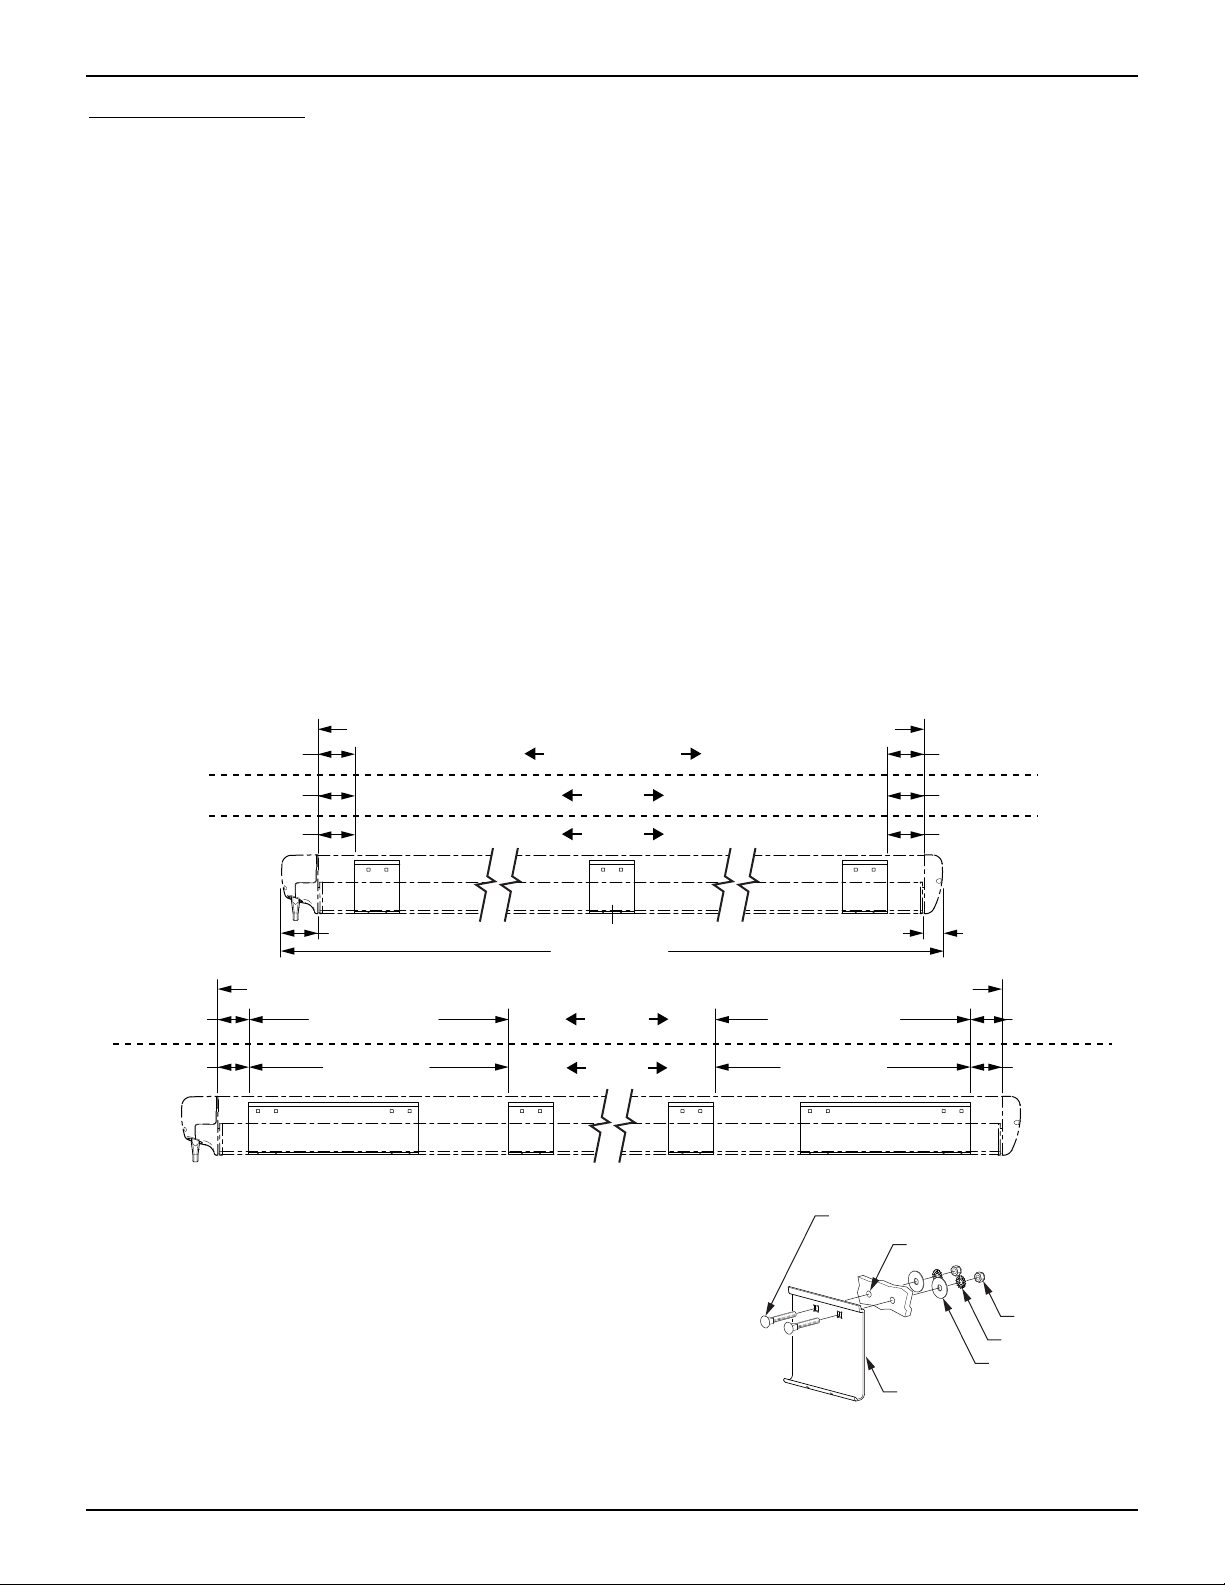
CAUTION
THE SCREWS MUST BE LOCATED IN THE OPEN AREAS OF THE AWNING CASE AS SHOWN.THE ARMS CANNOT
CLOSE COMPLETELY IF THE SCREW HEADS ARE UNDERNEATH.
14. Secure the awning using three (3) #14 x 1 1/2" lag screws.
WM006
Mounting Rail
Awning Rail
Figure 7. Mount Using Awning Rail.
Drill Area Drill Area Drill Area
Center Between Arms
Arm Mount Arm Mount
WM008
Figure 8. Securing the Awning Case.
“More information https://www.caravansplus.com.au"