CAREFREE OF COLORADO SL WINDOW AWNING
OPERATION
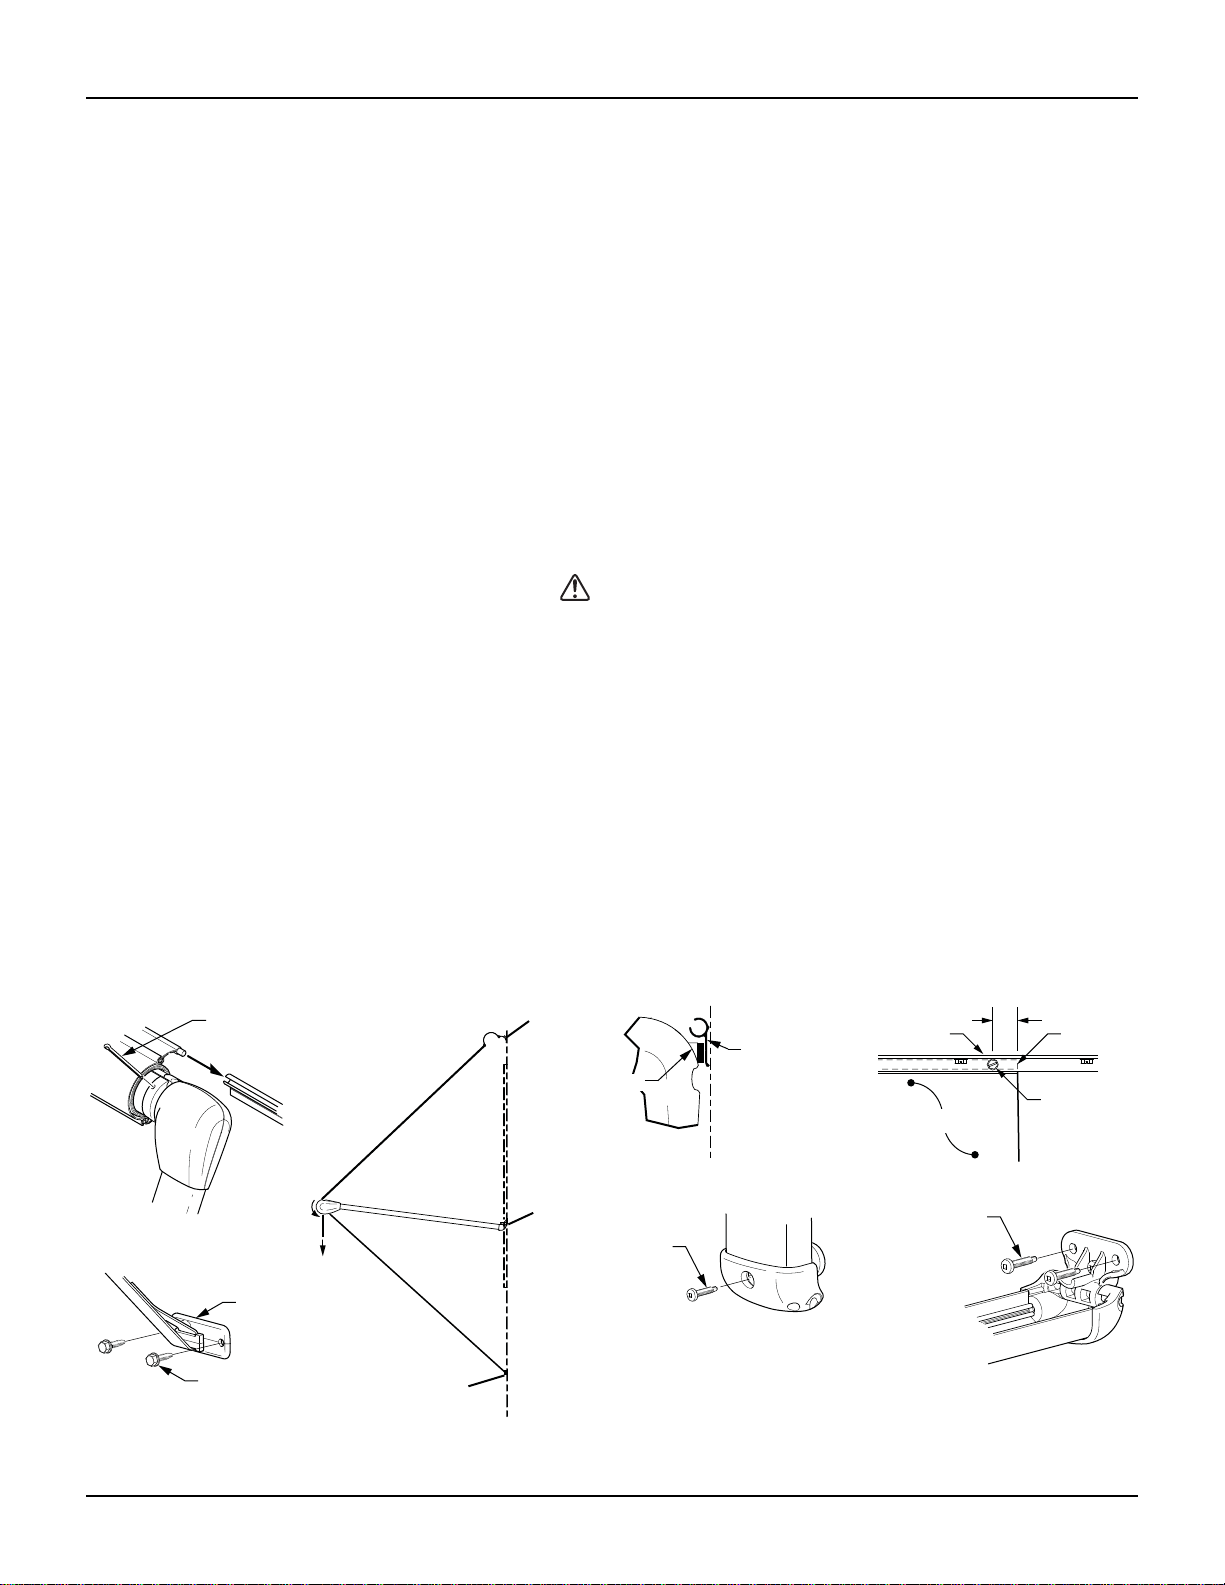
Catch
Pull Strap
EW006
To Lower the Awning: Using the pull cane, hook or grasp the pull strap and pull
the awning down. Hook the loop of the pull strap onto the catch.
Tip: During windy conditions, the strap may vibrate and "hum". To reduce this
effect, twist the strap 1 turn before hooking onto the catch.
To Raise the Awning: Remove the pull strap from the catch and untwist if
necessary. Allow the awning to roll up while holding onto the strap.
CAUTION DO NOT RELEASE THE STRAP UNTIL THE AWNING IS AGAINST THE COACH WALL.RELEASING THE
STRAP EARLY WILL CAUSE THE AWNING TO SLAM AGAINST THE WALL POSSIBLY CAUSING DAMAGE TO THE
AWNING AND/OR VEHICLE.
Tip: When rolling up the awning, hold the end of the pull strap off center. This keeps the strap from rolling
up on itself causing stretch marks in the fabric. This also reduces the amount of strap that hangs
below the roller in the travel position.
CLEANING
CAUTION DO NOT USE OIL BASED CLEANERS OR ANY CAUSTIC,GRANULATED,OR ABRASIVE TYPE
CLEANERS ON YOUR CAREFREE PRODUCT.
1. One of the best ways to keep the fabric looking good and to delay the need for deep or vigorous
cleanings is to hose fabrics off on a monthly basis with clear water. This practice will help prevent dirt
from becoming deeply imbedded in the fabric. In most environments, a thorough cleaning will be
needed every two to three years.
2. When it's time for a thorough cleaning, the fabric can be cleaned while on the awning frame.
For Vinyl Fabric – Use a soft brush and warm water with soap.
For Acrylic Fabric – Use a stiff brush and warm water with soap.
3. When cleaning the fabric, it is important to observe the following:
Always use a natural soap. Never detergent.
Water should be cold to lukewarm. Never more than 100 degrees.
Air-dry only. Never apply heat to the fabric.
Mildew
Mildew is a fungus growth that looks like dirt. Vinyl coated polyester fabrics are mildew resistant because
of a chemical biocide in the vinyl coating. Under ordinary conditions, mildew will not appear. However, in
areas where high temperature and humidity are common, mildew can be a problem and require the
material to be washed more frequently. THOROUGHLY rinse the fabric with clean water and allow to air dry
completely before rolling up the awning.
Leaking
On vinyl canopies, side hems and poly cords are stitched in with a sewing machine. On occasion, this
stitching may allow water to seep or leak through the stitches. This is normal and not a defect covered by
warranty. Treat the seams with a quality seam sealer.
ARM CARE
The best method of keeping the arms operating smoothly is to clean them. Dirt and debris can cause the
arms not to move easily. Periodically wash out the channels with running water (i.e. a hose) to keep them
clean. If the arms still do not move easily, lightly spray the joints with a dry silicone lubricant after the arms
have been cleaned and dried thoroughly.
Hardware Maintenance
Replace any parts that become damaged.
Periodically check all mounting hardware, screws, lags, etc., and re-tighten when necessary.
052533-001r3 4
“More information https://www.caravansplus.com.au"