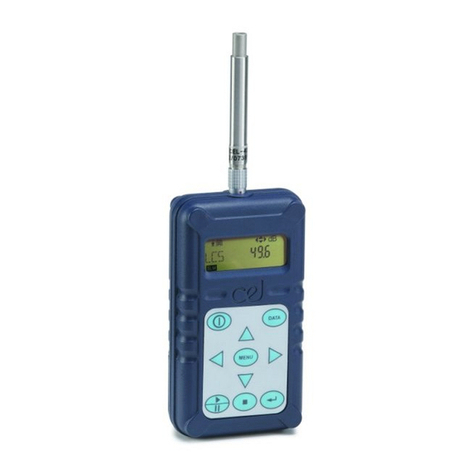
Casella CEL-490 Service manual

November 2005
CEL-450 & CEL-490
REAL-TIME
SOUND LEVEL METERS
Operators Handbook
HB3307-04

Page 2 - CEL-450/490 Operators Handbook
Contents

Warnings !
LOAD BATTERIES following the instructions given in
Section 1.3. Make sure they are inserted in the orientations
shown inside the battery compartment .
A single cell installed with the wrong polarity may still allow
the instrument to function, but will cause overheating
severe enough to rupture a cell, with consequent risk to the
operator and damage to the instrument.
DO NOT REMOVE the protective grid from Class 1
microphone capsules as this will expose the diaphragm,
which is extremely vulnerable to damage.
UNDER NO CIRCUMSTANCES should these instruments be
cleaned using a solvent based cleaner.
Repairs of damage caused by a failure to observe these
warnings will NOT be covered by the normal warranty
conditions.
Notes !
The CEL-450 and CEL-490 are supplied complete with Class 1 or Class 2
Electret Microphones and have no need of a 200V polarizing supply.
Therefore no such supply is available and it is safe to ignore the 200V
polarising supply warnings shown on CEL-250 or MK 250 microphone
packaging.
Throughout this book, display screens that are available only on a
CEL-490 will be shown with a dashed ----outline.
CEL-450/490 Operators Handbook - Page 3
Contents

Page 4 - CEL-450/490 Operators Handbook
Contents

Contents
Chapter ................... Page
1. INTRODUCTION . . . . . . . . . . . . . . . . . . 7
1.1 Display & Keys .................... 7
1.2 Quick Edit ....................... 9
1.3 Install Microphone, Preamplifier & Batteries .... 10
1.4 Switch Instrument ON/OFF ............. 10
1.5 Description ..................... 12
1.6 CEL-450 Sound Level Meter ............ 14
1.7 CEL-490 Sound Level Meter ............ 15
1.8 Instrument Power Supplies ............. 16
1.9 dB23 SoundTrack Software ............. 17
2. PRELIMINARY OPERATIONS . . . . . . . . . . . . 19
2.1 Select Instrument Configuration (Language,
Microphone Response Etc.) ............. 19
3. SELECT MEASUREMENT MODE,
TIMER SETTINGS & SETUP . . . . . . . . . . . . 23
3.1 Select Measurement Mode
(Bandwidth) ..................... 23
3.2 Select Run Timing .................. 23
3.3 Select Measurement Setup
(Factory- or User-Prepared Setups) ......... 27
3.3.1 Select Broadband Measurement Setup ....... 27
3.3.2 Select Narrow Band Measurement Setup ..... 32
4. ACOUSTIC CALIBRTION CHECK . . . . . . . . . . 37
4.1 Perform Acoustic Calibration Check ........ 37
4.1.1 Automatic Calibration Check ............ 38
4.1.2 Manual Calibration Check .............. 41
5. OPERATION . . . . . . . . . . . . . . . . . . . . 45
5.1 Measurement .................... 45
5.1.1 Start Measurement ................. 45
5.1.2 Broadband Measurement .............. 46
5.1.3 Narrow Band Measurement ............ 49
5.2 Recall Stored Data ................. 54
CEL-450/490 Operators Handbook - Page 5
Contents

Chapter ................... Page
5.3 Delete Stored Data ................. 56
5.4. Format Memory ................... 57
5.5 Use With Tape and DAT Recorders
(Including Calibration For Line Input) ........ 58
4.5.1 Recording ...................... 59
4.5.2 Replay ........................ 61
6. SPECIFICATION . . . . . . . . . . . . . . . . . . 63
6.1 General ....................... 63
6.2 Measurement Functionality ............. 67
6.2.1 CEL-450 Versions .................. 67
6.2.2 CEL-490 Versions .................. 69
7. PARTS & WARRANTY . . . . . . . . . . . . . . 71
7.1 Schedule of Parts .................. 71
7.2 Instrument Servicing & Warranty .......... 72
Getting Started
The following steps will get your CEL-450 or CEL-490 started.
1. Refer to Sections 1.1 and 1.2 to learn what is shown on the
display and how to use the Quick Edit function.
2. Install the microphone, preamplifier and batteries according to
Section 1.3.
3. Switch the instrument ON and follow the preliminary messages
as described in Section 1.4.
The messages indicate the instrument type and version.
4. Check “Hints for using Menus” between Chapters 1 and 2.
5. Select the display language and microphone response according
to Section 2.1.
6. Select a bandwidth, run timing and pre-set measurement set-up
according to Chapter 3.
7. Perform an acoustic calibration check as detailed in Chapter 4.
8. Start measurement and data logging as described in Section 5.1.
9. Recall stored data according to Section 5.2.
10. Record data on a tape or DAT recorder and replay it as described
in Section 5.5.
Page 6 - CEL-450/490 Operators Handbook
Contents

1. INTRODUCTION
Please read Sections 1.1 to 1.4 before commencing measurement. For a
quick introduction to instrument operations, Chapter 4 may be used as a
tutorial.
1.1 Display & Keys
AFmx
dB
AF
Aeq
AFmn Zpk
LL
L
L
L
0 140
v04001
Stop /Run /Pause indicator
(Instrument is in Run mode)
Period number
Battery condition Principal parameter
Principal level
Run-Time elapsed
Bandwidth
Icons showing active keys
Analog display of SPL
and levels
Additional parameters
Switches instrument On/Off
Changes menu (=operating mode
)
Enables Quick Edit function
Operates display back light
Move cursor (=select options)
Stops a measurement
Accesses stored data
Starts/Pauses/Restarts a
Measurement run
ØØØØØØ
73.8dB
65.4dB 69.9dB
69.4dB
Ø:1Ø
Figure 1: Display & Key Identities
(Further icons may be shown during operation)
Introduction
CEL-450/490 Operators Handbook - Page 7

The broadband screen in Figure 1 shows one principal and four
subordinate parameters, where the principal parameter is a level as
identified below.
The following frequency weightings may be shown:
A-, C- and Z- (Linear) weighted.
The following time weightings and other identities may be shown.
S Slow.
F Fast.
IImpulse.
pk Peak.
mx Maximum.
mn Minimum.
eq Equivalent continuous level.
AV Average level.
Tm3 Taktmaximal 3 sek.
Tm5 Taktmaximal 5 sek.
EP,v Leq based noise dose normalised to a user
specified period of hours and minutes.
When the period is specified as 8 hours, this
measurement unit will be shown as EP,d.
TWAv Time Weighted Average is the normalised time
averaged sound pressure level with the selected
frequency and time weighting that represents
the total average of a persons workplace noise
exposure averaged over a user specified period
of hours and minutes.
This unit of measurement is specified in the
USA: OSHA standard 1910-95 published in 1983.
When the period is specified as 8 hours, this
measurement unit will be shown as TWA.
N Percentile sound level.
AE Sound exposure level.
HML Calculated as LCeq -L
Aeq
L
evel
AS
L
98001
8
Frequency Weighting
Time Weighting
Introduction
Page 8 - CEL-450/490 Operators Handbook

1.2 Quick Edit
All control functions for the CEL-450 and CEL-490 are accessed via menu
displays. In addition a powerful Quick Edit facility can be invoked by
the key to allow measurement parameters and settings to be
changed quickly and easily on screen. Figure 2 shows how the quick edit
function enables the cursor keys to edit the current settings.
73.8dB
ØØØØØØ Ø:1Ø
Cpk
Cpk
dB
dB
dB
dB
AS
AS
A
CF
ASmx
CFmn
CFmn
CFmx
CFmx
Ceq
Ceq
L
L
L
L
72.1dB 68.6dB
L
L
L
L
L
L
L
L
64.8dB
Press
Change
Setting
Highlight Parameter To Select It
Other Parameters Will Have Changed
All Parameter Levels Are Shown In Run Mode
Press
Press
Stop
Quick Edit
Stop
Run
v04002
0 140
0 140
0 140
0 140
Figure 2: Quick edit functions
Introduction
CEL-450/490 Operators Handbook - Page 9

1.3 Install Microphone, Preamplifier
& Batteries
Screw the Class 1 microphone “finger tight” on to the preamplifier. With
the instrument switched OFF, insert the connector of the preamplifier
plus Class 1 microphone or Class 2 microphone / preamplifier unit into
the socket in the cone at the top of the instrument case. Face the red
dot on the preamplifier to the front of the instrument so that the key
engages in a keyway in the socket to ensure correct pin connection.
(To disconnect the
preamplifier unit from the
instrument, pull on the
knurled sleeve.)
Load four new 1.5 V
batteries (AA or equivalent)
into the battery compart-
ment in the rear of the
instrument (Figure 3).
Make sure they are
inserted in the orientations
shown inside the
compartment.
One cell installed with wrong polarity may still
allow the instrument to function, but can
cause overheating severe enough to rupture a
cell and damage the instrument.
1.4 Switch Instrument ON/OFF
1. Press to switch the instrument ON.
The instrument starts a series of self tests, during which it
indicates the instrument type, firmware version, preamplifier
type and interface status.
Serial Number Label
Tripod Bush (1/4" Whit.) 980016
Figure 3: Battery orientation
Introduction
Page 10 - CEL-450/490 Operators Handbook

At the end of the self test sequence, the instrument displays
memory information and battery voltage,
followed by the identity of the last used setup.
Finally it enters calibration check mode (described in Chapter 2).
512Kb
13Jan04 1Ø:54:42
1%
2
Format
Memory
Full
Runs
1-02
Current date and time
Last used setup
Setup
Press MENU
User Setup 1
Key to Start
1-03
1-04
dB
Auto 114.ØdB
L
ZF
Ø9JanØ4 11:28
80 - 190028A - NN
Preamp
CEL49ØA.1 vNN.NN
I/O
ID:
Class 1
None
NNNNNN
1-01
Inst. Type 450/490
Inst. Version A = Broadband
B = Octave band
C = Third octaves
1 = Class 1
2 = Class 2
Firmware version
Program version and issue
Interface status
Inst. identification number
The dates and times of the last 4
calibrations are stored.
See Section 2.2.
Introduction
CEL-450/490 Operators Handbook - Page 11

2. Press to switch the instrument OFF when all measurement,
setup and data recall operations are finished.
1.5 Description
Both the CEL-450 and CEL-490 Sound Level Meters make use of recent
developments in digital processors to feature a full 0 - 140 dB dynamic
range on a single uninterrupted scale. In addition, the narrow band
versions of these instruments offer real time frequency analysis.
Versions of these instruments are available with Class 1 or
Class 2 measurement accuracy to give an ability to make comprehensive
sound level measurements.
The main
difference between the
CEL-450 and CEL-490 is
the additional timing
facilities included in the
CEL-490. The CEL-450 is
intended primarily to make
the noise measurements required for Industrial Hygiene and Health &
Safety standards, while the more comprehensive timing features of the
CEL-490 make it more suited to the monitoring of Environmental noise.
Versions of both instruments are available for broadband
measurement, broadband plus octave band, and broadband, octave band
and third-octave band measurement. All frequency bands operate in real
time, using Class 0 filters.
To simplify
operation, frequently used
measurement setups can
be stored for re-use. The
setup memory can
accommodate one factory
setup and up to four user
specified setups for each
bandwidth.
Class 1 and Class 2 Measurement.
Broadband, Octave Band and Third Octave
Band versions.
Simultaneous measurement of up to 16
parameters in broadband mode.
Simultaneous measurement of up to 10
parameters in narrow band mode.
Quick Edit function for immediate parameter
change.
One factory setup and up to four user
specified setups stored for each bandwidth.
Up to four profiles can be attached to each
measurement.
CEL-450 CEL-490
Cumulative Measurement x x
Profile Measurement x x
Period Measurement x
Duration Timers x x
Delay Timers x
Ln% Measurement x
Introduction
Page 12 - CEL-450/490 Operators Handbook

Simple procedures allow a measurement setup to be selected
and the instrument to make the required measurements and save them
automatically in separate data memories for each bandwidth.
Data stored in the memory can be recalled to the display for
inspection, so that the operator can confirm that the results are valid
before leaving the test site.
The instruments can be operated and deliver adequate results
without the need for other equipment, beyond an acoustic calibrator. All
operations can be controlled via the instrument keypad and simple menu
options. Figure 4 shows the basic arrangement of the main menu, while
a more comprehensive menu structure is given on the fold out sheet at
the back of this book.
However, the instruments become even more versatile when
their measurement and setup data is downloaded to a PC using the
dB23 Windows™ based software. This software has the facilities
expected of fully featured Windows™ packages offering post
processing, cut and paste between applications, comprehensive word
processing capabilities, and extensive on screen graphing facilities.
Figure 4: Simplified menu structure
(Some of these options may not be available on all versions)
Measure
Mode
Setup
Calibration
Main Menu
Memory
Configure
Status
Set
Bandwidth
Select
Setup
Auto/Man
Line input
View/
Delete
Timers
v04009
PC Communications
Language
Backlight
Graph Range
Time & Date
Microphone Response
AC Out
p
ut
Date & Time
Memory Use
SLM Parameters
Measurement Period
Functions
Dose Parameters
Profiles
Set
Parameters
Calibrate
Select
Directory
Select
Data
Run Timer
Delay Timer
Introduction
CEL-450/490 Operators Handbook - Page 13

These instruments are constructed to withstand some of the
toughest industrial conditions with cases formed from a polyester/
polycarbonate material, giving them a high resistance to damage. Data
integrity is further protected by the use of robust electret microphones.
1.6 CEL-450 Sound Level Meter
The CEL-450 is ideal for on-site noise surveys and can also monitor
personal noise exposure in accordance with European - ISO or USA -
OSHA and DOD standards. The following weightings can be set:
RMS: A, C, Z (see section 1.1) weightings,
Peak: A, C, Z weightings,
Time: F (fast), S (slow), I(impulse),
Q: 3, 4, 5, 6 energy conversion factor.
Broadband models can measure all of the following parameters simul-
taneously with a single time constant.
LAF Sound level, with current weightings (A and F
are shown),
LAFmx Maximum level, with current weightings,
LAFmn Minimum level, with current weightings,
LAeq Equivalent continuous level, with current
frequency weighting,
Together with LCeq is used for HML calculations
of heaing damage,
LAIeq Equivalent continuous level, with impulse
weighting,
LZpk Linear peak,
LAE Sound exposure level (sometimes known as SEL),
LEp,v Noise dose normalised to a user selected
(variable) period of hours and minutes,
When the period is set to 8 hours, this will be
shown as Lex,8h.
LTm3 Cumulative average of fast weighted maximum
values taken over 3s periods (Taktmaximal 3),
LTm5 Cumulative average of fast weighted maximum
values taken over 5s periods (Taktmaximal 5),
TWAvTime Weighted Average is the normalised time
averaged sound pressure level with the selected
frequency and time weighting that represents
Introduction
Page 14 - CEL-450/490 Operators Handbook

the total LAvg of a person’s workplace noise
exposure averaged over a user selected
(variable) period of hours and minutes.
This unit is specified in the USA: OSHA standard
1910-95 published in 1983. When the period is
set to 8 hours, the unit will be shown as TWA.
LAvg Average level over the measurement period.
HML This value is the calculation: LCeq -L
Aeq.
Profiles Up to 4 parameters can be selected to have their
profile stored. Period times between 10 ms and
30 minutes can be selected.
Narrow band models can measure and scan the following parameters
simultaneously.
LAF Sound level, with current weightings (A and F
are shown here),
LAFmx Maximum level, with current weightings
LAFmn Minimum level, with current weightings
LAeq Equivalent continuous level, with current
frequency weighting.
Lpk User selectable measured broadband LZpk,L
Cpk
or LApk presented as a single result.
Cumulative measurements are saved for each user enabled parameter.
In addition, broadband mode allows up to four profiles to be stored for
each result set, with intervals from 10ms to 30min. LN% statistical data
can be measured and stored.
All sound level measurement parameters can be set from the
keypad and the whole measurement range is shown on a single 0 - 140
dB scale. The instruments have 2 Mb of memory, which is used on a
first-come basis. Duration timers can also be set in the main menu,
allowing the instrument to automatically switch off after a pre-defined
time.
1.7 CEL-490 Sound Level Meter
The CEL-490 is recommended for detailed measurements as, in addition
to the CEL-450 capabilities described above, it has more comprehensive
Introduction
CEL-450/490 Operators Handbook - Page 15

run timing facilities. These allow it to operate with user set delayed start
and stop times, and to store period results taken at regular intervals.
1.8 Instrument Power Supplies
All of these instruments are powered by a set of four standard AA size
batteries in a compartment in the back of the instrument case, and it is
recommended that alkaline IEC Type LR6 be used. Rechargeable
batteries can also be employed, but some types may give a shorter
operating life. Zinc carbon batteries are NOT recommended.
If there is doubt whether the batteries will be able to power the
instrument for the start and stop times set, or when measurements are
needed over long periods, the instrument can be powered directly from
an external 12V DC supply without the need to remove the internal
batteries.
DAMAGE to the instrument will occur if an
external power supply exceeds 14V DC. The
nominal external supply is 12V DC.
External power for the instrument is supplied via a 2.1 mm co-axial 2-line
D.C. connector in the bottom of the instrument case. Terminal polarity is
+12V DC on the tip and 0V DC ground on the sleeve.
A Casella CEL Universal Power Supply (-PC18) may be used to
power the instruments from nominal 110-240V 50/60 Hz mains supplies.
To prevent loss of data should an external power supply be interrupted
for any reason during measurement, it is recommended that a usable set
of batteries be kept in the instrument.
In general, download all important data and remove the batteries
from the instruments when they are to be out of use for some time.
Note that when an instrument is returned to battery operation
after being powered from an external supply, either: switch the
instrument OFF then ON again, or: disconnect ALL devices from the DC
input socket, in order to avoid additional discharging of the internal
batteries.
The instrument contains a built in lithium battery to maintain
stored data and setups for periods while the instrument is switched OFF.
Introduction
Page 16 - CEL-450/490 Operators Handbook

1.9 dB23 SoundTrack Software
The CEL-6813 dB23 Software enables data collected by the CEL-450 and
CEL-490 to be downloaded to a PC for storage, manipulation and the
production of reports. It also enables the PC to exercise comprehensive
control over the sound level meter.
Data can be exported in ASCII format to proprietary word
processing software, while profile and statistical data can be exported as
tab-delimited text files suitable for use with spreadsheets such as Lotus
123™ (Release 2 or later) and MS Excel™. In addition, on-screen
graphing and reporting facilities are available and full on-line control can
be exercised over the sound level meter.
The dB23 Software runs under MS Windows®taking advantage
of the control facilities offered by the environment, so that once
installed, users with a modest knowledge of Windows will find many
operations are performed almost instinctively with a minimum of learning
time.
Downloading is performed under the control of the PC. Data
from each of the measurement runs in the sound level meter is
transferred as a series of associated datafiles together with a note file in
which comments and information can be written. Once downloaded, the
user can display the following information:
¤Run summary for each run,
¤Data file,
¤Up to four profiles for each run,
¤Notepad for user-entered notes.
Introduction
CEL-450/490 Operators Handbook - Page 17

Hints For Using Menus
1. and displayed on a menu
show which option keys are active.
2. In general, and keys move the
reverse video cursor from field to field.
3. In general, and keys change the
entry in the cursor field.
4. at the bottom of a menu list indicates
there may be further options.
5. An indication such as 3/5 at the bottom of a
menu1shows that option 3 has been
selected from the 5 available.
6. Settings left highlighted on a menu screen
become the active options.
Note 1: The illustrations in this book are for full featured
instruments, other instruments may offer fewer or
no options.
Introduction
Page 18 - CEL-450/490 Operators Handbook

2. PRELIMINARY OPERATIONS
2.1 Select Instrument Configuration
(Language, Microphone Response Etc.)
Select the language in which the instrument will present menu options.
This should be the first operation so that the displays and options will be
understood.
Similarly, to get the most accurate results, these instruments
must be operated with a known microphone directional response and be
calibrated for this response.
When the language and microphone response are known to be
correct for the proposed measurement task, go directly to Section 4.1
Calibration Check.
European IEC standards require measurements to be performed
with microphones that have a Free Field response, while the U.S.A.
ANSI standards require Random Incidence microphones. The micro-
phone response is set via the Configuration menu.
Normally, these more permanent characteristics must be set
only once, as the instrument will store the settings and use them the
next time it is switched on.
Proceed as follows.
Operation Press Display Shows Comments
1. Switch the
instrument
ON
Start up messages are
displayed that include:
Instrument Type,
Firmware Version, Etc.
Finally, the Configuration
screen is displayed with
Battery Voltage, followed by
the Calibration check screen.
2. Select the
Main menu
2 times
This is the Main menu.
It gives access to further
menus that select:
Measurement Mode,
Measurement Setup,
Calibration Sequence,
Timers
Data Recall from Memory,
Instrument Configuration,
Status.
2-01
dB
L
ZF
Auto 114.Ø
Ø9JanØ4 11:28
Calibration
Timers
1/7
2-02
Setup
Measure Mode
Measure Mode
CEL-450/490 Operators Handbook - Page 19
Preliminary Operations

Operation Press Display Shows Comments
3. Select the
Configure
option
or Move the reverse video
cursor to the required line.
4. Move to
the
Configure
menu
This menu allows the
following items to be set:
RS232 Communication Baud
rates from 1200 to 115200,
Menu Language,
Backlighting Durations of 1,
5, 10, 15, 30 s, OFF or
Manual press ON press OFF,
Graph span and offset,
Instrument Time & Date,
Microphone Response Free
Field or Random,
A.C. Output for line
transmission or recording.
5. Select the
Language
option
or Move the reverse video
cursor to the required line.
6. Move to
the
Language
menu
This menu allows the
following languages to be
selected for menu
presentation:
English,
Français,
Deutsch,
Italiano,
Español.
7. Select the
required
language
or The highlighted language
will be used for menu
presentation.
This setting will also be
stored and used next time
the instrument is switched
on.
Press to return to the
Configuration menu.
Calibration
Memory
2-03
Setup
Configure
5/7
Language
Backlight
2-04
RS232 Comms
Graph Range
1/7
Backlight
2-05
RS232 Comms
Time & Date
Language
2/7
Deutsch
2-06
English
Italiano
Français
1/5
Deutsch
2-07
English
Italiano
Français
2/5
Page 20 - CEL-450/490 Operators Handbook
Preliminary Operations
This manual suits for next models
1
Table of contents
Other Casella Measuring Instrument manuals

Casella
Casella CEL-350 dBadge User manual

Casella
Casella HB4056-01 dBadge2 User manual

Casella
Casella CEL-960 User manual

Casella
Casella HB4087-01 User manual

Casella
Casella Evolution CM2010 User manual

Casella
Casella HAVex User manual

Casella
Casella dBadge2 HB4056-07 User manual

Casella
Casella 620 Series User manual

Casella
Casella CEL-350 dBadge User manual

Casella
Casella HB3340-02 User manual