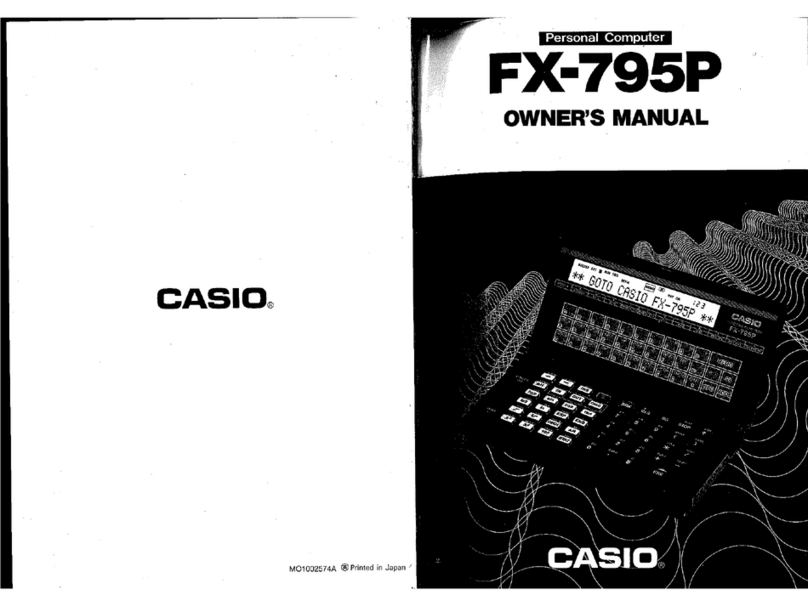
Casio FX-795P User manual

Personal
Computer
FX-795P
>
|
OWNER’S
MANUAL
MO1002574A
@
Printed
in
Japan
“

PERSONAL
COMPUTER
FX-/99P
OWNER’S
MANUAL
The
contents
of
this
manual
may
be
subject
to
change
without
notice.
Unlawful
copying
of
all
or
any
portion
of
this
manual
is
strictly
forbidden.
Please
be
aware
that
the
use
of
this
manual
for
other
than
personal
use
without
permission
from
CASIO
is
prohibited
under
the
copyrighting
law.
CASIO
Computer
Co.,
Ltd.
shall
not
be
held
responsible
for
any
damages
or
losses
resulting
from
the
use
of
this
manual.
CASIO.

Foreword
This:
manual
contains
easily
comprehensible
explanations
on
the
numerous
i
is
computer.
whe
feat
“eature
nf
this
equipment
is
the
fullness
of
its
scientific
functions
including
statistical
calculations.
Incorporating
many
numeric
functions
and
basic
statistics,
this
computer
will
enable
you
to
carry
out
troublesome
scientific
and
technological
calculations
as
well
as
statistical
calculations
by
simple
opera-
tion.
In
addition,
more
advanced
calculations
can
be
made
by.
using
a
BASIC
The
“cevond
feature
is
the
“FUNCTION
MEMOR
”
which
makes
possible
storage
of
numeric
expressions
to
enable
outputting
calculation
results
%
inputting
the
necessary
numeric
values.
By
using
this
function,
you
can
easily
make
numeric
calculations
without
any
special
BASIC
program.
The
third
feature
is
the
“DATA
BANK
function,”
which
permits
the
use
of
this
computer
as
an
“electronic
memo
pad.”
Unlike
a
paper
memo
pad
which
requires
laborious
efforts
later
to
put
the
individual
entries
in
order
or
retrieve
them,
this
computer
performs
such
work
quite
simply.
The
fourth
feature
is
its
“built-in
software
utilities”
consisting
of
five
types
of
mathematical
operation
programs.
With
the
use
of
this
function,
answers
can
be
easily
obtained
by
simply
entering
the
necessary
values
or
numeric
expressions.
As
shown
above,
this
computer
can
be
used
by
a
wide
variety
of
people
—
persons
who
want
to
learn
BASIC
for
the
first
time,
those
who
already
know
BASIC
and
want
to
make
full
use
of
this
computer.
We
hope
that
this
manual
will
enable
you
to
make
effective
use
of
this
computer
for
many
years
to
come.
Prior
to
Operation
This
computer
was
delivered
to
you
through
CASIO’s
strict
testing
process,
high
level
electronics
technology,
and
strict
quality
control.
To
ensure
a
long
life
for
your
computer,
please
observe
the
following
precau-
tions.
=
Utilization
Precautions
©
Since
this
computer
consists
of
precision
electronic
parts,
do
not
disassemble
it.
Also
do
not
apply
an
impact
to
it
by
throwing
or
dropping
it,
or
do-not
expose
it
to
rapid
temperature
changes.
In
addition,
do
not
store
it
in
a
place
with
high
temperatures
or
high
humidity,
or
in
a
dusty
place.
When
the
com-
puter
is
utilized
in
low
temperatures,
sometimes
the
display
response
is
slow
or
does
not
operate.
When
normal
temperature
conditions
are
restored,
how-
ever,
the
computer
operation
will
become
normal.
Special
care
should
be
taken
not
to
damage
the
computer
by
bending.
For
example,
do
not
carry
it
in
your
hip
pocket.
@
Devices
that
can
be
plugged
into
the
option
jack
are
the
Model
FA-5,
FP-12S,
FP-40
or
our
specified
devices.
Do
not
connect
any
other
devices.
*
Use
Printer
Cable
SB-2
when
connecting
FP-12S,
and
Interface
Pack
SB-42
when
connecting
FP-40.
@
Although
the
display
sometimes
becomes
faint
while
the
buzzer
is
sounding,
it
is
not
a
malfunction.
However,
if
the
display
becomes
very
faint,
replace
the
batteries
with
new
ones
as
soon
as
possible.
e
Every
two
years,
replace
the
batteries
with
new
ones even
if
the
computer
is
not
used.
Do
not
leave
exhausted
batteries
inside
it
because
trouble
may
occur
due
to
battery
leakage.
Always
keep
the
cap
for
the
connector
portion
in
place.
Remove
it
only
when
peripherals
are
to
be
connected
to
the
computer.
If
strong
static
electricity
is
applied
to
the
computer,
sometimes
the
memory
content
is
changed,
or
key
operation
cannot
be
performed.
To
discharge
static
electricity
accumulated
in
your
body,
touch
a
metallic
substance
like
a
door
knob.
If
this
occurs,
remove
the
batteries,
then
replace
them
again.
Always
turn
computer
power
off
before
connecting
peripherals.
To
clean
the
computer,
do
not
use
volatile
liquids
such
as
benzine
or
thinner.
Wipe
it
with
a
soft
dry
cloth,
or
a
cloth
dampened
with
a
neutral
detergent
solution.

Prior
to
Operation
Contents
a
—
aa
@
Do
not
turn
the
power
off
during
program
execution
or
operation.
CHAPTER
1
General
Guide
@
Since
the
computer
is
made
up
of
precision
electronic
parts,
avoid
dropping
it
,
while
a
program
is
being
executed;
otherwise
the
program
execution
may
be
1-1
Names
of
Components
.........
000.4
e
eens
stopped
or
the
memory
contents
may
be
changed.
1-2
Functions
of
Components
.......0....
0.0000
e
eee
©
When
a
malfunction
occurs,
contact
the
store-
where
the
computer
was
1-3
Power
Supply...
..
ec cc
ccccccccceecccceceuesues
purchased
or
a
nearby
dealer.
©
Before
seeking
service,
please
read
this
manual
again,
check
the
power
supply,
check
the
program
for
logic
errors,
etc.
CHAPTER
2
Manual
Operations
2-1
Let’s
Operate
the
Computer
..............0.
0.000.
2-2.
Begin
with
the
Four
Arithmetic
Operations
..........
2-3.
Calculation
Notes
..........
0.0...
e
eee
eee
2-4
Function
Calculations
2-5
Statistical
Calculations
CHAPTER
3
Using
the
“Function
Memory”
i
3-1
Calculations
with
the
Same
Formula
3-2
Utilization
for
Preparing
Tables
CHAPTER
4
Built-in
Software
Utilities
4-1
Software
Menu
.............
0c
ccc
eee
cece
eee
42
Matrix
Operations
........
0.0.0
cece
eee
eee
4-3
Complex
Number
Calculations
44
Numeric
Solution
of
Equations
4-5
Numeric
Integrations
.....0..0.
0.0.00
ccc
vee
eee
46
Binary,
Decimal
and
Hexadecimal
Operations

Contents
CHAPTER
5
Programming
with
BASIC
Language
5-1
Writing
Programs
.......
0.0.06.
0
cee
eee
eee
~+--
88
5-2.
Executinga
Program
........
2.
e
eee
ee
ee
ee
eee
91
5-3.
Variables
0.0...
ee
eee
ee te
ene
93
5-4
Method
of
Calculating
the
Program
Length
..........
100
5-5
Convenient
Techniques
cect
eee
ence
eee
101
5-6
Error
Messages
and
Debugging
............-.--2005
103
5-7
Convenient
Peripherals
...........
0.00.0
e
eee
eens
105
5-8
Usinga
PB-100
Program
..........
00.0.0
0
cece
eee
115
CHAPTER
6
Program
Library
6-1
Rearrangement
of
Data
(Sorting)
................-%
122
6-2
Horse
Race
Game
........
eee
ee
ce
eee
125
CHAPTER
7
Command
Reference
7-1
Manual
Commands
.......
0...
e
eee
ete
cree
ee
enee
133
NEW
[ALL]
........
000
eee
ce
cee
eens
133
RUN
ooo
ee
ee
eens
134
LIST
oo
ee
ee
te
eens
135
PASS
2.0.0...
0c
eee
eee
tt
eee
e
eg
e
eee
137
SAVETALL]
......
0.00.2
e
ees
dees
e
renee
139
LOAD
[ALL]
.......-
2...
eee
ee
ee
140
VERIFY
2.0...
eee
tet
e
ene
14]
CLEAR
..........
been
eee
een
e
eter
tenes
141
7-2
Program
Commands
.........-
20.00
eee
e
ee
een
eee
142
END
1...
cece
ee
tee
tne
teens
142
STOP
0...
cc
eee
ete
ent
teen
eens
142
[LET]
2...
ccc
ccc
cc
eee
ete
etnies
143
REM...
tee
teen
n
ene
144
7-3
7-4
Contents
INPUT
2.0.0.0...
ee
cee
eee
145
KEY$
2...
ee
ee
eee
enna
147
PRINT
2.0.0...
cee
eee
nee
148
CSR
Loe
ee
eee
eee
149
GOTO
oo.
eee
ene
150
ON~
GOTO
....
0...
eee
151
IF
~
THEN
2.0...
ee
eee
ee
152
FOR
~
TO
~
[STEP]
NEXT
..............-.005-
153
GOSUB
2.0.
ee
eee
eee
155
RETURN
.....
0.0.00
eens
156
ON
~
GOSUB
....
0.0...
eee
eee
eee
156
DATA
2...
cee
tenn
e
ne
ees
157
READ
2.0...
eee
eee
158
RESTORE
.......
0...
cece
eee
tenes
159
PUT
2.
cee
eee
eee
160
GET
20.
tenes
162
BEEP
......
0.00.00
c
eect
ee
164
DEFM
...
0.0...
ee
cece
eee
eee
165
DIM
20.
ee
ents
167
ERASE
2...
eee
ete
teens
169
MODE
.....
0.0...
eee
eens
170
STAT
CLEAR
2.0.0.0...
0.0.
ce
eee
eee
171
STAT
2.0...
ce
cee
teens
171
STAT
LIST
2.00.0...
0.0.0
c
cc
eee
ee
172
SET
o
00
e
e
eee
e
ee
173
Character
Functions
.
0.0...
ccc
c
ccc
ee ee
eee
174
LEN
2...
le
be
ete
eens
174
MIDS
..
0.
ce
ee
tne
175
VAL
Lo
cece
ee
tne
ee
176
STRS$
2...
cece
een
teens
177
Numeric
Functions
.........0..
0020:
cece
eee
eee
178
SIN,
COS,
TAN
2.0...
c
cece
cece
eee
178

CHAPTER
8
Convenient
DATA BANK
Function
8-1
8-2
8-3
8-4
8-5
8-6
8-7
8-8
8-9
Appendix
Character
Code
Table
Numeric
Functions
Error
Messages
Specifications
Index
Specifying
the
MEMO
IN
Mode
Inputting
Data
Displaying
the
Data
Contents
Correcting
Data
Retrieving
(Searching)
Data
Adding
and
Inserting
Data
Searching
Using
a
Program
Application
to
Tabular
Calculations
8-10
Combining
with
the
Function
Memory
Contents

General
Guide
To
those
who
have
never
touched
a
computer
or
are
already
familiar
with
computers,
it is
recommended
that
you
first
read
this
chapter
carefully,
The
quicker
you
become
familiar
with
the
configuration
of
the
computer
the
quicker
you
will
be
able
to
use
it
properly.

1-2
Functions
of
Componenis
|
|
1-1
Names
of
Components
@
Power
Switch
@
:
Slide
up
to
switch
on
power
and
slide
down
to
switch
off
power.
|
©
Shift
Key
(Red
key)
Press
this
for
a
one-key
command
(for
inputting
plural
characters
by
pressing
a
ane
single
key)
shown
in
red
on
the
panel,
for
symbol
display,
or
for
input
of
a
func-
et
GOTO
CASIO
FR-POSE
ae
tion.
Press
it
once,
and
the
SHIFT-IN
mode
will
be
selected
and
the
“
(S)”
sym-
woven
eT
ea
Pes
at
cleo
heeol
bol
will
light
up
on
the
display.
When
it
is
pressed
again
or
when
another
key
is
SS
:
=
pressed,
the
SHIFT-IN
mode
will
be
canceled
and
the
“(5)”
symbol
will
go
off.
eal”
LE»
(In
this
manual
the
symbol
@9
will
be
used
to
distinguish
the
key
from
the
:
®
elon
dE
:
alphabet
key
©)
.)
i
|
©
Numeral
Keys
(4)
®
Decimal
Point
key
Aegon
@®
a
|
-
ox
coy
Calculation
Command
Keys
7
2
;
ji
®
=
(2s)
{i
(t)
Execution
Key
Aaah
:
I
So
dee
Exponent
Key
—
@
=e
Parenthesis
Keys
GBBeH0
Power
key
C2)
cd
['
The
ten
keys
@)~{S)
are
used
for
number
input.
The
G]
key
is
for
decimal
m
point
input.
The
calculation
command
keys
(+),
©),
&K)
and
/
need
attention.
‘
These
keys
are
for
the
four
arithmetic
operations
(addition,
subtraction,
multi-
plication
and
division),
but
the
x
and
+
keys
of
ordinary
electronic
calculators
are
replaced
by
*
and
/
respectively.
This
is
because
of
the
need
for
common
Exponent
key
use
with
BASIC
language.
With
ordinary
electronic
calcula
ors,
the&)
key
is
Execution
key
used
to
get
an
answer.
In
the
case
of
this
computer
the
&)
key
is
used
for
that
©
®
®@®@w
oO
@
Display
window
@
Alphabet
keys
@®
Shift
key
@)
Display
contrast
@®
Function
memory
keys
®
Function
keys
@
Statistical
data
input
key
Numeral
keys
@®
Decimal
point
key
@SSS
O68
Calculation
command
keys
Connector
for
peripherals
Power
switch
Mode
key
FX
key
Memo
key
RESET
button
purpose.
For
example,
in
a
case
where
(20)
4
©)
3
@®)7
©)
5
B
are
pressed
in
the
case
of
ordinary
electronic
calculators,
this
computer
requires
that
120K)
4
213417
G5
&
be
pressed.
When
pressed
directly,
the
(€)
key
serves
as
the
exponent
key.
Press
it
before
inputting
the
exponent
(a
certain
power
of
10).
In
the
case
of
1.23
x
10*
for
example,
press
(C@)@H\EA
.
When
the
exponent
is
negative,
press
the
|)
key
after
the
(E)
key.

CHAPTER
1
General
Guide
aS
nen
For
example,
in
the
case
of
7.41
x
10°,
prs
OEMS.
When
this
key
is
pressed
after
the
@
key
(fJ5),
7
(the
ratio
of
the
circum-
ference
of
a
circle
to
its
diameter)
will
be
displayed.
.
The
(and
G)keys
are
for
inputting
parentheses
and
the(#)
key
for
power
calculations
(for
x”,
press
x
(4)
y).
@
Alphabet
Keys
and
Space
Key
-
DwWHROMUWoF
ANOHOHWH
HE)
Moo
oe
W
mM
GCI
CG)
td
These
keys
are
not
found
on
ordinary
electronic
calculators.
The
26
letters
of
the
alphabet,
the
symbol
keys
(&),G),G),
@)
and
the
space
key
(
fg)
are
arranged
as
on
a
typewriter.
They
are
used
to
give
commands
or
write
programs.
In
addition,
the
26-letter
keys,
A
to
Z,
serve
as
“variable
memory”
(where
numeric
values,
etc.
are
stored)
individually.
©
Equal
Key
())
This
key
is
not
intended
to
obtain
answers
from
calculations,
but
is
used
for
conditional
judgement
in
assignment
statements
(see
page
143)
or
IF
statements
(see
page
152).
When
it
is
pressed
after
the
4
key,
the
+
(not
equal)
symbol
will
be
displayed.
¢@
Function
Keys
One
of
the
features
of
this
computer
permits
one-key
input
of
functions
as
in
scientific
ca
ABS
INT
FRAG
=
culators.
This
is
very
convenient
for
function
{log}
Lin}
(exe)
eng
SET
ASN
ACS ATN
{hve}
(sin}
(cos)
[tan]
SGN
VAL(
DMSS(
Fal)
calculations.
(<3
and
2
are
“‘square”
and
“cube”
q
keys,
respectively.
(e]
is
a
key
for
calculation
of
LENE
minst
sTAst
(x?)
(<3)
(04)
an
exponential
function
(10*)
based
on.
10.
When
these
keys
are
pressed
after
the
=
key,
each
performs
the
function
shown
above
it.
1-2
Functions
of
Components
©
Hexadecimal
Key
(
'‘&§)
Press
(#4)
hexadecimal
number
&,
and
a
hexadecimal
number
will
be
converted
into
a
decimal
number.
Press
@4'@4
decimal
number
OG)
&4,
and
a
decimal
number
will
be
converted
into
a
4-digit
hexadecimal
number.
©
Engineering
Key
(
Ge
)
When
this
key
is
pressed,
a
calculation
result
or
a
numeric
value
displayed
by
a
PRINT
statement
is
converted
into
an
exponent
display.
When
this
key
is
pressed
repeatedly,
the
displayed
exponent
will
decrease
by
3
each
time.
The
Al
=
eS.
exponent
can
be
increased
by
3
each
time
by
pressing
&
(Multiple
of
3:
10°
=
K
(kilo),
10°
=
M
(mega),
10°
=
G
(giga),
10°°
=m
(milli),
10°°
=
#
(micro),
10
=
n
(nano),
10°!?
=
P
(pico)
@
Replay/Answer
key
(
(ae)
)
Press
this
key
to
recall
the
last
input
contents
calculated
using
&§.
When
this
key
is
pressed
after
pressing
the
FJ
key,
the
last
calculated
result
can
be
recalled.
©
Statistical
Data
Input
Key
(
@5
)
Press
this
key
after
statistical
data,
and
the
data
will
be
input
to
an
exclusive
memory
area.
When
pressed
following
the
J
key,
an
SDEL
function
is
per-
formed
to
delete
the
input
statistical
data
from
the
memory
area.
(For
details,
see
page
33.)
‘
@
Function
Memory
Keys
(
[)(ou}taiq)
These
keys
are
for
the
Function
Memory.
They
will
be
described
in
detail
in
Chapter
3.
©
Cursor
Movement
Keys
(
23285
)
These
keys
are
used
when
correcting
displayed
characters.
The
cursor
(““_”
blink-
ing
in
the
display
window)
is
moved
right
and
left
by
these
keys.
Each
time
this
key
is
pressed,
the
cursor
moves
by.
one
character.
When
the
key
is
held
down,
the
cursor
moves
continuously
through
all
of
the
characters
present.
When
US
is
pressed,
the
cursor
moves
to
the
left
edge
of
the
display
(the
beginning
of
the
line)
—
LINE
TOP
function.
When
@jH#
is
pressed,
the
cursor
moves
to
the
right
of
the
last
input
character
(the
end
of
the
line)
-
LINE
END
function.
5
\
|
|

CHAPTER
1
General
Guide
eL
©
Insert/Delete
Key
(
cn
This
is
another
convenient
key
for
correcting
displayed
characters.
When
it
is
pressed
directly,
the
characters
following
the
one
under
which
the
cursor
is
blinking
are
moved
to
the
right
so
that
a
space
can
be
created
for
character
insertion.
The
cursor
itself
does
not
move.
When
GG
are
pressed,
the
character
under
which
the
cursor
is
blinking
is
deleted
and
the
characters
on
its
right
are
moved
to
the
left.
The
position
of
the
cursor
remains
unchanged.
Continuous
insertion
and
deletions
are
possible
by
keeping
(#5
and
125
pressed
respectively.
@
Break
Key
(
bX)
)
This
is
a
powerful
key
capable
of
suspending
various
operations
(manual
opera-
tion,
program
execution,
input/output
with
a
cassette
tape,
output
to
the
printer,
program
list
output)
and
canceling
errors.
When
it
is
pressed
while
dis-
play
is
out
owing
to
AUTO
POWER
OFF
(see
page
12),
power
is
turned
on
again.
©
Clear
Screen
Key
(
(15)
)
This
clears
the
display
and
moves
the
cursor
to
the
left
edge
of
the
display
window.
@
Back
Space
Key
(
[8s]
)
When
this
key
is
pressed,
the
character
immediately
to
the
left
of
the
cursor
is
deleted
while
the
characters
immediately
to
the
right
of
that
character
are
moved
to
the
left.
Unlike
the
&5
key,
the
cursor
moves
to
the
left.
The
characters
to
the
left
of
the
cursor
can
be
deleted
continuously
by
keeping
this
button
pressed.
©
Stop
Key
¢
(09
}
When
pressed
during
program
execution,
this
temporarily
suspends
program
execution.
When
it
is
pressed
while
characters
are
being
scrolled,
the
display
is
temporarily
suspended.
Execution
is
resumed
when
the
&4)
key
is
pressed.
1-2
Functions
of
Components
eee
@
Memo
Key
{
{remo}
)
Press
this
key
to
use
the
DATA BANK
function.
For
detail,
see
Chapter
8.
©
FX
Key
(
(Fx)
Press
this
key
to
use
the
built-in
software
utilities,
For
details,
see
Chapter
4.
©
Mode
Key
(
[iow
)
When
specifying
a
computer
mode
or
an
angle
unit,
use
this
key
in
combination
wih,
@~@.
fece](=)+
+++
++
This
turns
the
key
input
buzzer
sound
on
and
off.
When
the
buzzer
is
on,
the
“BUZZER”
symbol
lights
up
on
the
display.
fend
(BJ
+--+
The
“RUN”
symbol
is
displayed
for
manual
and
program
calcula-
ions.
(RUN
mode)
fas
The
“WRT”
symbol
is
displayed
for
program
writing,
checking
and
editing.
(WRT
mode)
foot)
[)-
+++
The
“TRACE
ON”
symbol
is
displayed
for
execution
of
tracing.
(For
details,
see
page
104.)
foo
(B)--
+++
When
the
“TRACE
ON”
symbol
is
displayed,
the
execution
trace
mode
is
canceled
and
“TRACE
ON”
disappears.
(aon
(]--
+++
The
“DEG”
symbol
is
displayed
specifying
“degrees”
as
the
angle
unit.
(woo)
[S)--+-+-
The
“RAD”
symbol
is
displayed
specifying
“radians”
as
the
angle
unit.
(oo
(S)----
The
“GRA”
symbol
is
displayed
specifying
“grads”
as
the
angle
unit.
foo
ZZ)
+++
+
The
“PRT
ON”
symbol
is
displayed
and
printer
output
is
possible
when
a
printer
is
connected
to
the
computer.
(ox)
+--+
When
“PRT
ON”
is
displayed,
the
printer
output
mode
is
can-
celed
and
“PRT
ON”
disappears.
(oot
(Ea)
«= +=
++
The
“
@9[n)”
symbols
light
up
to
indicate
that
the
MEMO
IN
mode
is
specified.
This
mode
permits
memo
data
input
to
the
DATA
BANK.
(For
details,
see
Chapter
8.)
To
cancel
this
mode,
press
(x)
.

CHAPTER
1
General
Guide
r
*
@
Extension
Key
(
)
)
The
direct
mode
is
specified
immediately
after
the
power
is
turned
on.
When
a
key
is
pressed
in
this
mode,
the
character
printed
on
the
key
is
input.
However,
if
the
3
key
is
pressed,
the
extension
mode
(the
“EXT”
symbol
lights
up)
is
specified,
making
it
possible
to
input
small
letters
or
special
symbols.
The
exten-
sion
mode
is
effective
for
the
upper
half
of
the
keyboard.
Shown
below
are
the
functions-of
the
individual
keys
in
each
mode:
a)
Direct
Mode
(Just
press
the
desired
key.)
folwle|r[tly[u]i
jo]
Pe]
memo
[als[p|FiG{H}s|[
kL
|
=|
|
ex
[z|xjc|v[BIN|m
3
{2
|,
|
see
|
move
(=]
(+)
bys}
[S)
{en}
{in}
four)
feng
—
hyp
sin
cos!
tan]
ork]
(S)
log
ia]
[exr]
[Ena]
(4) (S)
He)
&)
(6)
=)
@O
fs)
[4a
x?)
{x3) (07)
fra)
b)
Shift-in
Mode
(Press
the
desired
key
after
&4
.)
ca
oo
PS P6
-nPrt
nr
ABS
INT
FRAC
«—
co
ca
ca
a
co
om ca
ca
SGN
VAL{
oMss(
ANS
co
co
P?
SEL
ASN
ACS
ATN
co
cm
om
cy)
co
&
Cc
pa
ca
PI
co
Pe
ca
LEN(
=MIDS()STAS(_SDEL
co
co
7-2
Functions
of
Components
c)
Direct
Mode
in
the
Extension
Mode
(Press
the
desired
key
while
“EXT”
is
on.)
d)
Shift-in
Mode
in
the
Extension
Mode
(Press
the
desired
key
after
J
while
“EXT”
is
on.)
Please
note
that
each
key
has
plural
functions.
When
the
@)
key
is
pressed
again
while
the
“EXT”
symbol
is
on
(extension
mode),
“EXT”
disappears
and
the
extension
mode
is
canceled:
¢
Display
Contrast
Control
When
the
display
is
dark
or
faint,
depending
on
the
battery
condition
or
display
view
angle,
adjust
it
by
moving
the
control
located
on
the
left
side
of
the
computer.
.
oS
Se
Se
T=
To
increase
the
display
contrast,
turn
the
control
in
the
direction
indicated
by
the
arrow.
To
weaken
the
contrast,
turn
it
in
the
opposite
direction.
Ef
the
con-
trast
is
still
weak
even
after
the
control
is
at
its
highest-contrast
position,
the
batteries
have
probably
run
down.
If
so,
replace
the
batteries
as
soon
as
possible.
(For
battery
replacement,
see
page
11.)

10
CHAPTER
1
General
Guide
@
Connector
for
Peripherals
Connect
peripherals,
that
are
available
separately
on
an
optional
basis,
to
this
connector,
Connect
the
FP-12S
or
FP-40
when
printing,
and
connect
Cassette
Interface
FA-5
when
using
a
tape
recorder,
po
©
Use
the
separately
available
exclusive
cable
SB-2
when
connecting
to
FP-12S,
and
the
separately
available
interface
pack
SB-42
when
connecting
to
FP-40.
Do
not
connect
devices
other
than
SB-2,
SB42
and
FA-5S
to
this
connector.
Always
keep
the
connector
covered’
with
the
accessory
cover
when
not
using
the
optional
devices.
@
RESET
Button
This
button
is
located
below
the
power
switch.
If
this
button
is
pushed
with
a
pointed
object
when
the
power
is
on,
the
computer
will
be
reset
to
the
state
where
no
specification
or
no
input
is
performed.
This
operation
may
be
used
when
the
computer
is
in
locked
state
due
to
strong
static
electricity.
Caution
is
required
since
all
programs
and
data
will
be
lost
if
pushed.
cx
LLLLLLELLLL
Leemw
_
pE_ut
goebe
coco
FOC
OCoeeLLLEL
e*LoOoL
LEL
‘—RESET
Button
1-3
Power
Supply
The
power
supply
system
for
the
computer
is
divided
into
the
main
power
supply
(two
CR2032
lithium
batteries)
and
an
auxiliary
power
supply
for
memory
backup
(one
CR1220
lithium
battery).
If
the
display
contrast
remains
weak
even
after
adjustment
(see
page
9),
replace
the
batteries
as
soon
as
possible
because
they
are
becoming
exhausted.
Note:
Be
sure
to
replace
the
batteries
every
two
years
regardless
of
their
use
in
order
to
prevent
the
chance
of
malfunction
due
to
battery
leakage.
=
Battery,
Replacement
1)
Switch
off
the
power
supply
and
remove
the
rear
panel
after
removing
the
three
screws.
2)
Remove
the
batteries.
Main
batteries:
t
~
Remove
the
battery
cover
after
loosening
Screws
the
screw
@.
Auxiliary
battery:
2.
Q
ELLIO)
Remove
the
battery
cover
after
loosening
the
screw
®.
3)
Remove
the
exhausted
batteries.
(They
can
be
removed
easily
by
tapping
the
battery
compartment
with
its
opening
facing
downward.)
4)
Wipe
the
surfaces
of
new
batteries
well’
with
a
dry
cloth
before
inserting
them
with
I
the
@
side
up.
5)
Press
the
batteries
down
with
the
battery
cover
and
slide
the
cover
to
close
the
bat-
tery
compartment.
Screw
@
Screw
®)
og”
(Ol
_JL_Jo}
fe
6)
Replace
the
screws
on
the
rear
panel
and
switch
on
the
power
supply.
11

12
CHAPTER
1
General
Guide
e@
Auxiliary
Batteries
The
auxiliary
battery
is
for
memory
backup.
This
battery
remains
in
operation
while
the
main
battery
is
being
replaced,
thus
preventing
the
program
and
data
from
vanishing.
Bear
in
mind
that
if
both
the
main
and
auxiliary
batteries
are
removed
at
the
same
time,
the
program
and
data
will
vanish.
If
the
main
and
auxiliary
batteries
must
be
replaced
at
the
same
time,
press
the
reset
button
with
a
pointed
object
after
switching
on
main
frame
power
supply.
Notes:
1.
Frequent
use
of
the
buzzer
shortens
battery
life.
2.
When
replacing
the
main
batteries,
be
sure
to
replace
both
at
the
same
time.
3.
Never
throw
batteries
into
a
fire.
It
will
be
dangerous
as
they
may
burst.
4.
Care
should
be
taken
to
ensure
that
battery
polarity(
©
,
©
)
is
correct.
Keep
batteries
out
of
reach
of
children.
If
swallowed
by
accident,
consult
a
doctor
immediately.
«
Auto
Power
Off
This
is
an
automatic
power-saving
function
designed
to
prevent
waste
of
power
when
a
user
forgets
to
switch
off
the
power
supply.
The
power
supply
is
auto-
matically
cut
off
in
6
minutes
upon
completion
of
operation
(except
during
program
execution)
or
upon
key-input
waiting
state
following
execution
of
an
INPUT
or
PRINT
statement.
In
such
a
case,
power
supply
can
be
resumed
by
turning
the
power
switch
off
and
then
on
again
or
by
pressing
the
4
key.
Note:
Even
when
the
power
supply
is
cut
off,
variable
content,
program
content
and
DATA
BANK
content
will
be
retained
but
mode
specifications
(“WRT”,
“TRACE
ON”,
“PRT
ON”,
etc.)
will
be
initialized
(immediately
after
turning
the
power
on).
Manual
Operations
One
must
at
least
operate
the
computer
to
become
familiar
with
the
unit.
Even
if
you
operate
something
wrong,
the
machine
will
not
be
broken,
Since
practice
makes
perfect,
as
the
proverb
says,
begin
practising
simple
operations.

2-1
Let’s
Operate
the
Computer
Try
the
computer
and
see
how
it
works.
First
slide
the
power
switch
to
ON,
and
the
following
display
will
appear.
BUZZER
RUN
DEG
Pa
First
erase
this
display.
To
do
so,
press
the
&3
key.
“Ready
PQ”
will
vanish.
Then
“2
will
begin
blinking
at
the
left
end.
This
is
called
the
“cursor”
and
indicates
the
starting
point
for
character
writing.
BUZZER
RUN
DEG
The
state
in
which
this
cursor
is
blinking
is
called
“key-input
waiting
state”,
—
namely,
the
blinking
cursor
indicates
that
the
computer
is
waiting
for
a
calcula-
tion
or
a
command.
The
cursor
is
usually
indicated
by
a
blinking
“~”,
but
as
characters
are
written
continuously,
it
sometimes
changes
to
a
blinking
“
&
”.
On
this
computer
one
line
consists
of
up
to
62
characters.
The
“
§
”
symbol
appears
as
a
warning
signal
when
the
number
of
written
characters
exceeds
55.
“BUZZER”,
“RUN”
and
“DEG”
will
probably
appear
at
the
top
of
the
display.
These
are
called
mode
displays
and
indicate
the
state
of
the
computer.
“RUN”
indicates
the
RUN
mode
in
which
manual
calculations
and
program
execution
can
be
performed.
“BUZZER”
shows
that
the
buzzer
is
on.
The
buzzer
beeps
at
each
key
input.
“DEG”
shows
that
the
angle
unit
is
the
degree.
In
addition,
other
angle
units
are
the
radians
(“RAD”
lights
up),
which
is
specified
by
press-
ing
@=(S)
,
and
the
grads
(“GRA”
lights
up)
specified
by
pressing
([6)
.
Be
careful
about
these
angle
units
when
handling
a
trigonometric
function,
inverse
trigonometric
function
or
coordinate
transformation.
Once
an
angle
unit
is
specified,
it
remains
in
effect
even
when
power
is
switched
off.
The
other
modes
displayed
are
the
program
writing
mode
(“WRT”
lights
up)
specified
by
pressing
@J(1)
,
the
trace
mode
(“TRACE
ON”
lights
up,
see
page
ES
2-7
Let’s
Operate
the
Computer
104)
specified
by
pressing
&=j(@)
,
the
printer
output
mode
(“PRT
ON”
lights
up,
see
page
113)
specified
by
pressing
l[7),
the
MEMO
IN
mode
for
the
DATA
BANK
function
(“fq(uy)”
lights
up,
see
page
212)specified
by
pressing
f=)
and
the
extension
mode
(“EXT”
lights
up)
specified
by
pressing
You
will
Jearn
these
as
you
become
familiar
with
the
computer.
Now
actually
press
the
keys
to
display
the
modes.
If
a
confusion
has
arisen
in
mdde
display,
switch
the
power
supply
off
and
then
on
again.
xT}
First
try
a
simple
calculation.
Example:
123+456=579
Press
(5)
.
Press
keys
according
to
the
above
equation.
NEBr
BEs
Lea+4i6.
Then
press
(¢)
instead
of
(=)
to
find
the
answer.
on od
ci
exe]
The
calculation
is
as
simple
as
with
an
ordinary
calculator,
isn’t
it?
Now
make
a
calculation
including
both
multiplication
and
addition.
Example:
33X5+16=181
Here
it is
assumed
that
34
has
been
input
by
mistake
instead
of
33.
3EWSBawWs)
15

16
CHAPTER
You
noti
2
Manual
Operations
ce
the
mistake,
but
don’t
worry.
Press
the
cursor
movement
key
({=])
and
bring
the
cursor
to
the
wrong
numeral.
SSERE
Then
press
the
right
key
(3)
.
(3)
Now
the
calculation
formula
has
been
corrected.
Find
the
answer.
exe]
Example:
26X7+23=205
It
is
assumed
that
32
has
been
input
instead
o
SX7HSe)
In
this
case
After
correcting
the
error
by
back-space
oper:
press
(x).
®
o
(3)
*Unlike
the
GIG)
keys,
the
[5s]
key
deletes
cursor
an
d
moves
all
characters
on
the
righ
when
using
the
6s}
key.
iél
23
by
mistake.
ZEe
TESS
he
(5)
key
is
convenient
for
correction.
the
character
on
the
left
of
the
one
space
to
the
left.
Be
careful
2-7
Let’s
Operate
the
Computer
As
shown
above,
when
a
mistake
is
noticed
during
the
input
process,
it
can
be
easily
corrected
by
using
the
cursor
movement
keys
or
the
3)
key.
However,
when
a
mistake
is
noticed
after
the
&
key
has
been
pressed,
use
the
REPLAY
function
(8)
or
calculate
again
from
the
beginning.
Now
write
characters
using
the
alphabet
keys.
These
keys
are
arranged
in
the
same
manner
as
on
typewriters
(ASCII
arrange-
ment).
First
write
capitals.
Example:
Input
A,
B,
C,
X,
Y
and
Z.
First
input
A,
B
and
C.
Aj(Bi[c
Then
input
X,
Y
and
Z.
Next,
insert
a
one-character
space
between
ABC
and
XYZ.
Bring
the
cursor
to
the
position
of
X.
Soc
Make’a
one-character
space.
fines}
To
insert
a
space
between.
characters
in
this
manner,
place
the
cursor
where
the
space
is
to
be
inserted
and
press
the
[¥s)
key.
When
desiring
to
insert
some
spaces,
keep
this
key
pressed:
This
computer
is
capable
of.
displaying
small
letters
and
special
characters
in
addition
to.numerals
and
capitals.
For
displaying
these
characters,
use
the
exten-
sion
mode.
See
page
9.

CHAPTER
2°
Manual
Operations
Example:
Display
the
small
letters
a,
b
and
c.
First
specify
the
extension
mode.
.
EXT
lights
up.
ex
Then
input
A,
B
and
C.
RUN
DEG
|
Example:
Display
the
marks
###
4.
Since
the
computer
is
already
in
the
extension
mode,
just
press
each
of
the
relevant
key
after
pressing
the
@]
key.
BUZZER
EXT
ABC
ghe
BUZZER
EXT
shoeeee_
|
(ee)
Gar]
Ba]
Gary]
>
Example:
Display
the
symbols
Eiip
.
Press
keys
as
shown
below
in
the
extension
mode:
BUZZER
EXT
RUN
DEG
GAP
Ga)
P
GaP
_
ahoeeeae
tip.
Since
the
above
marks
and
symbols
are
available,
they
may
be
used
for
various
purposes.
To
cance
disappears.
Now
we
believe
you
understand
key
operations.
While
you
are
practicing
key
operation,
“Error
2”
may
be
displayed
and
the
pressed
key.
locked.
This
is
not
a
trouble
but
a
message
that
the
wrong
operation
has
been
performed.
It
is
there-
fore
called
the
“error
message.”
In
such
a
case,
press
the
6)
key.
Then'the
error
message
will
disappear
and
the
computer
will
become
operable
again.
There
are
several
kinds
of
such
error
messages.
For
details,
see
page
242.
the
extension
mode,
press
&]
again
and
the
“EXT”
symbol
2-2
Begin
with
the
Four
Arithmetic
Operations
Try
simple
calculations.
Bear
in
mind
that
there
is
a
priority
sequence
in
opera-
tion,
i.e.,
multiplication
and
division
take
precedence
over
addition
and
sub-
traction.
Example
1:
234+4.5—53=—
25.5
Operation
n
a
=
ASB
@OBbebSes
=
al
*From
here
on,
numerals
will
be
no
longer
placed
in
boxes.
Example
2:
56X(—
12)+(—2.5)
=268.8
Operation
56HE
12062
.5a
265,8
*In
the
case
of
a
negative
numeral,
press
the
©)
key
before
pressing
the
numeral
key.
Example
3:
7X8—-4X5=36
Operation
7086
4H)
5b
*Multiplications
are
executed
first,
followed
by
subtraction.
Example
4:
(4.5%
1075)
X
(—2.3X
10778)
=
—0.01035
Operation
4.5075@6)2..3H5)7
8b
*For
exponent
display,
input
an
exponent
after
pressing
the
©)
key.
19

CHAPTER
2
Manual
Operations
ee
eum
In
addition
to
the
calculations
as
shown
above,
algebraic
calculations
using
varia-
bles
are
possible
with
this
computer.
These
calculations
are
convenient
when
a
certain
value
is
used
repeatedly.
For
example:
3x£+55
4x47+6=
S5x2+7=
If
the
value
of
x
in
the
above
calculations
is
123.456,
it is
troublesome
to
press
the
same
numeral
keys
repeatedly.
A
labor-saving
method
for
such
calculations
is
algebraic
calculation
using
a
variable.
Use
variable
X.
First
assign
123.456
to
the
variable
X.
YE
123.456
&
Where
J
does
not
mean
“equal,”
but
“assignment
of
the
right
side
to
the
left
side.”
Now
start
calculation.
3@)GI4)
5
&?
4@)R04)
6
be
5
QOH
7
&s
Repetitive
calculations
can
be
made
as
simple
as
this
when
a
variable
is
used.
This
computer
has
26
variables
from
A
to
Z,
which
makes
possible
storage
of
numerous
values.
In
the
above
example,
the
value
of
the
variable
X
is
constant
while
calculation
formulas
differ.
Please
note,
in
a
calculation
where
formulas
are
constant
and
the
value
of
the
variable
differs
the
computer
works
in
a
different
way.
For
example,
in
a
calcula-
tion
of
a
formula
3
x
+
5
=
where
x
varies
from
123
to
456
to
789
the
computer
uses
a
function
to
store
numeric
expressions
(calculation
formulas).
This
will
be
described
in
Chapter
3.
2-3
Calculation
Notes
=
Priority
Sequence
in
Calculation
As
mentioned
in
the
preceding
section,
calculations
are
subject
to
the
rule
of
“priority
sequence”
(true
algebraic
logic)
which
requires
that
multiplication
and
division
take
precedence
over
addition
and
subtraction.
This
computer
auto-
matically
judges
the
priority
sequence.
You
simply
input
a
numeric
expression
and
the
correct
answer
will
be
displayed.
Here
is
the
priority
sequence
in
a
calculation:
1)
Functions
(sin,
cos,
tan,
etc.)
2)
Power
(t)
3)
Multiplication
(R),
division
(/)
4)
Addition
(+),
subtraction
(-)
Calculations
are
performed
according
to
this
priority
sequence.
When
calcula-
tions
happen
to
be
equal
in
the
priority
sequence,
priority
is
given
to
the
calcula-
tion
on
the
left.
If
there
are
parentheses,
top
priority
should
be
given
to
the
parenthesized
calculation.
Example:
2+3*
S1N(17+13)
t2=2.75
L_@—
®
®
@
®
J
=
Number
of
Input/Output
Digits
and
Calculation
Digits
The
range
of
input
values
(number
of
input
digits)
acceptable
to
this
computer
is
12
digits
for
a
mantissa
and
2
digits
for
an
exponent.
The
same
number
of
digits
apply
to
internal
calculations.
The
displayed
range
of
a
value
(number
of
output:
digits)
is
10
digits
for
a
mantissa
and
2
digits
for.an
exponent.
Example:
10J23456789126
12345678912@
100
12345678912@H—-100&
g
z
21

2-4
Function
Calculations
This
computer
is
capable
of
performing
function
calculations
in
addition
to
the
four
arithmetic
operations.
i
The
functions
can
be
used
in
a
program,
but
manual
operation
is
described
here.
This
computer
is
provided
with
the
following
functions:
Name
of
Format
Function
and
input
range
i
Trigonometric
|
SIN
(Numeric
sin
IXI
<
1440°
(8a
rad,
1600gra)
i
function
expression)
*
hereafter
X
COS
(X)
cos
IXI
<
1440°
(8m
rad,
1600gra)
TAN
(X)
tan
IX1
<
1440°
(87
rad,
1600gra)
!
j
except
when
[XI
is
odd
multiple
of
uf
90°(n/2
rad,
100gra)
Inverse
ASN
(X)
sin*
|
[XI
<
1,-90°
<
ASN
<
90°
7
trigonometric
(tad:
-1/2
<
ASN
<
7/2,
:
function
gra:
-100
<
ASN
<
100)
i
ACS
(X)
cos?
|
IXI<
1,
0°
<
ACS
<
180°
(mad:
0
¢
ACS
<
a,
gra:
0
¢
ACS
<
200)
i
ATN
(X)
tant
|
-90°
<
ATN
<
90°
‘
(rad:
~n/2
<
ATN
<
0/2,
gra:
-100
<
ATN
<
100)
7
Hyperbolic
HYP
SIN
(X)
sinh
IX1
S
230,2585092
:
function
HYP
COS
(X)
cosh
IXI
<
230.2585092
i
HYP
TAN
(X)}
tanh
XI
<
107°
Inverse
HYP
ASN
(X)
sinh?
}
(X1<5x
10°?
li
hyperbolic
HYP
ACS
(X)
cosh*
|
1<¢X
<5
x
10°°
7
function
HYP
ATN
(X)
tani’
|
iXi<1
|
Square
root
SQR
(%)
Vx
X20
i
Cube
root
|
CUR
(X)
ve
|
IxI
<
Lore
lt
i
Power
KXtX
xY
x
<0
y:
natural
number
\
Exponential
EXP
(X)
ex
-10°°*
<X
<
230.2585092
:
function
i
22
k
2-4
Function
Calculations
eee
Name
of
Format
Function
and
input
range
Common
LOG
(X)
log,
,.*
X>0
logarithm
Natural
LN
(X)
logsx
|
X>0
logarithm
Integer
INT
(X)
[x]
Gives
maximum
integer
not
exceeding
X
(equal
to
Gaussian
function
[x])}
Fraction
FRAC
(X)
FRAC
|
Gives
decimal
portion
of
X
Absolute
ABS
(X)
Ixt
Gives
absolute
value
of
X
value
Sign
SGN
(X)
sgn
x
lwhen
X>0
0
when
X=0
.
-lwhenX<0
Rounding
off
|
RND
(X,
Number
|
RND(
Gives
the
value
of
X
which
is
rounded
of
digits)*
off
at
the
specified
digit.
(Number
of
digits|
<
100
Random
RAN
#
RAN
#
|
Generates
a
10-digit
random
number.
numbers
O<RAN#<1
T
wT
T
Gives
approximate
value
of
ratio
of
circle
circumference
to
diameter.
Decimal
>
DMS$
(X)*
DMS$
(
|
Converts
decimal
number
given
as
sexagesimal
X
into
sexagesimal
character
string
conversion
in
degrees,
minutes
and
seconds.
XI
<
108
Sexagesimal
>
|
DEG
(deg.
[,
min.]
DEG(
|
DEG
G,
y,
2)
=x
+
p/60
+
2/3600.
decimal
[,
sec.]
])*
IDEG
(x,
y,
z)1
<
101°
conversion
Decimal
+
HEX$
(X)*
HEX$
(|
Converts
value
of
X
into
4-digit
hexadecimal
hexadecimal
character
string.
[conversion
-32769
<
X
<
65536
23

24
CHAPTER
2
Manual
Operations
re
4
Name
of
.
.
function
Format
Function
and
input
range
Hexadecimal
|
&H
Hexadecimal
&Hx
Character
string
contains
hexadecimal
>
decimal
character
string
number
within
4
characters.
conversion
Factorial
FACT
(X)
x!
O<cXs
69
(0
and
positive
integer)
Permutation
NPR
(n,
1)*
|
npr
O<gr<gn<10"”
:
(0
and
positive
integer)
Combination
|
NCR
(n,
1)*
nCr
O<rgn<
10'°
(0
and
positive
integer)
Rectangular
POL
(X,
Y)*
POL(
IX]
<
10799,
LY]
<
101,
iXI+sY1#0
>
polar
X,
¥:
numeric
r
is
given
as
a
function
value
for
assign-
coordinate
expressions
ment
to
variable
X
while
value
of
@
is
transformation
assigned
to
variable
Y.
Polar
>
REC
(1,
6)*
REC
(
Ogr<
10'°°,
lel
<
1440°
(8m
rad,
rectangular
1,
@:
numeric
1600
gra)
coordinate
expressions
Gives
x
as
a
function
value
for
assign-
transformation
ment
to
variable
X
while
value
of
y
is
assigned
to
variable
Y.
L
Note:
In
the
case
of
asterisked
functions,
parameters
must
be
parenthesized.
*Certain
combinations
or
permutations
may
cause
errors
due
to
overflow
during
internal
calculations.
2-4
Function
Calculations
Os
ee
Now
perform
calculations
by
using
functions.
Frequently
used
functions
can
be
input
at
one
touch
of
the
respective
function
keys.
©
Trigonometric
Functions
(sin,
cos,
tan)
and
Inverse
Trigonometric
Functions
(sin,
cos,
tan™!)
When
using
these
functions,
be
sure
to
specify
the
angle
unit
(degrees,
radians,
grads).
Example:
sin
12.3456°
=
0.2138079201
Operation:
(i(Z)
(Angle
unit:
degrees
(DEG))
GI12.3456
ed
Example:
2+
sin45°
X
cos65.1°
=
0.5954345575
Operation:
245
R65.
1
a]
el
=]
oar)
fe
Lal
te
on nh
ba
|
Lm
|
Example:
sin"'
0.5
=
30°
Operation:
PAZ
@
5
Ge
ted
AT
Example:
cos(Frad)
=
9.5
Operation:
fo)
(Angle
unit:
radians
(RAD))
eos\(
Oi]
4&7)
3
Oe)
al]
on
25

CHAPTER
2
Manual
Operations
Example:
cos?
2
=
0.7853981634rad
Operation:
SSO
2
4
2
Bes
BT
Example:
tan(—35gra)
=
—0.6128007881
Ga)
(Angle
unit:
grads
(GRA))
fal]
35
Ee
©
Hyperbolic
Functions
(sinh,
cosh,
tanh)
and
Inverse
Hyperbolic
Functions
(sinh,
cosh”,
tanh”)
In
the
case
of
these
functions,
press
case
of
trigonometric
and
inverse
trigonometric
functions.
(wa)
and
then
press
the
same
keys
as
in
the
Example:
sinh(—4)
=
—2.301298902
Operation:
BESSA
2
Wie
~2,
301258982
Example:
cosh”!
1.5
=
0.9624236501
Operation:
Poles
1,
5
Ge)
He
padzae5al
©
Logarithmic
Functions
(log,
In),
Exponential
Function
(e*)
and
Power
Func-
tion
(x”)
Example:
logi.23
=
logw
1.28
=
0.08990511144
Operation:
31.2368
,
a,
gepagsilidd
26
Example:
In90
=
loge90
=
4.49980967
Operation:
1)
90
&q]
Example:
e
=
148.4131591
Operation:
=)
5
fd
Example:
123?
Operation:
123
Wie
i]
15129
Example:
123°
=
1860867
Operation:
123
@
be
Example:
10:23
=
16.98243652
Operation:
1,23
e%
Example:
5.62%
=
52.58143837
Operation:
5.6@12,
3b
Example:
123
=
7/1238
=
1.988647795
Operation:
12300147
eg
24
Function
Calculations
145,
4131551
woe
27
Other manuals for FX-795P
2
Table of contents
Other Casio Desktop manuals

Casio
Casio PA-2400U Troubleshooting guide

Casio
Casio FX-850P User manual

Casio
Casio PB-2000C User manual

Casio
Casio FX-795P User manual

Casio
Casio DT-300 User manual

Casio
Casio PB-2000C User manual

Casio
Casio FX-890P User manual

Casio
Casio Cassiopeia A-20 User manual
Casio
Casio FP-200 User manual
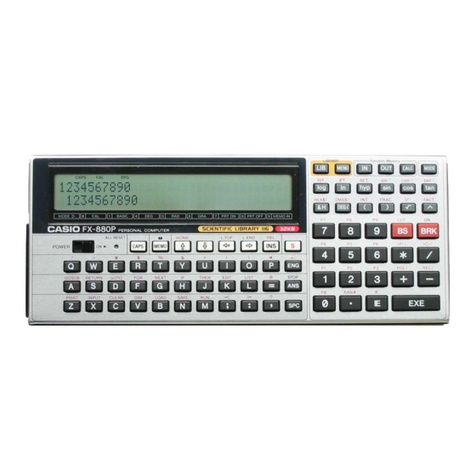
Casio
Casio PB-100 User manual