Cata UBESP60IX Installation instructions

WARNING: Read the instructions before using the appliance.
2
4
1
5
6
3
3
6
5
1
4
2
2
4
1
5
6
3
3
6
5
1
4
2
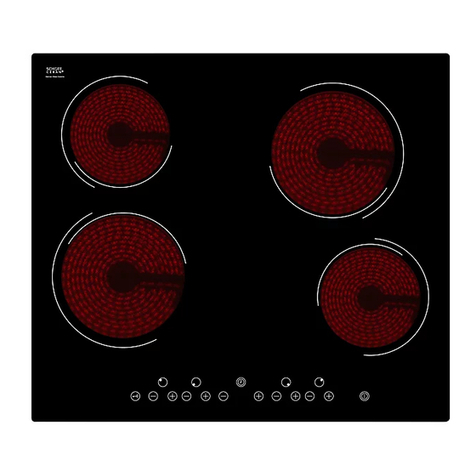
60cm Solid Hotplate Electric Hob
Model Number UBESP60IX

2
4
1
5
6
3
3
6
5
1
4
2
2
4
1
5
6
3
3
6
5
1
4
2
[01] x 1
[02] x 4
[03] x 1
[05] x 1
[04] x 4
TEMPLATE
TEMPLATE
1 : 1
60 cm Solid Plate Electric Hob

3
Let's
get started...
These instructions are for your safety. Please read through them
thoroughly before use and retain them for future reference.
Getting started… 04
Your product 04
Before you start 04
Safety 05
In more detail… 08
Operation 08
Care and maintenance 11
Troubleshooting 13
Recycling and disposal 14
Technical specications 14
Wiring 15
Technical and legal information 16
Guarantee 17
CE Declaration of conformity 19
Appendix...
20
Installation

4
Getting started...
Your product
Things to check before you start
Check the package and make sure you have all of the parts listed.
Decide on the appropriate location for your product.
The specications plate is available on this appliance. This plate displays
all the necessary identication information for ordering replacement parts.
If you sell the appliance, give it away, or leave it behind when you move
house, make sure you also pass on this manual so that the new owner
can become familiar with the appliance and its safety warnings.
You will need
Your product
Before you start
Installation guide
located at the end of
the guidebook
Control panel
2
4
1
5
6
3
3
6
5
1
4
2
2
4
1
5
6
3
3
6
5
1
4
2
To avoid the risks that are always present when you use an electrical
appliance it is important that this appliance is installed correctly and that
you read the safety instructions carefully to avoid misuse and hazards.
Please keep this instruction booklet for future reference and pass it on to
any future owners. After unpacking the appliance please check that it is
not damaged. If in doubt, do not use the appliance but contact Customer
Services on 0344 800 1128 (UK), 0144 75261 (Ireland).

5
Getting started...
Safety
Safety
These instructions are for your safety. Please read through them thoroughly
prior to installation and retain them for future reference.
• All installation work must be carried
out by a competent person or qualied
electrician.
• This appliance must be installed correctly
by a suitably qualied person, strictly
following the manufacturer’s instructions.
This appliance complies with all current
European safety legislation, however, the
Manufacturer must emphasise that this
compliance does not prevent the surfaces of
the appliance from heating up during use and
remaining hot during its operation.
Accessible parts may become hot during
use. Young children should be kept away.
Care should be taken to avoid touching the
appliance.
The Manufacturer highly recommends that this
appliance be kept out of the reach of babies
and small children.
Children should be supervised to ensure that
they do not play with the appliance.

6
Getting started...
This appliance is not intended for use by
persons (including children) with reduced
physical sensory, or mental capabilities, or by
those who lack experience and knowledge,
unless they have been given supervision and
instruction concerning the use of the appliance
by a person responsible for their safety.
Means for isolating the appliance must be
incorporated in the xed wiring in accordance
with the current wiring regulations. An all-
pole disconnection switch having a contact
separation of at least 3 mm in all poles should
be connected in xed wiring.
If the supply cord is damaged, it must be replaced
by the manufacturer, its service agent or similarly
qualied persons in order to avoid a hazard.
Make sure that the power cord is not caught
under or in the appliance and avoid damage to
the power cable.
Do not allow the electric cables to touch the
hot parts of the appliance.
Do not install the appliance outdoors in a
damp place or in an area which may be prone
to water leaks such as under or near a sink
unit. In the event of a water leak allow the
machine to dry naturally.
Safety

7
Getting started...
Safety
Safety
A steam cleaner is not to be used.
The appliance is not intended to be operated
by means of external timer or separated
remote-control system.
The appliance is for domestic use only.
When a cooking zone has been on for a long
time, the surface remains hot for some time
afterwards so do not touch the metal surface.
Do not store detergents or ammable
materials beneath the hob.
Do not leave hot oils or fats unattended as
they may catch light.
The Manufacturer declines all liability for
personal or material damage as a result
of misuse or incorrect installation of this
appliance.
Please dispose of the packing material
carefully.
Do not use ammable sprays in close vicinity
to the appliance.
We also recommend that great care be taken
during use and cleaning. Read the cleaning
and maintenance sections for this appliance
carefully.

8
In more detail...
Operation
Product functions
• 2 x 2.00 kW thermostatic plates (diameter 180 mm). Rapid hot plates.
• 2 x 1.50 kW thermostatic plates (diameter 155 mm). Semi-rapid hot plates.
• Side control operation. 6 power levels.
Control elements
Control panel
2
4
1
5
6
3
3
6
5
1
4
2
2
4
1
5
6
3
3
6
5
1
4
2
Reference Description Qty
A Rapid hot plates 2
B Semi-rapid hot plates 2
C Control panel 1
Operation
2
4
1
5
6
3
3
6
5
1
4
2
2
4
1
5
6
3
3
6
5
1
4
2
Caution
Any lm or stickers that are present on the hob surface when it is
delivered should be removed before use.
Care should be used when utilizing the appliance, otherwise there is a
risk of burns being caused.
If fat and oil overheats, then it can ignite extremely quickly. For this reason,
when cooking with fat and oil the appliance should not be left unattended.
Make sure that all of the cooking zones are switched off after use.

9
In more detail...
Before rst use
• You should switch on one cooking zone at a time, for 5 minutes at the
maximum setting. This will help to eliminate any new smell that exists and
evaporate any humidity that has formed on the heating elements during
transit. Make sure the room is properly ventilated during this procedure.
• When doing this burn off process, an appropriately sized saucepan
containing cold water should be placed on the zone in question.
• Do not burn off more than one zone at once.
Control knobs
• All operations are performed by means of the 4
control knobs that can be found on the right hand
side of the hob top.
• The control knobs can be turned either clockwise
or anti-clockwise to select a heating level. The
numbers around the outside of each control knob
indicates the power level that you have set the zone
to.
• A marking to the bottom right of each control knob,
indicates which zone that it controls.
2
4
1
5
6
3
Turning on a zone and setting a power level
Control panel
2
4
1
5
6
3
3
6
5
1
4
2
2
4
1
5
6
3
3
6
5
1
4
2
• Turn the control knob of the zone that you wish to cook on, clockwise or
anticlockwise until it reaches the power level that you desire.
• Each cooking zone can be adjusted between 1 and 6, one being the coolest
zone setting and six being the hottest zone setting.
• When you have nished cooking, make sure that you turn the control knob
anti-clockwise, to the 0 position.

10
In more detail...
Operation
Turning on a zone and setting a power level
Hob guidelines
• The rst few times the hob top is used, it may give off an acrid, burning smell.
• This smell will disappear completely with repeated use.
• The hob surface is tted with cooking areas of different diameter and power.
• The positions where the heat will radiate from are clearly marked on the hob
top. The saucepans must be positioned exactly on these zones for efcient
heating to occur. Pans should have the same diameter as the cooking zone
that they are being used on.
• You should not use saucepans with rough bottoms, as this can scratch the
solid plates.
• Before use, make sure that the bottoms of the saucepans are clean and dry.
• When cold, the bottom of the pans should be slightly concave, as they
expand when hot and lie at on the surface of the hob. This will allow the
heat to transfer more easily.
• The best thickness for the bottom of the pans is 2 – 3 mm of enameled steel
and 4 – 6 mm for stainless steel with sandwich type bottoms.
• If these rules are not followed, then there will be a great loss of heat and
energy. Heat not absorbed by the saucepan, will spread to the hob, frame
and surrounding cabinets.
• Preferably cover pans with a lid to permit cooking at a lower heat.
• Always cook vegetables and potatoes, etc. in as little water to reduce cooking
times.
• Food or liquid that has high sugar content may damage the hob top if it
comes into contact with the hob surface. Any spillages should be wiped up
immediately, however this may not prevent the hob surface from becoming
damaged.
Hotplate Recommended pan diameters (cm)
ASmall Hotplate 14-22
BLarge Hotplate 18-22
11
In more detail...
Care and maintenance
If the supply cord is damaged, it must be replaced by a special cord
or assembly available from the manufacturer or its service agent.
For domestic use only.
When a cooking zone has been on for a long time, the surface
remains hot for some time afterwards so do not touch the ceramic
surface.
Do not leave metal objects, such as knives, forks, spoons and lids
on the hob as they may get hot.
Do not put detergents or ammable materials beneath the hob.
If the surface of the hob is cracked, disconnect from power supply
the appliance to avoid any possibility of electric shocks.
OFF
Warning
Always switch off the electricity supply before
performing maintenance work. In the event of a fault,
contact an ofcial distributor or authorised dealer.
Caution
• Use soapy water and a cloth for cleaning. Never use abrasive
powders.
• Avoid banging pots and pans down on the hob.
• Cleaning and maintenance operations must only be carried out
when the hob is cool.
• The appliance should be cleaned after use.
• Wipe the inner and outer surface of the appliance and its accessories with
wet cloth.
• Any liquid overowing from the pan must always be removed with a cloth.
• Any residues that are left on the hob top surface from cleaning agents will
damage it.
Care and maintenance

12
In more detail...
Care and maintenance
After each use
• Wipe the inner and outer surface of the appliance and its accessories with
wet cloth.
• Dry the appliance by the surface with a clean cloth.
• If the hob top is heavily soiled a suitable stainless steel cleaner should be
used.
Note: If a stainless steel cleaner is not used regularly, then it is possible
for the surface of the hob to change colour over a period of time.
Using a specialist hob cleaner
• It is possible to purchase specialist stainless steel cleaner/conditioner.
• You should follow the instructions given by the manufacturer of the specialist
stainless steel cleaner/conditioner. You should ensure that it is suitable for
use on your appliance.
Maintaining the solid plates
• If something is spilt onto the plate itself, then it can be removed using a soft
brush, plastic or nylon scourer and warm water when the plate is cool.
• To keep the solid plates in good condition, you should put a little olive oil onto
a kitchen towel and rub it onto the surface of the plate. The next time the
plate is used, then it may produce a little smoke.
• Alternatively you can use a hotplate conditioner. The manufacturer’s
instructions should be followed when using these products.
Note: If the solid plates are not maintained regularly with olive oil or a
hotplate conditioner, then they may rust.

13
In more detail...
Troubleshooting
The following circumstances may not be a problem. Do not contact the customer
services until the problem has been conrmed.
If your appliance is still not functioning properly after making the below checks,
please contact customer services.
Do not take the appliance apart yourself, as you may damage the hob.
Problem Possible cause Possible solution
The cooking zones are
not functioning or will
not switch on
The mains electrical
supply is disconnected
Check that the mains
electrical supply to the
appliance is correct and
working
The mains fuse is
broken. Check the mains fuse
A humming sound is
heard when a cooking
zone is selected
The sound disappears
when the zone heats
up
It is normal
The cooking zones
have become
discoloured
Caused by burning of
remnants on zone
This will not affect the
working of the appliance.
You should make sure that
the cleaning instructions are
being followed regularly
Only two of the zones
on my hob are working
Electrical connection
failure
Recheck that the terminal
screws are all tightened
between the links
Troubleshooting

14
In more detail...
Recycling and disposal
Technical specications
Recycling and disposal
Environmental protection
Waste electrical products should not be disposed of with household waste.
Please recycle where facilities exist. Check with your Local Authority or retailer for
recycling advice.
The symbol on the product or its packaging indicates that this
product cannot be treated as normal household waste. This
product must be handed over to an electric and electronic
equipment collection point for recycling.
On ensuring that this product is disposed of correctly, you will help to avoid
possible negative consequences for the environment and public health, which
could occur if this product is not handled correctly. To receive more detailed
information about recycling this product, contact your local government, domestic
waste disposal services or the outlet where the product was bought.
Technical specications
Supply voltage 220-240V~, 50Hz
Max. rated inputs 7000W
Dimensions (W x H x D) 590 x 100 x 500mm
Net weight 11.2kg
* Double pole switched fused outlet with 3 mm contact gap.

15
In more detail...
Wiring
All installation work must be carried out by a competent
person or qualied electrician.
Before connecting the mains supply ensure that the mains
voltage corresponds to the voltage on the rating plate
inside the cooker hob.
WARNING: THIS APPLIANCE MUST BE EARTHED.
Mains Supply could be connected to the Mains Voltage by Direct Connection
USE A 32AMP FUSE
DOUBLE POLE SWITCHED
FUSED SPUR OUTLET
FUSE ON
EUR UK
Direct Connection
If the appliance is being connected directly to the mains an omnipolar circuit-
breaker must be installed with a minimum opening of 3mm between contacts.
The installer must ensure that the correct electrical connection has been made
and that it complies with wiring diagram.
The cable must not be bent or compressed.
Regularly check the power plug and power cord for damage. If the supply cord is
damaged, it must be replaced by a special cord or assembly available from the
manufacturer or its service agent.
Wiring

16
In more detail...
Technical and legal information
The Manufacturer declines all liability for damage caused to persons and objects
due to incorrect or improper installation of the appliance.
Electrical Requirements
Any permanent electrical installation must comply with the latest I.E.E.
Regulations and local electricity company regulations. For your own safety a
qualied electrician or contractor who is on the roll of the National Inspection
Council for Electrical Installation Contracting (NICEIC) should undertake the
electrical installation.
Electrical Connection
Before connecting the mains supply ensure that the mains voltage corresponds to
the voltage on the rating plate inside the appliance.
WARNING: THIS APPLIANCE MUST BE EARTHED
The appliance is supplied with a 3-core mains cable and must be connected to
the electricity supply via a double pole switch having a 3mm minimum contact gap
on each connector.
For UK only
A Switched Fused Connection Unit to BS 1363 Part 4 is recommended.
The fuse must be rated at 32 Amps.
The wires in the mains lead are coloured in accordance with the following code:
Brown = L - Live
Blue = N - Neutral
Green/Yellow = - Earth
The connection point must be placed in a position adjacent to the appliance so as
to be readily accessible for an engineer in the event of a breakdown.
Technical and legal information
To arrange an in guarantee service call, please contact customer services on the
following numbers.
UK & Northern Ireland Republic of Ireland (Eire)
Phone: 0344 800 1128 Phone: 014475261
Email: uksupport@apelson.co.uk
Web: www.spareszone.co.uk

19
In more detail...
CE Declaration of Conformity
Electric Hob
David Sala
Technical Manager
APPLIED INTERNATIONAL TECHNICAL
STANDARDS AND SPECIFICATIONS: ISO9001.2008
PLACE: Torelló
MACHINE APPLICATION:
TYPE:
EC DIRECTIVES APPLIED:
APPLIED HARMONIZED
STANDARDS:
We hereby certify that the mentioned accessory complies with the essential requirements of the
European Directives applicable, including their modifications and the corresponding transpositions
from the national law.
EN 60335-2-6 2003 + A1:2005 + A2:2008 used in conjunction with
EN 60335-1:2002 + A11:2004 + A1:2004 + A12:2006 + A2:2006 +
A13:2008 and EN 62233:2008
Comply with the following European Directives 2006/95/CE:
LVD (Low Voltage Directive) and the 2004/108/CE:
EMC (Electromagnetic Conformity)
MANUFACTURER: CATA
ADDRESS:
C/ Ter nº 2, Torelló 08570 - Barcelona (Spain)
The Manufacturer has a policy of continuous product improvement, it reserves
the right to adapt and carry out any modication considered necessary without
prior warning.
CE Declaration of Conformity
UBESP60IX

20
Appendix...
Clearance
Warning
Good ventilation is required around the appliance for easier dissipation of heat
and low power consumption.
Sufcient clearance is required around the appliance.
The gap between the hob and any cupboard above it should be at least
600mm.
600mm
At least
200mm
600mm
50mm
At least
200mm
2
4
1
5
6
3
3
6
5
1
4
2
2
4
1
5
6
3
3
6
5
1
4
2
Installation

21
Installation
01
02
Cut out worktop to the template dimensions with suitable equipment and seal the
cut edge with appropriate sealant.
Stretch out the supplied seal along the underside edge of the hob, ensuring the
ends overlap.
[03] x 1
[05] x 1
SILICONE
474mm
555 mm
TEMPLATE
TEMPLATE
[03]

22
03
04
Note: For electrical connection see Technical and legal information section.
474mm
555 mm
2
4
1
5
6
3
3
6
5
1
4
2
2
4
1
5
6
3
3
6
5
1
4
2
[04]
30mm
40mm
[02]
[04] [02]
[02] x 4
[04] x 4
Table of contents
Other Cata Hob manuals

Cata
Cata IB 603 BK /A Quick start guide

Cata
Cata INSB 6003 BK User manual

Cata
Cata UBTC30BV Specification sheet

Cata
Cata t-604 Manual

Cata
Cata I 604 B Manual

Cata
Cata GHFF70SS2 User manual

Cata
Cata T 3102 BK Quick start guide

Cata
Cata TDG 3002 BK Quick start guide

Cata
Cata IBG 6304 BK Quick start guide

Cata
Cata TT 603 Manual
Popular Hob manuals by other brands

Attila
Attila PRF 960 GAS Instructions for the use

Currys Essentials
Currys Essentials CCHOBKN10 installation manual

Electrolux
Electrolux GK29TCO user manual

Thetford
Thetford SHB981 Series User and installation instructions

Klarstein
Klarstein IGNITO DOMINO manual

Bosch
Bosch PIE...N1 SERIES instruction manual