CatLink BayMax Cat Litter Box User manual

Thank you for purchasing the CATLINK BayMax Cat Litter Box - SCOOPER SE!
As a company, CATLINK is committed to developing innovative products that cater to your pet's
needs and make your life easier. This user manual has been designed to help you get the most
out of your SCOOPER SE, with detailed instructions for setting it up and helpful tips and advice
for optimal usage.
The SCOOPER SE offers a variety of features that make it an indispensable addition to your
home. To ensure you can fully explore and utilize these features, we recommend keeping this
manual within easy reach for future reference. In case you require further assistance or have any
We hope you and your pets enjoy the freedom that comes with the CATLINK BayMax Cat Litter
Box - SCOOPER SE!
Thank you again for choosing CATLINK.

Always be sure any cat in your household that might use the SCOOPER SE weighs at least 3.3 lbs.
Cats must weigh 3.3 to 22 lbs to safely use the SCOOPER SE.
Always place the SCOOPER SE on a firm, level surface. Avoid soft, uneven, or unstable flooring,
which may affect the ability of the Unit to detect your cat.
Always unplug the Unit before servicing.
Never force your cat into the SCOOPER SE.
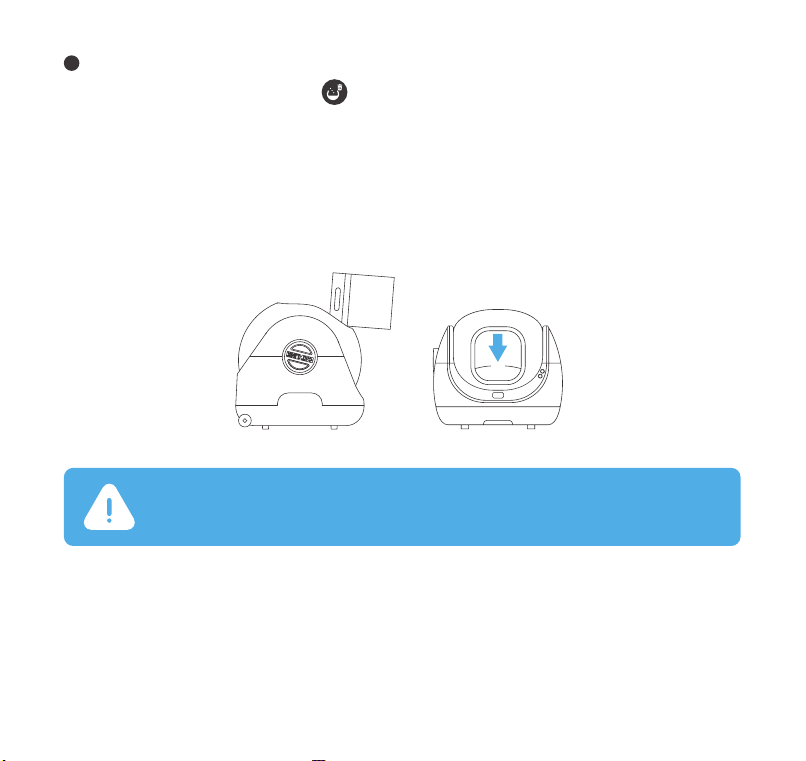
Never put anything in the Unit other than clumping litter or litter beads that are small enough to
pass through the screen.
Never sit on or place anything on top of the SCOOPER SE.
Never push the SCOOPER SE against a wall or into a corner (must not be touching any walls).
Never remove the Globe or Cover while the Unit is rotating or turn the Unit on if the Globe or
Cover is removed.
Never wet or submerge the Cover or Base.
Never allow children and people with reduced physical, sensory, or mental capabilities or lack
of experience and knowledge to use, clean, or maintain the SCOOPER SE without supervision,
instruction concerning its use in a safe way, and understanding of the hazards involved.
Children under 8 years of age should not be allowed contact with the SCOOPER SE.
Never allow children or others to play with the SCOOPER SE.
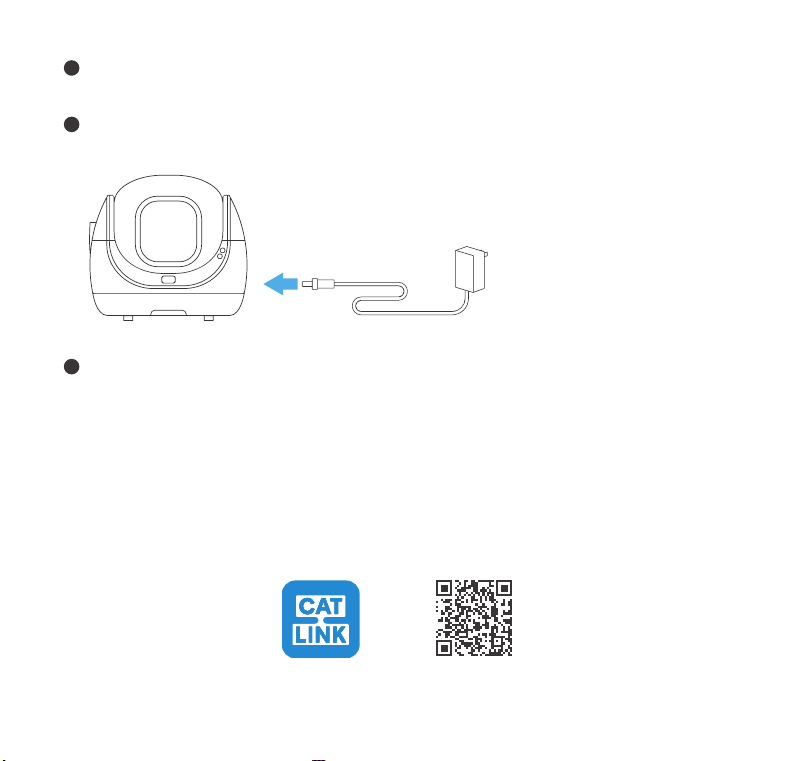
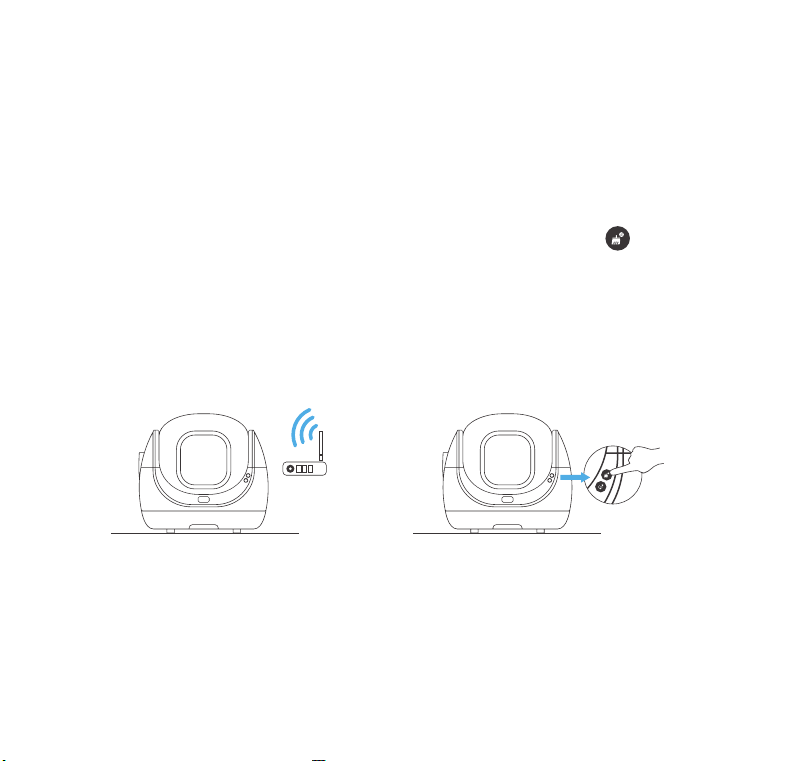
Never use an external power supply other than the one provided with the Unit. Only use the
power supply provided with the Unit. If it is damaged, contact us for a replacement.
①
②
③
④
⑤
⑥
⑦
⑧
⑨
⑩
Impoant Safety Instructions
12

Table of Contents
13
1
2
3
3
3
3
4
4
5
6
7
Packing List
Product Structure
Setting Up Your SCOOPER SE
1. Check the Items
2. Check Installation
3. Placement
4. Check the Trash Liner
5. Power On and Test Cycle
6. Wi-Fi Connection
7. Cat Litter
8. Activate and Place
Deodorization Hydrogel
Clean Modes
Button Functions
Indicator
How to Empty
Move the Unit
How to Clean
Safety Protection System
Troubleshooting
Product Specifications
Customer Service
8
8
9
10
11
11
12
12
14
15

Packing List01
SCOOPER SE x1
Deodorization
Hydrogel x1
Power Adapter x1 Trash Liner x1 User Manual
1

Product Structure02
Left Cover
Knob
Cover of
Waste Bin
Right Cover
Buttons
Indicator
Empty Pad
Screen
Base
2Toll free: +1 833 440 2772 Email: [email protected]
Packing List
Product Structure
Setting Up Your SCOOPER SE
1. Check the Items
2. Check Installation
3. Placement
4. Check the Trash Liner
5. Power On and Test Cycle
6. Wi-Fi Connection
7. Cat Litter
8. Activate and Place
Deodorization Hydrogel

Setting Up Your SCOOPER SE03
Once you have assembled the item and confirmed that the package is complete, get
started by following the steps below.
Placement:Place the Unit as required.
3
Check the items:Confirm that the item and accessories are present.
Check the installation:Ensure that all items are installed correctly to avoid any issues.
1
2
(1) Make sure that the Trigger
under the Right Cover is firmly
locked in place.
(3) Make sure that the Knob is set to
the Clean position and that the
Screen is not covered by the Empty
Pad used for emptying litter.
(2) Confirm that both Covers are
properly installed and free from
warping.
(1) Make sure that the Unit is placed
on a level and sturdy surface with no
objects beneath it. Soft, uneven, or
unstable flooring should be avoided.
(3) Place the Unit close to a stable
WiFi signal and far from devices
that may cause WiFi interference.
(2) Locate the Unit near a power outlet,
with no walls or corners touching it,
and nothing on top of it.
3

Check the Trash Liner:Check that the Trash Liner is properly fitted and the cover of the Waste
Bin is closed.
Power-on:If the Globe is incorrectly positioned after powering on, the device will automatical-
ly reset it through a self-check.
4
5
Wi-Fi connection
6
4Toll free: +1 833 440 2772 Email: [email protected]
NOTE:
Place the Unit as close to the router as possible, and make sure the Unit is powered on.
Authorize location information, and turn on GPS on your Android phone.
Use only letters and numbers in the WiFi name to avoid connection issues.
Use a 2.4GHz WiFi network to connect the product. 5GHz WiFi is not supported, and certain locations such
as hotels and airports that require special certification of WiFi may also not be supported.
●
●
●
●
Download the CATLINK app in the application market of your phone or scan the QR code.
①
CATLINK app For Android & iOS

Connection Failed
Placed close
to the router.
Press the Clean
Button for 10s.
5
Connect your phone to 2.4GHz Wi-Fi.
Register your account in the app and log in. (Make sure to authorize location information and
turn on GPS for your Android phone). On the DEVICE page, click the ‘+’ in the upper right corner,
select the SCOOPER SE, and follow the instructions to complete the Wi-Fi connection. If the Unit
can't be searched, click SCOOPER SE to add it manually at the bottom of the page, and follow the
prompts.
If you need to add the device manually, press and hold the Clean Button [ ] for 10 seconds.
You will hear two initial beeps, followed by two more beeps. Release the button once the Indica-
tor flashes.
Connect SCOOPER SE to Wi-Fi according to the prompts in the CATLINK app.
After the Wi-Fi connection is successful, the Indicator of the Unit will turn on.
After completing the above steps, you can use the functions in the CATLINK app.
②
③
④
⑤
⑥
⑦
If you experience connection failure, turn off the power and repeat the steps outlined above. Be
sure to read the NOTE under the [WiFi Connection] section of this chapter to ensure that you
follow the process correctly and avoid any errors.
If you fail to connect the device, please feel free to contact us.

7Cat litter
(1) Press the Add/Empty Button [ ] to turn the Globe upwards.
(2) Once the rotation has stopped, add 4L of cat litter.
(3) After adding litter, press the Add/Empty Button again to level the litter and reset the Globe.
(4) After leveling litter, make sure that the amount added does not exceed the Max line to avoid
wasting litter.
NOTE: Press the Add/Empty Button once before adding litter each time. After adding
litter, press the Add/Empty Button again to level it. If you forget to press the Add/Empty
Button before adding litter, be sure to run a cleaning cycle after adding litter.
MAX
4L
6Toll free: +1 833 440 2772 Email: [email protected]

Activate and place the Deodorization Hydrogel
8
Congratulations!
Your SCOOPER SE is now ready to use.
(1) Pull out the left
Knob.
NOTE: The Deodorization Hydrogel should
be replaced eve 60 days.
(5) Insert the Knob with
the activated Deodoriza-
tion Hydrogel back into
place.
(6) During installation, do
not turn the bottle mouth
down to avoid the outflow
of activation liquid.
(2) Insert the Deodor-
ization Hydrogel into
the Knob.
(4) Peel off the seal of
the Deodorization
Hydrogel and add the
activator.
(3) Rotate the Deodoriza-
tion Hydrogel counter-
clockwise to secure it in
place.
7

Button Functions05
Clean Modes04
8Toll free: +1 833 440 2772 Email: [email protected]
Explanation NoteIndicator Mode
Timer
Auto
Manual
You can schedule regular cleanings
in the app. Only clean litter according
to the schedule you have set.
The litter box will automatically
clean itself when your cat exits the
Globe.
You can manually start and pause
the cleaning process.
You can modify the Wait Time in the app, which
determines when the litter box will automatically
clean up after the cat leaves the Globe. By default,
it is set to 5 minutes.
It can only be set via app when the WIFI is
connected.
For kittens under 6 months old or weighing less than
3.3 lbs, it is recommended to use Manual mode.
Press
Press during cleaning process
Long press for 3 seconds
Long press for 10 seconds
Press
Press after adding litter
Long press for 3 seconds
Long press for 10 seconds
Long press the two buttons
for 3 seconds
Long press for 3 seconds
during emptying litter
One beep
One beep
Two beeps
Two beeps, and two beeps
One beep
One beep
Two beeps
Two beeps, and two beeps
Two beeps
Two beeps
Start cleaning
Pause cleaning
Switch clean modes
Enter Wi-Fi connecting mode
Add litter
Level litter
Start emptying
Calibrate weight
Open/close Panel Lock
Cancel emptying
Clean
Add / Empty
Combination Buttons
+
Button Operation Explanation Sound

Indicator06
StatusIndicator Lights Explanation Note
ON
ON
OFF
Flashing
ON
OFF
OFF
Panel Lock On
Panel Lock Off
The Unit is in Empty Mode.
Wi-Fi connecting
Wi-Fi connected
Wi-Fi not connected
The Unit is in Clean Mode.
Infrared induction protection
Weighing induction protection
The left/right/both Side Covers
are not installed properly.
Panel Lock
Wi-Fi
Safety Indicator
Empty Mode
The Unit in this state can't
clean.
The Unit in thisstate can't
empty.
The Unit suspends the
operation.
The Unit suspends the
operation.
The Unit suspends the
operation.
Motor failure The Unit suspends the
operation.
ON
ON
ON
Waste Bin Full
Weighing calibration
The Unit is in timer Mode.
The Unit is in auto Mode.
The Unit is in manual Mode.
Safety Indicator
Safety Indicator
Manual Mode
Blue Light On
Red Light On
Purple Light On
Purple Light Flashing
Fast
Red and Blue Alternately
Flashing
Blue Light Flashing
9

Empty means removing all the litter from the Globe.
How to Empty07
To prevent the Waste Bin from overflowing during the emptying process, replace the Trash
Liner with a new one.
*Do not attempt to empty the Waste Bin when it is full.
Rotate the Knob to the Empty position, and the Empty Pad will cover the Screen.
*Do not rotate the Knob while the Unit is in motion.
To start the emptying process, either long press the Add/Empty Button for 3 seconds or
select Empty in the app.
*Empty cannot be performed when the Knob is not in the Empty position.
Once emptying is complete, rotate the Knob to the Clean position and the Empty Pad will
return to its home position.
*Cleaning cannot be performed when the Knob is not in the Clean position.
After the Knob returns to the Clean position, open the Waste Bin cover and replace the Trash
Liner.
①
②
③
④
⑤
Rotate the Knob to the Empty position. Press and hold the Add/Empty
Button for 3 seconds.
10 Toll free: +1 833 440 2772 Email: [email protected]

(1) Avoid dragging the Unit directly on
the floor. Instead, it is recommended to
lift the Unit with your hands.
(2) Alternatively, gently lift and slide the
SCOOPER SE using the method shown in
the figure.
Move the Unit08
How to Clean09
Do not wash the Base and avoid spraying
any liquids on it. Instead, use a damp cloth
to wipe it clean.
The Globe and Side Covers can be washed
directly with water. Once done, make sure to
dry them thoroughly before reinstalling.
Side Covers Side Covers
Globe
Base
11

Troubleshooting11
1. Wipe the Indicator clean with a damp cloth.
2. Press the Clean Button once to let it perform a
self-cleaning.
Reinstall the Side Covers.
Press the Clean Button once to let it perform a self-clean-
ing.
The Unit stops working due to load cell
protection.
The Unit stops working due to anti-pinch
protection.
Trouble Solution
Safety Protection System10
ExplanationPriorityProtection
Gravity
Sensor
Infrared
Sensor Level 1
Level 2
Level 3
Level 4
Injury Prevention
Sensor
Motor
Protection
If an object enters while the Globe is rotating, the infrared protection will be triggered,
causing the Globe to stop rotating. The blue safety indicator light will remain on, and an
abnormal notification will appear in the app. Once the object has been detected to
leave, the Globe will resume rotating.
If an object weighing over 3.3 lbs enters during the rotation of the Globe, the weighing
protection will automatically stop the rotation. Once the object leaves, the Globe will
resume rotating.
While the Globe is rotating, if Side Covers are not properly in place, the anti-pinch
protection will be triggered, causing the Globe to stop rotating. The safety indicator
light will flash purple quickly and an abnormal notification will be sent through the app.
This protection can only be lifted after manual intervention.
In the event of unexpected motor resistance during rotation, the Globe will stop
rotating and an abnormal notification will appear in the app. The Globe will automati-
cally resume after 10 seconds.
12
The Unit stops working due to infrared sensor
protection.

Weighing
calibration
1. Choose a reference. It can be any item that
weighs 3.3 lbs such as three 16.9 fl oz bottles of
water.
4. Put the reference in the Globe.
3. Press and hold the Add/Empty Button for 10
seconds, and release it after hearing 2 beeps. The
Safety Indicator light will flash blue.
5. The blue light of the Safety Indicator is on, and
after hearing a beep, the weighing calibration is
completed.
2. Unplug and restart.
The weighing data is inaccurate
(The inaccuracy caused by the use
environment has been excluded)
SolutionTrouble Steps

Product Specications
CATLINK BayMax Cat Litter Box - SCOOPER SE
CL - CA - 01
PP
23.58 x 20.98 x 21.45 inches
12V / 2A
Cat (3.3-22 lbs)
24.25 lbs
GB 4706.1-2005
CATLINK
www.catlinkus.com
Product Name
Product Model
Main Material
Product Size
Rated Voltage
Applicable Scope
Weight
Carried Standard
Brand
Website
12
14 Toll free: +1 833 440 2772 Email: [email protected]

Customer Seice13
15
We will provide customers with a one-year free warranty service.
If you have questions or need assistance, contact us!
Phone Support
+1 833 440 2772
Mon–Fri: 10AM–6PM EST
Email Support
[email protected] 24/7

This manual suits for next models
1
Table of contents
Other CatLink Pet Care Product manuals
Popular Pet Care Product manuals by other brands

Brinsea
Brinsea TLC-30 eco operating manual

Trixie
Trixie 12690 Series Shortening and Charging

Petainer
Petainer IS-PET998DBB operating guide

Stop Woofer
Stop Woofer DBC-SW-DC638 manual

Petsafe
Petsafe Staywell installation guide

Retriev-R-Trainer
Retriev-R-Trainer SIDE-KICK REMOTE LAUNCHER operating instructions