CATVISION CAR-403HP User manual

CAR-403HPbox
Quick Start Guide
www.catvisiononline.in
1

Congratulations on purchasing your brand
new Catvision CAR-403HP.
Your Satisfaction is the foundation of our
success.
Follow this guide to setup your device.
Before use, be sure to read the precautions
contained in this User’s Guide. Keep the User’s
Guide in a safe place for future reference.
For the most up-to-date information about
this product, visit the official website at
www.catvisiononline.in
Catvision CAR-403HP is the 4K Quad Core
Smart TV Box based on the ARM Cortex
Quad Core Processor, paired with the and
powered by the world’s current leading
Android 11
Operating System.
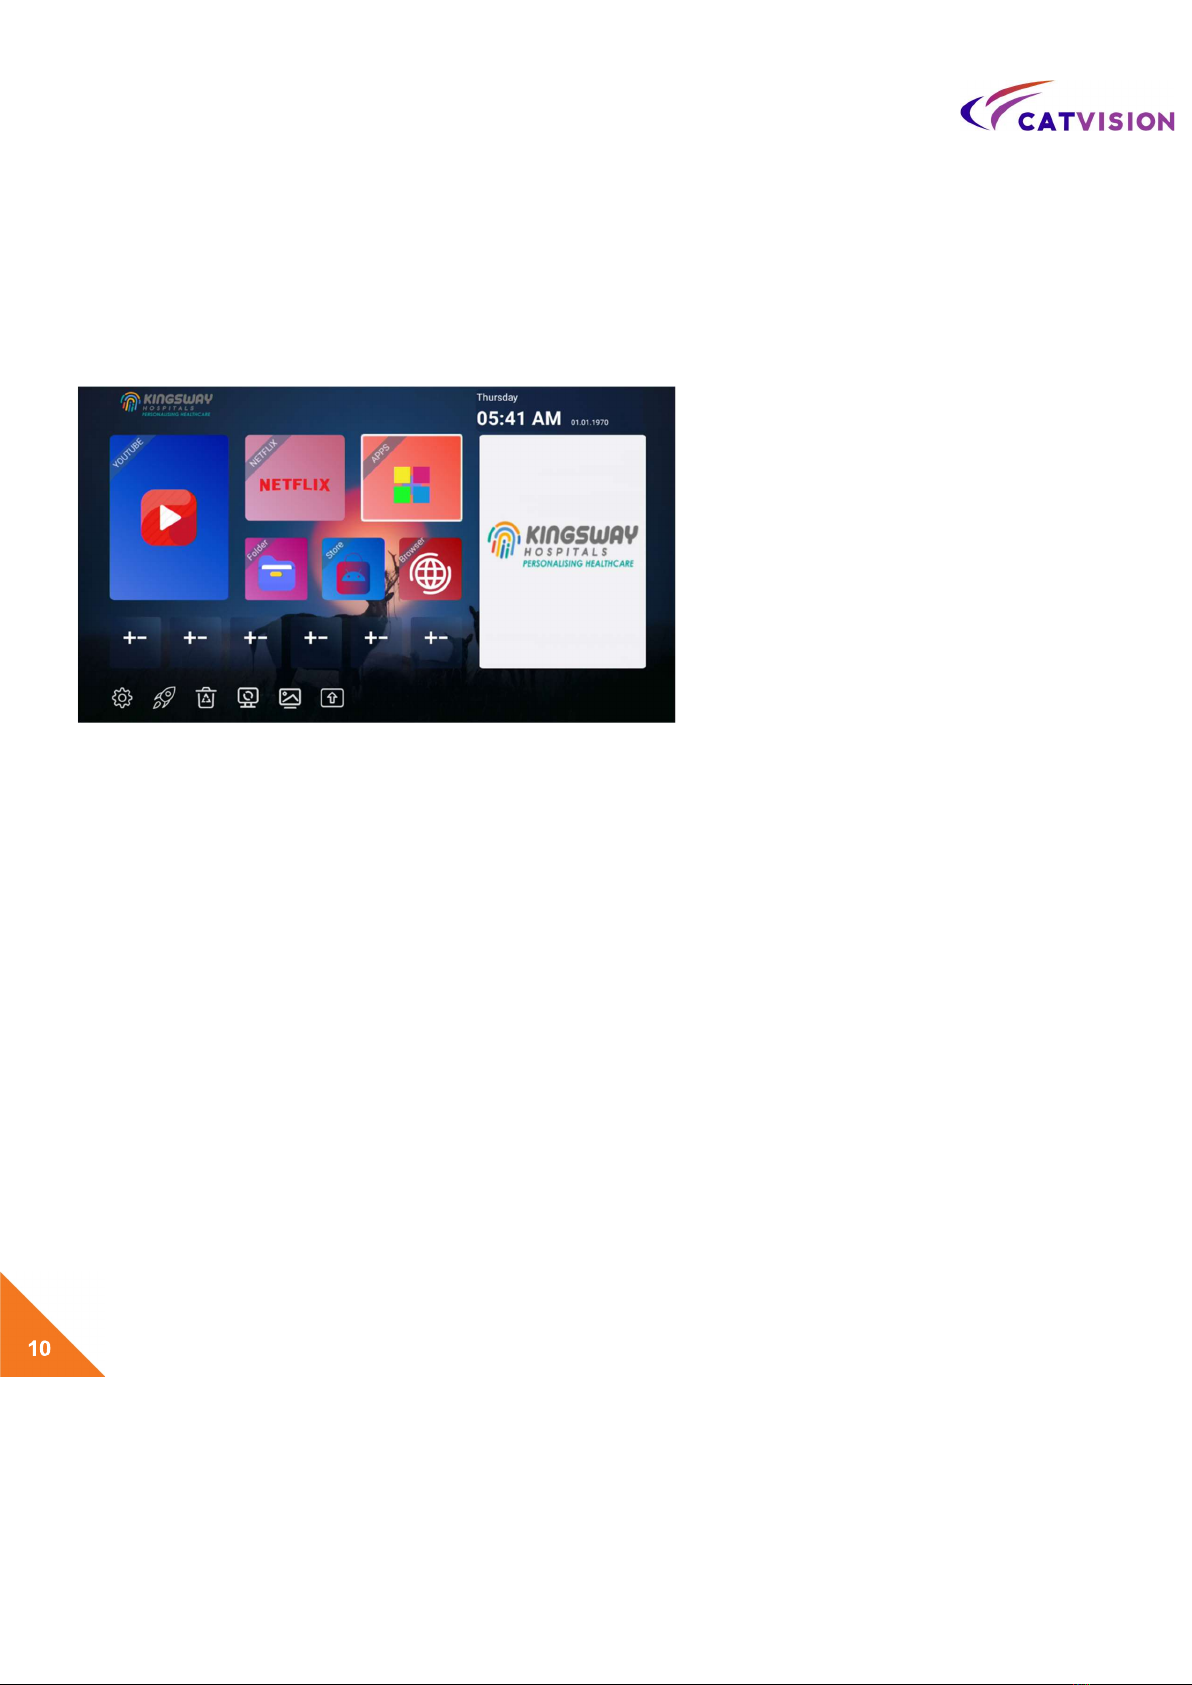
You now have full access to the Google Play
Store allowing you to download all of your
favorite android-based applications, and
installing them right onto your device. You
also have access to our very own App Store,
which consists of pre-ap
proved android apps
for your device.
Alternatively, you can
download android applications from third
party stores and sources and install them
directly using an external storage device.
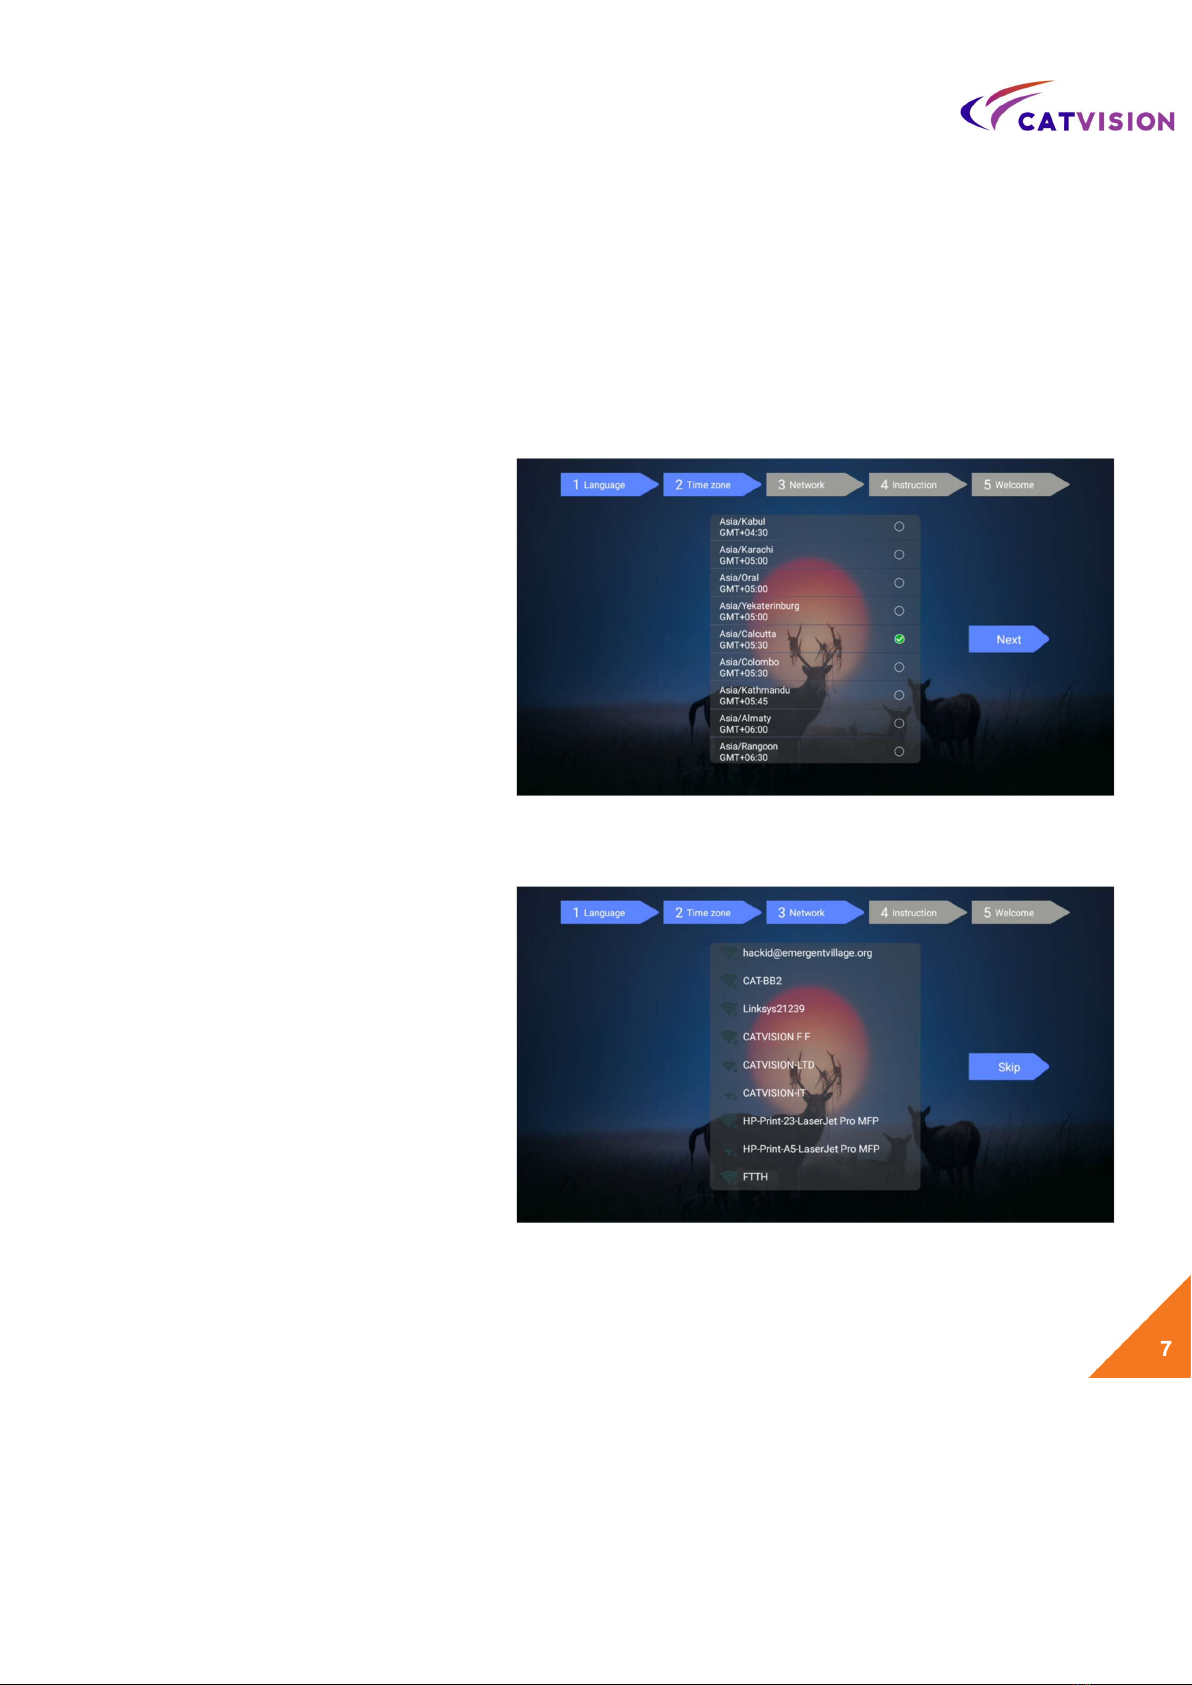
Your new device comes with an
Ethernet
and Wi-Fi connection, allowing you
to
connect to your home or office internet
connection, as well many of your other
devices all on the same network. This way, you
can share content amongst your connected
devices, such as videos, music and photos.
2

Quick Setup Guide
1.
Power Status
2.
IR Sensor
3.
SD Card
4.
USB Slots
5.
SPD IF
6.
A/V(3.5mm)
7.
HDMI
8.
LAN Port
9.
DC Input
HDMI
Cable
A/V
Cable
AC
Adapter
Remote
Control
After opening the box, please check carefully with the packing list. If any item is missing or damaged,
please contact your dealer as soon as possible, or contact our customer service department
3
4
2
1
5
6
7
8
9

Connecting the Power, Audio and Video
Place CAR-403HP on a flat platform near the TV, and make sure nothing blocks the remote
control signal.
NOTE: This is yet to be done.

1.
Power ON/OFF
2.
Volume Down
3.
Volume
Up
4.
Mouse ON/OFF
5.
Select
Key/Enter
6.
Navigation Left, Right, Up,
Down Keypad
7.
Returns to Home Screen
8.
Returns to Previous Screen
9.
Menu
10.
Number Pad
11.
Mute
12.
Delete
13.
Infrared ON/OFF Sensor
14.
Setup
KR-40
Remote
How to use
First plug in the USB
Receiver to any USB port
on your box. Then press
any button to start up
the remote control. The
Remote Control will go into
sleep mode after being
idle for one minute. Press
any button to wake up the
remote control.
13
1
3
5
2
4
6
7
8
9
10
11
12
7
14

First Time Usage
Part 1: Power Up
After powering up, your TV or
monitor will initially display an
animated “Catvision” logo while
loading. When loading is complete,
the display will enter the setup
screen.
Select the Languages (Note: English is
default)
Select Next with your remote.

Select your time zone (Note:
Asia/Calcutta GMT+5:30 is
default).
Connect the available Wi-Fi or you
can skip this step for later.

This screen shows some details about
your home screen. Press Next
.
Select “Finish”. You will now be
taken to the Catvision Android
Menu Screen as shown to the left.
You have now finished setting up
your unit for the first time. Now, let’s
take you through the menus.

The right screen shot is the Home
Screen Menu of your CAR-403HP
.
You will find an Icon labeled
“Apps” that will bring you to all of
your Android Apps, as well as
6
Favorite App Icons available at
bottom of screen
.
The Settings menu is also built into
the Home Screen, you can access
the Settings part by simply using
the IR Remote Control’s Arrow Keys,
moving them to the far left or right
of the Home Screen.
Here is a list of some of the
following Android Apps that come
pre-installed on your Catvision
CAR-403HP:
•
Google Play Store
•
You Tube
•
App Store
•
Netflix
•
And Many More

All of your Pre-Installed Android
Apps can be found by just opening
up the “Apps” Icon, as shown on the
screen shot page to the left.

Part 2: Language & Input
Using the arrow key,
press until
you’ve reached the settings icon
on the bottom of the home
screen.
Select the Language option to
change your language settings.
Here you can change to the
Language of your choice.
(Note: Default Language is English).

Part 2.1 - Setting up the Date and Time
Click the return button to revert back to the settings menu
Select the Date & Time option
Here you can Set your Date, Time,
Time Zone, and Time Display
Format.
Once done Press the home button
on the remote to take you back to
the Home Screen.
12

Part 3: How to add favorite app
Selecting Favorite Icons on the
Home Screen
You can customize 6 icons on the
Home Menu of your choosing. To
do so, using the IR Remote Control,
move the cursor to the place you
want to add, press the OK button
and you will see the following
screen.
You will now be taken to a list of
all of your installed Android Apps,
as shown in the screen shot to the
right.
Now choose the APP you want to
add as one of your
new Favorites APP Icon on the Home
Menu and press OK.

Here we will choose the Android App
“Chrome”.
Now you can see “Chrome” has
become one of your favorite applica-
tions. You can repeat this process
for each of the 6 Favorites icons that
you want on your Home Screen.
Press the Home button on the
remote to be taken back to the
Home Screen.

The Settings menu is available at
bottom of
the Home Screen, you
can access the Settings part by
just using the IR Remote
Control’s Arrow Keys.
The settings screen shot menu
shown above, includes all the
settings for the CAR-403HP.
WiFi Setup
The available WiFi networks
in your
area will be scanned when Wi-Fi
toggle is “ON”.

Connect to the WiFi network
that is
available to you. If connecting
to a
secured WiFi network, the
corresponding password will need
to be entered in at first, or you will
get “failed to connect” and need to
re-enter the password.
Ethernet
Setup
To connect your box via Ethernet
connection, you must use a RJ45
Ethernet Cable. Connect it to the
Ethernet port on the back of your
CAR-403HP, then connect the other
end
to your Router, Ethernet Switch
or Powerline Adapter.
This will connect to the network
automatically.
Display Resolution Setting
The Default resolution setting when
you first turn on your CAR-403HP is
1920x1080p.
Using the remote, select
“HDMI Setting”
16

Here you can select your
Video
Resolution Output.
Output Mode
Here you can change the output
mode from 480i, 480P, 576i, 576P,
720i, 720P, 1080i, 1080P, 2K and
4K
Resolution.
Make sure the setting you choose is
supported by your Television before
switching the output mode.
Zoom Setting
Using the remote, move down and
highlight the “Zoom” menu
option. Select OK with the
remote to open this setting menu.

4.0
App Market Places
You can find and install more apps by using the following
marketplaces already pre-installed on your Catvision
CAR-403HP.
1
- Google Play Store
2
- App Store
Zoom Setting
Use the navigation keys (Left, Right,
Up, Down) and OK buttons of the
remote control to adjust your
display position to fit your Television
screen to your liking.
Both of these apps can be found on your main screen. Both Marketplaces have thousands of apps
to choose from such as Games, Movies, TV shows, Live TV, Android Menu Launchers, Web Browsers
and so much more.

Congratulations!
This completes the first-time setup process of your brand new Catvision
For Technical Support Please refer to the back of the User Manual.

Technical Support
Online Support:
Support: support@catvisionindia.com
CALL TOLL FREE
7669300112
www.catvisiononline.in
Table of contents
Other CATVISION Set-top Box manuals