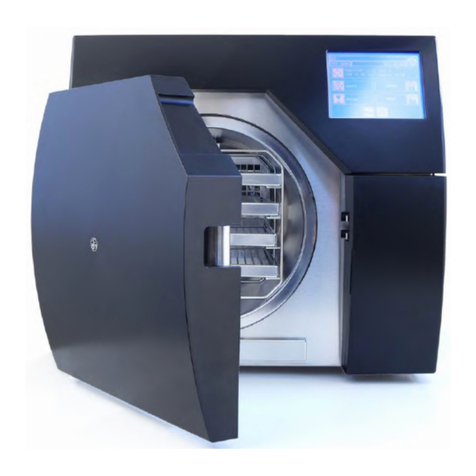
CBM VAPORE User manual

C.B.M. S.r.l. Medical Equipment - Via Castello 10, 26038 Torre d Picenardi (CR) - Italy
Rev. 7 24/07/2006 IGEAPag. 1 di 45
STERILIZZATORE
A VAPORE Art. 2400
STEAM STERILIZER
Èun prodotto
Class IIa (93/42/CE)
Istruzioni d uso....................pag.4
User s instructions.............page 10
Mode d emploi....................pag.16
Betriebsanweisungen........seite 23
Instrucciones para el uso....pag 30

C.B.M. S.r.l. Medical Equipment - Via Castello 10, 26038 Torre d Picenardi (CR) - Italy
Rev.
7
24/07/2006
IGEA
Pag.
2
di
45

C.B.M. S.r.l. Medical Equipment - Via Castello 10, 26038 Torre d Picenardi (CR) - Italy
Rev.
7
24/07/2006
IGEA
Pag.
3
di
45

C.B.M. S.r.l. Medical Equipment - Via Castello 10, 26038 Torre d Picenardi (CR) - Italy
Rev.
7
24/07/2006
IGEA
Pag.
4
di
45
INDICE
Legenda componenti......................................pag.4
Avvertenze......................................................pag.4
Informazioni generali......................................pag.5
Installazione....................................................pag.6
Istruzioni duso................................................pag.6
Funzioni dutilità..............................................pag.7
Tasti RESETe COUNTER
(interruzione di un ciclo).................................pag.7
Pulizia.............................................................pag.7
Manutenzione ordinaria..................................pag.7
Guida di primo intervento...............................pag.8
Garanzia.........................................................pag.9
RAEE..............................................................pag.9
Tempi di sterilizzazione e asciugatura............pag.9
Tabella allarmi............................................pag.37-38
Tabella Sicurezza..........................................pag.39
Schema idraulico ed elettrico.....................pag.40-42
Caratteristiche tecniche.................................pag.44
Dichiarazione di conformità...........................pag. 45
LEGENDACOMPONENTI:
A) Volantino
B) Coperchio serbatoio
C) Sportello per rubinetto di scarico
D) Leva di sicurezza
E) Dado piedini
F) Rubinetto scarico serbatoio
G) Interruttore principale con fusibili
H) Display
I) led verde power
J) led verde door locked
K) Led giallo heating
L) Led giallo cycle
M) Tasto START - ed ENTER
N) Tasto CYCLE e RESET
O) Tasto DRIYNG e COUNTER
P) Tasto UTILITY
Q) Tasto SHIFT
R) Led rosso EMPTY
S) Led verde OK
T) Led giallo FULL
U) Manometro
V) Interruttore generale verde
W) Presa seriale
X) ---------------------
Y) Pulsante di ripristino
AVVERTENZE
•Luso del presente apparecchio èriservato a
personale qualificato
•La sterilizzatrice deve essere utilizzata solamente
con acqua distillata.
•Primadi utilizzare per la primavolta
l'apparecchiatura, si consiglia di verificare la
pulizia della camera di sterilizzazione edi
effettuare un ciclo di sterilizzazione a vuoto.
•In caso di interruzione di corrente mentre
l'autoclave èin fase di sterilizzazione al ritorno di
tensione sul displayappariràla scritta ALLARME
12 - BLACK OUTil ciclo saràconsiderato nullo.
•Comunque ed in ogni caso ogni ciclo va
considerato valido se al termine del ciclo appare
sul displayla scritta OK - CICLO FINITO
•In caso di piùcicli consecutivi l'apparecchiatura
puòraggiungere temperature esterne elevate.
•Per non contaminare l'acqua del serbatoio, si
consiglia di non lasciare alcun oggetto appoggiato
sulla macchina edi verificare che il tappo del
serbatoio sia chiuso.
•Si raccomanda l'utilizzodell'autoclave in un luogo
pulito.
•Verificare che il materiale sia sterilizzabile con il
ciclo di sterilizzazione scelto.
•In tutti icasi di mal funzionamento svuotare la
camera connettendo il tubo di silicone collegato al
rubinetto scarico acqua ad un contenitore. Aprire
quindi il rubinetto el'acqua in camera defluirànel
contenitore esterno.
•Primadi svitare qualsiasi parte della sterilizzatrice
assicuratevi che questa sia sconnessa dalla rete
di alimentazione.
Il presente apparecchio èprogettato e costruito in
conformitàalla direttiva comunitaria 93/42/CEE
"Dispositivi medici e la C.B.M. S.r.l. si considera
responsabile agli effetti della sicurezza, affidabilità
e prestazioni purchéeventuali modifiche o
riparazioni siano effettuate da persone da essa
autorizzate, purchél'impianto elettrico
dell'ambiente sia conforme alle prescrizioni IEC e
purchél'apparecchio sia impiegato in conformità
alle presenti istruzioni d'uso.
IMPORTANTE: La Ditta costruttrice resta sollevata
da ogni responsabilitàper eventuali danni a persone
o cose derivanti dal mancato allacciamento della
linea di terra.
CONSIGLI PER L'USO
•Si raccomanda luso di buste monouso di buona
qualità,con lo scopo di evitare che particelle di
carta si stacchino dall involucro durante la

C.B.M. S.r.l. Medical Equipment - Via Castello 10, 26038 Torre d Picenardi (CR) - Italy
Rev. 7 24/07/2006 IGEAPag. 5 di 45
sterilizzazione evadano ad ostruire le varie parti
dellimpianto idraulico dellautoclave,
compromettendone il funzionamento.
•Si raccomanda la pulizia elasciugatura degli
strumenti da sterilizzare primadi inserirli
nellautoclave. Luso, per il lavaggio degli
strumenti, di liquidi contenenti cloruri èdannoso
per la macchina epuòcausare rapidi danni alle
parti interne dellautoclave.
•Nel caso si presenti, durante la fase di carico
acqua, la visualizzazione di “Allarme2”,potrebbe
essere presente un problemadi conducibilità
elettrica dellacqua odi messa aterra
dellimpianto elettrico. Se lacqua utilizzata èbi-
distillata otri-distillata, avente cioèconducibilità
elettrica vicina azero, la sonda di livello non può
sentirne la presenza. Per questo motivo
suggeriamodi utilizzare semplicemente acqua
demineralizzata. Se poi limpianto elettrico cui è
connessa lautoclave èdotato di una messa a
terra insufficiente, le sonde di livello non possono
funzionare correttamente epuòsuccedere che
non rilevino la presenzadi acqua. Per evitare
malfunzionamenti ènecessario creare una presa
unica di tipo “Schuko”dedicata per lautoclave,
verificare la messa aterra nella presa enon
utilizzare riduzioni e prolunghe.
•Si raccomanda la frequente pulizia del filtro di
scarico posto sulla parete in basso della camera
di sterilizzazione. Primadellestrazione del filtro
stesso dalla sua sede, la zona circostante della
camera va pulita da eventuali residui, per evitare
che durante loperazione di estrazione del filtro lo
sporco fermonelle vicinanzecada allinterno del
tubo di scarico. Anche il filtro di scarico va svitato
amano epulito possibilmente con aria
compressa.
•Si ricorda che le visualizzazioni di allarmeo
avviso vanno azzerate mediante la funzione
RESET,ottenibile con la pressione simultanea
dei tasti SHIFTeRESET.Se la macchina viene
spenta con un allarmeoun avviso in atto, senza
cioèazzerarlo primadello spegnimento, alla
nuova accensione verràvisualizzato “Allarme12
Black-Out”,con lo scopo di avvisare lutente che
la macchina èstata spenta in una “fase attiva”.
Resettando questo messaggio la macchina si
riporta nelle condizioni iniziali, pronta per un
nuovo ciclo.
•Il materiale non destinato allutilizzoimmediato
deve essere sterilizzato allinterno di un imballo
(buste e/o contenitori rigidi per sterilizzazione a
vapore).
Autoclave Igea
INFORMAZIONI GENERALI
Interruttore Principale
Posizionato sul lato sinistro dellapparecchiatura
contiene anche i fusibili
Nella fase di installazione dellapparecchiatura si
consiglia di attivarlo edi lasciarlo sempre acceso,
Durante lutilizzodellapparecchiatura si utilizzerà
esclusivamente linterruttore generale verde
Interruttore generale verde:
Posizionato vicino al basamento, l'interruttore
premuto si illumina confermando l'allacciamento
elettrico ed il possibile utilizzo dell'apparecchiatura.
scritta cycle: (fig.4) Situata sopra il display,indica la
posizione dove viene visualizzato il tipo di ciclo
selezionato (tempo in min./temperatura in gradi °C).
Tabella indicante i cicli disponibili a pag.9
scritta drying: (fig.4) Situata sopra il display,indica
la posizione dove viene visualizzato il programmadi
asciugatura selezionato (tempo in min.).
Tabella indicante i tempi disponibili a pag.9
Leds di segnalazione
led verde power: Il led s'illumina quando c'è
tensione nella macchina.
led verde door locked: -Confermala buona
chiusura della porta.
led giallo heating: Segnala il funzionamento delle
resistenze.
led giallo cycle:Indica che l'autoclave sta
eseguendo un ciclo.
RESERVOIR (Serbatoio):
Il livello dell'acqua distillata nel serbatoio è
verificabile tramite i seguenti indicatori luminosi:
led rosso EMPTY:
Se acceso indica che il serbatoio èvuoto. Per
sicurezzaquando il led EMPTY èacceso l'utilizzo
della macchina èinibito.
led verde OK:
Quando acceso, segnala che la quantitàd'acqua
distillata contenuta nel serbatoio èsufficiente per
almeno un ciclo di sterilizzazione.
led giallo FULL:
Indica il raggiungimento del livello massimo
dell'acqua nel serbatoio, dopo la sua accensione
interrompere immediatamente l'immissione d'acqua
distillata nel serbatoio.
Tasti funzioni:
Tasto START:
Premendo il tasto START si da inizio al ciclo e
all'eventuale asciugatura selezionata.
Tasto CYCLE:
Premuto piùvolte, seleziona il ciclo che si desidera
effettuare.
Tasto DRYING:
Premuto piùvolte, seleziona il tempo di asciugatura
che si desidera effettuare.
Tasto UTILITY:
Premuto dàaccesso alle funzioni di utilità.
Tasto SHIFT:
Premuto contemporaneamente con itasti RESET o
COUNTER, ne abilita il funzionamento.

C.B.M. S.r.l. Medical Equipment - Via Castello 10, 26038 Torre d Picenardi (CR) - Italy
Rev. 7 24/07/2006 IGEAPag. 6 di 45
Manometro:
Durante la fase di sterilizzazione nella camera si crea
una pressione, questa èindicata sul manometro.
Nella sezione Manutenzione sono segnalati icontrolli
da effettuare.
Presa seriale:
La scritta printer identifica la presa seriale SR2 con
la quale èpossibile collegare la sterilizzatrice ad un
PC oad una stampante per eseguire la registrazione
dei cicli di sterilizzazione
Accesso al serbatoio
Nella parte superiore dell'apparecchiatura èpossibile
accedere al serbatoio, per il riempimento o
l'eventuale rabbocco. Si consiglia di lasciare sempre
chiuso il serbatoio durante l'utilizzo dell'autoclave.
Èvivamente consigliato l'utilizzodi acqua distillata
onde evitare incrostazioni nella macchina che ne
potrebbero compromettere la funzionalità.
Accesso alla camera
L'accesso alla camera di sterilizzazione e composto
da un volantino e da un gancio di sicurezza. Per
poter accedere all'interno della camera mantenere
alzato il gancio di sicurezza, e svitare il volantino in
senso antiorario. Grazie al gancio di sicurezza, non è
possibile accedere alla camera di sterilizzazione
quando l'apparecchiatura èin funzione. Questo per
impedire l'involontaria apertura dell'autoclave col
conseguente rischio di mancata sterilizzazione o
danni a cose e/o persone.
Si consiglia di non forzare mai la leva per aprire la
camera, nel caso questa sia dura attendere qualche
secondo per riprovare ad aprire.
Rubinetto di scarico camera
Aprendo lo sportello, situato nella parte destra della
sterilizzatrice, si accede al rubinetto di scarico acqua
della camera, utile in caso di malfunzionamento.
Innesto di scarico serbatoio acqua sporca
Aprendo la porta dell'autoclave, èpossibile
connettere lapposito tubo allinnesto di scarico
serbatoio.
Si ricorda che l'altra estremitàdel tubo andràprima
inserita in un recipiente per la raccolta dell'acqua
scaricata.
INSTALLAZIONE
Collocare l'autoclave su un piano solido erobusto.
Con l'ausilio di una livella verificare la messa in piano
dello sterilizzatore. Se ènecessaria una regolazione
sbloccare idadi situati sotto l'autoclave con una
chiave da 13mm.esvitare oavvitare ipiedini fino al
posizionamento ottimale, quindi bloccare i dadi.
Allacciamento all'impianto elettrico
Collegare il cavo di alimentazione allapparecchio ed
attivare linterruttore principale
Collegare l'apparecchiatura ad una presa elettrica
munita di messa aterra, con una tensione di
alimentazione di 230Volt. econ portata minimadi
10A.
L'autoclave monta fusibili di sicurezzadel tipo
250V - 10A 5x20
ISTRUZIONI D'USO
Pur essendo dotata di pulsanti multi funzione è
possibile utilizzare l'autoclave in modo molto
semplice tramite i seguenti tasti:
Tasto START
Tasto CYCLE
Tasto DRYING
ATTENZIONE: Si raccomanda di pulire ed asciugare
con cura il materiale da sterilizzare
Per un uso semplice ed essenziale dell'autoclave
procedere come segue:
•
Premere l'interruttore generale everificare il livello
dell'acqua.
‚
Nel caso manchi l'acqua, togliere il coperchio del
serbatoio eversare direttamente nell'imboccatura
l'acqua distillata fino all'accensione del led giallo
FULL (livello massimo) operlomeno del led verde
OK, quindi richiudere il serbatoio.
ƒ
Inserire nella camera il materiale da sterilizzare e
richiudere, girando il volantino in senso orario.
Dopo l'accensione del led door locked effettuare
ancora ¼di giro del volantino.
„
Premere il tasto CYCLE eselezionare il ciclo da
effettuare.
IMPORTANTE:Primadi selezionare il ciclo
controllare la tabella apag 9everificare la
compatibilitàdel materiale da sterilizzare con la
temperatura ed il tipo di ciclo.
…
Premere il tasto DRYING per selezionare l'eventuale
asciugatura. (vedi tabella a pag. 9).
†
Dopo aver verificato sul displayl'esatta
corrispondenzadelle scelte effettuate premere
START e verificare l'accensione del led cycle.
Sul displayappariràla scritta CICLO N°x, eda
questo momento l'autoclave procederàalle fasi di
sterilizzazione in modo completamente automatico.
‡
Èpossibile seguire tutte le fasi di sterilizzazione
leggendole sul display.
ˆ
Afine ciclo appariràsul displayla scritta OK. CICLO
FINITO accompagnata da un segnale acustico.
Se non si èselezionata l'asciugatura aprire la porta
ed estrarre il materiale sterile.
‰
Se l'asciugatura èstata selezionata appariràla scritta
ASCIUGATURA aquesto punto socchiudere la porta
di 2cm.lasciandola accostata al dispositivo di
chiusura epossibilmente fermata con un giro di vite.
Al termine della fase d'asciugatura compariràsul

C.B.M. S.r.l. Medical Equipment - Via Castello 10, 26038 Torre d Picenardi (CR) - Italy
Rev. 7 24/07/2006 IGEAPag. 7 di 45
display la scritta OK CICLO FINITO; accompagnata
da un segnale acustico, aprire quindi la porta ed
estrarre il materiale sterile
FUNZIONI D'UTILIT
Con l'autoclave in fase di attesa (e mai durante
l'esecuzione di un ciclo di sterilizzazione) èpossibile
accedere alle funzioni d'utilitàtramite il tasto
UTILITY.Premendo questo tasto vengono
visualizzate sul displaytutte le voci qui sotto
elencate:
MANUTENZIONE: Segnala le operazioni di
manutenzione da effettuare ele loro relative
scadenze.
TEST LEDS:
Esegue una verifica funzionale dei led.
TEMPERATURA IN CAMERA:
Visualizzala temperatura effettiva all'interno della
camera.
SELEZIONE LINGUA:
Rende possibile scegliere il linguaggio dei messaggi
visualizzati sul displaytra iseguenti lingue:
ITALIANO, INGLESE, FRANCESE, TEDESCO e
*SPAGNOLO (*) se presente nella versione
DATA E ORA:
Rende possibile le modifiche al datario e all'orologio.
Modalitàd'uso:
Dopo aver selezionato la voce desiderata col tasto
UTILITY procedere come segue:
MANUTENZIONE:
Se si desidera visionare imessaggi di manutenzione
premere ENTER. Appariràsul displayil 1°
messaggio, per visionare isuccessivi messaggi
premere ancora il tasto UTILITY.Se si desidera
terminare la lettura anzitempo premere il tasto
SHIFT e contemporaneamente il tasto RESET.
TEST LEDS:
Per un controllo del funzionamento effettivo dei led
premere il tasto ENTER.Per 5secondi tutti iled
funzionanti si illumineranno.
TEMPERATURA IN CAMERA:
Per verificare la temperatura all'interno della camera
premere
ENTER.Ripremere lo stesso pulsante per uscire
dalla funzione.
SELEZIONE LINGUA:
Nel caso si desideri modificare la lingua premere
ENTER.Scegliere la lingua desiderata col tasto
UTILITY.
Per confermare la scelta premere ENTER.
DATA E ORA:
Per modificare data eora premere due volte il tasto
ENTER,aquesto punto itasti CYCLE eDRYING
funzioneranno rispettivamente da più(+) e meno (-).
Confermare ogni singolo valore modificato tramite il
tasto ENTER.
TASTI RESET E COUNTER
Se premuti contemporaneamente con il tasto SHIFT
assumono le seguenti funzioni:
RESET
1. Interrompe un ciclo in attuazione, qualora un
qualsiasi motivo lo renda necessario.
2. Azzera gli allarmi ripristinando l'apparecchiatura.
COUNTER
1. Visualizzain qualsiasi momento il numero totale
dei cicli effettuati dalla sterilizzatrice.
PULIZIA
Per una buona pulizia utilizzare esclusivamente
detergenti neutri erisciacquare abbondantemente
con acqua.
Le guarnizioni etutte le parti di plastica possono
essere pulite con del cotone imbevuto dalcool.
Non utilizzare spugne omateriali abrasivi che
possano danneggiare la superficie.
Per la pulizia evitare lutilizzodi detergenti,
disinfettanti oaltri liquidi contenenti cloruri o
tricloroetilene (trielina) poichélacciaio Inox è
intaccato da essi, in caso di contatto si consiglia il
risciacquo immediato ela sostituzione dellacqua del
serbatoio. (vedi manutenzione n°•).
MANUTENZIONE ORDINARIA
Œ
Ogni 20 cicli oppure ogni due settimane di lavoro
pulire il filtro di scarico acqua.
ATTENZIONE: Prima di svitare il filtro, assicurarsi di
aver rimosso l’eventuale sporco in camera
Questo filtro si trova all'interno della camera di
sterilizzazione, sotto la griglia del fondo in mezzoalla
resistenza e si toglie semplicemente svitandolo.
Si pulisce con aria compressa ocon acqua corrente.
E' pulito quando guardandolo controluce si vede la
reticella completamente libera.
ATTENZIONE Questa operazione va effettuata tutte
le volte che alla fine della fase "scarico vapore" il
manometro segna una pressione residua in camera,
l'asciugatura non
dàbuoni risultati osi verifica il caso che aprendo la
porta fuoriesca dell'acqua dalla camera.
•
Ogni 50 cicli, oppure ogni mese di lavoro, cambiare
l'acqua del serbatoio.
Per fare questa operazione:
Aprendo la porta dell'autoclave, èpossibile
connettere lapposito tubo allinnesto di scarico
serbatoio acqua.
Si ricorda che l'altra estremitàdel tubo andràprima
inserita in un recipiente per la raccolta dell'acqua
scaricata

C.B.M. S.r.l. Medical Equipment - Via Castello 10, 26038 Torre d Picenardi (CR) - Italy
Rev. 7 24/07/2006 IGEAPag. 8 di 45
Quando il serbatoio èvuoto pulire il fondo del
serbatoio ed isensori usando del cotone ed una
pinza sufficientemente lunga.
Ž
Ogni 50 cicli, oppure ogni mese, pulire il sensore di
livello acqua in camera.
Aprire la porta etogliere la griglia del fondo,
alzandola esfilandola. Il sensore di livello èl'astina
bianco/trasparente lunga circa 3cm.che sale
verticalmente dal fondo, in mezzo alla resistenza.
L'astina ed il dado di testa vanno puliti
accuratamente usando un batuffolo di cotone
imbevuto d'alcool accertandosi di non lasciare alcun
residuo di cotone.
•
Ogni 50 cicli, oppure ogni mese, controllare che in
fase di sterilizzazione la pressione indicata dal
manometro sia nella fascia 2~2,3 bar per la
temperatura 134°C, oppure nella fascia 1~1,3 bar
per la temperatura 121°C. In caso ciònon si
verificasse chiamare il centro di assistenza.
•
Ogni 150 cicli oppure ogni 3mesi, od ogni volta che
lo si ritenga necessario, pulire la guarnizione della
porta. Per pulire la guarnizione utilizzare un batuffolo
di cotone imbevuto d'alcool.
‘
Ogni 300 cicli, oppure ogni 6mesi controllare che il
dado di chiusura non si stia usurando per qualche
anomalia.
Il dado di chiusura si puòusurare se gli imbocchi
della vite non sono normali ese chiudendo la porta si
deve sforzare piùdel dovuto. Ci si accorge che il
dado si sta usurando se si trova polvere di ottone nei
filetti della vite di chiusura. Per evitare che la porta
rimanga chiusa solo grazie alla leva di sicurezzasi
deve cambiare il dado di chiusura al piùpresto
possibile. Ogni mese lubrificare dado evite. Si
consiglia l'uso di lubrificanti per cuscinetti a
rotolamento estrisciamento, con campo termico -20°
÷+300°C.
Si consiglia, in ogni caso, la sostituzione del pezzo
ogni tre anni.
’
Ogni 300 cicli oppure ogni 6 mesi od ogni volta che lo
si ritenga necessario pulire la camera di
sterilizzazione ela porta. Per pulire la camera ela
porta utilizzare un batuffolo imbevuto di alcool
accertandosi di non lasciare alcun residuo di cotone.
“
Ogni 6mesi pulire il filtro di carico acqua, in
corrispondenzadel cambio dell'acqua del serbatoio,
quando appunto il serbatoio èvuoto. Togliere il
pannello sinistro esvitare con una chiave da 19mm.
il dado in ottone posto sul raccordo sotto il serbatoio.
Estrarre la reticella che va pulita con aria compressa
ocon acqua corrente poi riporla nella sua sede e
riavvitare il dado.
”
Almeno una volta all'anno, verificare l'integritàdella
valvola di sicurezza:
La valvola di sicurezza èposizionata all'interno del
carter, sul fianco destro della camera di
sterilizzazione.
Svitare la parte superiore zigrinata fino ache si
sentiràuno scatto, quindi inserire la punta di un
cacciavite nella feritoia (parte inferiore della valvola),
e alzare il pistoncino.
Eseguita questa operazione riavvitare la parte
superiore della valvola.
Si consiglia, in ogni caso, la sostituzione della valvola
ogni tre anni.
GUIDADI PRIMO INTERVENTO
ATTENZIONE Prima di contattare l'assistenza
controllare la seguente guida ela tabella allarmi
allegata
DIFETTO: Spina inserita, interruttore generale verde
in posizione Imatutto spento (compresa la luce
verde dell'interruttore).
CAUSA:
a) Non arriva tensione.
b) Fusibili bruciati.
RIMEDIO:
a) Verificare che ci sia tensione di alimentazione
b) Verificare che linterruttore principale sia in
posizione I
c) Sostituire ifusibili allinterno dellinterruttore
principale
Primadi iniziare il cambio dei fusibili si deve togliere
il cavo dalla presa.
Se alla riaccensione odurante il primociclo si
dovessero bruciare subito, si deve chiamare
l'assistenzatecnica per togliere l'inconveniente che
provoca la rottura dei fusibili di protezione.
DIFETTO:Siaccende solo l'interruttore generale
verde, masul pannello comandi nessuna spia è
accesa.
CAUSA: E' intervenuto il termostato di massimaper
sovratemperatura in camera.
RIMEDIO: Togliere la presa della corrente epremere
con un cacciavite il pulsante di ripristino situato nel
foro del pannello sinistro (vedi Fig. 3 - 5)
Premere afondo il pulsante per ripristinare il
termostato di massima. Se durante il successivo
ciclo dovesse intervenire di nuovo il termostato di
massima, chiamare l'assistenzatecnica per
eliminare l'inconveniente che ne provoca l'intervento

C.B.M. S.r.l. Medical Equipment - Via Castello 10, 26038 Torre d Picenardi (CR) - Italy
Rev. 7 24/07/2006 IGEAPag. 9 di 45
GARANZIA:
La C.B.M. garantisce le proprie autoclavi per un (1)
anno dalla data di registrazione del primo ciclo contro
eventuali difetti di costruzione oguasti ai componenti
non dovuti ainsindacabile giudizio della C.B.M., a
cattivo uso dellautoclave da parte degli operatori.
Avvertenza.
La garanzia non copre parti soggette ausura e
riparazioni osostituzioni eseguite da personale non
autorizzato dalla C.B.M.
Durante il periodo di garanzia leventuale sostituzione
di una autoclave saràdecisa dalla C.B.M. solo in
caso di impossibilitàdi effettuare una riparazione tale
da garantire il corretto funzionamento della
macchina.
Dati, descrizioni eillustrazioni sono puramente
indicativi.
La C.B.M. S.r.l. si riserva il diritto di apportare
modifiche migliorative ai propri prodotti senzanessun
preavviso.
ISTRUZIONI PER RAEE
Rifiuti di Apparecchiature Elettriche ed Elettroniche -
Direttiva 2002/96/CE
Il simbolo (soprariportato) che appare su questo
prodotto indica che il prodotto non devessere
smaltito assieme ai normali rifiuti urbani ma mediante
raccolta separata.
Le attrezzature elettriche ed elettroniche possono
contenere materiali nocivi per lambiente e la salute
umana e, pertanto, devono essere smaltite presso
apposite discariche.
La legge sanziona severamente coloro che
smaltiscono questi rifiuti abusivamente.
Alla fine del proprio ciclo di vita lapparecchiatura può
essere consegnata al proprio distributore qualora si
intenda acquistarne una nuova o similare.
CICLI DI STERILIZZAZIONE
Temp.(°C) Tempo -
Strumenti non imbustati - 134°C5min
Strumenti imbustati / Vetro - 134°C20min
Rifiuti in contenitore inox - 134°C30min
Materiale poroso / gomma non
confezionato 121°C20min
Materiale poroso / gomma confezionato
121°C30min
Ciclo rapido d’emergenza per strumenti
sfusi 134°C3min
ASCIUGATURA
Tempi d'asciugatura disponibili - 0 -10 - 15 - 20 - 25 - 30min
ATTENZIONE: Per un funzionamento ottimale dellautoclaveseguire le indicazioni qui sotto
riportate.
1) In caso di sterilizzazione di strumenti chirurgici odi materiale metallico non superare la quantità
di 5 Kg.
2) In caso di sterilizzazione di materiali tessili èbuona norma non occludere completamente ifori
della griglia di fondo e non caricare la camera oltre l80% del volume disponibile.

C.B.M. S.r.l. Medical Equipment - Via Castello 10, 26038 Torre d Picenardi (CR) - Italy
Rev. 7 24/07/2006 IGEAPag. 10 di 45
INDEX
Components legend...................................page 10
Warnings....................................................page 10
General information....................................page 11
Installation..................................................page 12
User s instructions......................................page 12
Utilityfunctions...........................................page 13
RESETand COUNTER keys
(cycle interruption)...................................page 13
Cleaning.....................................................page 13
Routine maintenance.................................page 13
First intervention guide...............................page 14
Guarantee..................................................page 15
WEEE.........................................................page 15
Sterilizing and drying times.........................page 15
Alarms Table...........................................page 37-38
Safetytable................................................page 39
Wiring and hydraulic diagram..................page 40-42
Technical particulars..................................page 44
Declaration ofconformity............................page 45
COMPONENTS LEGEND:
A)Handwheel
B) Reservoir lid
C) Drain tap door
D) Safetylever
E)Feet nut
F) Clutch to unload
G)Main Switch with fuses
H)Display
I)Power green led
J)Door locked green led
K)Heating yellowled
L)Cycle yellowled
M)START - and ENTER key
N)CYCLE and RESET key
O)DRYING and COUNTER key
P) UTILITY key
Q) SHIFT key
R) EMPTY red led
S) OK green led
T) FULL yellowled
U)Manometer
V) Green Main switch
W) Serial outlet
X)----------------
Y)Reset key
WARNINGS
•The use ofthis device is limited to qualified staff.
•The sterilizer must be used onlywith distilled
water
•Before using the equipment for the first time, we
recommend to checkthe cleaning ofthe sterilizing
chamber and to effect a loadless sterilizing cycle.
•In case ofpower failure during the autoclave
sterilizing phase when the power comes back the
writing ALARM 12 -BLACK OUTappears on the
display, the cycle is considered invalid.
Anywayand in anycase each cycle is to be
considered valid ifat the end ofthe cycle the writing
OK - FINISHED CYCLE appears on the display.
•In case ofseveral running cycles the equipment
can reach high external temperatures.
•In order not to contaminate the reservoir water,
werecommend you not to let anyobject leaning
on the machine and to checkthat the reservoir
cap is closed.
•Werecommend to use the autoclave in aclean
area.
•Checkthat the material can be sterilized with the
chosen sterilization cycle.
•In all cases ofmalfunction emptythe chamber
connecting the silicone pipe linked to the water
drain tap to a container Then open the tap and the
water will flowfromthe chamber into the
external container.
•Before screwing out anypart ofthe sterilizer make
sure that this one is disconnected fromthe
feeding network.
•This equipment has been designed and
manufactured in compliance with the Comunity
regulation 93/42 EEC "Medical devices" and
C.B.M. S.r.l. is considered responsible concerning
safety,reliabilityand performances on condition
that possible modifications or repairs shall be
effected bypersonnel authorized byC.B.M. ,
provided that the environment electric equipment
is in compliance with IEC regulations and
provided that the equipment is used according to
these user s instructions.
IMPORTANT:The manufacturer companyis
relieved ofanyresponsibilityfor possible damages to

C.B.M. S.r.l. Medical Equipment - Via Castello 10, 26038 Torre d Picenardi (CR) - Italy
Rev. 7 24/07/2006 IGEAPag. 11 di 45
people or things coming fromnot effecting the earth
line connection.
USE SUGGESTION
•Werecommend to use first qualitydisposable
bags, in order to avoid little pieces of paper being
torn off the envelope during sterilization and
obstructing the different parts ofthe hydraulic
systemand the autoclave, compromising their
working.
•Werecommend to clean and drythe instruments
to be sterilized before putting theminto the
autoclave. It is dangerous for the machine to use
chloride containing detergents to clean
instruments: it mayquicklyendanger the inner
pieces ofthe autoclave.
•Ifduring the water loading phase, “Alarm2”
appears, it maybe aproblemofelectric
conductivityofthe water or ofearthing ofthe
electric system.Ifyou use bi- or tridistilled water,
that is having electric conductivitynear zero, the
level probe cannot feel its presence. For this
reason wesuggest to use onlydemineralized
water. On the other hand, ifthe electric system
the autoclave is connected to is provided with an
insufficient earthing, the level probes cannot work
correctlyand theymaynot feel the presence of
water. Toavoid malfunctions it is necessaryto
use an only “Schuko”type socket for the
autoclave, to test the earthing in the socket and
to avoid the use ofreductions and patch cords.
•Afrequent cleaning ofthe exhaust filter placed
on the bottomwall ofthe sterilization chamber is
recommended. Before removing the filter itself
fromits seat, the surrounding area ofthe
chamber is to be cleaned frompossible
residuum s, in order to avoid the dirt near the
filter falling into the exhaust tube while removing
the filter itself.Also the exhaust filter shall be
manuallyunscrewed and cleaned with
compressed water, ifpossible.
•Please remember that the alarmdisplayor
warning shall be reset through the RESET
function, bycontemporarilypressing the SHIFT
and RESETkeys. Ifthe machine is switched off
when an alarmor awarning are being displayed,
that is without resetting thembefore putting out
the machine, on switching on the machine “Alarm
12 Black-Out”is displayed, in order to informthe
user that the machine had been put out in
“running phase”.Byresetting this message the
machine goes backto its starting conditions,
readyfor a newcycle.
•The material not intended for immediate use
must be packed and sterilised inside the package
(envelope and/or rigid container for sterilising by
steam).
Autoclave Igea
GENERAL INFORMATION
Main switch
Set on the left-hand side ofthe equipment and also
holds the fuses
During the stage ofinstalling the equipment it is
advisable to activate it and leave it switched on
permanently.While the equipment is being operated,
use onlythe green main switch
Green Main switch:
Placed near the basement, the switch ,when it is
pressed, lights up confirming the electric connection
and the possible use ofthe equipment.
writing cycle: (fig.4) Placed on the display,it
showsthe position where the type ofselected cycle
is displayed (time in min./temperature in °Cdegrees).
Table showing the available cycles at page 15
writing drying: (fig.4) Placed on the display,it
showsthe position where the selected drying
programis displayed (time in min.).
Table showing available times at page 15
Signalings leds
power green led: The led lights up when the voltage
is present on the machine.
Doorlocked green led: It confirmsthe right closing
ofthe door.
Heating yellow led: Signalling the working ofthe
resistances.
Cycle yellow led:It showsthat the autoclave is
effecting a cycle.
RESERVOIR:
The level ofthe distilled water in the reservoir can be
checked through the following luminous indicators:
EMPTY red led:
Ifit is lighted it showsthat the reservoir is empty.For
safetyreasons when the EMPTYled is lighted the
use ofthe machine is inhibited.
OK green led:
When it is lighted, it showsthat the quantityof
distilled water contained in the reservoir is enough for
at least one sterilization cycle.
FULL yellowled:
It showsthe reaching ofthe maximumwater level in
the reservoir, after its lighting immediatelystop the
immission ofdistilled water in the reservoir.
Functions keys:
START key:
Pressing the START key the cycle and the possible
selected drying begin.
CYCLE key:
Ifit is pressed more than one time, it selects the
cycle you wish to effect.
DRYING key:
Ifit is pressed more than one time, it selects the
drying time you wish to effect.

C.B.M. S.r.l. Medical Equipment - Via Castello 10, 26038 Torre d Picenardi (CR) - Italy
Rev. 7 24/07/2006 IGEAPag. 12 di 45
UTILITY key:
When it is pressed it enables the access to the utility
functions.
SHIFT key:
Ifit is pressed together with the RESET or
COUNTER keys, it enables their working.
Manometer:
During the sterilization phase apressure is created in
the chamber.
In the Maintenance section controls to be effected
are signalled.
Serial outlet:
The writing printer identifies the serial outlet SR2
through which it is possible to connect the sterilizer
with aPC or with aprinter in order to carryout the
recording ofthe sterilization cycles.
Access to the reservoir
In the upper part ofthe equipment it is possible to
enter the reservoir, for its filling or its possible topping
up. Werecommend to let the reservoir always closed
during the use ofthe autoclave.
Wedeeplyrecommend the use ofdistilled water in
order to avoid scalings in the machine that could
compromise its functionality.
Access to the chamber
Access to the sterilization chamber is made up ofa
handwheel and asafetyhook.In order to enter
inside the chamber keep the safetyhookraised, and
screwup the handwheel anticlockwise.
Thanksto the safetyhook,it is not possible to enter
the sterilization chamber when the equipment is
working. This in order to prevent the unintentional
opening ofthe autoclave with the consequent riskof
not effecting the sterilization or to damage things
and/or people. Werecommend never to force the
lever in order to open the chamber, in this case wait
for some seconds and tryto open again.
Chamber drain cock
Ifyou open the door, placed on the right part ofthe
sterilizer, you approach the drain cockofthe water
fromthe chamber, useful in case ofmalfunction.
Clutch to unload the water tank
Byopening the autoclave door the proper tube can
be connected with the clutch for unloading the water
tank.
Please remember that the other end ofthe tube shall
be first put into a vessel to collect unloaded water.
INSTALLATION
Place the autoclave on asolid and strong plane. With
the help ofalevel, checkthe setting on the plane of
the sterilizer. Ifaregulation is necessaryrelease the
nuts placed under the autoclave through a13 mm.
keyand unscrewor screwthe feet until the optimal
positioning is reached, then lockthe nuts.
Electric system connection
Connect up the power supplycable to the apparatus
and turn on the main switch
Connect the equipment to an electric plug equipped
with an earthing, with afeeding voltage of230Volt.
and with a minimumcapacityof10A.
On the autoclave safetyfuses ofthe kind 250V - 10A
- 5x20 are installed.
USER’S INSTRUCTIONS
Even if it is equipped with multifunction push
buttons the autoclave can be used in avery
simple way through the following keys:
START key
CYCLE key
DRYING key
ATTENTION: werecommend to clean and dry
carefullythe material to sterilize.
For asimple and essential use ofthe autoclave
operate in the following way:
•
Press the main switch and checkthe water level.
‚
In case the water is missing, remove the reservoir lid
and directlypour the distilled water into the opening
until the FULL yellowled lights up (maximumlevel)
or at least the OK green led, then close again the
reservoir.
ƒ
Insert the material to sterilizeinto the chamber and
close again, turning the handwheel clockwise.
After the lightening ofthe door locked led effect
again ¼ofa handwheel revolution.
„
Press the CYCLE keyand select the cycle to effect.
IMPORTANT:Before selecting the cycle checkthe
table at page 15 and verifythe compatibilityofthe
material to sterilizewith the temperature and the kind
ofcycle.
…
Press the DRYING keyin order to select the possible
drying (see table at page 15 ).
†
After checking on the displaythe exact
correspondence ofthe effected choices press
START and verifythe lighting ofthe cycle led.
The writing CYCLE N°xwill appear on the display,
and fromthis moment the autoclave shall begin the
sterilization phases in a completelyautomatic mode.
‡
It is possible to followall the sterilization phases
reading themon the display.
ˆ
At the end ofthe cycle the writing OK. FINISHED
CYCLE will appear on the displaywith asound
signal.
If the drying has not been selected open the door and
take out the sterilized material.
‰

C.B.M. S.r.l. Medical Equipment - Via Castello 10, 26038 Torre d Picenardi (CR) - Italy
Rev. 7 24/07/2006 IGEAPag. 13 di 45
Ifthe drying has been selected the writing DRYING
will appear; at this moment half-close the door 2cm.,
leaving it placed near the closing device and possibly
stopped bya turn ofscrew.
At the end ofthe drying phase the writing OK
FINISHED CYCLE will appear on the display;with a
sound signal, then open the door and takeout the
sterilized material.
UTILITY FUNCTIONS
When the autoclave is in the waiting phase (never
during the execution ofasterilizing cycle) it is
possible to enter the utilityfunctions through the
UTILITY key. Pressing this keyall the headings listed
here beloware visualized on the display:
MAINTENANCE:
It indicates maintenance operations to effect and
their relating terms.
TEST LEDS:
It effects a functional inspection ofthe leds.
TEMPERATURE IN THE CHAMBER:
It displaysthe actual temperature inside the
chamber.
LANGUAGE SELECTION:
It makes possible to choose the language of
messages visualized on the displayamong the
following languages: ITALIAN, ENGLISH, FRENCH,
GERMAN, *SPANISH
(*) ifexisting in the version.
DATE AND HOUR:
It makes possible to modifythe dater and the clock.
Instructions for use:
After selecting the desired heading with the UTILITY
keyoperate in the following way:
MAINTENANCE:
Ifyou wish to screen maintenance messages press
ENTER. The 1st message will appear on the display;
in order to screen the following messages press
again the UTILITY key.Ifyou wish to end the
reading before its timepress the key SHIFT and the
RESET keyat the same time.
TEST LEDS:
In order to check the actual working of the leds press
the ENTER key.All the working leds will light up for 5
seconds.
TEMPERATURE IN THE CHAMBER:
In order to verifythe temperature inside the chamber
press
ENTER.Press again the samepush button to go out
ofthe function.
LANGUAGE SELECTION:
In case you wish to modifythe language press
ENTER. Choose the desired language bythe
UTILITY key.
To confirmyour choice press ENTER.
DATE AND HOUR:
In order to modifydate and hour press the ENTER
key twice,at this moment the CYCLE and DRYING
keyswill workrespectivelyfrom plus(+) and minus (-
).
Confirmeach single modified value through the
ENTER key.
RESET AND COUNTER KEYS
Iftheyare pressed together with the SHIFT key they
take on the following functions:
RESET
1. It stops acycle in progress, whenever anyreason
makes it necessary.
2. It set alarms to zero resetting the equipment.
COUNTER
1. It displaysthe total number ofcycles executed by
the sterilizer, at anymoment
CLEANING
In order to do agood cleaning use neutral detergents
onlyand rinse with plentyofwater.
Gaskets and all plastic parts can be cleaned with
some cotton soaked with alcohol.
Do not use sponges or abrasive materials that can
damage the surface.
During the cleaning avoid the use ofdetergents,
disinfectants or other liquids containing chlorides or
trichloro-ethylene because theyattackthe stainless
steel; in case ofcontact an immediate rinsing is
recommended with the replacement ofthe water in
the reservoir.
ROUTINE MAINTENANCE
Œ
Every20 cycles or after twoworking weeksclean the
water drain filter.
ATTENTION: Before unscrewing the filter, be sure you
have removed any dirt in the chamber
This filter is placed inside the sterilization chamber,
under the bottomgrate in the middle ofthe
resistance and can be simplyremoved screwing it
out. It can be cleaned with compressed air or with
running water. It is clean when ,looking into the light,
you can see its wire gauze completelyfree.
ATTENTION You must effect this operation every
timethat the manometer indicates aresidual
pressure in the chamber at the end ofthe “steam
release”phase, when the drying does not produce a
good result or it happens that when you open the
door some water is coming out ofthe chamber.
•
Every50 cycles, or after each working month,
change the reservoir water.
In order to execute this operation:
Byopening the autoclave door the proper tube can
be connected with the clutch for unloading the water
tank.
Please remember that the other end ofthe tube shall
be first put into a vessel to collect unloaded water.

C.B.M. S.r.l. Medical Equipment - Via Castello 10, 26038 Torre d Picenardi (CR) - Italy
Rev. 7 24/07/2006 IGEAPag. 14 di 45
When the reservoir is emptyclean its bottom and the
sensors using some cotton and a pliers long enough.
Ž
Every50 cycles, or each month, clean the sensor of
the water level in the chamber.
Open the door and remove the bottomgrate ,raising
and taking it off.The level sensor is the
white/transparent small rod about 3cm.long coming
up verticallyfromthe bottom,in the middle ofthe
resistance.
The small rod and the head nut must be carefully
cleaned using awad ofcotton wool soaked with
alcohol, making sure not to let anycotton residue.
•
Every50 cycles ,or each month, checkthat during
the sterilization phase the pressure indicated bythe
manometer is in the band 2~2.3 bars for the
temperature 134°C, or in the band 1~1.3 bars for the
temperature 121°C. In case this does not takeplace
call the service centre.
•
Every150 cycles or every3months, or everytime
you thinkit is necessary,clean the door gasket. Use
awad ofcotton soaked with alcohol to clean the
gasket.
‘
Every300 cycles, or every6months checkthat the
stop nut is not wearing out because ofsome defect.
The stop nut can wear out ifthe screwmouths are
not normal and when you have to force more than
necessaryclosing the door.
You can realizethat the nut is wearing out ifyou find
somebrass dust in the threads ofthe closing screw.
In order to avoid that the door is kept closed thanks
to the safetylever onlyyou must change the stop nut
as soon as possible. Each month lubricate the nut
and the screw.Werecommend to use lubricants for
rolling and plain bearings, with athermic field of -20°
÷+300°C.
Werecommend, in anycase, to replace the piece
everythree years.
’
Every300 cycles or every6months or everytimeyou
thinkit is necessaryclean the sterilization chamber
and the door. In order to clean the chamber and the
door use awad ofcotton wool soaked with alcohol,
making sure not to let anycotton residue.
“
Every6months clean the water load filter ,at the
sametimeofthe water change in the reservoir, that
is when the reservoir is empty.Remove the leftpanel
and screwout with a19 mm.keythe brass nut
placed on the pipe fitting under the reservoir. Take
out the wire gauzethat must be cleaned with
compressed air or with running water, then replace it
in its seat and retighten the nut.
”
Once ayear ,at least, it is necessaryto verifythe
integrityofthe safety-valve:
The safety-valve is placed inside the carter, righ side
ofthe sterilizing chamber .
Unscrewthe higher knurled part until you can hear a
click,then insert the nose ofascrewdriver into the
slit (the lower part ofthe valve), and raise the small
piston.
After the execution ofthis operation retighten the
higher part ofthe valve.
Werecommend, in anycase, to replace the safety-
valve everythree years.
FIRST INTERVENTION GUIDE
ATTENTION: Before calling for service assistance
checkthe following guide and the enclosed table of
alarms
FAULT: Plug inserted, green main switch on position
Ibut all is inactive (including the green switch pilot
light).
CAUSE:
a) Current is not arriving.
b) Fuses burnt out
REMEDY:
a) Checkto ensure that power is present
b) Checkto ensure that the main switch is in
posizione I
c) Replace the fuses inside the main switch
Before starting to change the fuses the power cable
must be detached fromthe plug.
Ifafter turning on once more or during the first cycle
theyburn out again immediately,then technical
service assistance must be called in ordeer to rectify
the fault causing the protective fuses to jump.
DEFECT:Onlythe green main switch is lighted, but
no pilot lamp is lighted on the control panel.
CAUSE: The overheating cutoff is operating
because ofan excess temperature in the chamber.
SOLUTION: Takethe outlet awayand press the
button placed in the hole ofthe leftpanel with the
help ofa screwdriver (see Fig. 3 - 5).
Press the button veryhard in order to reset the
maximumthermostat. If,during the following cycle,
the maximumthermostat should interfere again, call
the technical assistance in order to remove the
trouble causing the intervention.
ATTENTION: In all cases ofmalfunctioning empty
the chamber connecting the silicone pipe, linked to
the water drain tap, with acontainer .Then open the
tap and the water in the chamber will flowdownin
the external container.
ATTENTION: Before unscrewing anypart ofthe
sterilizer be sure that this one is disconnected from
the feeding network
GUARANTEE:
C.B.M. guarantees its ownautoclaves for one (1)
year fromthe recording date of the first cycle, against
possible building defects or damages to the
components not due according to the irrevocable
opinion ofC.B.M., to an improper use ofthe
autoclave fromthe operators.
Warning.

C.B.M. S.r.l. Medical Equipment - Via Castello 10, 26038 Torre d Picenardi (CR) - Italy
Rev. 7 24/07/2006 IGEAPag. 15 di 45
The guarantee does not cover parts subject to wear
and repairs or replacements effected bypersonnel
that is not authorized byC.B.M.
During the guarantee period the possible
replacement ofan autoclave will be decided by
C.B.M. onlyin case it is impossible to effect arepair
such to assure the correct running ofthe machine.
Data,descriptions and illustrations are purely
indicative.
C.B.M. S.r.l. reserves the right to carryout
ameliorative modifications to its own products without
anyprevious notice.
Disposal Of Electric And Electronic
Refuse
Waste fromElectrical and Electronic
Equipment - Directive 2002/96/EC
(WEEE)
The symbol (shown above) that appears on this
product means that it should not be disposed of
together with normal household refuse but should be
treated separately.
Electric and electronic equipment maycontain
substances that are harmful to the environment and
to the health ofhumans and should therefore be
disposed ofat special waste disposal sites.
There are harsh legal penalties in force against
persons found disposing ofsuch equipment in an
irresponsible manner.
When the equipment is no longer ofanyuse, it may
taken backto the outlet fromwhich you intend to
purchase a replacement.
STERILIZATION TIMES
Temp.(°C) Time-
Unpacked instruments- 134°C5min.
Packed instruments/Glass - 134°C20min.
Waste in stainless container 134°C30min.
Porous material/ rubber not packed 121°C20min.
Porous material/ rubber packed 121°C30min.
Emergency rapid cycle for unpacked
instruments 134°C3min.
DRYING
Available drying times 0 - 10 - 15 - 20 - 25 - 30min.
ATTENTION: In order to havean optimal working ofthe autoclavefollowthe instructions
below:
1) In case ofsterilization ofsurgical instruments or metallic material do not exceed a
quantityof5 Kg.
2) In case ofsterilization oftextiles it is agood rule not do obstruct the bottom grate holes
completelyand not fill the chamber beyond 80% ofthe available volume.

C.B.M. S.r.l. Medical Equipment - Via Castello 10, 26038 Torre d Picenardi (CR) - Italy
Rev. 7 24/07/2006 IGEAPag. 16 di 45
INDEX
Légende des composants.............................pag.16
Avertissements .............................................pag.16
Informations générales..................................pag.17
Installation.....................................................pag.18
Mode demploi...............................................pag.18
Fonctions d utilitè...........................................pag.19
Touches RESETet COUNTER
(interruption dun cycle).................................pag.19
Nettoyage......................................................pag.19
Entretien courant ..........................................pag.20
Guide de première intervention.....................pag.20
Garantie.........................................................pag.21
DEEE.............................................................pag. 21
Temps de stérilisation et de séchage............pag.22
Tableau des alarmes.....................................pag.37
Tableau de sécurité.......................................pag.39
Schéma électrique et hydraulique..............pag.40-42
Caractéristiques techniques..........................pag.44
Declaration de conformitè..............................pa. 45
LEGENDE DES COMPOSANTS
A)Volant àmain
B)Couvercle du réservoir
C) Porte pour le robinet dé coulement
D) Levier de sécurité
E)Ecrou des pieds
F)Branchement pour la vidange de leau
G) Interrupteur principal avec fusibles
H)Display
I) Led vert power
J)Led vert door locked
K) Led jaune heating
L) Led jaune cycle
M)Touche START - et ENTER
N)Touche CYCLE et RESET
O)Touche DRIYNG et COUNTER
P) Touche UTILITY
Q) Touche SHIFT
R)Led rouge EMPTY
S) Led vert OK
T)Led jaune FULL
U) Manomètre
V)Interrupteur vert général
W)Prise sérielle
X) ------------------
Y) Touche pour remettre àlé tat initial
AVERTISSEMENTS
•Lutilisation de cet appareil est reservéau
personel qualifié.
•La stérilisateur peut être employéseulement avec
de leau distillé.
•Avant demployer lappareillage pour la première
fois, on conseille de vérifier la propretéde la
chambre de stérilisation et deffectuer un cycle de
stérilisation àvide.
•Dans le cas dune interruption de courant pendant
que lautoclave est dans la phase de stérilisation,
au retour de la tension linscription ALARME 12 -
BLACK OUTapparaîtra sur le display,le cycle
sera considérénul.
•Pourtant et en tout cas chaque cycle peut être
considérévalable si àla fin du cycle linscription
OK-CYCLE TERMINE apparaît sur le display
•Dans le cas de plusieurs cycles consécutifs
lappareillage peut arriver àdes températures
extérieures élevées.
•Pour ne pas contaminer leau du réservoir, on
conseille de ne pas laisser dobjets appuyés sur la
machine et de vérifier que le bouchon du
réservoir soit fermé.
•On recommande demployer lautoclave dans un
lieu propre.
•Vérifier que le matériel puisse être stériliséavec
le cycle de stérilisation quon a choisi.
•Dans tous les cas de mauvais fonctionnement
vider la chambre en joignant le tube en silicone,
enclenchéau robinet dé coulement deau, avec
un conteneur. Ensuite ouvrir le robinet et leau
dans la chambre sé coulera dans le conteneur
extérieur.
•Avant de dévisser une partie quelconque du
stérilisateur assurez-vous que celui-ci soit
déconnectédu réseau d alimentation.
•Cet appareillage est projetéet construit
conformément àla directive communautaire
93/42 CEE "Dispositifs médicaux" et C.B.M. S.r.l.
se considère responsable pour ce qui concerne
la sécurité,la fiabilitéet les performances à
condition que les modifications ou les réparations
éventuelles soient effectuées par des personnes
autorisées par C.B.M., àcondition que le système
électrique de la pièce soit conformeaux
préscriptions IEC et àcondition que lappareillage
soit employéconformément àce mode d emploi
IMPORTANT:La sociétéconstructrice est
déchargéede toute responsabilitépour les éventuels

C.B.M. S.r.l. Medical Equipment - Via Castello 10, 26038 Torre d Picenardi (CR) - Italy
Rev. 7 24/07/2006 IGEAPag. 17 di 45
dommages àpersonnes ou choses qui viennent du
branchement manquéde la ligne de terre.
CONSEIL D'USAGE
•Nous vous recommandons d'utiliser des
enveloppes jetabls de bonne qualité,pour éviter
que les particules de papier ne se détachent de
l'enveloppe au cours de la stérilisation et n'aillent
obstruer les différentes parties de l'installation
hydraulique de l'autoclave, empêchant ainsi son
bon fonctionnement.
•Nous vous recommandons de bien nettoyer et
d'essuyer les instruments àstériliser avant de les
mettre dans l'autoclave. L'utilisation pour le
lavage des instruments de liquides contenant des
chlorures est nocifpour la machine et peut
abîmer rapidement les parties internes de
l'autoclave.
•Si pendant la phase de remplissage de l'eau
apparaît"Alarme2" il pourrait s'agir d'un
problèmede conductibilitéélectrique de l'eau et
de mise àla terre de l'installation électrique. Si
l'eau utiliséeest bidistilléeou tridistillée, c'est à
dire ayant une conductibilitèélectrique proche du
zéro, la sonde de niveau ne peut pas en capter la
présence. C'est pourquoi, nous suggérons
d'utiliser simplement de l'eau déminéralisée. Si
en plus, l'installation électrique sur laquelle est
branchéel'autoclave possède une mise àla terre
insuffisante, les sondes de niveau ne peuvent
pas fonctionner correctement et il peut arriver
qu'elles ne relèvant pas la présence d'eau. Pour
éviter de mauvais fonctionnements, il faut
installer une prise unique de type "schuko" pour
l'autoclave, vérifier la mise àla terre de la prise et
ne pas utiliser de réducteurs ni de rallonges.
•Nous vous recommandons de nettoyer
fréquemment le filtre de vidange placésur la
paroi en bas de la chambre de stèrilisation. Avant
d'ôter le filtre de son réceptacle, il faut nettoyer
tout autour pour enlever les résidues éventuels et
pour éviter qu' au moment oùl'on enlève le filtre,
les saletésqui se sont déposées ne tombent à
l'intérieur du tube de vidange. Le filtre de vidange
aussi doit être dévisséàla main et nettoyési
possible àl'air comprimé.
•Nous vous rappelons que l'affichage d'alarmes
ou d'avertissement s'effacent au moyen de la
fonction RESET,en appuyant simultanément sur
les touches SHIFTet RESET.Si on éteint la
machine alors qu'ne alarmeou un avertissement
est en cours, c'est àdire sans que cette alarme
ou cet avertissement n'ait étéremis àzéro avant
la coupure, quand on rallume, "Alarme12 Black-
Out" apparaîtafin d'avertir l'utilisateur que la
machine se repositionne dans les conditions de
départ, prête pour un nouveau cycle
•Le matériel non destinéàêtre utilisé
immédiatement doit être étuvéàl intérieur d un
emballage ( enveloppes et/ou container rigides
pour lé tuvage àla vapeur).
Autoclave Igea
INFORMATIONS GÉNÉRALES
Interrupteur principal
Situésur le côtégauche de lappareil, il contient
également les fusibles
Lors de la phase dinstallation de lappareil, il est
conseilléde lactiver et de le laisser toujours allumé.
Pendant lutilisation de lappareil, on utilisera
exclusivement linterrupteur vert général.
Interrupteur g nral vert:
Placéprèsde lembasement, linterrupteur pressé
sé claire en confirmant le branchement électrique et
le possible emploi de lappareillage.
inscription cycle: (fig.4)
Placéesur le display,elle indique la position oùle
type de cycle sélectionnéest visualisé(temps en
min./température en degrés °C). Tableau indiquant
les cycles disponibles àla page 22
inscription drying: (fig.4) Placéesur le display,
elle indique la position oùle programmede séchage
sélectionnéest visualisé(temps en min.).
Tableau indiquant les temps disponibles àla page 22
Leds d’indication
led vert power: le led sé claire quand il yade la
tension dans la machine.
Led vert door locked: Il confirmeque la porte est
bien fermée.
led jaune heating: Il indique le fonctionnement des
résistances.
led jaune cycle:Il indique que lautoclave est en
traîn d effectuer un cycle.
RESERVOIR:
Le niveau deau distilléedans le réservoir peut être
vérifiéau moyen des indicateurs lumineux suivants:
led rouge EMPTY:
Quand il est alluméil indique que le réservoir est
vide. Pour des raisons de sécuritéquand le led
EMPTY est allumél emploi de la machine est interdit.
led vert OK:
Quand il est alluméil indique que la quantitédeau
distilléecontenue dans le réservoir est suffisante
pour un cycle de stérilisation au moins.
led jaune FULL:
Il indique que le niveau maximumdeau dans le
réservoir a étéatteint, aprèsson allumage arrêter
immédiatement lintroduction deau distilléedans le
réservoir.
Touches fonctions
Touche START:
En pressant la touche START le cycle et lé ventuel
séchage sélectionnécommencent.

C.B.M. S.r.l. Medical Equipment - Via Castello 10, 26038 Torre d Picenardi (CR) - Italy
Rev. 7 24/07/2006 IGEAPag. 18 di 45
Touche CYCLE:
Quand elle est presséeplusieurs fois elle sélectionne
le cycle que l on veut effectuer.
Touche DRYING:
Quand elle est presséeplusieurs fois elle sélectionne
le temps de séchage que lon veut effectuer.
Touche UTILITY:
Quand elle est presséeelle donne accèsaux
fonctions d utilité.
Touche SHIFT
Si elle est presséeen mêmetemps des touches
RESET ou COUNTER,elle rend possible leur
fonctionnement.
Manomètre:
Pendant la phase de stérilisation dans la chambre
une pression est crée, celle-ci est indiquéesur le
manomètre.
Dans la section Entretien les contrôles àeffectuer
sont signalés.
Prise s rielle :
Linscription printer identifie la prise sérielle SR2 par
laquelle il est possible de brancher le stérilisateur
avec un PC ou avec une imprimante pour effectuer
lenregistrement des cycles de stérilisation.
Accès au r servoir
La partie supérieure de lappareillage donne accès
au réservoir, pour le remplissage ou lé ventuel
remplissage àras bord. On conseille de laisser
toujours le réservoir fermépendant lemploi de
lautoclave.
On conseille vivement lemploi deau distilléeafin
dé viter des tartres dans la machine qui pourraient
compromettre sa fonctionnalité.
Accès àla chambre
L'accès àla chambre de stérilisation est composé
dun volant àmain et dun clamage de sécurité.Afin
de pouvoir accéder àlintérieur de la chambre garder
le clamage de sécuritélevé,et dévisser le volant à
main en sens inverse aux aiguilles dune montre.
Grâce au crochet de sûreté,on ne peut pas accéder
àla chambre de stérilisation lorsque lappareil est en
marche. Cela pour empêcher louverture involontaire
de lautoclave avec le risque conséquent de
stérilisation manquéeou de dommages àchoses
et/ou personnes. En plus, il est conseilléde ne
jamais forcer le levier afin douvrir la chambre, dans
ce cas il faut attendre quelques secondes et retenter
douvrir.
Robinet de decharge chambre
En ouvrant le volet, placédans la partie droite du
stérilisateur, on accède au robinet de décharge d'eau
de la chambre, utilisable en cas de fonctionnement
défaillant.
Branchement pour la vidange de l’eau:
En ouvrant la porte de lautoclave, on peut relier le
tuyau prévu àcet effet au branchement pour la
vidange du réservoir d eau.
Nous vous rappelons que lautre extrémitédu tuyau
devra tout dabord être introduit dans un récipient
servant àrecevoir leau vidangée.
INSTALLATION
Placer lautoclave sur un plan solide et robuste.
Vérifier la mise en plan du stérilisateur àlaide dun
niveau. Si un réglage est nécessaire débloquer les
écrous placéssous lautoclave avec une clefde 13
mm.et dévisser ou visser les pieds jusqu à leur
positionnement optimal, ensuite bloquer les écrous.
Branchement de l’installation lectrique
Brancher le câble dalimentation àl appareil et activer
linterrupteur principal
Brancher lappareillage sur une prise électrique
équipéede mise àla terre, avec une tension
dalimentation de 230Volt. et avec un débit minimum
de 10A.
Sur lautoclave on amontédes fusibles de sécurité
de type 250V - 10A - 5x20.
MODE D’EMPLOI
Mêmesil est dotéde touches multifonctions on peut
employer lautoclave dune façon trèssimple par les
touches suivantes:
ATTENTION: on recommande de nettoyer et
essuyer le matériel àstériliser avec les plus
grand soin
Touche START
Touche CYCLE
Touche DRYING
Pour un emploi simple et essentiel il faut opérer
comme suit:
•
Presser linterrupteur général et vérifier le niveau
deau.
‚
En cas dabsence deau, enlever le couvercle du
réservoir et verser leau distilléedirectement dans
lembouchure jusqu à lallumage du led jaune FULL
(niveau maximum)ou ,au moins,du led vert OK,
ensuite refermer le réservoir.
ƒ
Introduire dans la chambre le matériel àstériliser et
refermer, en tournant le volant àmain dans le sens
des aiguilles dune montre.
Aprèslallumage du led door locked effectuer
encore ¼de tour du volant àmain.
„
Presser la touche CYCLE et sélectionner le cycle è
réaliser.
IMPORTANT:Avant de sélectionner le cycle
contrôler le tableau àla page 22 et vérifier la
compatibilitédu matériel àstériliser avec la
température et le type de cycle.
…
Presser la touche DRYING pour sélectionner le
séchage éventuel (voir tableau àla page 22).

C.B.M. S.r.l. Medical Equipment - Via Castello 10, 26038 Torre d Picenardi (CR) - Italy
Rev. 7 24/07/2006 IGEAPag. 19 di 45
†
Aprèsavoir vérifiésur le displayla correspondance
exacte des choix effectuéspresser START et vérifier
lallumage du led cycle.
Sur le displaylinscription CYCLE N°xapparaîtra, et
àpartir de ce moment lautoclave effectuera les
phases de stérilisation de façon complétement
automatique.
‡
Il est possible de suivre toutes les phases de la
stérilisation en lisant le display.
ˆ
Ala fin du cycle linscription OK. CYCLE TERMINÉ
apparaîtra sur le display, avec un indication sonore.
Si le séchage napas étésélectionnéouvrir la porte
et extraire le matériel stérilisé.
‰
Si le séchage a étésélectionnélinscription
SECHAGE apparaîtra, àce moment entrouvir la
porte de 2cm.et la laisser entrouverte au dispositif
de fermeture et autant que possible arrêtéepar un
tour de vis. Ala fin de la phase de sèchage
linscription OK CYCLE TERMINÉapparaîtra sur le
display,avec un indication sonore.; ouvrir ensuite la
porte et extraire le matériel stérilisé.
FONCTIONS D’UTILITÉ
Quand lautoclave est dans la phase dattente
(jamais pendant lexécution dun cycle de
stérilisation) il est possible daccéder aux fonctions
dutilitéau moyen de la touche UTILITY.En pressant
cette touche on visualise sur le displaytous les mots
qui sont sur la liste ci-dessous:
ENTRETIEN: Il indique les opérations àeffectuer
et leur rélatives échéances.
TEST LEDS:
Il exécute un contrôle fonctionnel des leds.
TEMPERATURE DANS LA CHAMBRE:
Il visualise la température réelle àlintérieur de la
chambre.
SELECTION LANGUE:
Il rend possible de choisir le langage des messages
visualiséssur le displayparmiles langues suivantes:
ITALIEN, ANGLAIS, FRANÇAIS, ALLEMAND et
*ESPAGNOL (*) si présent dans la version.
DATE ET HEURE:
Il rend possible de modifier le dateur et lhorloge.
Mode d’emploi:
Aprèsavoir sélectionnéle mot choisi par la touche
UTILITYopérer comme suit:
ENTRETIEN:
Si lon veut visionner le messages dentretien presser
ENTER le 1er message apparaîtra sur le display,
pour visionner les messages suivants presser encore
la touche UTILITY.Si lon désire terminer la lecture
en avance presser la touche SHIFT et la touche
RESET en même temps.
TEST LEDS: Pour contrôler le fonctionnement
effectifdes leds presser la touche ENTER.Pendant
5secondes tous les leds qui fonctionnent seront
allumés.
TEMPERATURE DANS LA CHAMBRE:
Pour vérifier la température àlintérieur de la
chambre presser ENTER.Presser encore la même
touche pour sortir de la fonction..
SELECTION LANGUE:
Dans le cas oùvous désirezmodifier la langue
presser ENTER.Choisir la langue désiréepar la
touche UTILITY.
Pour confirmer votre choix presser ENTER.
DATE ET HEURE:
Pour modifier la date et lheure presser deux fois la
touche ENTER, àce moment les touches CYCLE et
DRYING fonctionneront respectivement de plus(+)
et moins (-).
Confirmer chaque valeur modifiéepar la touche
ENTER.
TOUCHES RESET ET COUNTER
Quand elles sont pressées simultanément avec la
touche
SHIFT elles prennent les fonctions suivantes:
RESET
1. Elle arrête un cycle en cours, quand une raison
quelconque rend cela nécessaire .
2. Elle met àzèro les alarmes en remettant
lappareillage àlé tat initial.
COUNTER
1. Elle visualise en tout moment le nombre total des
cycles réalisés par le stérilisateur.
LED-TEST:
Zur Durchführung einer effektiven Funktionskontrolle der
Leds, die Taste ENTER betätigen. Alle funktionierenden
Leds leuchten für die Dauer von 5 Sekunden auf.
NETTOYAGE
Afin davoir un bon nettoyage nutiliser que de
détergents neutres et rincer abondamment àleau.
On peut nettoyer les garnitures et toutes les parties
en plastique avec du coton imbibéd alcool.
Ne pas employer dé ponges ou de matériels abrasifs
qui puissent endommager la surface.
Pendant le nettoyage éviter lemploi de détergents,
désinfectants ou dautres liquides qui contiennent
des chlorures ou du trichloroéthyléne car ils
attaquent lacier inox, en cas de contact un rinçage
immédiat et le remplacement de leau du réservoir
sont conseillés.
ENTRETIEN COURANT
ŒTous les 20 cycles ou aprèsdeux semaines de
travail nettoyer le filtre dé coulement d eau.
ATTENTION: Avant de dévisser le filtre, sassurer davoir
levétoute saletééventuelle

C.B.M. S.r.l. Medical Equipment - Via Castello 10, 26038 Torre d Picenardi (CR) - Italy
Rev. 7 24/07/2006 IGEAPag. 20 di 45
Ce filtre est placéàlintérieur de la chambre de
stérilisation, sous la grille du fond au milieu de la
résistance et peut être enlevéen le dévissant
simplement.
On peut le nettoyer avec de lair compriméou avec
de leau courante. Il est propre quand ,en le
regardant àcontre-jour, on peut voir la toile
métallique complètement libre.
ATTENTION Il faut effectuer cette opération toutes
les fois que le manomètre indique une pression
résiduelle dans la chambre , àla fin de la phase
“échappement vapeur”,quand le séchage ne donne
pas de bonnes résultats ou quand il arrive que de
leau sort de la chambre en ouvrant la porte..
•Tous les 50 cycles, ou chaque mois de travail,
changer l eau du réservoir.
Pour réaliser cette opération:
En ouvrant la porte de lautoclave, on peut relier le
tuyau prévu àcet effet au branchement pour la
vidange du réservoir d eau.
Nous vous rappelons que lautre extrémitédu tuyau
devra tout dabord être introduit dans un récipient
servant àrecevoir leau vidangée.
Quand le réservoir est vide nettoyer le fond du
réservoir et les capteurs en employant du coton et
une pince suffisamment longue.
ŽTous les 50 cycles ,ou chaque mois ,nettoyer
le capteur du niveau de leau dans la chambre.
Ouvrir la porte et enlever la grille du fond, en la
levant. Le capteur du niveau est la petite tige
blanche/transparente avec prèsde 3cm.de long qui
monte verticalement du fond, au milieu de la
résistance.
Il faut nettoyer la tige et lé crou de tête
soigneusement en employant un morceau de coton
imbibédalcool et sassurer de ne pas laisser aucun
reste de coton.
•Tous les 50 cycles, ou chaque mois, il faut
contrôler que pendant la phase de stérilisation la
pression indiquéepar le manomètre soit dans la
bande 2~2,3 bar pour la température 134°C, ou dans
la bande 1~1,3 bar pour la température 121°C. Dans
le cas oùcela ne se vérifie pas il faut appeler le
centre d assistance.
•Tous les 150 cycles ou après3mois, ou chaque
fois qu on pense quil est nécessaire, nettoyer la
garniture de la porte. Pour nettoyer la garniture
employer un morceau de coton imbibéd alcool.
‘Tous les 300 cycles, ou après6mois il faut
contrôler que lé crou de fermeture n ait pas dusure à
cause d une anomalie.
Lusure de lé crou de fermeture peut se vérifier si les
bouches de la vis ne sont pas normales et si en
fermant la porte on doit forcer plus quil faut.
On peut sapercevoir de lusure de lé crou si lon
trouve de la poudre de laiton dans les filets de la vis
de fermeture. Afin dé viter que la porte reste fermée
seulement grâce au levier de sécuritéil faut changer
lé crou de fermeture le plus tôtpossible. Chaque
mois il faut lubrifier lé crou et la vis. On conseille
lemploi de lubrifiants pour roulements et coussinets
àglissement, avec un intervalle de température de -
20°÷+300°C.
En tout cas, on conseille le remplacement de la pièce
tous les trois ans.
’Tous les 300 cycles ou aprèssix mois ou chaque
fois qu on pense quil est nécessaire de nettoyer la
chambre de stérilisation et la porte. Pour nettoyer la
chambre et la porte employer un morceau de coton
imbibédalcool et sassurer de ne pas laisser aucun
reste de coton.
“Tous les 6mois nettoyer le filtre pour le
chargement deau, en correspondance du
changement de leau du réservoir, justement quand
le réservoir est vide. Enlever le panneau de gauche
et dévisser avec une clefde 19 mm.lé crou en laiton
placésur le raccord au-dessous du réservoir.
Extraire la toile métallique qui doit être nettoyéeavec
de lair compriméou avec de leau courante, ensuite
la remettre dans son logement et revisser lé crou.
”
Une fois par an ,au moins, vérifier lintégritédu
clapet de sûreté:
Le clapet de sûretéest positionnéàlintérieur du
carter, àdroite de la chambre de stérilisation.
Dévisser la partie supérieure moletéejusqu à ce que
lon entend un déclenchement, ensuite insérer la
pointe dun tournevis dans la fente (partie inférieure
du clapet), et lever le petit piston.
Aprèslexécution de cette opération revisser la partie
supérieure du clapet.
En tout cas, on conseille le remplacement du clapet
de sûretétous les trois ans.
GUIDE DE PREMIÈRE INTERVENTION
ATTENTION Avant de contacter lassistance
contrôler le guide suivant ainsi que le tableau des
alarmes, ci-joint.
DEFAUTS: Prise insérée, interrupteur vert général
en position Imais éteind (ycompris le voyant
lumineux vert de linterrupteur).
CAUSES:
a) Pas de tension.
b) Fusibles fondus.
SOLUTIONS:
a) Vérifier que lalimentation est sous tension
b) Vérifier que linterrupteur principal est en position I
c) Changer les fusibles àlintérieur de linterrupteur
principal
Avant de changer les fusibles, il faut retirer le câble
de la prise.
Si au redémarrage ou durant le premier cycle ils
fondent subitement, il faut appeler lassistance
technique pour quelle remédie au problèmecausé
par la fonte de ces fusibles de protection.
DEFAUT:Seulement linterrupteur général vert est
allumé,mais sur le tableau de commande aucun
voyant est allumé
This manual suits for next models
1
Table of contents
Languages:
Other CBM Laboratory Equipment manuals
Popular Laboratory Equipment manuals by other brands

HumanLab
HumanLab SHWB-30 Operation manual

Agilent Technologies
Agilent Technologies 1260 Infinity user manual

DoorBird
DoorBird A1091 Series installation manual

OHAUS
OHAUS Frontier FC5513 instruction manual

Waters
Waters ACQUITY Refractive Index Detector Overview and maintenance guide

Hach
Hach TenSette plus Basic user manual

gc
gc Aadva Lab Scan Instructions for use

Ivoclar Vivadent
Ivoclar Vivadent Programat P710 Short instructions

Bruker
Bruker SampleXpress user manual

Tuttnauer
Tuttnauer Elara11 Installation

Endecotts
Endecotts Minor 200 operating instructions

Thermo Scientific
Thermo Scientific TSX Series Installation and operation