Ceado ES700 Setup guide

Prot while promoting good health.
Ceado ES-700Ceado ES-700
TRAINING GUIDE

START
ON/OFF
STOP
0
1
Fig. 1
Main parts (Fig.1- Fig. 2)
7
3
Fig. 2
2
8
2
1
Motor housing
Bowl
Spout
Juicer cover
Locking arm
Food pusher
Feed chute
Pulp container
8
7
6
5
4
3
2
1Basket
Pulp retainer
Grating disc
Switch ON-OFF (I-O)
START button
STOP button
Motor shaft
Drive disc
16
15
14
13
12
11
10
9
4
13
6
5
12 14
9
11
10
1
15
15
Model ES700 with double feed chute 2 and 3 inches.
Getting Started with your new Ceado ES-700
• Plug the juicer into a dedicated circuit.
• Make sure the juicer is placed on a solid countertop with a clear amount of space to access the pulp bin.
• Review the parts of the juicer.
• Before juicing, watch the training videos.
• Create a Standard Cleaning and Juicing Policy for your employees.

Key Operation Points
The proper order to remove the parts when disassembling the juicer is:
• Remove food pusher(s)
• Release the locking arm by placing your thumbs under the arm. Place your remaining ngers on the
feed chute(s) for support and lift up and pull forward
• Remove juicer cover
• Remove basket assembly (note: it is magnetized and no tool is required to remove it)
• Remove pulp retainer (make note of how it is placed on the juicer between the bowl and cover)
• Remove bowl
Reassemble in the reverse order and be sure the internal edge is facing down on the pulp retainer.
Also make sure the basket’s clutch disc is correctly inserted onto the drive disc.
• Make note of the On/O Switch and the Start/Stop button.
• NOTE: DO NOT USE AN ADAPTOR PLUG
• Make sure the On/O button is in the “o” position and the locking arm is hooked onto the juicer cover
• Turn the juicer on by pushing the on/o button to the “on” position
• Turn on the motor by pushing the START button
• Turn o the motor by pushing the STOP button
You are now ready to juice. Use the food pusher to gradually push down the fruit and/or vegetables
towards the spinning grating disc at the bottom of the feed chute without exerting excessive
pressure.

• Keeping your juicer clean throughout the day will ensure a longer life and safe and delicious
drinks for your customers.
• DO NOT USE ABRASIVE PRODUCTS OR SPONGES TO CLEAN THE BASKET.
NEVER USE BLEACH OR CHLORINE-BASED CLEANING PRODUCTS ON THE JUICE
EXTRACTOR. WHITE VINAGER IS SAFE AND EFFECTIVE.
• Clean the juicing basket about every 40 lbs. of fruits/vegetables for the ES-700 and 30 lbs.
for the ES500. Do not let traces of fruit or vegetables dry and harden on the pulp container,
basket, juicer cover or food pusher, as it could create noise and reduce juice yield.
• It will vary based upon what types of recipes you are juicing. Soft fruits and vegetables will
need to be cleaned out more frequently.
• To clean the juicer cover, bowl, basket, pulp container, pulp retainer and food pusher, rinse
under running water and wash with warm water and mild liquid detergent. Rinse and dry.
• While you are juicing it is best to always alternate a hard fruit or vegetable with a soft one.
• Pour 1 cup of water in the juicer slowly between juice making to clear the bowl and spout.
• Wipe the outside of the juicer with a microber cloth to keep it shiny.
• Do not put the lid in the dishwasher as it will become discolored.
• To reduce the cleaning procedures to a minimum, we suggest placing a plastic bag inside
the pulp container.
• The removable parts, except the pulp container and juice cover are dishwasher safe.
DO NOT IMMERSE THE PULP CONTAINER IN HOT WATER. The hot water can distort the
molded shape and it will not t as snugly against the base.
• To get the highest yield of juice, always clean the basket with the nylon brush provided.
Place the basket under running water and use the brush to clean the inside of the strainer,
as it lengthens its lifespan. You can also immerse the basket in a solution of hot water with
lemon juice or vinegar to loosen any blocked material. Leaving the basket to soak overnight
will also help to thoroughly clean it. Even better, try using our exclusive EZ Power Cleaner
made for Ceado juicers. You will be amazed how well it works!
Standard Cleaning Procedures

The Ceado’s basket can become o balance if pulp is sticking more to one side. There
are a few ways to clear it:
1. The machine just may clear itself, you will hear a loud vibrating noise and then a whoosh
as the pulp is self-ejected into the basket.
2. Slowly pour a little water through the chute to help the juicer clear out the basket.
3. Run a hard vegetable such as a carrot or apple through the chute. When you juice make
sure to alternate hard and soft produce. Fruits that are overly ripe quickly clog the juicing
basket. Beets will tend to stick to one side if not quartered and fed through both chutes
alternating the sides.
4. Open the top and scoop the pulp out that is sticking to the basket.
5. If you are experiencing vibrations and the above tips did not work it might be time to
remove the basket and clean it under water. If you are juicing a lot of peeled citrus, the
tiny pulp will accumulate and block the screen of the basket, so make sure to scrub and
remove it. Purchasing an extra basket to have on hand is a good idea so you can simply
put in the new basket and place the dirty one in a white vinegar soak and then scrub and
rinse without any downtime.
Troubleshooting Tips

Frequently Asked Questions
Can I juice any type of fruits and vegetables? Technically speaking, you could. Fruits like
bananas that are rich in starch and with a particular consistency are impossible to be eectively
juiced with a centrifugal juice extractor.
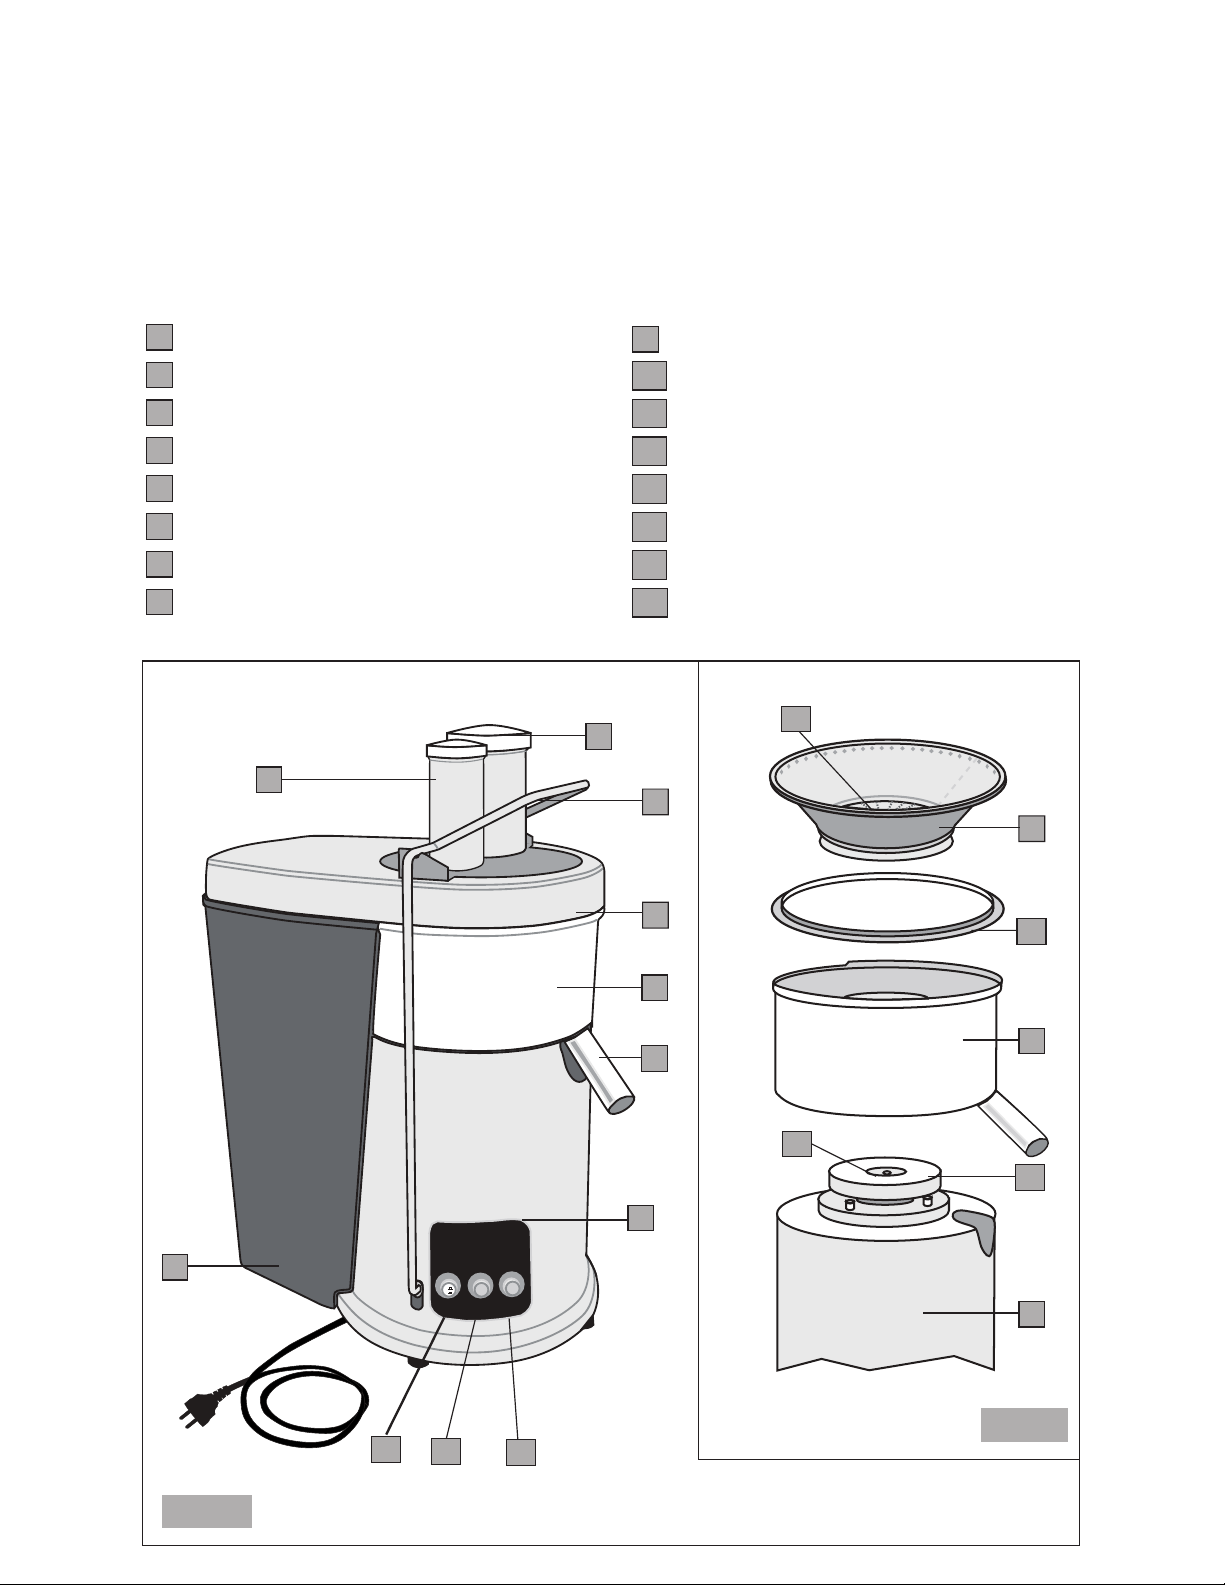
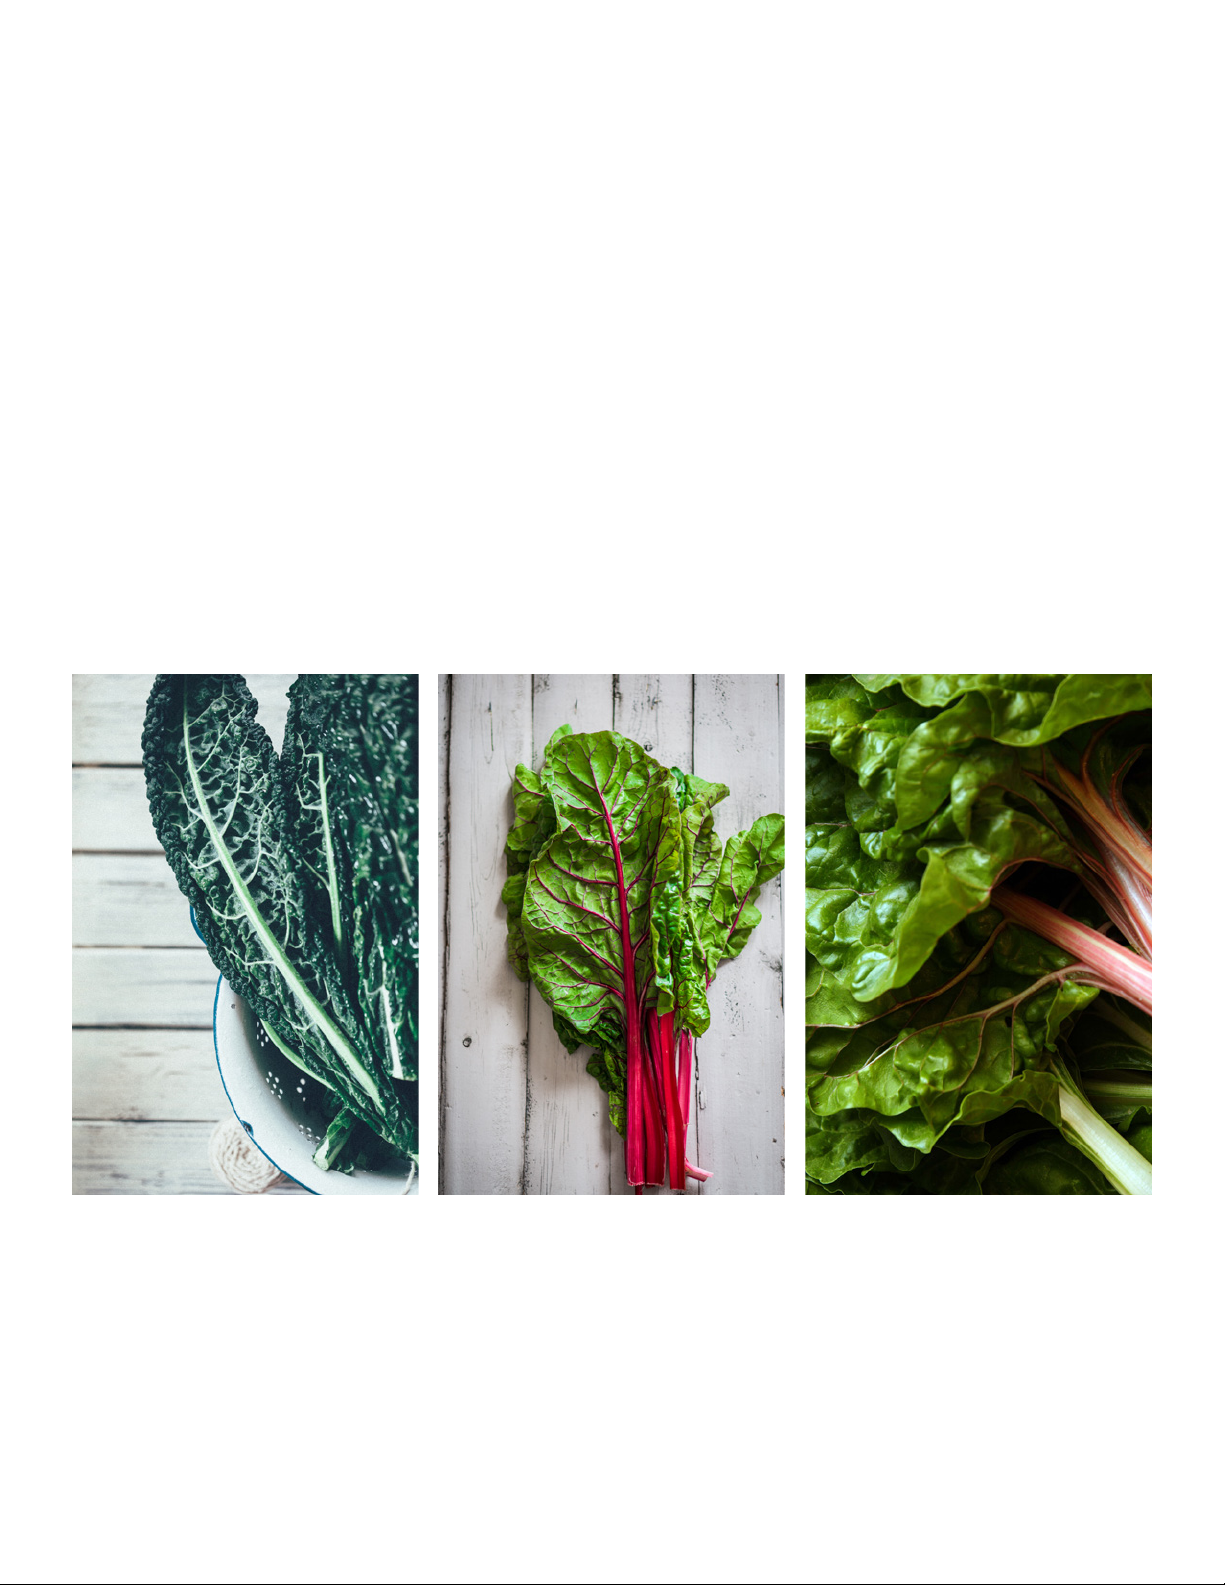
Can I juice greens and soft spine vegetables? Yes! The smaller feed chute of the model
ES700 has been designed for this task.
Is it better to use under ripened fruits or ripe fruits? Fruits that are overly ripe, quickly clog
the juicing basket. This results in wetter pulp and a lower juice yield. Under-ripened fruits are
often bitter and oer a lower juice yield. When possible, use fruits and vegetables which are in
season and are at peak freshness.
Do I have to peel all of the fruits and vegetables before juicing them? Use the same rule
as if you were eating them. Fruits or vegetables with a hard, bitter or inedible skin or rind, such
as melon, pineapple, mango, kiwi, and citrus must be peeled before being inserted in the juice
extractor. Carrots, apples, peaches, and the like can be juiced without being peeled.
Do I have to remove the seeds or stones from some fruits? This is the same rule as above;
always remove stones from apricots, peaches, and other pitted fruits. You do not need to
remove seeds from apples, watermelons, citrus, and other similar fruit with small seeds.
Can I juice citrus? Yes! Citrus oers a great yield of juice. Always remember to peel them rst,
as the skin is usually extremely bitter and also will get stuck underneath the teeth of the grating
disc and into the strainer.
Can I juice fruits and vegetables whole? Yes, given that the conditions above are met (no
need to peel them or remove stones), and it ts into the feed chute. For instance, apples,
carrots, peppers, cucumbers, fennels, etc. can be juiced without any further work apart from
washing them rst.
Why does the Ceado have smaller/dierent teeth? After thorough research and multiple
tests, we’ve found that smaller teeth will grate smaller chunks of fruits/veggies, thus enabling
the net/lter mesh to better “exploit” them. This leads to higher yield and dryer pulp.
Why does the Ceado have such a heavy asynchronous motor? We chose a reliable, low
speed asynchronous motor that performs to guarantee enough speed and torque to exploit the
fruits and vegetables but not too much to burn the vitamins. Coupled with the design of the net
and grating discs, we’ve found that it is the perfect balance for a smooth, clean juice and great
output and yield.
How often do I have to replace the motors bearings? Never! As long as the machine is
properly cleaned and maintained, you should never have to replace the motors bearings. Ceado
uses the highest quality and longest-lasting motor bearings available.
Is it ok to pour water through the chutes to moisten the basket? Yes, but very carefully.
This can be helpful only if the juicer is not going to be used for a while, as to prevent leftover
fruit or vegetables from drying on the basket.

How often do I need to clean my machine? The pulp container has a capacity of 6+ (for
ES500) to 8+ (for ES700) quarts. Generally, we suggest cleaning the juicing basket after about
40 lbs. of fruits/vegetables for ES700, 30 lbs. for ES500 that you juice. Most importantly, do not
to let traces of fruit or vegetables dry and harden on the pulp container, basket, juicer cover or
food pusher. This could create noise and reduce juice yield. It will vary based upon what types
of recipes you are juicing. Soft fruits and vegetables will need to be cleaned out more frequently.
Can I wash it in the dishwasher? Apart from the pulp container, which only needs to be
immersed in hot water, the other removable parts are dishwasher safe. Please note that juicer
cover is made of anodized aluminum, and therefore will darken if washed into the dishwasher.
The juice bowl, pulp retainer, and juicing basket are stainless steel and we suggest cleaning
the juicing basket using the nylon brush included (always from the inside of the strainer) as it
lengthens its life span.
Helpful Tips: Having a second complete basket on hand is very helpful, so as to reduce
downtime while cleaning the original basket. When possible, soak the fruits and vegetables
(especially harder ones such as carrots) before juicing them, so that it eases the process
and guarantees more yield. When juicing leafy greens, try to juice a small bunch together
instead of processing them separately. Juicing a carrot after “sticky fruits” (such as an
apple) usually helps to self-clean the basket.
Why is the mesh designed as it is? As stated above, larger holes in the mesh would allow
bigger chunks to lter into the juice. If the holes are too small, the yield will be lessened and
lead to wetter pulp.
Why does the ES700 have two feed chutes? The smaller feed chute is ideal for long fruits
and vegetables (carrots, celery, etc.), as well as for juicing leafy and soft spine greens which
tend to “runaway” in the larger chutes. The larger chute is designed for bigger fruits (such as
apples) which can be juiced without cutting them, leading to quicker service. Due to the nature
of beets they tend to stick to one side of the basket when juicing. This causes the basket to be
o balance and cause loud noise as well as vibrations of the machine. To eectively juice beets
you should quarter them and feed them into both chutes alternating the sides. This alleviates
any problems. When juicing celery you should fold the stalk in half and put into the smaller chute.
What type of maintenance needs to be done on our Ceado? Cleaning your juicer daily is the
most important and necessary maintenance that you can do. At night it is also a good idea to
soak the basket in a white vinegar solution to remove any built-up residue. You will also want to
keep an eye on the teeth. When you see the teeth on the blade getting dull, install a new grating
disc. See page for how to quickly and easily change the grating disc. You can always order
additional discs from https://www.shopjuicernet.com.
Frequently Asked Questions (cont’d)

Juicing Greens with the Ceado ES700
Choose the best greens for the job. Do not use the bags of precut greens that will y right out the
back of the juicer. Select the full leaf versions of the greens.
1) Burrito Method
Take a few leaves and roll them up into a burrito shape. Put that clump of greens through the juicer
for a higher juice yield. Do not juice one leaf at a time; always bunch them together.
2) Sandwich Method
You can take the rolled leaves and put them between harder produce to help the greens juice
better. You can wrap the greens around a carrot or sandwich them between apples or other hard
produce.
3) Slow and Steady
The Ceado ES700 will pull the produce into the blade area. You should not quickly jam the greens
into the chute. Insert the wrapped leaves or sandwiched greens slowly into the chute when juicing;
et the machine do the work.

Instructions for Changing the Grating Disk
IMPORTANT: CLEAN BASKET ASSEMBLY THOROUGHLY BEFORE CHANGING GRATING DISK
AND HANDLE WITH CARE.
2875 Jupiter Park Drive, Jupiter FL 33458
Main: (800) 627-2886, Service (561) 408-0799
www. juicernet.com
IMPORTANT: CLEAN THE BASKET ASSEMBLY THOROUGHLY BEFORE CHANGING
DISC AND HANDLE WITH CARE.
STEP
DESCRIPTION
PHOTO
1
A channellock wrench is required to change the
grating disc. This tool is readily available at any
hardware store and most maintenance staff
carry this tool.
2 Place the basket assembly upside down on a
flat surface.
3
Use the channellock wrench to loosen the nut.
After removing, you will have a total of four (4)
pieces:
1. Basket
2. Base
3. Grating Disc with Screw
4. Clutch Drive
INSTRUCTIONS:
GRATING DISC CHANGE IN BASKET ASSEMBLY – MODEL ES700

Instructions for Changing the Grating Disk (cont’d)
4
Make note of one side of the center screw that
is flat. This must align with the flat side of the
hole in the a) the basket; b) the base; and c) the
grating disc
5
Take the replacement grating disc and place it
in the base of the basket, aligning the flat side
of the hole. Insert the special screw.
6
Assemble the flat side of the base against the
bottom of the basket assembly (outer edge
turned down).
Place basket upside down on a flat surface and
replace the clutch disk. Tighten with
channellock wrench.
Other manuals for ES700
1
Table of contents
Other Ceado Juicer manuals