• Place the fryer on an even, heat-resistant surface. Do not place the fryer near heat sources,
places with high humidity levels, or combustible materials.
• There are no internal serviceable parts, do not attempt to disassemble the appliance.
• The appliance is not intended to be operated by means of an external timer or separate
remote-control system.
• Do not insert or allow ngers or foreign objects to enter any ventilation or exhaust openings,
as it could cause an electrical shock or re.
• Do not turn the fryer on if there is no oil in the tank.
• It is not advisable to mix different oil types or oils with different qualities.
• The fryer has a safety thermostat that turns the fryer off in case of overheating. This may
happen if there is not enough oil in the tank.
WARNING: do not attempt to move the fryer until it has completely cooled down. This can
take up to three hours. Use the handles at both sides.
WARNING: do not immerse the cord, plug, or any non-removable part of the fryer in water
or any other liquid, nor expose the electrical connections to water. Make sure your hands are
dry before handling the plug or switching on the appliance.
• Unplug from the electrical outlet when not in use and before cleaning. Allow it to cool down
completely before attaching or removing parts, and before cleaning the appliance.
• Do not leave the fryer unattended while connected to the mains supply.
• Do not lean over the fryer while in use.
• Be careful not to touch the surfaces of the fryer as they will become hot when in use.
• Cleaning and maintenance must be carried out according this instruction manual to make
sure it functions properly. Turn off and unplug the appliance before moving and cleaning it.
Allow it to cool completely before cleaning and storing it.
2. BEFORE USE
• Carefully unpack the appliance and remove all packaging materials. Check the contents to
make sure that all the parts and accessories are present and in good condition.
• Attach the handle of the basket in its place. Note that the handle folds back and locks for
storage.
• Wash the lid, basket, lter, and tank by hand with hot soapy water.
• Wipe the control panel with a damp cloth and/or kitchen paper.
IMPORTANT: do not immerse the control panel in water.
• Dry all parts of the fryer thoroughly and place the tank, lter, control panel, basket, and lid
back in place. Make sure the tank is in its correct position and aligned correctly, the max/min
marks should be placed to the right.
3. OPERATION
• Remove the lid and take out the frying basket.
• Pour oil into the tank up to the maximum mark.
• Recommended types of oil: olive, corn, groundnut, or vegetable oil. Do not use margarine or
butter.
NOTE: do not plug the appliance into the mains supply without oil in the tank.
NOTE: the lid must not be closed while the fryer is being used.
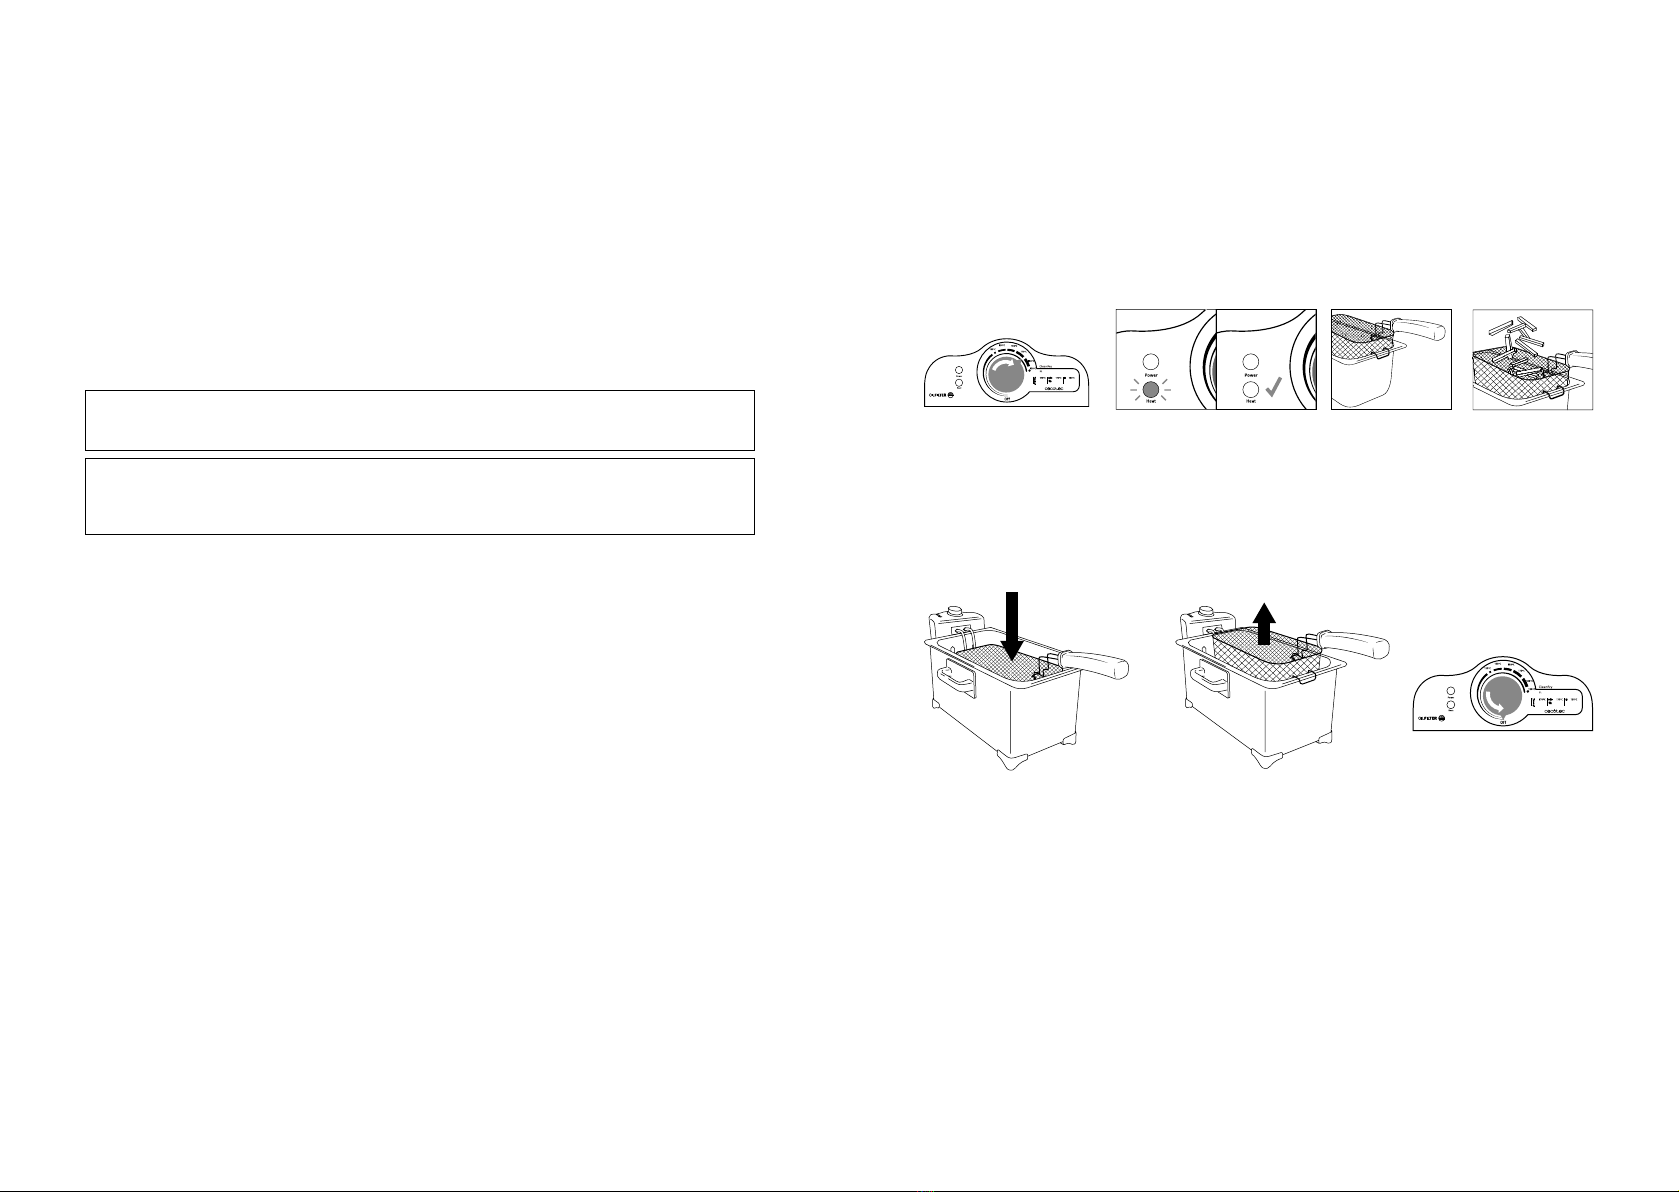
A. Remove the lid and plug the fryer into the mains supply. Turn the temperature dial to the
desired heat setting.
B. When the oil reaches the desired temperature, the green light will turn off (do not add food
until the selected temperature has been reached). The green light will light up again when
food is placed in the oil, but will turn off when the oil reaches the selected temperature again.
C. Hang the basket on the side of the tank (make sure the handle is locked into place and dry).
D. Place food in the frying basket (food should be as dry as possible).
E. Carefully lower the frying basket into the hot oil (the oil may spit as it fries the foodstuffs).
F. When the foodstuffs are ready, raise and place the basket in its resting position on the side
of the tank. Let it drain the foodstuffs.
G. Turn the temperature dial off and unplug the fryer. Allow it to cool down for at least 2-3
hours before moving or cleaning it.
H. Place the foodstuffs in a dish covered with kitchen paper to remove any excess oil.
It is important not to close the lid while the fryer is being used.
The following frying times and temperatures are intended as a guide and should be adjusted
to suit different quantities or thickness after your own taste.
E F G
BA C D