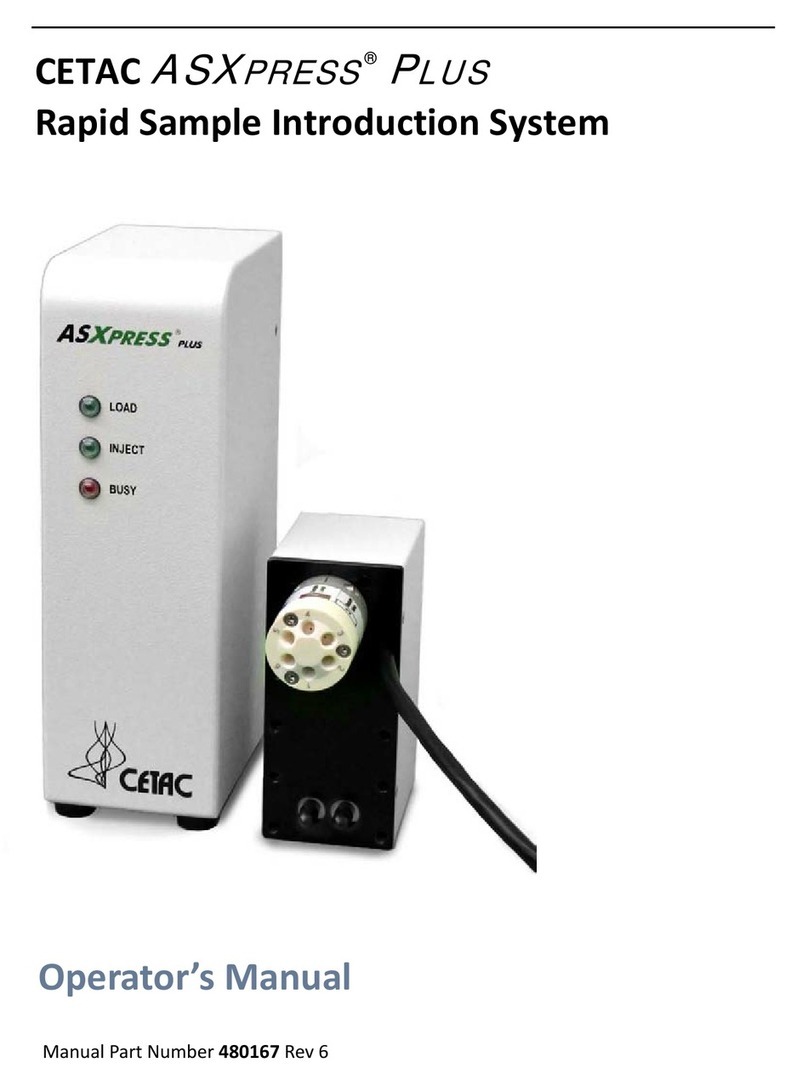
CETAC ASXPRESS PLUS User manual

CETAC
ASXPRESS PLUS
Rapid Sample Introduction System
Upgrade for EXR-8 Autosamplers
Manual Part Number 480176 rev1 a
Installation Guide

COPYRIGHT
© 2010 CETAC Technologies
480176 rev1a, September, 2010
CETAC Technologies
Customer Service & Support
14306 Industrial Road
Omaha, Nebraska 68144, USA
Phone (800) 369-2822 (USA only)
Phone (402) 733-2829
Fax (402) 733-1932
E-mail custserv@cetac.com
REVISIONS
CETAC Technologies strives to provide the
scientific community with an unparalleled
combination of effective technology and
continuing value. Modular upgrades for
existing instruments will continue to be a
prime consideration as designs progress.
CETAC Technologies reserves the right to
revise this document and/or improve
products described herein at any time without
notice or obligation. Warranty registration
entitles the named owner exclusively to
manual change pages/new editions as they
are published.
SAFETY
CAUTION and WARNING statements, as
applied in this document, shall be interpreted
consistent with the following context:
CAUTION applies only to potential property
damage conditions; WARNING applies to
potential personal injury conditions, in
combination with or exclusive of potential
property damage.
All user-serviceable components are
specifically identified in this document as
such; the balance shall be assumed to require
the expertise of a factory service
technician/engineer for adjustment, repair,
replacement, modification, etc. Others not so
qualified and performing these actions shall
do so at their own risk.
Under all conditions the user must observe
safe laboratory procedures during the
operation of this product.
Furthermore, never
operate the instrument without first reading
and understanding the Operator’s Manual and
ensuring that the instrument is operated
safely and properly.
TRADEMARK ACKNOWLEDGEMENTS
Windows is a registered trademark of
Microsoft Corporation in the United States and
other countries.
All other marks are the property of their
respective owners.

3
Contents
1Introduction ..............................................................................................................5
Overview.................................................................................................................................... 5
Firmware Requirements .................................................................................................... 6
Supported Firmware Versions .................................................................................. 6
Where to Get the Firmware ....................................................................................... 6
2Setting the Pump Speed Jumper ........................................................................7
Opening the Autosampler to Access the Jumpers ................................................... 7
Accessing the Interior of the Autosampler........................................................... 7
Setting the Pump Speed Jumper (ASX-520/ASX-520HS/EXR-8) .....................15
Closing Up the Autosampler ...........................................................................................15
3Installing the Rinse Plumbing ......................................................................... 17
Install the Xpress Rinse Station and Rinse Tubing ...............................................17
Removing the Existing Rinse Station....................................................................18
Installing the Xpress Rinse Station........................................................................18
Installing the Rinse Tubing..............................................................................................19
Notes .................................................................................................................................19
Install the 1.0mm ID Sample Probe on the Autosampler...................................22
4Connecting the ASXPRESS PLUS System............................................................ 23
Valve/Pump Module Liquid Flow Connections......................................................31
ASXPRESS PLUS Power/Communication General Connections ...........................32

ASXPRESS PLUS / EXR-8 Installation Guide
4
This page is intentionally blank.

5
1Introduction
Overview
This guide explains how to set up a CETAC EXR-8 Extended Rack Autosampler
for use with the ASXPRESS PLUS Rapid Sample Introduction System.
Most instructions focus on the ASX-520 version of the EXR-8; minor changes to
the procedure may be required for the ASX-510 and ASX-520HS versions.
This guide is for use by qualified chemists or laboratory technicians who are
familiar with electrical and chemical safety precautions. See the ASXPRESS PLUS
Operator’s Manual for notices and safety information.
To install the system, you will need to
1Remove the cover from the autosampler.
2Upgrade the autosampler firmware, if necessary (see page 6).
3Set the autosampler pump speed jumper to its fastest setting (see page 7).
4Reassemble the autosampler cover.
5Install the new cable bracket on the autosampler, if necessary. (See the
Installation Guide which is provided with the bracket.)
6Install the new rinse station and connect the rinse tubing (see page 17).
7Connect the autosampler to the ASXpress Plus system and to the analytical
instrument (see page 23).

ASXPRESS PLUS / EXR-8 Installation Guide
6
NOTE
Some of these steps may already have been performed by CETAC or your
dealer.
Firmware Requirements
Supported Firmware Versions
The ASXPRESS PLUS Rapid Sample Introduction System is compatible with the
following firmware versions:
ASX-520/ASX-520HS: firmware version 1.06 or later.
ASX-510: firmware version 1.7 or later.
Where to Get the Firmware
The software needed to upgrade the firmware on the autosampler and the
firmware upgrade file can be downloaded from the CETAC web site. To
download the software and the firmware, go to
http://www.cetac.com/downloads/download.html and select Autosampler
Firmware Update. You will be presented with a form that asks for basic
contact information. Upon completion, you will be e-mailed a web site
address, a login ID and a password that will allow you to download any new
firmware upgrade that may be available for your autosampler along with the
necessary software to perform the upgrade.
See the next chapter for information on obtaining and upgrading the firmware.
You can upgrade the firmware by setting some switches and using a firmware
update utility, or by replacing the processor module ("Rabbit module") in the
autosampler. Contact CETAC to determine which method is most appropriate
for your autosampler. Instructions for updating the firmware are included with
the firmware update utility.

7
2Setting the Pump
Speed Jumper
To change the pump speed, you will need to disassemble the autosampler so
that you can move a jumper on the circuit board.
What happens if the jumper is not set to the highest speed? With the
recommended tubing configuration, the built-in peristaltic pump is used to
evacuate the rinse station, while an external pump fills the station. If the built-
in pump is not running at the fastest speed, the rinse station will overflow.
ELECTRICAL AND MECHANICAL HAZARDS
Make sure the unit is off and unplugged before beginning this procedure.
Opening the Autosampler to Access the Jumpers
NOTE
Your equipment may differ in appearance from what is shown in the photos.
The photos show components which are intended to represent typical CETAC
instruments from a range of eras. Most of the photos depict a standard ASX-
520; note that for the EXR-8, the standards rack is attached to autosampler and
not integrated with the tray.
Accessing the Interior of the Autosampler
1Place the autosampler on a flat surface and ensure that the unit is powered off.
2Remove the two Kynar thumbscrews from the Y-axis home block.
WARNING

ASXPRESS PLUS / EXR-8 Installation Guide
8
Figure 2-1 View of Y-axis home block with Kynar thumbscrews.
3Remove the entire Z-drive assembly from the Y-arm by pulling the Z-drive
assembly forward and off of the autosampler arm as shown (Figure 2-2).
Figure 2-2 Z-drive removed from arm assembly. (Photo shows
standard ASX-520 tray with integral standards rack.)

ASXPRESS PLUS / EXR-8 Installation Guide
Chapter 2: Setting the Pump Speed Jumper
9
4Once the Z-drive assembly is removed, remove the rinse station (Figure 2-3).
Turn the rinse station ¼ turn counter-clockwise while pulling it upward. Also,
the tubing located at the bottom of rinse station will have to be disconnected
from the pump at the rear of the autosampler.
Figure 2-3 View of rinse station
5Remove the standards rack. Remove the three screws and pull it forward.
Figure 2-4 Removing the standards rack.

ASXPRESS PLUS / EXR-8 Installation Guide
10
6The autosampler tray should then be removed. Lift up the tray and pull out
(Figure 2-5).
Figure 2-5 Removing the tray (ASX-520)
7Next, the front cover is to be removed. Remove the four corner screws (Figure
2-6).
Figure 2-6 Front view of ASX-520 autosampler showing front cover
screws

ASXPRESS PLUS / EXR-8 Installation Guide
Chapter 2: Setting the Pump Speed Jumper
11
8The front cover is removed by lifting it slightly and pulling forward (Figure
2-7).
Figure 2-7 ASX-520 autosampler with the front cover being removed
9The screws that hold the inner shield must be removed. Move the Y-axis
assembly all the way to the left (Figure 2-8 shows screw locations). Your
autosampler may have a newer style shield with splashguard. These are
removed in a similar manner.
Figure 2-8 View of inner shield inside the ASX-520 autosampler

ASXPRESS PLUS / EXR-8 Installation Guide
12
10 The inner shield can be removed by moving the arm to the right or left then
lifting it up while pulling forward.(Figure 2-9).
Figure 2-9 Removal of inner shield (ASX-520)
11 If you have a newer shield/splash guard combination proceed as follows.
Locate and remove the 5 screws holding the shield in place.
Figure 2-10 View of new shield and splashguard inside the ASX-520.

ASXPRESS PLUS / EXR-8 Installation Guide
Chapter 2: Setting the Pump Speed Jumper
13
12 Remove the two shield pieces. Notice that the splashguard goes under the
chassis on the top and over the chassis on the bottom. When you replace the
splashguard, ensure it is oriented in this manner.
Figure 2-11 View of splashguard placement.

ASXPRESS PLUS / EXR-8 Installation Guide
14
13 Remove the splashguard by pulling it out from one side. It may be necessary to
reach under the guard and remove it from the support standoffs.
Figure 2-12 View of splashguard removal.

ASXPRESS PLUS / EXR-8 Installation Guide
Chapter 2: Setting the Pump Speed Jumper
15
Setting the Pump Speed Jumper (ASX-520/ASX-
520HS/EXR-8)
1Locate the block of pump speed pins on the left side of the main circuit board
2Move the jumper from its existing position to the position marked “Max RPM
”
(Figure 2-13).
Figure 2-13 Jumper position utilized to increase pump speed (ASX-520)
Note:
ASX-520/ASX520HS main boards of differing eras/versions may have varying
orientation of jumper positions. Follow the label on the circuit board for
proper jumper positioning.
Closing Up the Autosampler
Once the firmware has been upgraded and the pump speed has been set, you
can close up the autosampler.
•Reinstall all shields
•Reinstall the front cover
•Reinstall the standards rack
Try to align the standards rack to its original position. Use the marks
left on the rack by the screws as a guide.
•Reinstall the Z-drive assembly

ASXPRESS PLUS / EXR-8 Installation Guide
16
This page is intentionally blank.

17
3Installing the Rinse
Plumbing
To work properly with the ASXPRESS PLUS Rapid Sample Introduction System,
the autosampler will require:
Xpress rinse station
External pump (required to achieve adequate sample and rinse flow rate)
and associated plumbing
1.0mm ID sample probe
INJURY HAZARD
Ensure that AC power to the autosampler is off before proceeding with
installation. If power to the autosampler is not turned off, the autosampler
could begin moving while you are working on it.
The plumbing connections should be made without using tools. In fact, using tools
such as screwdrivers or pliers to perform installation tasks may result in a damaged
or unusable instrument. Do not tighten fittings with anything other than your
fingers.
Install the Xpress Rinse Station and Rinse Tubing
An Xpress rinse station (Figure 3-1) and associated modified tubing
arrangement is required to accommodate the design requirements of the
ASXPRESS PLUS system. Please note the following considerations:
If you have purchased a full system, it will already be configured properly
and this step will not be necessary.
If you are connecting the ASXpress Plus system to an autosampler with a
standard rinse station installed, then you will need to replace it with the
WARNING
CAUTION

ASXPRESS PLUS / EXR-8 Installation Guide
18
Xpress rinse station (supplied with the upgrade kit), and make the tubing
modifications as described in this section.
The Xpress rinse station is smaller than the one provided with the
autosampler. This smaller rinse station allows the rinse solution to flow
efficiently at the high flow rate used by the ASXPRESS PLUS system.
Figure 3-1 Xpress Rinse Station for ASX-500/510 Autosamplers
Removing the Existing Rinse Station
1Verify that the autosampler is turned off and unplugged, and that no hazardous
materials are present in the rinse station or tubing.
2Turn the rinse station ¼ turn counter-clockwise while pulling up.
3Note how the rinse tubing is threaded underneath the autosampler.
4Remove the tubing connecting the rinse station to the peristaltic pump.
5Remove the tubing connecting the rinse station to the drain/waste container.
Set the rinse station and all tubing aside, as those items will not be
reinstalled. You may wish to store the rinse station in a labeled plastic bag,
in case the autosampler ever needs to be restored to its original state.
Installing the Xpress Rinse Station
1Gently push the Xpress rinse station into place onto the rinse station holder
block (mounted on the autosampler front cover) and turn it ¼ turn clockwise.
2Replace the screw to secure the rinse station.
Standard Rinse Station Xpress Rinse Station

ASXPRESS PLUS / EXR-8 Installation Guide
Chapter 3: Installing the Rinse Plumbing
19
Installing the Rinse Tubing
An external peristaltic pump, which is faster than the one built into the
autosampler, must be used to supply the rinse station.
The pump will be powered by the ASXPRESS PLUS electronics module.
Use only the pump provided with the ASXPRESS PLUS system.
Figure 3-2 Rinse Tubing Diagram
Notes
The external peristaltic pump feeds two channels of rinse solution, mixed with
one channel of air, into the rinse station. Leave one input of the pump channel
disconnected (open to the atmosphere). The bubbles in the rinse solution
improve the cleaning action of the rinse station.
The peristaltic pump built into the autosampler removes rinse solution. To
avoid overflowing the rinse station, both channels of the pump must be used,
and the pump must be running at its fastest speed.
CAUTION

ASXPRESS PLUS / EXR-8 Installation Guide
20
Rinse solution may be recycled by directing the waste tube into the rinse
solution container, if appropriate for your application. Make sure that the end
of the waste tube is above the surface of the liquid in the container.
A short length of 1/4" OD tubing is used as an intake "straw."
A short length of 5/16" OD tubing is connected to the output port of the rinse
station, then connected with an adapter to the 1/4" OD tubing. This makes it
easier to remove the tubing from the rinse station.
Tubing between the autosampler and stationary objects (the external pump
and rinse container) should run through the "chain." Tubing on the
autosampler should be secured using the tray and clips, to prevent it from
shifting as the autosampler moves. Bend the waste line in a "U" shape so that it
can be clipped in place, but be careful not to kink the tubing.
The following photos show how the tubing might be arranged:
Figure 3-3 External peristaltic pump
Figure 3-4 Rinse intake tube
Rinse solution
from container
Air
Rinse solution
with air bubbles
to rinse station
Other manuals for ASXPRESS PLUS
1
Table of contents
Other CETAC Laboratory Equipment manuals

CETAC
CETAC ASXpress User manual

CETAC
CETAC ASX-260 User manual

CETAC
CETAC ASX-520 User manual

CETAC
CETAC ASX-510 Guide

CETAC
CETAC ASX-520 Use and care manual

CETAC
CETAC ASX-1400 User manual

CETAC
CETAC ASX-520 Instruction Manual

CETAC
CETAC ASXPRESS PLUS User manual

CETAC
CETAC LSX-213 User manual
CETAC
CETAC ASX-500 Series User manual