manuals.online logo
Brands
  1. Home
  2. •
  3. Brands
  4. •
  5. Checkpoint
  6. •
  7. Network Hardware
  8. •
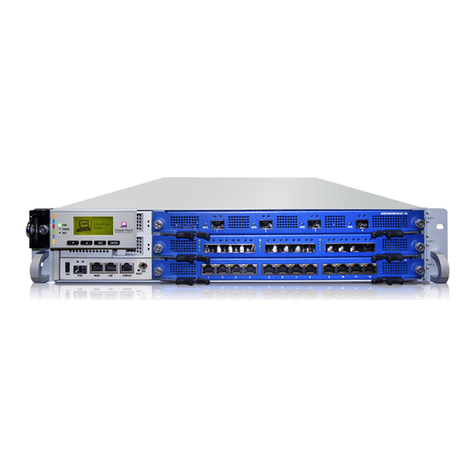
  9. Checkpoint Smart-1 225 Instruction Manual

Checkpoint Smart-1 225 Instruction Manual

Classification [Protected] P/N:705871 | 1
© 2014 Check Point Software Technologies Ltd. All rights reserved.
For a list of our trademarks, please refer to: http://www.checkpoint.com/copyright.html.
For a list of our Third Party Copyright notices, please refer to: http://www.checkpoint.com/3rd_party_copyright.html
Installing a Smart-1 LOM Card
705871
Protected
2014
This document is for Smart-1 225, Smart-1 3050, and Smart-1 3150 models.
Important
Read the Health and Safety Information in the Getting Started Guide
(http://supportcontent.checkpoint.com/documentation_download?ID=32309).
To protect the appliance and LOM card from electrostatic discharge, make sure that
you are grounded.
We recommend that you use an ESD grounding wrist strap. Connect the grounding
plug on the wrist strap to the chassis grounding point.
Preparing the Appliance
Before you start to install or remove the LOM card, make sure that:
The appliance is in a clean environment and on a level surface.
You can physically access and open the cover of the appliance.
You can connect to the WebUI or CLI.
You have the Check Point LOM card RMA kit.
RMA Kit Contents
FRU Installation Guide
LOM card
Screwdriver
RMA kit sticker
ESD grounding strap (anti-static)
| 2
To prepare the appliance:
1. Using the CLI or WebUI, shut down the appliance.
2. Remove the power cords from the appliance.
3. Put on the ESD strap and attach the other end to a grounding point.
4. Remove the appliance from the rack and put it on a flat surface.
5. Remove the appliance top cover.
The diagram shows how to remove the Smart-1 3150 cover. The Smart-1 225 and
Smart-1 3050 covers are similar.
Item
Description
1
Appliance cover
2
Appliance cover screws
3
ESD grounding point - location changes according to model
3|
Finding the LOM Card Socket
These illustrations show the location of the LOM card in the Smart-1 appliance models.
Smart-1 225
Item
Description
1
Front panel
2
LOM card (in socket)
3
Rear panel
| 4
Smart-1 3050
Item
Description
1
Front panel
2
LOM card (in socket)
3
Rear panel
5|
Smart-1 3150
Item
Description
1
Front panel
2
LOM card (in socket)
3
Rear panel
| 6
Removing the LOM Card
Make sure that you prepare the appliance ("Preparing the Appliance" on page 1) before
you remove the LOM card.
To remove the LOM card:
1. Remove the retaining screw on the LOM card.
2. Pull the socket locking levers OUT (away from the card edges).
3. Lift the rear end of the card up and pull it out of the socket.
4. Close the appliance and make sure that it starts correctly:
7|
a) Connect the power cords to the appliance.
b) Turn on the appliance using the power switch at the rear of the appliance.
c) Make sure that the LCD screen shows the appliance model.
Installing the LOM Card
To install the LOM card in the appliance:
1. Find the LOM card socket on the system board.
IMPORTANT! - Be careful. There are sharp metal parts in the appliance, such as
the heat sink fins and bracket, which can cause injury and damage the LOM card.
2. Carefully move the cables away from the LOM card socket.
3. Hold the LOM card at an angle to align it with receptacle in the socket.
| 8
4. Press down on the LOM card until it lies flat.
5. Close the appliance.
6. Insert and tighten the screw at the bottom of the LOM card.
7. Make sure the LOM card is installed correctly:
a) Connect the power cords to the appliance.
b) Turn on the appliance using the power switch at the rear of the appliance.
c) Use an Ethernet cable to connect the LOM port to a computer.
9|
Initial LOM Login
To log in to the LOM WebUI:
1. Open a web browser and enter the default IP address of the LOM card:
192.168.0.100.
The login window opens.
2. Enter the default User name (admin) and password (admin).
Attaching the RMA Kit Sticker
After you install the new RMA component, attach the RMA kit sticker on the appliance.
Important - Failure to attach the RMA kit sticker correctly will void the
appliance warranty.
To attach the new RMA kit sticker:
1. Make sure that the appliance operates correctly.
2. Attach the new RMA kit sticker to the side of the appliance.
3. Clearly mark this information on the sticker:
RMAed component on the appliance (LOM Card or Memory Module)
Year and month of RMA
Sample RMA Kit Sticker

Other manuals for Smart-1 225

2

This manual suits for next models

2

Other Checkpoint Network Hardware manuals
Checkpoint CPAC-Falcon-10G-B Instruction Manual

Checkpoint

Checkpoint CPAC-Falcon-10G-B Instruction Manual

Checkpoint 5000 Series User manual

Checkpoint

Checkpoint 5000 Series User manual

Checkpoint UTM-1 Edge W16 User manual

Checkpoint

Checkpoint UTM-1 Edge W16 User manual

Checkpoint 730 User manual

Checkpoint

Checkpoint 730 User manual

Checkpoint 16000 User manual

Checkpoint

Checkpoint 16000 User manual

Checkpoint 4200 User manual

Checkpoint

Checkpoint 4200 User manual
Checkpoint MHO170 User manual

Checkpoint

Checkpoint MHO170 User manual

Checkpoint NGX R66 User manual

Checkpoint

Checkpoint NGX R66 User manual

Checkpoint 1570 User manual

Checkpoint

Checkpoint 1570 User manual

Checkpoint VPN-1 Edge X Series User manual

Checkpoint

Checkpoint VPN-1 Edge X Series User manual

Checkpoint 910 User manual

Checkpoint

Checkpoint 910 User manual

Checkpoint 6000 Series User manual

Checkpoint

Checkpoint 6000 Series User manual

Checkpoint 1500 Series Instruction Manual

Checkpoint

Checkpoint 1500 Series Instruction Manual

Checkpoint Quantum SMART-1 600-M User manual
Checkpoint

Checkpoint Quantum SMART-1 600-M User manual

Checkpoint L-71 Instruction Manual

Checkpoint

Checkpoint L-71 Instruction Manual
Checkpoint 770 User manual

Checkpoint

Checkpoint 770 User manual

Checkpoint MHO175 User manual

Checkpoint

Checkpoint MHO175 User manual

Checkpoint TE250X User manual

Checkpoint

Checkpoint TE250X User manual

Checkpoint IPS-1 User manual

Checkpoint

Checkpoint IPS-1 User manual

Checkpoint 21000 Appliances G-70 Guide
Checkpoint

Checkpoint 21000 Appliances G-70 Guide

Checkpoint Smart-1 5050 Instruction Manual

Checkpoint

Checkpoint Smart-1 5050 Instruction Manual

Checkpoint QUANTUM FORCE 19000 User manual

Checkpoint

Checkpoint QUANTUM FORCE 19000 User manual

Checkpoint QUANTUM SPARK 1530 User manual

Checkpoint

Checkpoint QUANTUM SPARK 1530 User manual

Checkpoint QUANTUM SMART-1 User manual

Checkpoint

Checkpoint QUANTUM SMART-1 User manual

Popular Network Hardware manuals by other brands
ADC Campus-RS Remote user manual

ADC

ADC Campus-RS Remote user manual

eks DL-485 Series manual

eks

eks DL-485 Series manual

Quectel SC200K Series instruction manual

Quectel

Quectel SC200K Series instruction manual

Tektronix 070-9180-01 user manual

Tektronix

Tektronix 070-9180-01 user manual

Advantech FWA-2320 user manual

Advantech

Advantech FWA-2320 user manual

Mitsubishi AJ71E71N-T user manual

Mitsubishi

Mitsubishi AJ71E71N-T user manual

Nortel AccessNode 2016 user guide

Nortel

Nortel AccessNode 2016 user guide

SAF Phoenix G2 IDU user manual

SAF

SAF Phoenix G2 IDU user manual

LaCie Rugged Secure user manual

LaCie

LaCie Rugged Secure user manual

Juniper MX150 Hardware guide

Juniper

Juniper MX150 Hardware guide

Cypress I2C-USB Guide

Cypress

Cypress I2C-USB Guide

Avision UNICORN user guide

Avision

Avision UNICORN user guide

Telex Communications 2472AA instruction manual

Telex Communications

Telex Communications 2472AA instruction manual

AVS AVS-NVRH16-8 user manual

AVS

AVS AVS-NVRH16-8 user manual

2N OfficeRoute quick guide

2N

2N OfficeRoute quick guide

Bay Technical Associates DS72 owner's manual

Bay Technical Associates

Bay Technical Associates DS72 owner's manual

Aetina DeviceEdge AGX Orin Series user manual

Aetina

Aetina DeviceEdge AGX Orin Series user manual

D-Link D DES-6509 DES-6509 Specifications

D-Link

D-Link D DES-6509 DES-6509 Specifications

manuals.online logo
manuals.online logoBrands
  • About & Mission
  • Contact us
  • Privacy Policy
  • Terms and Conditions

Copyright 2025 Manuals.Online. All Rights Reserved.