manuals.online logo
Brands
  1. Home
  2. •
  3. Brands
  4. •
  5. Chiayo
  6. •
  7. Microphone System
  8. •
  9. Chiayo R-1010 User manual

Chiayo R-1010 User manual

Fig. 6
Printed in Taiwan, Mar 2003
12I359
WIRELESS MICROPHONE SYSTEM
Operating Manual
M-1000 / Q-1000
ISO 9001
CHIAYO ELECTRONICS CO., LTD.
http://www.chiayo.com.tw E-mail: [email protected]
OFFICE: 30, LANE 27, SEC.4. JEN-AL ROAD, TAIPEI, TAIWAN / TEL: 886-2-2741-5741 FAX: 886-2-2752-5242
FACTORY: 88, CHUNG HSIAO STREET 2, CHIAYI, TAIWAN. / TEL: 886-5-271-1000 FAX: 886-5-276-7611
4.Sliding the power switch of the transmitter control panel to
"ON" position, as show in Fig.7, the battery status indicator
gives a flash to indicate a normal operation. If there is no flash,
it indicates either power supply is not available or battery is
installed wrongly. If the indicator keeps lighting , it indicates
that battery is weak , a replacement is necessary.
Caution: The audio cable serves as antenna for this VHF system. Please stretch the
cable to its maximum to get the most efficient transmission power.
6
5
7
Fig. 7
Fig. 8
Fig. 9
6
7 8 9
R-1010/R-2010
REAR PANEL
1.POWER SWITCH AND VOLUME CONTROL
Turn the knob clockwise until it clicks to switch on the power. Further turning will incre-
ase the volume.
2.POWER ON INDICATOR
When power is switched on the power on LED will light up.
3.RF SIGNAL INDICATOR
Indicates RF signal received. As soon as signal is emitted from the microphone the
LED of the indicator will light up.
4.AF SIGNAL INDICATOR
Indicates the audio signal. When sound is applied to microphone LED will light up.
5.ANTENNA INPUT JACK
For direct mounting of antenna or antenna extension cable.
6.UNBALANCED AUDIO OUTPUT JACK
7.DC POWER SUPPLY INPUT SOCKET
A 12-15V external DC power supply or an AC adapter could be connected to this socket
while the negative is grounded.
CONTROLS AND FUNCTIONS
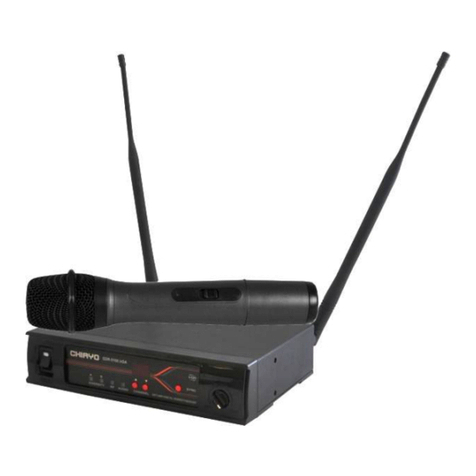
R-1000 / R-2000 is a VHF high-band non-diversity system with quartz controlled
fixedfrequency design. The receiver must be combined with Chiayo's Q- and M-
series of wireless microphone.
1. MATCHING WIRELESS MICROPHONE:Q- and M- series such as Q-1000 &
M-1000
1. MAIN FRAME:R-1000 / R-2000
2. ACCESSORIES:1)AC adapter 2)antenna X 1(R-1000) /antenna X 2(R-2000)
3)Output cable / PHONE 4)Operating manual
OUTLINE
FRONT PANEL
GENERAL
CONTROLS AND FUNCTIONS
SYSTEM COMBINATION
COMPOSITION
2.To access the battery ,pull out the battery cover as in Fig.2.
Belt-Pack Transmitter(M-1000)
3.Insert a 9V battery with correct polarity into the battery compartment and put back
the compartment cover, as show in Fig.3.4.
6
1.The Belt-Pack transmitter is shown in Fig.1.
Fig.1
Fig.2
Fig.3 Fig.4
1
USED AS A STAND ALONE SYSTEM
INSTALLATION OF THE RECEIVER
1.Connect the AF output of the receiver from unbalanced output jack to input
jack of the mixer by an output cable attached with "PHONE" plug as shown in
Fig. 2.
1.Install an antenna perpendicularly to the antenna input jack at the rear panel
of the receiver as shown in Fig. 1.
CONNECT
5 2
(Q-1000)
HAND-HELD Microphone
2.Connect a power adapter to the DC power supply input socket then plug the
adapter to an appropriate AC outlet with caution to the correct voltage under both
AC outlet and adapter marked. as shown in Fig. 3.
1.Mount the two connected R-1000 or R-2000 into an optional MP-60 panel as
shown in Fig. 4.
USED AS A PACK MOUNT SYSTEM
The overall system is a combination of a receiver and a wireless microphone. The
combination for R-1000 or R-2000 could be selected as the following.
BASIC COMBINATION SYSTEM
R-1000 / R-2000 matches Q-1000 M-1000
BASIC COMBINATION SYSTEM
When two or more wireless microphone are used carriers must be different from
the others in order to avoid mutual interference.
To make sure that the system performs correctly please place the receiver at
least 1 meter above the ground and at least 1 meter away from concrete walls or
metal surfaces to prevent any reflection. The microphone should also be at least
1 meter away from the receiving antenna as shown in Fig. 5.
SYSTEM COMBINATION
USED AS MULTI-CHANNEL SYSTEM
INSTALLATION OF THE SYSTEM
OPERATION INSTRUCTIONS OF OVERALL SYSTEM
1. Turn volume control of the receiver as well as the mixer or the equipment to be
used to the minimum then switch on the receiver. The pilot LED of the
receiver will light up and the AF signal indicator will give a flash.
2. When a transmitter is switched on RF signal indicator LED of the receiver
will light up indicating that the system is in normal operation. When indicator
LED of the receiver does not light up indicating that the system does not
match both of the transmitter and the receiver should be checked whether they
are in normal operation or not.
3. When a matching transmitter is switched on at distance within 15 meters away
from a receiver RF signal indicator LED of the receiver does not light up
indicating that the system is matched but is in abnormal operation.
4. When sound is applied to the microphone while the system is switched on and
is in normal operation AF signal indicator will light up accordingly indica-
ting that audio output of the system is in normal operation.
5. AF output level can be adjusted by volume adjustor to match the maximum
input level of the equipment to be used.
6. Audio output level must be adjusted to match a proper input level of the mixer
or the equipment to be used. If output of the receiver is adjusted too high and
volume control of the mixer is turned too low, it will cause the mixer output to be
distorted. Conversely the mixer output will not be distorted but a poor S/N
ratio will be caused.
7. After proper adjusting the output volume of the system adjust volume control
of the mixer or the equipment to be used to get a desired sound level output of
the microphone.
8. Power supply voltage can vary from 12-15V DC
OPERATION OF THE OVERALL SYSTEM
3 4
CAUTION
1.Since use of an antenna extremely influences efficiency of the wireless microphone
system, proper selection and set-up are necessary. The shorter the better is the
most important rule to keep distance between the microphone and the receiiving
antenna.
2.In case of multi-channel operation, proper selection of non-interference channels is
of utmost importance.
3.Remove batteries out of the microphone if the unit is not to be used for a long period.
4.Tuned circuits and variable resistors & capacitors inside the transmitter and the
receiver have been precisely adjusted, please do not make any adjustment.
Otherwise, normal operation will be interrupted.
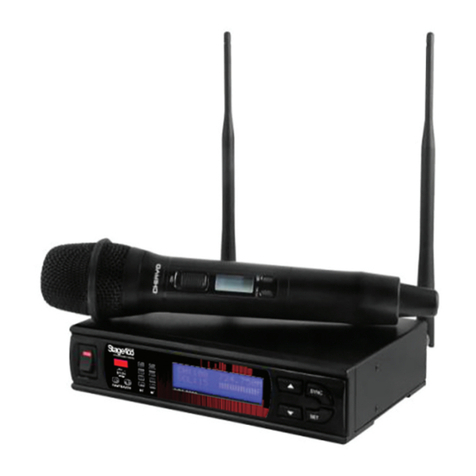
This manual suits for next models

3

Other Chiayo Microphone System manuals

Chiayo IWR-200 User manual

Chiayo

Chiayo IWR-200 User manual

Chiayo SQ-6100 IrDAR User manual

Chiayo

Chiayo SQ-6100 IrDAR User manual

Chiayo AIR-812 User manual

Chiayo

Chiayo AIR-812 User manual

Chiayo IWR-320 User manual

Chiayo

Chiayo IWR-320 User manual

Chiayo Stage-100 Series User manual

Chiayo

Chiayo Stage-100 Series User manual

Chiayo Live-100 series User manual

Chiayo

Chiayo Live-100 series User manual

Chiayo R-1001 User manual

Chiayo

Chiayo R-1001 User manual

Chiayo Q-818 User manual

Chiayo

Chiayo Q-818 User manual

Chiayo IrDA-9000 User manual

Chiayo

Chiayo IrDA-9000 User manual

Chiayo IWM-202 User manual

Chiayo

Chiayo IWM-202 User manual

Chiayo NDR-3100 User manual

Chiayo

Chiayo NDR-3100 User manual

Chiayo SDR-8200 User manual

Chiayo

Chiayo SDR-8200 User manual

Chiayo R-1001 User manual

Chiayo

Chiayo R-1001 User manual

Chiayo SDR-5100 IrDA User manual

Chiayo

Chiayo SDR-5100 IrDA User manual

Chiayo QR-4000 U User manual

Chiayo

Chiayo QR-4000 U User manual

Chiayo SDR-6200 IrDA User manual

Chiayo

Chiayo SDR-6200 IrDA User manual

Chiayo QR-4000N User manual

Chiayo

Chiayo QR-4000N User manual

Chiayo RR-2000 User manual

Chiayo

Chiayo RR-2000 User manual

Chiayo SDR-6200 IrDA User manual

Chiayo

Chiayo SDR-6200 IrDA User manual

Chiayo IRX2 User manual

Chiayo

Chiayo IRX2 User manual

Chiayo Q-200 User manual

Chiayo

Chiayo Q-200 User manual

Chiayo COACH PRO User manual

Chiayo

Chiayo COACH PRO User manual

Chiayo RRS-2000 User manual

Chiayo

Chiayo RRS-2000 User manual

Chiayo DH2400 User manual

Chiayo

Chiayo DH2400 User manual

Popular Microphone System manuals by other brands

Audio Technica M2 Setup and operation manual

Audio Technica

Audio Technica M2 Setup and operation manual

Audio Technica System 8 Installation and operation

Audio Technica

Audio Technica System 8 Installation and operation

Galaxy Audio Any Spot DHT-QUAD user manual

Galaxy Audio

Galaxy Audio Any Spot DHT-QUAD user manual

AMC iLive X2 user manual

AMC

AMC iLive X2 user manual

Sennheiser EW 352 G2 operating instructions

Sennheiser

Sennheiser EW 352 G2 operating instructions

Touchboards TBC-VC-3000 quick start guide

Touchboards

Touchboards TBC-VC-3000 quick start guide

Monacor IMG STAGELINE ATS-42R operating instructions

Monacor

Monacor IMG STAGELINE ATS-42R operating instructions

RCS WR-016 operating instructions

RCS

RCS WR-016 operating instructions

LG LH-W750TA Service manual

LG

LG LH-W750TA Service manual

Panasonic SHFX67 - WIRELESS HOME THEATER SOUND SYSTEM operating instructions

Panasonic

Panasonic SHFX67 - WIRELESS HOME THEATER SOUND SYSTEM operating instructions

JTS RU-901G3 instruction manual

JTS

JTS RU-901G3 instruction manual

Better Music Builder VM-82U G3 operating instructions

Better Music Builder

Better Music Builder VM-82U G3 operating instructions

Sennheiser EW 110 G3 - FREQUENCY SHEETS manual

Sennheiser

Sennheiser EW 110 G3 - FREQUENCY SHEETS manual

Shure PSM 900 user guide

Shure

Shure PSM 900 user guide

Lightspeed FP 1000 user manual

Lightspeed

Lightspeed FP 1000 user manual

Shure PGXD quick start guide

Shure

Shure PGXD quick start guide

Anchor UHF-7000 user manual

Anchor

Anchor UHF-7000 user manual

Altronics redback C 8867C operating instructions

Altronics

Altronics redback C 8867C operating instructions

manuals.online logo
manuals.online logoBrands
  • About & Mission
  • Contact us
  • Privacy Policy
  • Terms and Conditions

Copyright 2025 Manuals.Online. All Rights Reserved.