manuals.online logo
Brands
  1. Home
  2. •
  3. Brands
  4. •
  5. Chicco
  6. •
  7. Car Seat
  8. •
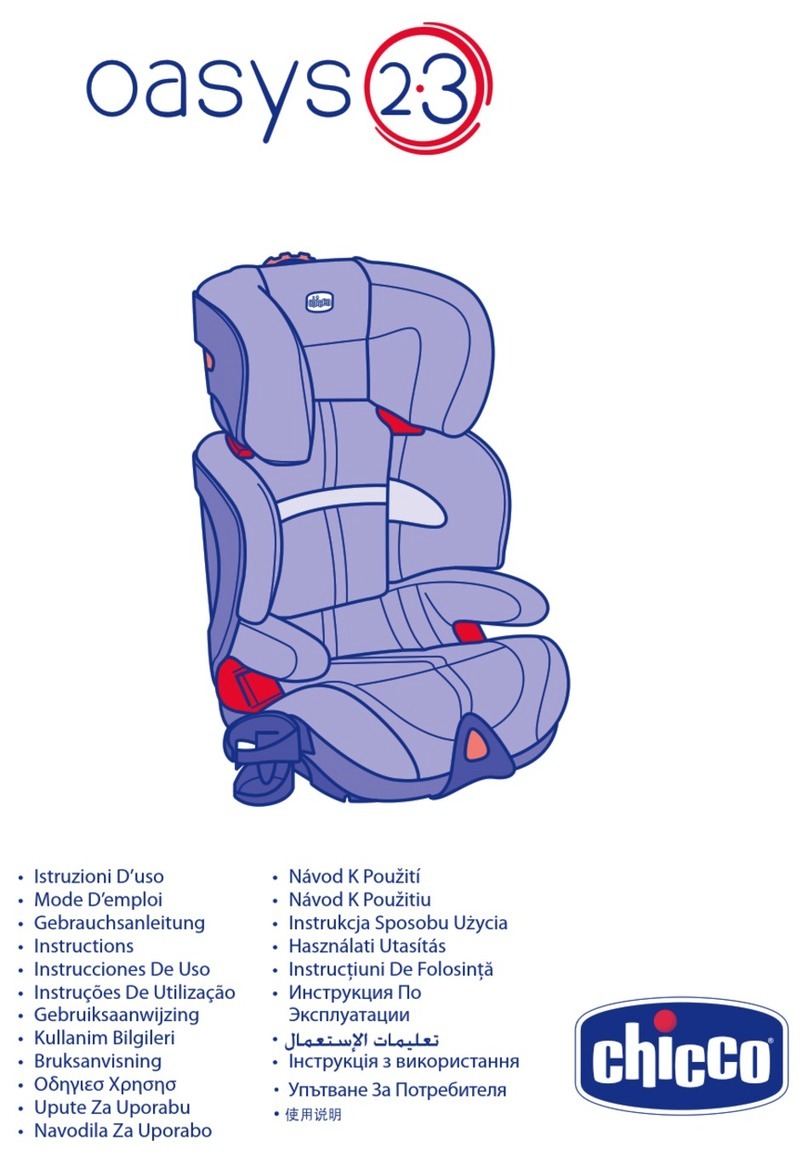
  9. Chicco OASYS 2/3 FixPlus User manual

Chicco OASYS 2/3 FixPlus User manual

composit chicco con trapping sul pallino rosso
logo chicco con trapping sul pallino rosso
logo chicco senza trapping sul pallino rosso
rosso:
pantone 186 C
blu:
pantone 2747 C
适用组别
2/3组
Groups
2/3
适用体重
15-36公斤
Weight
15-36kg
适用年龄
约3-12岁
Age Approx.
3-12 years
安装方向
前向安装
Installation
Forward Facing
通用类 、
半通用类
Universal &
Semi-Universal
执行标准:GB27887-2011
STANDARD: GB27887-2011
2 3
2 3
重要:使用之前,仔细完整阅读本说明手册,避免使
用中出现危险,同时妥善保存本手册,以便未来查
阅。为了不影响儿童安全,请仔细阅读本说明。
Important: please read these instructions carefully before
use and keep them for future reference. for your child’s
safety, read these instructions carefully.
OK
NO! NO!
5
P
Q
R
I
K
L
M
P
A
C
E
J
O H
G
B
DF
N
4
AB
C
NO!
1
3
2
NO! OK! OK!
5
OK
NO! NO!
54
NO! OK!
OK!
OK
5
5a
5b
4
6
8
7
9
76
O
CLICK
10
12
14
11
13
15
6
咔嚓
76
O
CLICK
6
16
18
20
17
19
21
98
2 cm
22
24
26
23
25
27
98
28
30
32
29
31
33
10
34
36a
35
36b
1111
使用说明
OASYS2/3FIXPLUS
使用说明
重要:使用之前,仔细完整阅读本说明手
册,避免使用中出现危险,同时妥善保存
本手册,以便未来查阅。为了不影响儿童
安全,请仔细阅读本说明。
注意!使用之前,取出并清除塑料袋及构
成产品包装的部件,远离儿童可以触及的
地方。建议根据现行法律规定分类回收,
弃用处置这些包装零件。
非常重要!立刻阅读
• 根据中国GB27887-2011标准,本儿童
安全座椅属于”2/3组”, 适合体重介于
15至36kg之间的儿童使用(参考年龄3
至12岁)。
• 在儿童乘车安全方面,每个国家都有不
同的法律法规。因此建议联系当地主管
部门,获得详细信息。
• 安全座椅调整操作只可由成人完成。
• 阅读说明之前不可使用产品。
• 儿童严重受伤风险不仅出现在车祸时,
还出现在其它情况中(比如急刹车等)
,若没有严格遵守本手册中的说明,风
险增加。
• 保存说明手册,以便未来查阅:安全座椅
靠背中备有专用口袋,可盛放使用手册。
• 本产品仅可作为汽车安全座椅使用,不
适合家中使用。
• 对于产品的不当使用和与本说明不符
的用途,Artsana公司拒绝承担任何
责任。
• 任何安全座椅均无法保证车祸时儿童的
安全,但可降低严重受伤风险。
• 儿童乘车时,即使路途短促,也必须使
用正确安装的安全座椅;否则可能影响
儿童安全。特别注意检查皮带是否张
紧,不可卷曲或位置错误。
• 发生车祸之后(即使事故轻微),或意
外坠落之后,安全座椅也可能出现肉眼
无法发现的损伤:因此必须更换。
• 不要使用二手安全座椅:可能存在肉
眼无法发现的结构损伤,影响产品安
全性。
10 1111
使用说明
OASYS2/3FIXPLUS
使用说明
重要:使用之前,仔细完整阅读本说明手
册,避免使用中出现危险,同时妥善保存
本手册,以便未来查阅。为了不影响儿童
安全,请仔细阅读本说明。
注意!使用之前,取出并清除塑料袋及构
成产品包装的部件,远离儿童可以触及的
地方。建议根据现行法律规定分类回收,
弃用处置这些包装零件。
非常重要!立刻阅读
• 根据中国GB27887-2011标准,本儿童
安全座椅属于”2/3组”, 适合体重介于
15至36kg之间的儿童使用(参考年龄3
至12岁)。
• 在儿童乘车安全方面,每个国家都有不
同的法律法规。因此建议联系当地主管
部门,获得详细信息。
• 安全座椅调整操作只可由成人完成。
• 阅读说明之前不可使用产品。
• 儿童严重受伤风险不仅出现在车祸时,
还出现在其它情况中(比如急刹车等)
,若没有严格遵守本手册中的说明,风
险增加。
• 保存说明手册,以便未来查阅:安全座椅
靠背中备有专用口袋,可盛放使用手册。
• 本产品仅可作为汽车安全座椅使用,不
适合家中使用。
• 对于产品的不当使用和与本说明不符
的用途,Artsana公司拒绝承担任何
责任。
• 任何安全座椅均无法保证车祸时儿童的
安全,但可降低严重受伤风险。
• 儿童乘车时,即使路途短促,也必须使
用正确安装的安全座椅;否则可能影响
儿童安全。特别注意检查皮带是否张
紧,不可卷曲或位置错误。
• 发生车祸之后(即使事故轻微),或意
外坠落之后,安全座椅也可能出现肉眼
无法发现的损伤:因此必须更换。
• 不要使用二手安全座椅:可能存在肉
眼无法发现的结构损伤,影响产品安
全性。
• 不要使用损坏、变形、过度磨损、或缺
少部件的安全座椅:可能失去初始安
全规格。
• 未经制造商批准,禁止修改或增补产
品。
• 不要将非制造商提供和批准的配件、备
件或部件装在本安全座椅上。
• 不要使用枕头或杯子等垫片从汽车座椅
上升高安全座椅或从安全座椅上升高儿
童:车祸时安全座椅可能无法正确提
供保护。
• 确认儿童和安全座椅、安全座椅和座椅
或安全座椅和车门之间没有任何物品(
比如文件夹、书包)。
• 确认车辆座椅(折叠式、翻倒式或旋转
式)正确钩接。
• 检查车内后仓是否运输没有固定或没有
安全放置的物品或包裹:出现事故或急
刹车时可能伤害乘客。
• 不要让儿童玩耍安全座椅组件和部件。
• 不要让儿童独自待在汽车中,可能发
生危险!
• 安全座椅上每次只可乘坐一名儿童。
• 确保车内所有乘客均系好安全带,一方
面可以保证自身安全,另一方面在出现
事故或急刹车时可以避免伤害儿童。
• 注意!(头枕和靠背的)调整中,确
保安全座椅活动部件没有与儿童身体
接触。
• 行驶过程中,对安全座椅或儿童进行调
整之前,必须将车辆停放在安全处。
• 定期检查儿童是否打开安全带接扣,并
查看儿童是否玩耍安全座椅或其部件。
• 旅行过程中不要给儿童食物,特别是棒
棒糖、冰棍或其它有棒的食物。车祸或
急刹车可能受伤。
• 长途旅行过程中,建议经常停靠:儿童
在汽车安全座椅内容易疲倦,需要活
动。建议让儿童从人行道侧上下车(有
人陪伴)。
• 不要取下安全座椅衬套上的标签和商
标,该操作可能损坏衬套。
• 不要让安全座椅长时间暴露于日光下:
可能导致材料和面料变色。
• 当车辆停放在日光下时,让儿童坐入安
全座椅时,必须确保没有温度过高的部
件:否则,晾凉后再让儿童入座,避
免灼伤。
1212
重要通知
1. 本产品为儿童安全座椅,符合中国
GB27887-2011标准,有两种不同的装
配类型:
-使用固定连接器FixPlus (P) 和汽车3点式
安全带,该装置为”半通用式”,仅适用
于“车辆列表”中注明的车辆;
-不带固定连接器FixPlus, 使用汽车3点式
安全带,该装置为“通用式”。
2. 仅适用于配有3点式静态或收缩式安全
带的车辆,符合GB14166或UN/ECE 16
标准要求。
3. 若有疑问,请联系产品制造商或经销
商。与产品及汽车座椅相关的使用限制
及要求。
与产品及汽车座椅相关的使用限制及要求
注意!严格遵守与产品及汽车座椅相关的
使用限制 要求:否则无法保障安全。
• 儿童体重应当介于15至36kg。
• 汽车座椅必须配有3点静态式或卷缩式
安全带,符合GB14166或UN/ECE 16标
准要求(图1-图2)。
• 汽车安全带接扣可能过长,相对座椅下
侧的高度过高(图3)。此时安全座椅
不可固定在该座椅上,而应安装在另一
个没有问题的座椅上。详细信息,请联
系汽车制造商。
• 安全座椅可以安装在前排乘客座椅或任
何后排座椅上,必须朝行驶方向放置。
不要将安全座椅放在与汽车行驶方向相
侧向反的座椅上(图4)。
注意!根据事故统计数据,一般来说,汽
车后排座椅比前排座椅更加安全:因此建
议将安全座椅安装在后排座椅上。特别
的,最安全的座椅是配有3点式安全带的
后排中间座椅:此时建议将安全座椅放在
后排中间座椅上。
若安全座椅放在前排座椅上,安全起见,
建议根据后排乘客就坐情况让座椅尽量后
移,并将靠背调整到尽可能垂直的位置
上。若汽车配有安全带高度调节器,必须
将其固定在最低位置上。然后检查安全带
调节器位于汽车座椅靠背处后退位置(或
最大水平位置)上(图5A和5B)
若前排座椅配备前侧气囊,则不建议将
安全座椅安装在该座椅上。若安装在任
何受气囊保护的座椅上,请参见汽车说
明手册。
使用说明
目录
• 通过安全带将安全座椅装入汽车并让
儿童入座
• 在汽车中安装安全座椅和安全带及固定
连接器FixPlus并让儿童入座
• 将安全座椅装入汽车但没有儿童入座
• 如何将儿童从安全座椅中取出
• 从汽车中取出安全座椅
• 安装和取出杯架
• 调整靠背高度
• 调整靠背宽度
• 调整靠背/座椅倾斜度
• 拆取靠背/座椅衬套
• 保养并清洁衬套
组件
A. 头枕
B. 对角式安全带轨道
C. 靠背
D. 扶手
E. 座垫
F. 腹部安全带轨道
G. 杯架
H. 倾斜度调整按钮
I. 安全带轨道开/闭按钮
J. 杯架钩接
K. 靠背宽度调整轮
L. 靠背高度调整杆
M. 用于放置说明手册的后兜
N. 侧翼
O. 固定连接器FixPlus手柄
P. 固定连接器
Q. 指示器
R. 固定连接器脱钩系统按钮
通过安全带将安全座椅装入汽车并让儿
童入座
注意!本说明文本及配图以在后排右侧座
椅上安装安全座椅为例。
在其它位置上安装时,必须执行相同的
操作顺序。
1.将安全座椅放在座椅上,靠背支在座
椅上
注意!确认座椅头枕不干扰安全座椅头
枕:不可向前推头枕(图6)。此时应当
从装有安全座椅的汽车座椅上取下头枕。
取下安全座椅并由乘客使用座椅时,记得
将头枕装回座椅。
13
注意!安全座椅后侧必须贴近汽车座椅。
2.儿童就坐时,后背紧贴安全座椅靠背。
3.检查靠背高度(参见“调整靠背高度”
段落)。
4.检查靠背宽度(参见“调整靠背宽度”
段落)。
5.将汽车安全带对角部分插入对角安全带轨
道(B)。确认安全带轨道开/闭按钮完全
关闭,确认可以看到白色参照线(图7)。
6.钩接汽车安全带,让腹部安全带穿过扶
手下方的红色腹部安全带轨道(F),对
角安全带穿过接扣侧扶手下方(图8)
7.向上拉汽车安全带对角带,让整条安全
带张紧,尽量贴近儿童躯干和双腿,但不
要过紧!(图9)
注意!确认汽车安全带正确张紧。
注意!确认汽车安全带没有扭曲
(图10)。
注意!确认对角带正确靠在儿童肩膀上
(图9),且没有压在颈部;如有必要,
调整靠背高度(参见“调整靠背宽度”
段落)。
注意!然后确认汽车安全带调节器位于汽
车座椅靠背处后退位置(或最大水平位
置)上(图5)。
注意!不要让安全带从本说明书所示之外
的其它位置上穿过!(图11)
注意!检查儿童是否正确坐在安全座椅
上,确保不要向前滑动
确认没有使用的硬质连接器均位于相应
的后格中。
在汽车中安装安全座椅和安全带及固定连
接器FixPlus并让儿童入座
注意!采用FixPlus连接器安装座椅之前,
必须确认座椅处于竖直不倾斜状态。
注意!本说明文本及配图以在后排右侧座
椅上安装安全座椅为例。在其它位置上安
装时,必须执行相同的操作顺序。
重要!必须使用汽车安全带安装安全座
椅。固定连接器FixPlus是额外装置,与安
全带同时使用,改善安全座椅稳定性。
1.将安全座椅放在座椅上,靠背支在汽车
座椅上(图12)
注意!确认座椅头枕不干扰安全座椅头
枕:不可向前推头枕(图6)。此时取下
汽车座椅头枕。取下安全座椅并由乘客使
用汽车座椅时,记得将头枕装回座椅。
2.向上拉倾斜调整按钮(H)下方的拉杆
1212
使用说明
目录
• 通过安全带将安全座椅装入汽车并让
儿童入座
• 在汽车中安装安全座椅和安全带及固定
连接器FixPlus并让儿童入座
• 将安全座椅装入汽车但没有儿童入座
• 如何将儿童从安全座椅中取出
• 从汽车中取出安全座椅
• 安装和取出杯架
• 调整靠背高度
• 调整靠背宽度
• 调整靠背/座椅倾斜度
• 拆取靠背/座椅衬套
• 保养并清洁衬套
组件
A. 头枕
B. 对角式安全带轨道
C. 靠背
D. 扶手
E. 座垫
F. 腹部安全带轨道
G. 杯架
H. 倾斜度调整按钮
I. 安全带轨道开/闭按钮
J. 杯架钩接
K. 靠背宽度调整轮
L. 靠背高度调整杆
M. 用于放置说明手册的后兜
N. 侧翼
O. 固定连接器FixPlus手柄
P. 固定连接器
Q. 指示器
R. 固定连接器脱钩系统按钮
通过安全带将安全座椅装入汽车并让儿
童入座
注意!本说明文本及配图以在后排右侧座
椅上安装安全座椅为例。
在其它位置上安装时,必须执行相同的
操作顺序。
1.将安全座椅放在座椅上,靠背支在座
椅上
注意!确认座椅头枕不干扰安全座椅头
枕:不可向前推头枕(图6)。此时应当
从装有安全座椅的汽车座椅上取下头枕。
取下安全座椅并由乘客使用座椅时,记得
将头枕装回座椅。
13
注意!安全座椅后侧必须贴近汽车座椅。
2.儿童就坐时,后背紧贴安全座椅靠背。
3.检查靠背高度(参见“调整靠背高度”
段落)。
4.检查靠背宽度(参见“调整靠背宽度”
段落)。
5.将汽车安全带对角部分插入对角安全带轨
道(B)。确认安全带轨道开/闭按钮完全
关闭,确认可以看到白色参照线(图7)。
6.钩接汽车安全带,让腹部安全带穿过扶
手下方的红色腹部安全带轨道(F),对
角安全带穿过接扣侧扶手下方(图8)
7.向上拉汽车安全带对角带,让整条安全
带张紧,尽量贴近儿童躯干和双腿,但不
要过紧!(图9)
注意!确认汽车安全带正确张紧。
注意!确认汽车安全带没有扭曲
(图10)。
注意!确认对角带正确靠在儿童肩膀上
(图9),且没有压在颈部;如有必要,
调整靠背高度(参见“调整靠背宽度”
段落)。
注意!然后确认汽车安全带调节器位于汽
车座椅靠背处后退位置(或最大水平位
置)上(图5)。
注意!不要让安全带从本说明书所示之外
的其它位置上穿过!(图11)
注意!检查儿童是否正确坐在安全座椅
上,确保不要向前滑动
确认没有使用的硬质连接器均位于相应
的后格中。
在汽车中安装安全座椅和安全带及固定连
接器FixPlus并让儿童入座
注意!采用FixPlus连接器安装座椅之前,
必须确认座椅处于竖直不倾斜状态。
注意!本说明文本及配图以在后排右侧座
椅上安装安全座椅为例。在其它位置上安
装时,必须执行相同的操作顺序。
重要!必须使用汽车安全带安装安全座
椅。固定连接器FixPlus是额外装置,与安
全带同时使用,改善安全座椅稳定性。
1.将安全座椅放在座椅上,靠背支在汽车
座椅上(图12)
注意!确认座椅头枕不干扰安全座椅头
枕:不可向前推头枕(图6)。此时取下
汽车座椅头枕。取下安全座椅并由乘客使
用汽车座椅时,记得将头枕装回座椅。
2.向上拉倾斜调整按钮(H)下方的拉杆
(O)。(图13)
3.拉住拉杆,从靠背后侧完全取出固定连
接器(P)(图14)。
4.将两个固定连接器(P)钩接在汽车座
椅上靠背和座垫之间的ISOFIX接头上。
注意!确保正确钩接,确认两个指示器
(Q)指在绿色位置(图16)。
5.朝汽车靠背方向用力推安全座椅(图17
),按下手柄(O),确保安全座椅靠背
紧密贴合汽车座椅。
6.让儿童入座,后背紧贴安全座椅靠背,
根据上一章第3-4-5-6-7条操作使用安全带
正确安装(通过安全带将安全座椅装入汽
车并让儿童入座),注意各项必要措施。
固定连接器FixPlus用于改善安全座椅的舒
适度和稳定性。若在车中使用时出现问
题,可以使用Oasys FixPlus安全座椅而不
使用选配件。
将安全座椅装入汽车但没有儿童入座
如果没有儿童乘坐,安全座椅必须用三点
式汽车安全带绑在座椅上,或者放在后备
箱。车祸或急刹车时,没有固定的安全座
椅可能会对乘客造成危险。
若汽车配有Iso󺻠x接头,固定安全座椅时
仅可使用FixPlus连接器,执行“使用安全
带和固定连接器FIXPLUS将安全座椅装入
汽车”章节第1-4-5条操作。
仅用汽车安全带固定安全座椅时,执行“
使用安全带将安全座椅装入汽车”章节第
1-5-6-7条操作。
如何将儿童从安全座椅中取出
只需解开汽车安全带接扣,安全带缩回时
用手扶好。
从汽车中取出安全座椅
注意!拆卸安全座椅之前,先让儿童下车。
1.解开汽车安全带。
2.从轨道上取出安全带对角部分,缩回时
用手扶好。
若同时使用固定连接器固定安全座椅,必
须从专门的钩子上将其取下:
1. 将固定连接器脱钩系统上的两个红色按
钮(R)拉向自己,从汽车座椅上相应的
Iso󺻠x接头上取下连接器(图18),指示
器完全变红。
2. 将固定连接器推向安全座椅底部,使其
完全回到底座内部(图19),保持拉杆拉
出(O)。
14
安装和取出杯架
安全座椅配有2个插扣,一个在座椅右
侧,一个在座椅左侧,可根据喜好安装
杯架。
安装杯架时:
1. 将杯架插入专门的插扣(图20)
2. 向下推杯架,直到锁定(图21)
注意!不要将玻璃容器或热水放在杯架
上,否则可能伤到儿童。
取下时:
1. 按下杯架后侧的手柄,松开杯架,从专
用插扣上将其取下(图22)
杯架插扣配备专用装置,总是能够保持
水平位置。
将杯架调整至所需位置:
1. 按下后侧手柄,旋转杯架,直至所需
位置。
调整靠背高度
靠背高度有9个调整位置,以让安全座椅
更好的适应儿童高度。
确保儿童头部保护良好,汽车对角安全带
正确靠在肩部。
靠背高度调整时,检查对角安全带轨道
(B)放在肩上,距离至少2cm(图23)
调整时:
1.用手按下头枕后侧的靠背高度调整手柄
(L)(图24)
2.升高/降低靠背,适应儿童肩高(图25)
3.松开手柄,确认接入所需位置。
调整靠背宽度
可以调整靠背宽度,让安全座椅更好的适
应儿童身高。
调整时,操作头枕上的靠背宽度调整旋
钮(K):
1.逆时针旋转靠背放宽(图26),顺时针
旋转收紧(图27)。
调整靠背/座垫倾斜度
可以通过倾斜度调整按钮(H)倾斜安
全座椅。
汽车安全座椅的靠背/座垫倾斜度分为4
级,儿童可以在最舒适的位置上旅行。
倾斜靠背时,只需通过前开口抓紧座垫
(图28),拉向自己。
将安全座椅重新放在竖直位置上,按下
倾斜度调整按钮(H),向后推汽车座
椅靠背。
注意!使用过程中不要倾斜安全座椅。
执行调整操作之前,必须让儿童离开安
全座椅。
倾斜或拉直Oasys安全座椅之后,必须检
查三点式汽车安全带是否正确张紧,距离
儿童肩部最多2cm(图23)。
必须在停车时执行该操作。
拆取靠背/座椅衬套
汽车安全座椅面料可以取下洗涤。面料通
过粘扣和松紧带固定在座椅结构上。
完全升高靠背(C)并张开侧翼(N)
(图29)。
靠背
从侧翼后侧开始,通过粘扣分开面料(图
30)并将其取下。
自下而上将中间部分从靠背上分开,完全
取下头枕部分,注意靠背后侧的松紧带。
(图31)
座垫
1.分开坐椅后侧的粘扣(图32)
2.拉扯面料,张紧松紧带,从两侧着手
(图33)将其从腹部安全带轨道(F)
上取下
3.抓紧两条松紧带,从两侧着手(图34)
从腹部安全带轨道(F)上取下面料
4.中央保护罩通过两个齿固定在靠背上,
向上拉中央保护罩,将两个齿从相应的底
座上取下(图35)
5.取下扶手面料
6.摘取时,向上拉锚定在倾斜调整按钮附
近的塑料三角箍(H)(图36A和36B)
将衬套罩在结构上:
完全升高靠背并张开侧翼。
座垫
首先套上座垫衬套,从第6点向第1点反
向操作,特别注意让面料完美帖服在结
构上,特别是两个腹部安全带轨带(F)
处,让两条松紧带从下方穿过。
靠背
从头枕侧开始,将安全带和面料小心插入
后侧盖板中。然后完全套上面料,反向操
作完成步骤1和2。
保养并清洁衬套
清洁和保养操作仅可由成人执行。
清洁衬套
15
安全座椅衬套可完全取下洗涤。清洗时按
照衬套标签上的说明操作:
30°C机洗
30° C
不可漂白
不可烘干
不可熨烫
不可干洗
不要使用刮擦性的清洁剂或溶剂。
不要甩干衬套,不要拧干。
仅可使用制造商批准的替换件更换衬套,
衬套是安全座椅的有机组成部分,因此
影响安全。
注意!不可取下衬套使用安全座椅,否则
可能影响儿童安全。
清洁塑料部件
只可用沾有水或中性清洁剂的抹布清洁
塑料部件。
不要使用刮擦性的清洁剂或溶剂。不可润
滑安全座椅任何活动部件。
检查组件完整性
建议定期检查下列部件的完整性和磨损
状态:
• 衬套:检查垫材是否漏出或破损。确认
缝线是否完好。
• 塑料:检查各塑料部件磨损状态,确认
是否存在明显的损坏或掉色痕迹。
注意!若儿童座椅损坏、变形或严重磨
损,则必须更换,否则可能失去原有安
全属性。
保存产品
没有安装在车内时,最好将儿童座椅放在
干燥、远离热源、没有灰尘、潮湿、日光
直射的地方。
产品弃用处置
到达儿童座椅使用期限之后,终止使用该
产品并作垃圾处置。环保起见,根据所在
国现行法律规定分离不同类型的垃圾。
14
注意!使用过程中不要倾斜安全座椅。
执行调整操作之前,必须让儿童离开安
全座椅。
倾斜或拉直Oasys安全座椅之后,必须检
查三点式汽车安全带是否正确张紧,距离
儿童肩部最多2cm(图23)。
必须在停车时执行该操作。
拆取靠背/座椅衬套
汽车安全座椅面料可以取下洗涤。面料通
过粘扣和松紧带固定在座椅结构上。
完全升高靠背(C)并张开侧翼(N)
(图29)。
靠背
从侧翼后侧开始,通过粘扣分开面料(图
30)并将其取下。
自下而上将中间部分从靠背上分开,完全
取下头枕部分,注意靠背后侧的松紧带。
(图31)
座垫
1.分开坐椅后侧的粘扣(图32)
2.拉扯面料,张紧松紧带,从两侧着手
(图33)将其从腹部安全带轨道(F)
上取下
3.抓紧两条松紧带,从两侧着手(图34)
从腹部安全带轨道(F)上取下面料
4.中央保护罩通过两个齿固定在靠背上,
向上拉中央保护罩,将两个齿从相应的底
座上取下(图35)
5.取下扶手面料
6.摘取时,向上拉锚定在倾斜调整按钮附
近的塑料三角箍(H)(图36A和36B)
将衬套罩在结构上:
完全升高靠背并张开侧翼。
座垫
首先套上座垫衬套,从第6点向第1点反
向操作,特别注意让面料完美帖服在结
构上,特别是两个腹部安全带轨带(F)
处,让两条松紧带从下方穿过。
靠背
从头枕侧开始,将安全带和面料小心插入
后侧盖板中。然后完全套上面料,反向操
作完成步骤1和2。
保养并清洁衬套
清洁和保养操作仅可由成人执行。
清洁衬套
15
安全座椅衬套可完全取下洗涤。清洗时按
照衬套标签上的说明操作:
30°C机洗
30° C
不可漂白
不可烘干
不可熨烫
不可干洗
不要使用刮擦性的清洁剂或溶剂。
不要甩干衬套,不要拧干。
仅可使用制造商批准的替换件更换衬套,
衬套是安全座椅的有机组成部分,因此
影响安全。
注意!不可取下衬套使用安全座椅,否则
可能影响儿童安全。
清洁塑料部件
只可用沾有水或中性清洁剂的抹布清洁
塑料部件。
不要使用刮擦性的清洁剂或溶剂。不可润
滑安全座椅任何活动部件。
检查组件完整性
建议定期检查下列部件的完整性和磨损
状态:
• 衬套:检查垫材是否漏出或破损。确认
缝线是否完好。
• 塑料:检查各塑料部件磨损状态,确认
是否存在明显的损坏或掉色痕迹。
注意!若儿童座椅损坏、变形或严重磨
损,则必须更换,否则可能失去原有安
全属性。
保存产品
没有安装在车内时,最好将儿童座椅放在
干燥、远离热源、没有灰尘、潮湿、日光
直射的地方。
产品弃用处置
到达儿童座椅使用期限之后,终止使用该
产品并作垃圾处置。环保起见,根据所在
国现行法律规定分离不同类型的垃圾。
保修
在按照使用说明书正常操作的情况下所产
生的任何缺陷均在保修范围内。
因此,保修不适用于因不当操作、磨损或
意外事故造成的损坏。
关于符合规定的缺陷的保修期,请参见
产品购买国施行的相关国家法律的具体
条款。
GB
标准代号:GB27887-2011
符合中国人民共和国
《机动车儿童乘员约束系统》标准
16
Instructions for use
OASYS 2/3 FIXPLUS
IMPORTANT: PLEASE READ THESE
INSTRUCTIONS CAREFULLY BEFORE USE
AND KEEP THEM FOR FUTURE REFERENCE.
READ THESE INSTRUCTIONS CAREFULLY
TO GUARANTEE YOUR CHILD’S SAFETY
AT ALL TIMES. WARNING! BEFORE USE,
REMOVE AND DISPOSE OF ALL PLASTIC
BAGS AND PACKAGING MATERIALS AND
KEEP THEM OUT OF REACH OF CHILDREN.
IT IS RECOMMENDED TO DISPOSE OF
THESE ITEMS AT AN APPROPRIATE
DIFFERENTIATED COLLECTION POINT, AS
REQUIRED BY THE REGULATIONS IN FORCE.
VERY IMPORTANT!
TO BE READ IMMEDIATELY
• This child car seat is “Group 2/3” certified,
to carry children from 15 to 36kg of weight
(from 3 to approximately 12 years of age),
and conforms to China GB27887-2011
Standard.
• Each country imposes different road
safety laws and regulations when
transporting children in vehicles. This is
why it is highly recommended to contact
your local authorities to receive further
information.
• The child car seat adjustment operations
must only be carried out by an adult. The
product must not be used by anybody
who has not read these instructions.
The risk of serious injuries to the child
increases, not only in the case of accidents,
but also in other circumstances (i.e.:
sudden braking etc.), if these instructions
are not followed carefully.
• Please keep the instruction booklet for
future reference. There is a special pocket
behind the child car seat backrest to store
its user manual.
• This product is expressly intended to be
used only as a child car seat; it should not
be used indoors.
• Artsana declines all responsibility for any
inappropriate use of the product and for
any use not in compliance with these
instructions.
• No child car seat can guarantee the
total safety of your child in the event of
an accident, but the use of this product
reduces the risk of serious injuries should
the same occur.
• Always place your child in the properly
installed car seat, even when travelling
short distances; failure to do so may put
his safety at risk. In particular, check that
the harness belt is tightened correctly, is
not twisted and is in the correct position.
• After an accident, even a minor one, or
an accidental fall, the child seat may incur
damage, even if it is not visible to the
naked eye: it must therefore be replaced.
• Do not use second hand child car
seats: they may have suffered structural
damage, which is not visible to the naked
eye, but enough to seriously compromise
the safety of the product.
• Never use a child car seat that is damaged,
deformed, excessively worn or one
with any missing parts. It may no longer
comply with the original safety standards.
• This product must not be modified in any
way, unless such modification is approved
by the manufacturer.
• Do not fit any accessories, spare parts or
components on the stroller which have
not been supplied and approved by the
manufacturer.
• Do not use spacers, for example pillows,
blankets, etc., to distance the child car
seat from the car seat or to distance the
child from the child car seat: in the event
of an accident, the child car seat may not
operate correctly.
• Check that there are no objects between
the child and the child car seat (e.g.
satchel, rucksack) between the child car
seat and the vehicle seat or between the
17
child car seat and the door of the vehicle.
• Check that vehicle seats (folding,
adjustable or rotating versions) are
secured correctly.
• Do not transport loose or unsecured objects
or baggage on the back shelf of the vehicle:
in the event, of an accident or sudden
braking, they may injure the passengers.
• Do not let children play with the
components or parts of the child car seat.
• Never leave your child unattended in the
car, it can be dangerous!
• Do not carry more than one child at a time
in the child car seat.
• Ensure that all the car passengers fasten
their seat belt, for their own safety and
because, during the journey, they may
injure the child in the event of an accident
or sudden braking of the car.
• WARNING! Ensure that during the
adjustment operations (of the headrest
and backrest) the movable parts of the
child car seat do not come into contact
with your child.
• When travelling, stop the vehicle in a safe
place before carrying out any adjustment
operations on the child car seat or the child.
• Check periodically that your child does
not unfasten the buckle of the safety
harness, or that it does not tamper with
the child car seat or any of its parts.
• Avoid giving food to your child while
travelling, in particular lollypops, ice lollies
or other foods on sticks. it may injure
your child in the event of an accident or
sudden braking.
• On long journeys, it is recommended
to make frequent stops: children tire
very easily in child car seats and need to
stretch their legs. It is recommended to
accompany your child in and out of the
car from the pavement side, not the traffic
road side.
• Do note remove the labels and trademarks
from the child car seat lining; this could
damage the lining itself.
16
be used indoors.
• Artsana declines all responsibility for any
inappropriate use of the product and for
any use not in compliance with these
instructions.
• No child car seat can guarantee the
total safety of your child in the event of
an accident, but the use of this product
reduces the risk of serious injuries should
the same occur.
• Always place your child in the properly
installed car seat, even when travelling
short distances; failure to do so may put
his safety at risk. In particular, check that
the harness belt is tightened correctly, is
not twisted and is in the correct position.
• After an accident, even a minor one, or
an accidental fall, the child seat may incur
damage, even if it is not visible to the
naked eye: it must therefore be replaced.
• Do not use second hand child car
seats: they may have suffered structural
damage, which is not visible to the naked
eye, but enough to seriously compromise
the safety of the product.
• Never use a child car seat that is damaged,
deformed, excessively worn or one
with any missing parts. It may no longer
comply with the original safety standards.
• This product must not be modified in any
way, unless such modification is approved
by the manufacturer.
• Do not fit any accessories, spare parts or
components on the stroller which have
not been supplied and approved by the
manufacturer.
• Do not use spacers, for example pillows,
blankets, etc., to distance the child car
seat from the car seat or to distance the
child from the child car seat: in the event
of an accident, the child car seat may not
operate correctly.
• Check that there are no objects between
the child and the child car seat (e.g.
satchel, rucksack) between the child car
seat and the vehicle seat or between the
17
child car seat and the door of the vehicle.
• Check that vehicle seats (folding,
adjustable or rotating versions) are
secured correctly.
• Do not transport loose or unsecured objects
or baggage on the back shelf of the vehicle:
in the event, of an accident or sudden
braking, they may injure the passengers.
• Do not let children play with the
components or parts of the child car seat.
• Never leave your child unattended in the
car, it can be dangerous!
• Do not carry more than one child at a time
in the child car seat.
• Ensure that all the car passengers fasten
their seat belt, for their own safety and
because, during the journey, they may
injure the child in the event of an accident
or sudden braking of the car.
• WARNING! Ensure that during the
adjustment operations (of the headrest
and backrest) the movable parts of the
child car seat do not come into contact
with your child.
• When travelling, stop the vehicle in a safe
place before carrying out any adjustment
operations on the child car seat or the child.
• Check periodically that your child does
not unfasten the buckle of the safety
harness, or that it does not tamper with
the child car seat or any of its parts.
• Avoid giving food to your child while
travelling, in particular lollypops, ice lollies
or other foods on sticks. it may injure
your child in the event of an accident or
sudden braking.
• On long journeys, it is recommended
to make frequent stops: children tire
very easily in child car seats and need to
stretch their legs. It is recommended to
accompany your child in and out of the
car from the pavement side, not the traffic
road side.
• Do note remove the labels and trademarks
from the child car seat lining; this could
damage the lining itself.
• Do not leave the highchair under the sun
for a long time: prolonged exposure to
direct sunlight may cause the fabric cover
to fade.
• If the vehicle has been left in the sun,
check that the different parts of the
child car seat are not too hot: in such an
event, let the child car seat cool down first
before placing the child into it, in order to
avoid burns.
IMPORTANT INFORMATION
1. This is a child restraint system approved
to China GB27887-2011 standard,
For two different types of installation:
- using the rigid FixPlus (P) clasps, with
the 3-point car seat belts, the device is
classified
As a “Semi-Universal” device which
is compatible for use on the vehicles
indicated in the relative “List of approved
vehicles”.
- using the child car seat without the rigid
Fix-Plus clasps, with the 3-point car seat
belts,the device is classified as a “Universal”
device.
3. Only suitable if the vehicle is fitted with
a 3-point static or 3-point retractor safety
harness approved to GB14166 or UN/ECE
16 standards.
RESTRICTIONS AND REQUISITES
REGARDING THE USE OF THE
PRODUCT AND CAR SEAT
WARNING! Read these restrictions and
requisites carefully to ensure the product
and car seat are used safely: if you don’t,
the safety levels can not be guaranteed.
• The child car seat is suitable for children
from 15 up to 36 Kg in weight. The car
seat must be fitted with a 3-point static or
3-point retractor safety belts approved to
GB14166 or UN/ECE 16 Standards (Diag.1-
Diag.2)
• You may find that the safety belt buckle is
too long and exceeds the foreseen height
18
in relation to the lower section of the child
car seat (Diag. 3). In this case the child car
seat must not be installed on that specific
seat, and you should try installing it on a
seat that does not have this inconvenience.
Please contact the car manufacturer for
further information on this aspect.
• The child car seat can be fitted into the
front passenger seat or any other back
seats, always in a forward facing direction.
Never use this child car seat on vehicle
seats which are facing sideways or
rearwards (diag. 4)
WARNING! According to car accident
statistics, the rear seats of a vehicle are
generally safer than the front seat: it is
therefore recommended to fit the child
car seat into the rear seats of the car. In
particular, the central rear seat is the safest,
when fitted with a 3-point safety strap: in
this case it is recommended to fit the child
car seat onto the central rear seat of the
vehicle.
If the child car seat is fitted in the front seat
of the car, in order to ensure maximum
safety, it is recommended to push the seat
back as much as possible, bearing in mind
the comfort of the passenger sitting in the
seat directly behind it and adjusting the
backrest to the most vertical position. If the
vehicle is fitted with an adjuster to regulate
the height of the safety belt, position it as
low as possible. Check that the safety belt
adjuster is behind (or at the most aligned)
with the backrest of the vehicle seat (Diag.
5A and 5B).
It is not recommended to fit the child car
seat into a front seat equipped with airbag.
If you wish to fit the child car seat in any
seat protected by airbag, always refer to
the vehicle instructions manual. Make sure
that the buckle seat belt is not too high
and not rests on the armrest of the car seat
(Diag 3). Otherwise, try to install the car
seat for your child on another car seat in
the car.
INSTRUCTIONS FOR USE
Contents
• Fitting the child car seat inside the vehicle
using safety belts and placing the child
inside
• Fitting the child car seat inside the vehicle
using safety belts and rigid FixPlus clasps
and placing the child inside
• Installing the child seat inside the vehicle
without the child inside
• How to remove the child from the child
car seat
• Removal of the child car seat from the
vehicle
• Installing and removing the cup holder
• Adjusting the height of the back rest
• Adjusting the width of the back rest
• Adjusting the inclination of the child car
seat backrest/seat
• Removable backrest/seat covers
• Cleaning and maintenance of the seat
covers
Parts
A. Headrest
B. Diagonal belt guide
C. Backrest
D. Armrests
E. Seat
F. Lap belt guide
G. Cup holder
H. Reclining adjuster button
I. Safety belt guide open/close button
J. Cup holder clip
K. Backrest width adjuster wheel
L. Backrest height adjuster lever
M. Rear pocket for instruction booklet
N. Side wings
O. Rigid FixPlus clasp lever
P. Rigid clasps
Q. Indicators
R. Rigid clasp release system buttons
Fitting the child car seat inside the
vehicle using safety belts and placing
the child inside
WARNING! These instructions and
diagrams are for the installation of the child
car seat on the right back seat.
To fit the child car seat in other positions,
carry out these operations in the same
order.
1. Place the child car seat onto the vehicle
seat with the backrest up against the
vehicle seat
backrest
WARNING! Check that the vehicle headrest
does not interfere with the child seat
headrest: it must not push it forwards (Diag.
6). If this happens, remove the headrest
from the vehicle seat where you intend
to install the child car seat. Remember to
replace the vehicle headrest when the
child car seat is removed and a passenger
uses the seat.
WARNING! The rear side of the child car
seat must be resting against the vehicle
seat.
2. Place your child inside the car seat
with his back correctly placed against the
backrest.
3. Check the backrest height (see
paragraph “ADJUSTING THE HEIGHT OF
THE BACKREST”)
4. Check the backrest width (see
paragraph “ADJUSTING THE WIDTH OF THE
BACKREST”)
5. Thread the diagonal car seat belt
through the diagonal belt guide (B). Check
that the belt guide (l) open/close button is
firmly closed; you must be able to see the
white reference line (Diag. 7).
6. Connect the car safety belt by threading
the lap belt trough the red lap belt guides
(F) under the two armrests in line, and by
threading the diagonal belt under the
armrest on the side of the fastener buckle
(Diag. 8).
7. Pull the diagonal car safety belt upwards,
19
18
INSTRUCTIONS FOR USE
Contents
• Fitting the child car seat inside the vehicle
using safety belts and placing the child
inside
• Fitting the child car seat inside the vehicle
using safety belts and rigid FixPlus clasps
and placing the child inside
• Installing the child seat inside the vehicle
without the child inside
• How to remove the child from the child
car seat
• Removal of the child car seat from the
vehicle
• Installing and removing the cup holder
• Adjusting the height of the back rest
• Adjusting the width of the back rest
• Adjusting the inclination of the child car
seat backrest/seat
• Removable backrest/seat covers
• Cleaning and maintenance of the seat
covers
Parts
A. Headrest
B. Diagonal belt guide
C. Backrest
D. Armrests
E. Seat
F. Lap belt guide
G. Cup holder
H. Reclining adjuster button
I. Safety belt guide open/close button
J. Cup holder clip
K. Backrest width adjuster wheel
L. Backrest height adjuster lever
M. Rear pocket for instruction booklet
N. Side wings
O. Rigid FixPlus clasp lever
P. Rigid clasps
Q. Indicators
R. Rigid clasp release system buttons
Fitting the child car seat inside the
vehicle using safety belts and placing
the child inside
WARNING! These instructions and
diagrams are for the installation of the child
car seat on the right back seat.
To fit the child car seat in other positions,
carry out these operations in the same
order.
1. Place the child car seat onto the vehicle
seat with the backrest up against the
vehicle seat
backrest
WARNING! Check that the vehicle headrest
does not interfere with the child seat
headrest: it must not push it forwards (Diag.
6). If this happens, remove the headrest
from the vehicle seat where you intend
to install the child car seat. Remember to
replace the vehicle headrest when the
child car seat is removed and a passenger
uses the seat.
WARNING! The rear side of the child car
seat must be resting against the vehicle
seat.
2. Place your child inside the car seat
with his back correctly placed against the
backrest.
3. Check the backrest height (see
paragraph “ADJUSTING THE HEIGHT OF
THE BACKREST”)
4. Check the backrest width (see
paragraph “ADJUSTING THE WIDTH OF THE
BACKREST”)
5. Thread the diagonal car seat belt
through the diagonal belt guide (B). Check
that the belt guide (l) open/close button is
firmly closed; you must be able to see the
white reference line (Diag. 7).
6. Connect the car safety belt by threading
the lap belt trough the red lap belt guides
(F) under the two armrests in line, and by
threading the diagonal belt under the
armrest on the side of the fastener buckle
(Diag. 8).
7. Pull the diagonal car safety belt upwards,
to ensure the belt is taut and fitting
properly over the child’s legs and chest;
don’t tighten it too much!. (Diag. 9)
WARNING! Check that the car safety belt is
tight enough.
WARNING! Check that the car safety belt is
not twisted (Diag. 10).
WARNING! Check that the diagonal
safety belt fits correctly across the child’s
shoulder (Diag.
9) and does not press on the neck; adjust
the backrest accordingly (see paragraph
“ADJUSTING THE HEIGHT OF THE
BACKREST”).
WARNING! Check that the car safety belt
adjuster is behind the backrest of the car
seat (or at least aligned to it) (Diag. 5).
WARNING! Do not fit the car safety belt in
any way other than that indicated in these
instructions! (Diag. 11)
WARNING! Check that the child is strapped
into the child car seat correctly so that he
cannot slide forwards.
Check that any unused rigid clasps are
hidden away in the compartment at the
back.
Fitting the child car seat inside the
vehicle using safety belts and rigid
FixPlus clasps and placing the child
inside
WARNING! Before installing the child
car seat using the FixPlus clasps, check
the child car seat is in a vertical and not
reclined position.
WARNING! These instructions and
diagrams are for the installation of the child
car seat on the right back seat. To fit the
child car seat in other positions, carry out
these operations in the same order.
IMPORTANT! The child car seat MUST
ALWAYS be installed using the car safety
belts. The rigid Fix- Plus clasps are an
additional device to the use of car safety
belts and aim to provide greater stability
for the child car seat.
19
20
1. Place the child car seat onto the vehicle
seat with the backrest up against the
vehicle seat
backrest (diag. 12)
WARNING! Check that the vehicle headrest
does not interfere with the child seat
headrest: it must not push it forwards
(Diag. 6). If this happens, remove the car
seat headrest. Remember to replace the
vehicle headrest when the child car seat
is removed and a passenger uses the seat.
2. Pull the lever (O), located under the
inclination adjuster button (H), upwards.
(Diag. 13)
3. While keeping the lever pulled, pull out
the rigid clasps (P) completely from the
rear of the backrest (diag. 14).
4. Insert the two rigid clasps (P) into the
corresponding ISOFIX anchorage points on
the car seat, located between the backrest
and the seat (diag. 15).
WARNING! Check that the two indicators
(Q) are green which means the system has
been installed correctly (diag.16).
5. Push the child car seat firmly against
the backrest of the car seat (Diag. 17),
pushing the lever (O) to ensure maximum
adherence of the child car seat backrest
against the car seat.
6. Sit the child inside with his back against
the child car seat backrest and follow the
instructions 3-4-5-6-7 provided in the
previous chapter to install the car safety
belts, (Fitting the child car seat inside the
vehicle using safety belts and rigid FixPlus
clasps and placing the child inside) paying
attention to every single detail.
The rigid FixPlus clasps are designed to
improve the levels of comfort and stability
of the child car seat. It is possible to use
the Oasys FixPlus child car seat without
these optionals, if you encounter problems
installing them in your car.
Installing the child seat inside the
vehicle without the child inside
When the child is not travelling in the car,
the child car seat should be left secured
by the vehicle three-point safety belt, or
stowed away in the car boot. An unsecured
child car seat may be a source of danger
for the other passengers in the event of an
accident or sudden braking.
How to remove the child from the child
car seat
Release the car belt buckle, accompanying
the belt as it retracts.
Removal of the child car seat
WARNING! Remove the child from the
child car seat before removing it.
1. Release the car safety belt.
2. Unthread the diagonal strap through the
guide, accompanying it as it retracts.
If the rigid clasps have been used to fasten
the car seat in place, they must now be
released from the anchor points:
1. Pull the two red buttons on the rigid
clasp release system towards you, release
the clasps from the corresponding Isofix
anchor points on the car seat (Diag. 18) so
that the indicator is completely red.
2. Hold the lever up (O) as you push the
rigid clasps all the way into the base of the
child car
seat, (Diag. 19).
Installing and removing the cup
holder
The child car seat has 2 inserts, one on
the right and one on the left of the side of
the seat where you can fit the cup holder
whenever you like.
To install the cup holder:
1. Insert the cup holder into the relative
guide (Diag. 20)
2. Press the cup holder downwards until it
clicks into place (Diag. 21).
WARNING! Do not place glass containers or
21
hot liquids on the cup holder as they could
harm the child.
To remove it:
1. Press the lever on the back of the cup
holder and lift it upwards, out of the guide
(Diag. 22)
The cup holder guides are fitted with a
special device that makes sure it always
remains in a horizontal position.
To rotate and position the cup holder:
1. Press the lever on the back and rotate it
to the desired position
Adjusting the height of the back rest
The height of the headrest can be adjusted
to 10 different positions to adapt the child
car seat to
the height of the child.
Make sure the child’s head is always well
protected and the car diagonal safety belt
is positioned
properly on his shoulder.
When adjusting the height of the backrest,
check that the diagonal belt loop (B) is
positioned at
a maximum of 2 cm above the child’s
shoulder (Diag. 23)
To make the adjustment:
1. Use one hand to press the child car seat
backrest height adjuster lever (L) located
on the back of the headrest (Diag. 24)
2. Raise/lower the backrest to adapt it to
the height of the child’s shoulders (Diag.
25)
3. Release the lever checking that it has
clicked into the desired position.
Adjusting the width of the back rest
The width of the backrest can be adjusted
to adapt the child car seat to suit the
physique of
the child. Use the backrest width regulator
wheel (K) located above the headrest, to
adjust the width:

Other manuals for OASYS 2/3 FixPlus

4

Other Chicco Car Seat manuals

Chicco OASYS 2-3 EVO FIXPLUS User manual

Chicco

Chicco OASYS 2-3 EVO FIXPLUS User manual

Chicco KEYFIT User manual

Chicco

Chicco KEYFIT User manual

Chicco KEY 1 User manual

Chicco

Chicco KEY 1 User manual

Chicco OASYS 1 EVO ISOFIX User manual

Chicco

Chicco OASYS 1 EVO ISOFIX User manual

Chicco OASYS 2/3 FixPlus User manual

Chicco

Chicco OASYS 2/3 FixPlus User manual

Chicco YOUniverse User manual

Chicco

Chicco YOUniverse User manual

Chicco KEYFIT User manual

Chicco

Chicco KEYFIT User manual

Chicco OASYS 2/3 FixPlus User manual

Chicco

Chicco OASYS 2/3 FixPlus User manual

Chicco KEYFIT 30 User manual

Chicco

Chicco KEYFIT 30 User manual

Chicco CosmoS User manual

Chicco

Chicco CosmoS User manual

Chicco OASYS 2/3 FixPlus User manual

Chicco

Chicco OASYS 2/3 FixPlus User manual

Chicco Oasys i-Size User manual

Chicco

Chicco Oasys i-Size User manual

Chicco GoFit User manual

Chicco

Chicco GoFit User manual

Chicco synthesis User manual

Chicco

Chicco synthesis User manual

Chicco Oasys 0+ UP BebeCare User manual

Chicco

Chicco Oasys 0+ UP BebeCare User manual

Chicco MyFit User manual

Chicco

Chicco MyFit User manual

Chicco GRO-UP 123 User manual

Chicco

Chicco GRO-UP 123 User manual

Chicco NEPTUNE - 1 User manual

Chicco

Chicco NEPTUNE - 1 User manual

Chicco YOUniverse Fix User manual

Chicco

Chicco YOUniverse Fix User manual

Chicco CosmoS User manual

Chicco

Chicco CosmoS User manual

Chicco Oasys 1 isofix

Chicco

Chicco Oasys 1 isofix

Chicco KEYFIT User manual

Chicco

Chicco KEYFIT User manual

Chicco KEYFIT User manual

Chicco

Chicco KEYFIT User manual

Chicco New Zenith 0+1 User manual

Chicco

Chicco New Zenith 0+1 User manual

Popular Car Seat manuals by other brands

JANE Xtend instructions

JANE

JANE Xtend instructions

5DOT POLAR FIX 01 Instructions for use

5DOT

5DOT POLAR FIX 01 Instructions for use

Giordani Pegasus Plus Series owner's manual

Giordani

Giordani Pegasus Plus Series owner's manual

Invacare Van Seat PHWH93 Owner's maintenance manual

Invacare

Invacare Van Seat PHWH93 Owner's maintenance manual

Jole trillo eco instruction manual

Jole

Jole trillo eco instruction manual

infa-secure CS9013 instruction manual

infa-secure

infa-secure CS9013 instruction manual

Diono Rainier instruction manual

Diono

Diono Rainier instruction manual

BEBE CONFORT ISEOS TT Instructions for use

BEBE CONFORT

BEBE CONFORT ISEOS TT Instructions for use

Axkid Rekid MINIKID 3 quick start guide

Axkid Rekid

Axkid Rekid MINIKID 3 quick start guide

BESAFE Handicap installation instructions

BESAFE

BESAFE Handicap installation instructions

Graco AFFIX owner's manual

Graco

Graco AFFIX owner's manual

Inglesina Magellano instruction manual

Inglesina

Inglesina Magellano instruction manual

Be Cool PickUp instructions

Be Cool

Be Cool PickUp instructions

Combi Everest 8400 instruction manual

Combi

Combi Everest 8400 instruction manual

Silver Cross Balance i-Size manual

Silver Cross

Silver Cross Balance i-Size manual

Graco CONNEXT owner's manual

Graco

Graco CONNEXT owner's manual

Britax Marathon E9L06 Replacement instructions

Britax

Britax Marathon E9L06 Replacement instructions

Romer Britax BABY-SAFE plus II User instructions

Romer

Romer Britax BABY-SAFE plus II User instructions

manuals.online logo
manuals.online logoBrands
  • About & Mission
  • Contact us
  • Privacy Policy
  • Terms and Conditions

Copyright 2025 Manuals.Online. All Rights Reserved.