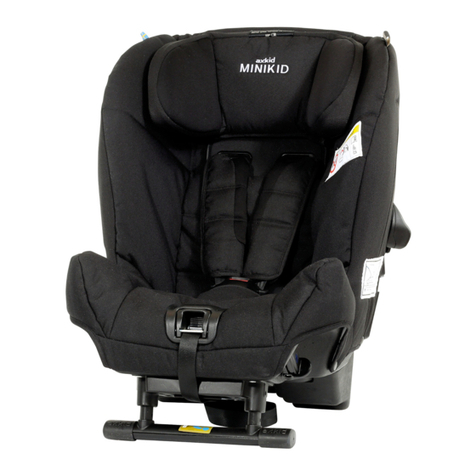
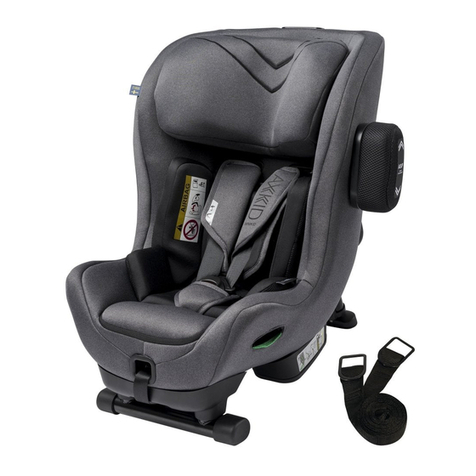
Axkid Minikid User manual

3-9
EN
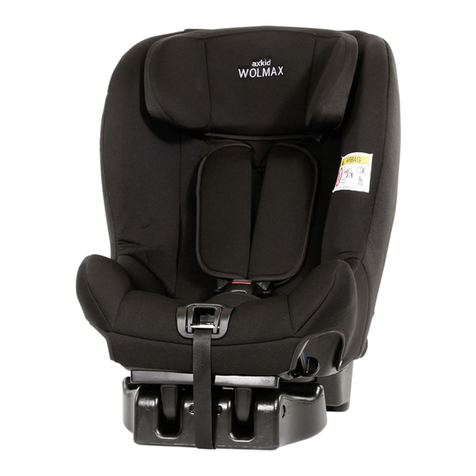
Axkid Minikid
0-25kg
Axkid AB, Odinslundsgatan 17, 412 66 Göteborg, Sweden ● www.axkid.com ● [email protected] ● +46 511 760 620
ECE R44/04
10-16
DE
17-23
PL
24-30
PT
31-37
SE
38-44
SI
45-51
CZ
52-58
SK

B
C
E
F
D
G
J
H
I
K
P
O
Q
R
L
M
N
A

J
K
G
N
D
3
45
2
1
iii

6
8
9
7

10

M
P
Q
i
0° 10°
11 12
13 14
15 16
i
i
ii
ii
ii

18
17
19
20 21
L
I
i
E

ii
i
i
ii
F
22 23
H
E
I
24 25
H
26 27

i
iii iii
ii
31
32
ii
i
28
30
29
i
i

3
EN
Axkid Minikid
Instruction Manual
Rear-facing 0-25 kg with vehicle seat belt and tethers
Read this instruction manual carefully before installing the Minikid child restraint. If in doubt, contact
your retailer who can demonstrate a correct installation. An incorrect installation could endanger
your child.
Axkid always recommends using an infant carrier until the child is steady enough to sit unaided.
Axkid does not recommend using Minikid 0-25 kg from birth, because smaller children need better
support and protection the rst couple of months of life.
Do not use a child restraint in a seating position where an active airbag is tted. If you still wish to
install the Minikid in this location the airbag must be disconnected at an authorised service centre.
Some vehicles may be equipped with a switch which allows you to manually switch the airbag o. It
is important to always check if the vehicle’s indicator light shows that the airbag is turned o.
Extensive research has shown that the risk of serious injury or worse is ve times greater for a young
child when in a forward facing restraint compared to a rearward-facing restraint. In Minikid your child
can travel rearward-facing up to 25kg.
Always use the support leg when installing the Minikid seat. The support leg is a very important
safety feature designed to maximise your child’s safety in an accident.
Should you have an accident, no matter how small, your child restraint should be replaced. It may
have damage that is undetectable and could seriously jeopardize your child’s safety. For this reason
Axkid do not recommend purchasing second hand child restraints.
Never leave your child unattended in the car.
Ensure any luggage or loose objects are secured in your vehicle as they may cause injuries to
passengers in the event of a collision.
Store this instruction manual in the designated pocket (O) on the car seat.
Read this instruction manual before installing the Minikid child restraint in your vehicle. For
more information and installation videos visit www.axkid.com.
Thank you for choosing an Axkid child seat. Our team has over 30 years combined experience within child
safety, and we have done our utmost to make the Minikid child seat as safe as possible. The Minikid child
restraint is approved according to ECE R44/04, the latest European standards for child safety. To maximise
your child’s safety it is important that you keep the following in mind;
Important information
V10
4
Thechildrestraintcanbeused onanyforwardfacingpassengerseatwhichhasa3-pointseatbelt(i),
solongasthereisnoactiveairbaginplace.Thechildrestraintcannotbeusedwitha 2-pointlapbelt(ii).
IMPORTANT: If you wish to install your Minikid in a location where an airbag is tted, then the airbag
must be disconnected at an authorized service centre. Some vehicles may be equipped with a switch
which allows you to manually switch the airbag o. It is important to always check if the vehicle’s
indicator light shows that the airbag is turned o.
WARNING:Neveruseon a seat with an activeairbag
WARNING:Neveruseon rearwardor sidefacingvehicleseats
WARNING:Air bags aredesigned foradults and canseriously harm yourchildin a crash
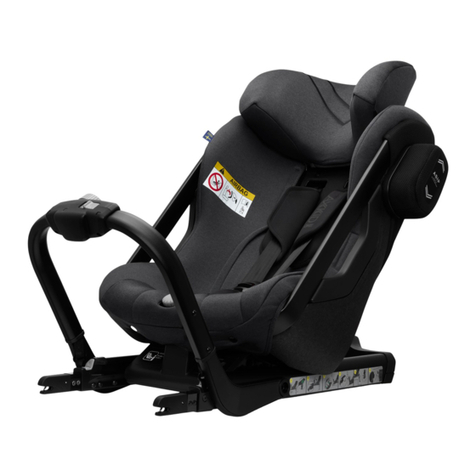
Parts
1
Allowed and disallowed positioning of the
child car seat
Contents
Parts 4
Allowed and disallowed positioning of the child car seat 4-5
Rear-facing 0-25kg with vehicle seat belt and tethers
Thisassemblycanbeused forchildrenweighingbetween0-25kg(0-55lb).
5-8
Removing and fitting the covers 8-9
Care and maintenance 9
Warranty 9
The Minikid child restraint is suitable for use from approximately six months of age, or from when
your child can sit up unsupported, up until the age of six. This child restraint can ONLY be installed
rear-facing.
AHeadrest J Heels
B Integral harness K Indented vertical line
C Harness buckle L Side impact pad connector
D Seat belt slot M Tether straps
E Harness adjuster button N Belt lock-o
F Harness adjustment strap O Pocket for storage of instruction manual
G Recline adjustment lever P Support leg
H Headrest brake lever Q Leg extension button
I Side impact pad R Lower anchor straps (x2)

5
Allowed and disallowed positioning of the child car seat.
Frontpassengerseat(no activeairbag) Yes
Frontpassengerseat(activeairbag) NO
Forwardfacingseatwith3-pointseatbelt Yes
Seatwith2-pointseatbelt NO
Sidefacingseats NO
Rearfacingseats NO
Never use this child seat in a car that is not equipped with an
ECE Reg 16 approved three-point belt.
The easiest way to lift the Minikid into the vehicle is with its back rst. Place the child restraint in
the vehicle with the back of the restraint facing the front of the vehicle.
The heels (J) should be sitting over the edge of the vehicle seat. The indented vertical line (K)
on the heel should align vertically with the end of the vehicle’s seat. If installing in a small vehicle,
or if your child does not require extra leg room, you can instead place the heel upon the vehicle’s
seat this will also achieve a more reclined position.
Note: When installing Minikid in the front seat it is possible, but not crucial, for the back of the restraint
to have contact with the dashboard.
To adjust the angle of the child restraint, press the recline adjustment lever (G) to select one
of the ve reclining positions. Always choose the most upright position as possible, however
your child must be able to hold their head up on its own, and there should be enough recline to
ensure your child’s head does not fall forward when sleeping. The rule of thumb is that the older the
child grows, the more upright the seat can be installed. Please note that once the installation of the
Minikid is complete, it will be somewhat more reclined as it sinks into the vehicle’s seat from tightening
seat belts and tether straps.
Positioning the child restraint
Rear-facing 0-25 kg with seatbelt&tethers
2
3
4
Never install a child restraint in a passenger seat
where an active airbag is tted.

6
Open the belt lock-o clips (N) on both sides of the Minikid child restraint. Fully lengthen the
seat belt until the lap section of the belt is at least 70-80cm (27-32 inches) long. Feed the seat
belt through the seat belt slot (D), between the seat cover and seat body until the belt comes
out through the seat belt slot on the other side. If you prefer, you can instead feed the seat belt through
the seat belt slot (D), then over the top of the seat belt cover and then through the seat belt slot on the
other side.
Insert the seat belt tongue into the vehicle’s seat belt buckle. Pull the seat belt until all slack is
removed along the seat belt route. Secure both the lap and shoulder belt in the lock-o closest
to the vehicle’s seat belt buckle.
In the lock-o on the opposite side, only the lap belt should be secured.
5
6
7
Fastening the vehicle seat belt
Some vehicles may already be tted with anchorage points at the back of the front seat rails, or, if
installing in the front passenger seat, in front of that seat.
If your vehicle does not have these anchor points, the supplied lower anchor straps must be
used.
For installation in the back seat, feed the buckle end of the anchor strap through either the rear
of the front seat rails, or the hinge of the front seat. The anchoring point needs to be as close
to the oor as possible. In doing so you should always insert the buckle of the anchor strap
through the closest appropriate slot in the strap to create a slip knot then pull tight. This needs to be
repeated on both sides to create two anchor points.
When installing Minikid in the front passenger seat the lower anchor straps must be attached
to the front gliding tracks so the anchor points will be located along the front edge of the
passenger seat.
Pull out the upper tether strap from the belt housing (M) to an appropriate length.
Check that the white marking on the strap (i) is visible. If not, you can try crossing the straps
over (ii) to give them some extra length to enable the white marking to be visible.
Clip the anchor attachments directly onto the vehicle anchorage points (or lower anchor straps
if you have used them). Press down hard on the top of one side (i) of the child restraint then
repeat on the other side (ii). When you do this it’s important that you really use your full body
weight to press down and get the tether straps to really tighten hard. This will give the tether straps
their rst tightening.
Attaching the tether straps
8
9
10
11
12
13

7
AlthoughoptionalweSTRONGLYadvise usingtheside impactpadwherepossibletoaddextraprotection
fromsidecollisions.
Locatethe sideimpactpadconnector(L) onthechild seatnearesttothe sideofthe vehicle(i.e.closest
tothe door).
IMPORTANT: Ensurethetwotriangulararrows(i) ontheside impactpad(I)pointinthesame direction asthe
triangulararrowon thesideimpactpadconnector(L).
Placetheupperofthetwooval openingson theundersideofthesideimpactpadover the sideimpactpad
connector.Push the sideimpactpadagainstthe sideofthecarseatand slidethe sideimpactpadupwards
ontotheside impactpadconnector.Youwill feela slightclickasthesideimpactpadlocksinplace.
To remove:pushthesideimpactpaddownwardsand remove.
Unfoldthesupportleg (P)out toitsmaximumangle.Presstheleg extensionbutton(Q)and extendthe
support leg until it reaches the oor.
Note:Thesupportleg beltmay,but does notneed, tobe fullytensioned.
Itisimportantthatyoucheckthatthesupportleg isatan angleover10°fromthebackoftheseat.You
couldcheckthisbyensuringthatthesupportleg isfurtherawayfromtheseatthanthe verticalline.
Pressdownon thechild restraintfromside tosideagain(i)(ii),the tetherstrapswillbethenbe
automaticallytightened.
IfyouhaveinstalledMinikid inthebackseatyoucannowmovethefrontseattoacomfortableposition.
Note:Thebackofthe childrestraintmay, but doesnotneed tobeincontactwith thebackofthefrontseat.
14
15
16
Placing your child in the seat
Presstheharnessadjusterbutton(E)and pullforwardontheshoulderstraps(notthe shoulderpads)
tocompletelyloosentheharness.
Presstheredharnessreleasebuttonon the buckleandunfastenthe harness.
Placeyourchild inthecarseat.Putyourchild’sarmsinbetweenthe shoulderstraps sothatthestraps
arehangingoverthechestandstomach.
Pulltheshoulderstrapstogetherandinserttheharness tonguesintothecrotchbuckle.
Pulltheharnessadjustmentstrap(F). It’simportantthatyoualwayspulltheharness straightandcentral
whenyoutightentheadjustmentstrap.This willtightenthe harnessand theheadrestwill automatically
slidedowntotheappropriateheight.
18
19
20
21
22
Using the side impact protection pad
17

8
The headrest on your Minikid is equipped with a head support brake. This can be used if you
want to keep the headrest in a xed position. To activate the head support brake, pull the
harness adjustment strap until the headrest is at the desired height, you will hear a faint “click”
sound from the headrest as it locks into position. Check that the headrest can not be pulled down any
further and activate the headrest brake by moving the lever (H) across to the right.
WARNING: Do not pull up the headrest with the parking brake activated.
WARNING:Neverusethe child restraint without its covers.The covers arean integral safety
feature.
Removethe sideimpactpad(I) ifattachedandensuretheheadrestbrake lever(H)is unlockedby
turningittotheleft.
Presstheharnessadjusterbutton(E)and pullforwardontheshoulderstraps(notthe shoulderpads)
tocompletelyloosentheharness.
Note:Ifthe headrestdoes notraiseupcheck theheadrestbrakelever(H)is unlocked.Havingthe
headrestraisedwill make removingthe headrestcovereasier.
Locate the elastic loops (i). Working on one loop at a time, place your index nger in the loop and trace
theloopbacktowhereitisattachedontheheadrestvia ahook (ii).Carefullyremovetheelasticloops
fromeachhook(ii).
Unzipthetwozipsonthe headrest(oneon theundersideofthe right-hand-sideoftheheadrest(i) and
oneontheback(ii)).
Starting from the right, carefully pull the cover o from the headrest. Once the headrest cover has been
removed,lowertheheadrestagainandlock inposition.Thiswillhelp whilstremovingtheseatcover.
Presstheredharness releasebuttononthe buckletounfastentheharness andremovethecrotch
pad.
Unzipthethreezips ontheseatcover(oneoneachsideofthefrontofthe cover(i)and oneonthe back
ofthecover(ii). Ensureyoufullyunzip the zips oneachsideofthefrontcover(i).
Unfastenallthepressstuds(i),(ii),(iii).
Releaseand remove the plasticstrip (i)along thefront ofthe childrestraint. IMPORTANT! Ensure you
pulltheplasticstripandDO NOTpullthe fabric .
Carefullyremovethe seatcoverfromaroundtheharness adjusterhousing(ii).
IMPORTANT!Store the plastic strip safely for when you need to t the seat cover again. If you do lose the
plasticstripyouwillneed tocontactyourretailerforareplacement.
Head support brake on headrest
Removing and fitting the covers
23
24
25
26
27
28
29
30
31

9
Careandmaintenance
The seat cover can be removed and washed in a washing machine at 30º C on the “Gentle
Cycle” programme. Do not put the cover in a dryer as this can damage the cover and the
padding may separate from the fabric.
Visit www.axkid.com to nd videos explaining how to remove and attach the cover.
Any plastic parts of Minikid can be cleaned with mild detergent and water. Do not use
aggressive chemicals containing solvents etc, as this can cause damage to the plastic and
compromise the safety of the child restraint.
All materials used in the Minikid child restraint are recyclable and should be recycled as per
your local legislation. Ask your local recycling centre for advice when recycling this product.
Do not make any modications or alterations to the Minikid child restraint other than those
described in this instruction manual. Follow the instructions in this manual carefully. Any repairs
must be carried out by the manufacturer or agent.
If the seat cover needs replacing ensure only original products from Axkid are used. If other
products are used the Minikid’s safety system may be compromised and could lead to severe
injury or death in case of an accident.
All materials used have a very high UV-resistance rating. However, UV-light is very aggressive
and will ultimately lead to fading of the seat cover. This is not covered by our warranty as it is
considered normal wear and tear.
Warranty
The Minikid child restraint is covered by a 24 month warranty from date of purchase. Ensure
you save your receipt and bring it to your place of purchase should you have any warranty
issues. The warranty does not cover:
* Normal wear and tear
* Damage due to incorrect use, neglect or accident
* If repairs have been carried out by a third party
Carefullypull outthe plasticrod(i) holdingthe seat-backfabrictotheseat.Pullthe seat-backfabric
forwardand feed thecrotchstrapthroughtheseat-basefabric.You cannow,startingfromthetopof
the seatcover,carefullyremovetheseatcoverensuringyoureleaseanyVelcro®tabsasyoudoso.
To t the cover, reverse the above steps ensuring the harness and shoulder pads are routed correctly.
32

10
LesenSiedieseBedienungsanleitung vorGebrauchsorgfältigdurch.ImZweifelkontaktierenSie Ihren Händler,
derIhneneine korrekteMontagedemonstrierenkann.EinefehlerhafteMontagekannIhrKindgefährden.
Axkid empehlt, so lange wie möglich eine Babyschale zu verwenden, bis das Kind stabil genug ist, um ohne Hilfe
zusitzen. DieVerwendungdesMinikid0-25kgabGeburtistnichtempfohlen,dakleinereKinderindenersten
Lebensmonaten eine bessere Unterstützung und einen besseren Schutz benötigen.
VerwendenSie denKindersitznichtaufSitzplätzenmitaktivenAirbagsoder schaltenSiedenAirbag
entsprechend aus.GegebenenfallsmussdiesdurcheinenService-Technikerdurchgeführtwerden.Bitte
überprüfenSieimmerdie Kontrollleuchte,dieanzeigt,obderAirbagausgeschaltetist.
UmfangreicheForschungenhabenergeben,dassdas RisikovonKindern,ernsthafte,schwereVerletzungen
zuerleiden,bei VerwendungvonvorwärtsgerichtetenSitzenfünfmalsohochistwiebeirückwärtsgerichteten
Sitzen!
ImMinikidkannIhrKind biszu25 kgrückwärtsgerichtetreisen.
VerwendenSie immerden Stützfußbeim MontierendesMinikidSitzes. DerStützfußisteinsehrwichtiges
Sicherheitsmerkmal, das entwickelt wurde, um die Sicherheit des Kindes im Falle eines Unfalls zu erhöhen.
Nacheinem Unfall solltedasKinderrückhaltesystem,unbeachtetder Schwere desUnfalls,ersetztwerden.Es
können nicht sichtbare Schäden entstanden sein und dadurch ernsthaft die Sicherheit des Kindes gefährden.
Axkid empehlt daher, kein gebrauchtes Kinderrückhaltesystem zu kaufen.
LassenSie Ihr Kind nieunbeaufsichtigtimAuto
SichernSiejegliches GepäckinIhremFahrzeug,da diesVerletzungenim Falle einesZusammenstoßes
verursachenkann.
BewahrenSie dieseBedienungsanleitunginderdafürvorgesehenenTasche (O) amAutositzauf.
LesenSie dieseBedienunsganleitung vorGebrauchsorgfältigdurchund bewahren Siesie fürspäter
auf. Für mehr Informationen und Anwendungsvideosbesuchen Sie www.axkid.comoder www.vital-
innovations.de.
VielenDank,dass SiesichzumKaufvonAxkid Kindersitzentschiedenhaben.Unser Teamhateineüber30-jährige
Erfahrung in Bezug der Sicherheit von Kindern und wir haben unser Möglichstes getan, den Apollo Kindersitz so sicher
wie möglich zu machen. Das Apollo Rückhaltesystem ist zugelassen nach ECE R44/04, den neusten europäischen
Standards für Kindersicherheit. Um die Sicherheit der Kinder zu erhöhen, ist es wichtig die folgenden Punkte zu beachten:
Wichtige Informationen
Axkid Minikid
Bedienungsanleitung
Rückwärtsgerichtet 0-25 kg mit Fahrzeuggurt und Spanngurt
DE

11
DasKinderrückhaltesystemkannanjedemvorwärtsgerichtetemBeifahrersitzbenutztwerden, dereinen
Dreipunktgurt(i) hat,vorausgesetztderAirbagistausgeschaltet.DasRückhaltesystemkannnichtmit
einem2-PunktBeckengurtbenutztwerden(ii).
WICHTIG:VerwendenSiedenKindersitznichtaufSitzplätzenmitaktivenAirbagsoder schaltenSieden Airbag
entsprechendaus. Gegebenenfallsmuss diesdurcheinenService-Techniker durchgeführtwerden.Bitte
überprüfenSieimmerdie Kontrollleuchte,die anzeigt,obderAirbagausgeschaltetist.
WARNUNG: VerwendenSie den Kindersitz niemals auf Sitzplätzen mit aktivenAirbags
WARNUNG: VerwendenSie den Kindersitz niemals auf rückwärts- oder seitwärtsgerichteten
Fahrzeugsitzen.
WARNUNG: Airbagswurdenfür Erwachsene entwickeltund könnenIhr Kind bei einem Unfallernsthaft
gefährden.
Bestandteile desSitzes
1
Erlaubte und unerlaubte Positionen des
Kindersitzes
Inhalte
Bestandteile des Sitzes 11
Erlaubte und unerlaubte Positionen des Kindersitzes 11-12
RückwärtsgerichtetesFahren,0-25 kg mit Fahrzeuggurtund Spanngurt.
DieseAufbaukannfür Kinderzwischen0-25kgverwendetwerden.
12-15
Entfernen und Anbringen der Stobezüge 15-16
Pflege und Wartung 16
Garantie 16
Das Minikid Kinderrückhaltesystem ist geeignet für den Einsatz ab etwa sechs Monaten bis sechs
Jahre. Dieser Kindersitz kann ausschließlich rückwärtsgerichtet installiert werden.
AKopfstütze J Absatz
B Sicherheitsgurt des Kindersitzes K VertikaleEinkerbung
C Gurtschloss L Konnektor für Seitenaufprallschutzpolster
D Schlitz für Sicherheitsgurt M Tasche zum Verstauen der Bedienungsanleitung
EAuslöseknopf für Gurt N Spanngurte
F Verstellbarer Sicherheitsgurt O Tasche zum Verstauen der Bedienungsanleitung
G
Einstellhebel
P Stützfuß
H Bremshebel der Kopfstütze Q Knopf für Stützfußverlängerung
I Seitenaufprallschutzpolster R Haltegurt zur Verankerung (x2)

12
Erlaubte und unerlaubte Positionen des Kindersitzes
Beifahrersitz(kein aktiverAirbag) Ja
Beifahrersitz(aktiverAirbag) NEIN
VorwärtsgerichteterSitzmitDrei-Punkt-Gurt Ja
SitzmitZwei-Punkt-Gurt NEIN
SeitlichgerichteteSitze NEIN
RückwärtsgerichteteSitze NEIN
Benutzen Sie den Kindersitz niemals in einem Auto, welches
nicht mit einem genehmigten ECE Reg 16 Drei-Punkt-Gurt
ausgestattet ist.
Heben Sie den Minikid mit der Rückseite zuerst in das Fahrzeug. Platzieren Sie den Kindersitz
so, dass die Rückseite zur Fahrtrichtung ausgerichtet ist.
Der Absatz (J) muss dabei über den Rand des Fahrzeugsitzes hinausragen. Die vertikale
Einkerbung (K) am Absatz sollte gleichmäßig zur Kante des Fahrzeugsitzes ausgerichtet
sein. Beim Einbau in kleineren Fahrzeugen oder wenn Ihr Kind keine extra lange Beinfreiheit
benötigt, können Sie den Absatz auch auf den Fahrzeugsitz stellen.
Hinweis: Beim Befestigen des Minikid am Vordersitz kann die Rückseite des Kindersitzes das
Armaturenbrett berühren.
Zum Einstellen der Neigung drücken Sie den Hebel (G) und suchen Sie eine der fünf
Liegepositionen aus. Wählen Sie einen möglichst aufrechten Winkel, wobei die Neigung so zu
wählen ist, dass der Kopf des Kindes beim Schlafen nicht nach vorne fällt. Eine Daumenregel
besagt, dass je älter die Kinder werden, desto aufrechter kann der Sitz eingestellt werden. Beachten
Sie auch, dass sich der Kindersitz durch Festziehen der Gurte etwas nach unten in den Fahrzeugsitz
neigt.
Einbau des Sitzes
Rückwärtsgerichtetes fahren, 0-25kg mit
Fahrzeuggurt und Spanngurt.
2
3
4
Verwenden Sie den Kindersitz niemals auf
Sitzplätzen mit aktiven Airbags.

13
Önen Sie die Gurtsperre (N) an beiden Seiten des Minikid. Ziehen Sie den Sicherheitsgurt
vollständig heraus bis der Beckengurt etwa 70-80 cm lang ist. Ziehen Sie den Gurt durch den
Schlitz (D) unterhalb des Sitzpolsters bis der Gurt auf der anderen Seite wieder herauskommt.
Wenn Sie möchten, können Sie den Gurt auch über das Polster spannen.
Stecken Sie den Sicherheitsgurt in das Gurtschloss und ziehen Sie den Gurt fest. Sichern Sie
sowohl den Hüftgurt als auch den Schultergurt in der Gurtsperre am Gurtschloss möglichst
eng am Autositz.
In der Gurtsperre auf der anderen Seite wird nur der Hüftgurt gesichert.
5
6
7
Befestigen des Sicherheitsgurtes
Einige Fahrzeuge verfügen bereits über Verankerungspunkte an der Sitzschiene des Vordersitzes
oder an der Vorderseite des Beifahrersitzes.
Falls Ihr Fahrzeug diese Verankerungspunkte nicht hat, müssen Sie die mitgelieferten
Haltegurte verwenden.
Zum Befestigen des Kindersitzes auf dem Rücksitz, ziehen Sie das Ende des Haltegurtes
entweder durch die Rückseite der Sitzschiene oder einen anderen Befestigungspunkt
am Vordersitz. Der Verankerungspunkt sollte sich so nah wie möglich am Fahrzeugboden
benden. Ziehen Sie dabei den Gurt immer durch eine der Önungen des Bandes, sodass eine
Schlaufe entsteht und ziehen Sie diese fest. Dies sollte an beiden Seiten vorgenommen werden,
damit zwei Verankerungspunkte vorhanden sind.
Beim Einbau des Minikid am Vordersitz müssen die Haltegurte an der vorderen Gleitschiene
befestigt werden.
Ziehen Sie die Spanngurte (M) aus dem Gurtgehäuse auf eine geeignete Länge heraus.
Prüfen Sie, ob die weiße Markierung am Gurt sichtbar ist (i). Falls nicht überkreuzen Sie die
Gurte (ii).
Befestigen Sie die Spanngurte direkt an den Verankerungspunkten. Drücken Sie anschließend
mit Ihrem ganzen Körpergewicht die Rückenlehne auf einer Seite fest herunter (i). Wiederholen
Sie dies auch auf der anderen Seite (ii). Dadurch werden die Spanngurte gestrat.
Neigen Sie den Stützfuß (P) bis zu seinem maximalen Winkel. Drücken Sie den Knopf für die
Stützfußverlängerung (Q) und verlängern Sie den Stützfuß bis zum Boden. Hinweis: Der Gurt
am Stützfuß kann aber muss nicht vollständig gespannt werden.
Anbringen der Spanngurte
8
9
10
11
12
13
14
Other manuals for Minikid
2
Table of contents
Languages:
Other Axkid Car Seat manuals

Axkid
Axkid Connect User manual

Axkid
Axkid Modukid Infant User manual

Axkid
Axkid Kidzone User manual

Axkid
Axkid Rekid User manual

Axkid
Axkid Mate User manual

Axkid
Axkid MODUKID INFANT 2 User manual

Axkid
Axkid Grow User manual

Axkid
Axkid Kidzone User manual

Axkid
Axkid Modukid User manual

Axkid
Axkid Duofix User manual