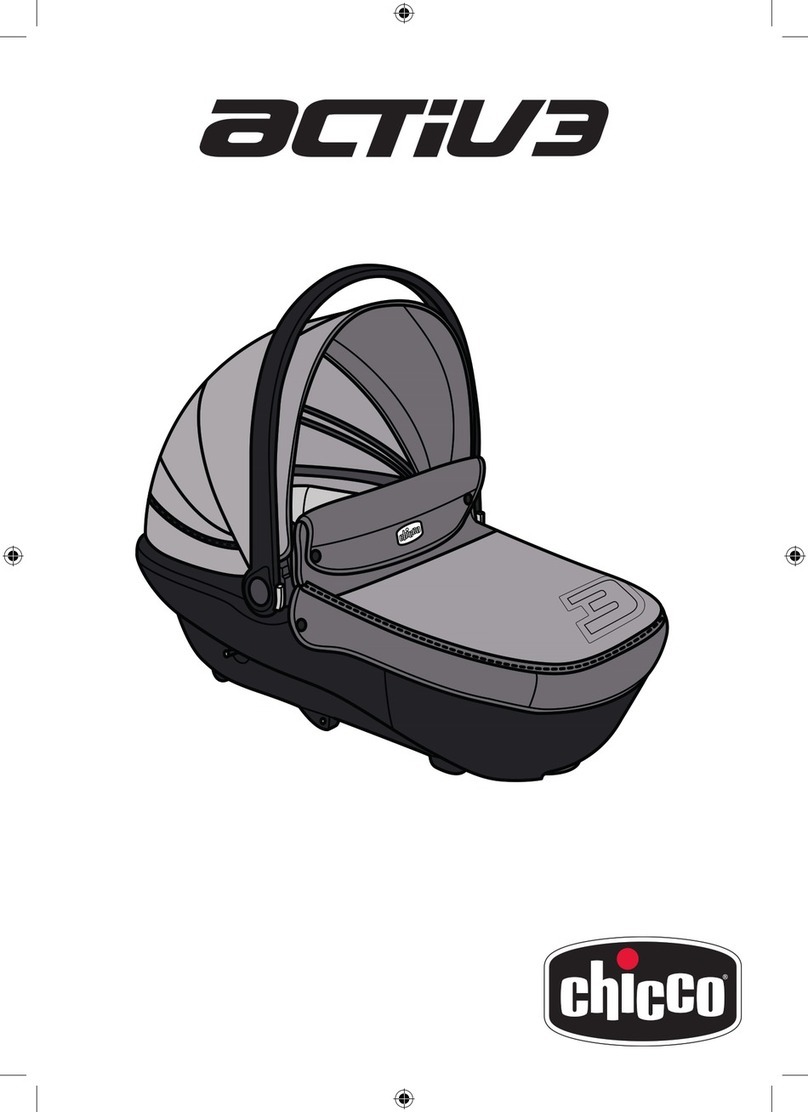
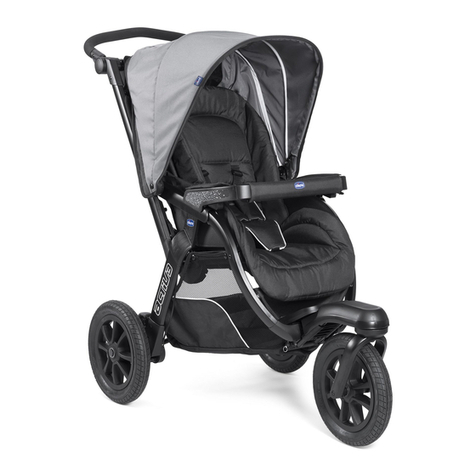
Chicco Activ3 User manual


2

3
12 3A
3B 3C 4
567
8A 8B 8C

4
910 11A
11B 11C 12
13
14A 14B
15A 15B
16A

5
17 18
19A 19B 20
21 22 23A
23B 24 25
16B

6
26 27 28A
28B 29 30
31 32
35
33
36
34

7
37 38 39
40 41 42
43 44
47A
45
47B
46

8
48 49A 49B
49C 50A 50B
51A 51B 51C
52 53A 53B

9
54

10
I
AVVISO IMPORTANTE
IMPORTANTE – TENERE QUESTE
ISTRUZIONI PER RIFERIMENTI
FUTURI
ATTENZIONE: PRIMA DELL’USO RI-
MUOVERE ED ELIMINARE EVENTUA-
LI SACCHETTI DI PLASTICA E TUTTI
GLI ELEMENTI FACENTI PARTE DELLA
CONFEZIONE DEL PRODOTTO O CO-
MUNQUE TENERLI LONTANI DALLA
PORTATA DEI BAMBINI.
AVVERTENZE
•ATTENZIONE: Non lasciare mai il
tuo bambino incustodito.
•ATTENZIONE: Prima dell’uso as-
sicurarsi che tutti i meccanismi di
bloccaggio siano correttamente
innestati.
•ATTENZIONE: Per evitare lesioni
durante le operazioni di apertura
e chiusura del prodotto, assicurarsi
che il bambino sia a debita distan-
za.
•ATTENZIONE: Non lasciate che il
vostro bambino giochi con questo
prodotto.
•ATTENZIONE: Utilizzare sempre i
sistemi di ritenuta.
•L’uso di spartigambe e cinture di
sicurezza è indispensabile per ga-
rantire la sicurezza del bambino.
Utilizzare sempre le cinture di sicu-
rezza contemporaneamente allo
spartigambe.
•ATTENZIONE: Questo prodotto
non è adatto per correre o pattina-
re.
•ATTENZIONE: prima dell’uso, con-
trollare che il meccanismo di ag-
gancio della navicella, della seduta
o del seggiolino auto siano corret-
tamente agganciati.
•L’uso del passeggino è consentito a
bambini di età compresa tra 0 e 36
mesi, sino ad un massimo di 15 kg
di peso.
•Per bambini dalla nascita no a cir-
ca 6 mesi d’età, lo schienale deve
essere utilizzato in posizione com-
pletamente reclinato.
•Il dispositivo di frenatura deve esse-
re sempre inserito quando si posi-
ziona e rimuove il bambino.
•Utilizzare il dispositivo frenante
ogni qualvolta si sosti.
•Non lasciare mai il passeggino su
un piano inclinato, con dentro il
bambino, anche se con i freni azio-
nati.
•Non sovraccaricare il cestello. Peso
massimo 3 kg.
•Ogni peso attaccato ai manici e/o
sullo schienale e/o sui lati del pas-
seggino potrebbe compromettere
la stabilita del passeggino.
•Non trasportare più di un bambino
alla volta
•Non applicare al passeggino ac-
cessori, parti di ricambio o compo-
nenti non fornite o approvate dal
costruttore.
•Con il seggiolino auto installato sul
passeggino, questo veicolo non
sostituisce una culla o lettino. Se il
bambino necessita di dormire, allo-
ra dovrebbe essere collocato in una
navicella, culla o lettino
•Vericare prima dell’assemblaggio
che il prodotto e tutti i suoi com-
ponenti non presentino eventuali
danneggiamenti dovuti al traspor-
to, in tal caso il prodotto non deve
11
essere utilizzato e dovrà essere
tenuto lontano dalla portata dei
bambini.
•ATTENZIONE: Nelle operazioni di
regolazione assicurarsi che le parti
mobili del passeggino non venga-
no a contatto con il corpo del bam-
bino.
•Non usare il passeggino sulle sca-
le o sulle scale mobili: si potrebbe
perdere improvvisamente il con-
trollo.
•Questo prodotto deve essere utiliz-
zato esclusivamente da un adulto.
•Il prodotto deve essere assemblato
esclusivamente da un adulto.
•Assicurarsi che gli utilizzatori del
passeggino siano a conoscenza
dell’esatto funzionamento dello
stesso.
•Per evitare rischi di strangolamento,
non dare al bambino e non riporre
vicino al bambino oggetti muniti di
corde.
•Prestare attenzione quando si sale e
scende un gradino o il marciapiede.
•Se lasciate il passeggino esposto
al sole per molto tempo, aspettate
che si rareddi prima di mettervi il
bambino. L’esposizione prolungata
al sole può causare cambiamenti di
colore nei materiali e tessuti.
•Non usare il prodotto se alcune par-
ti sono rotte, strappate o mancanti.
•Evitare il contatto del passeggino
con acqua salina per prevenire la
formazione di ruggine.
•Non utilizzare il passeggino in
spiaggia.
CONSIGLI PER LA PULIZIA E LA MANUTENZIONE
Questo prodotto necessita di manutenzione periodica.
Le operazioni di pulizia e manutenzione devono essere eettuate solo
da un adulto.
PULIZIA
Il passeggino è sfoderabile (fare riferimento al capitolo “SVESTIZIO-
NE/VESTIZIONE DELLA SEDUTA”).
Per la pulizia delle parti tessili riferirsi alle etichette di lavaggio.
Di seguito sono riportati i simboli di lavaggio ed i relativi signicati:
Lavare a mano in acqua fredda
Non candeggiare
Non asciugare meccanicamente
Non stirare
Non lavare a secco
Pulire le parti in plastica periodicamente con un panno umido.
Asciugare le parti in metallo, dopo un eventuale contatto con ac-
qua, al ne di evitare il formarsi di ruggine.
MANUTENZIONE
Lubricare le parti mobili, in caso di necessità, con olio secco al
silicone. Controllare periodicamente lo stato di usura delle ruote
e tenerle pulite da polvere e sabbia. Assicurarsi che tutte le parti
in plastica che scorrono sui tubi in metallo siano pulite da polvere,
sporco e sabbia, al ne di evitare attriti che possono compromettere
il corretto funzionamento del passeggino.
Tenere il passeggino in un posto asciutto.
MONTAGGIO DELLE RUOTE POSTERIORI
1. Procedere inlando il perno della ruota nell’apposito alloggia-
mento no ad udire un“click”di avvenuto ssaggio; ripetere l’opera-
zione per l’altra ruota posteriore (g. 1).
ATTENZIONE: Accertarsi che i gruppi ruote siano ssati corretta-
mente.
2. E’possibile smontare le ruote per ridurre ulteriormente le dimen-
sioni quando il passeggino è chiuso. Per togliere le ruote tirare i tasti
di rilascio indicati in gura 2 ed estrarre la ruota. Ripetere l’operazio-
ne anche per l’altra ruota posteriore.
MONTAGGIO DELLA RUOTA ANTERIORE
3. Prima di tutto è necessario montare la forcella anteriore. Per fare
ciò, occorre allineare i fori presenti sul telaio del passeggino con i fori
della forcella (g. 3A). A questo punto deve essere inserito il perno
(g. 3B) in dotazione. Successivamente, vincolare il perno inserito
con l’apposito anello (g. 3C).
4. Bloccare la forcella anteriore sul telaio come indicato in gura 4
sino ad udire un click.
5. Inserire il perno della ruota anteriore nell’apposita sede nella for-
cella sino ad udire un click di avvenuto aggancio (g. 5).
6. Inne, abbassare il coperchio del poggiapiedi sino ad udire un
click di avvenuto aggancio (g. 6).
7. Per smontare la ruota anteriore, è necessario agire sulla leva posta
sotto il poggiapiedi, e slare quindi la ruota (g. 7)
APERTURA DEL PASSEGGINO
8. Per aprire il passeggino, premere il pulsante collocato sul tubolare
maniglia (g. 8A) e ruotare in avanti la manopola (g. 8B), muoven-
do il passeggino come in gura 8C.
ATTENZIONE: prima dell’uso assicurarsi che il passeggino sia bloc-
cato in posizione aperta, vericando che il meccanismo sia eetti-
vamente bloccato.
IMPUGNATURA REGOLABILE IN ALTEZZA
Per rendere più ergonomico l’utilizzo del passeggino, è possibile
regolare l’altezza dell’impugnatura in 4 posizioni. Per ridurre l’in-
gombro del passeggino da chiuso, è possibile abbassare comple-
tamente l’impugnatura.
9. Per abbassare o alzare l’impugnatura del passeggino agire con-
temporaneamente sui pulsanti esterni e regolare l’impugnatura nel-
la posizione più confortevole per il vostro utilizzo (g. 9).

12
MONTAGGIO DEL CESTELLO PORTAOGGETTI
Il passeggino è dotato di cestello portaoggetti.
10. Fissare il cestello tramite i bottoni automatici come indicato in
gura 10.
CHIUSURA DEL PASSEGGINO
11. Per chiudere il passeggino, premere il pulsante collocato sul tu-
bolare maniglia (g. 11A) e contemporaneamente ruotare in avanti
la manopola (g. 11B), muovendo il passeggino come in gura 11C.
12. Per una maggiore compattezza del prodotto da chiuso, è possi-
bile piegare la forcella anteriore agendo sull’apposita leva (g. 12).
ATTENZIONE: per piegare la forcella anteriore, assicurarsi che il
meccanismo piroettante sia sbloccato.
13. Inne, per una compattezza massima, è possibile ridurre ulterior-
mente l’ingombro rimuovendo le ruote posteriori e la ruota anterio-
re (vedasi sezione“Montaggio ruote”).
RIMOZIONE DELLA SEDUTA
Per rendere più leggero il passeggino quando si installa la sacca o il
seggiolino auto, è possibile rimuovere la seduta.
14. Per rimuovere la seduta occorre prima di tutto staccare la capot-
ta dal tessile della seduta agendo sugli appositi velcri posizionati
posteriormente (g. 14A) e lateralmente (g. 14B) alla capotta.
15. Aprire la zip posizionata sul tessile che avvolge il tubolare posto
al di sotto del maniglione (g. 15A) e slare i due inserti di plastica
posti sui tubi laterali del passeggino (g. 15B) agendo sui pulsanti.
16. Slacciare i nastri presenti posteriormente indicati in gura 16A e
slare il tessile dal poggiagambe 16B.
17. Inne, sollevare contemporaneamente le due leve poste sul re-
tro della seduta (g. 17) e tirare verso di sé.
18. E’ possibile utilizzare la capotta del passeggino senza la seduta,
avvolgendo la patella tessile posteriore della capotta al tubolare e s-
sandola con i velcri presenti internamente alla capotta stessa (g. 18).
MONTAGGIO DELLA SEDUTA
19. Per montare la seduta, è necessario far scorrere le parti plastiche
della seduta sul telaio del passeggino come mostrato in gura 19A
no ad udire un doppio click di avvenuto aggancio (g. 19B).
A questo punto occorre agganciare le parti tessili nel seguente
modo:
20. Inserire gli inserti di plastica nelle apposite sedi poste sui tubi
laterali del passeggino (g. 20);
21. Attaccare i nastri presenti posteriormente come indicato in -
gura 21;
22. Chiudere la zip posizionata sul tessile che avvolge il tubolare po-
sto al di sotto del maniglione (g. 22);
23. Fissare la capotta al tessile della seduta agendo sugli appositi
velcri posizionati posteriormente (g. 23A) e lateralmente (g. 23B)
alla capotta.
SVESTIZIONE DELLA SEDUTA
Il passeggino è completamente sfoderabile. Per rimuovere il tessile,
è necessario prima di tutto procedere con le operazioni descritte ai
punti 15 e 16.
24. Successivamente, slacciare le bbie e slare i 2 nastri tessili pre-
senti sotto la seduta (g. 24), facendo passare quest’ultimi attraverso
le apposite asole plastiche.
25. A questo punto tirare verso l’alto il tessile per slarlo dal telaio
dello schienale (g. 25).
VESTIZIONE DELLA SEDUTA
Per vestire nuovamente la seduta, dopo un eventuale lavaggio, è
necessario:
26. Calzare la parte tessile dello schienale sul telaio dello stesso (g.
26)
27. Intervenire sui 2 nastri tessili presenti sulla seduta inserendoli
nelle apposite asole plastiche (g. 27).
28. Allacciare le bbie poste sotto la seduta (g. 28A) e inlare il tes-
sile sul poggiagambe (28B).
Inne, è necessario procedere con le operazioni descritte ai punti
20, 21, 22 e 23.
UTILIZZO DELLE CINTURE DI SICUREZZA
29. Il passeggino è dotato di sistema di ritenuta a cinque punti di
ancoraggio costituito da due spallacci, una cintura girovita ed uno
spartigambe con bbia.
ATTENZIONE: per l’utilizzo con bambini dalla nascita no a circa
6 mesi è necessario utilizzare gli spallacci facendoli prima passare
attraverso le due asole di regolazione (g. 29).
30. Vericare che gli spallacci siano all’altezza ideale per il vostro
bambino: in caso contrario regolarne l’altezza (g. 30).
31. Dopo aver adagiato il bambino, inlare le 2 forchette nella bbia
e regolare se necessario la larghezza del girovita agendo sulle bbie
(g. 31).
32. Per sganciare la cintura girovita, premere contemporaneamente
le due forchette laterali (g. 32).
ATTENZIONE: per garantire la sicurezza del vostro bambino è indi-
spensabile utilizzare sempre le cinture di sicurezza.
ATTENZIONE: per garantire la sicurezza del bambino è indispen-
sabile utilizzare contemporaneamente spartigambe e cinture di
sicurezza.
ATTENZIONE: dopo la rimozione della cinghia girovita (es per il
lavaggio), assicurarsi che la stessa sia riassemblata correttamente
usando le apposite asole. La cinghia deve essere nuovamente re-
golata.
REGOLAZIONE SCHIENALE
33. Premendo il tasto posto sullo schienale del passeggino, è pos-
sibile regolarne l’inclinazione in 4 posizioni; rilasciando il tasto, lo
schienale si blocca nella posizione più vicina.
ATTENZIONE: con il peso del bambino le operazioni possono ri-
sultare più dicoltose.
REGOLAZIONE POGGIAGAMBE
Il poggiagambe del passeggino può essere ssato in 2 posizioni, per
un maggiore comfort del bambino.
34. Premere contemporaneamente i due pulsanti laterali come
mostrato in gura 34 per regolare il poggiagambe nella posizione
desiderata.
MANICOTTO ESTRAIBILE
ATTENZIONE: non utilizzare mai il manicotto per sollevare il pas-
seggino con dentro il bambino.
Codici 79270, 79541
35. Per rimuovere il manicotto paracolpi, spingere le due levette
poste nell’estremità inferiore dei braccioli (g. 35) e tirare verso l’alto
il manicotto.
36. Per una congurazione più pratica, è possibile rimuovere anche
che i braccioli, andando ad agire sulle leve poste centralmente sotto
di essi (g. 36).
37. Per riagganciare i braccioli, occorre inserire nell’apposita fessura
la parte plastica terminale del bracciolo di destra e ruotare verso il
basso sino ad udire un click di avvenuto aggancio (g. 37). Ripetere
la stessa operazione per l’altro bracciolo.
Codici 79542, 79543
38. Per rimuovere il manicotto paracolpi occorre agire sulle leve po-
ste centralmente sotto i braccioli (g. 38).
39. Per riagganciare il manicotto paracolpi, occorre inserire nell’ap-
posita fessura le parti plastiche terminali del manicotto e ruotare
verso il basso sino ad udire un doppio click di avvenuto aggancio
(g. 39).
FRENO DI STAZIONAMENTO
Il freno di stazionamento è posto in prossimità dell’impugnatura del
passeggino e agisce contemporaneamente su entrambe le ruote
posteriori.
40. Per frenare il passeggino, ruotare verso l’alto la leva di destra con
il simbolo no alla posizione di blocco (g. 40).
ATTENZIONE: Dopo aver azionato la leva del freno, assicurarsi che
esso sia correttamente innestato su entrambi i gruppi ruote poste-
riori.
41. Per sbloccare il freno di stazionamento, premere il pulsante po-
sto al centro della leva (g. 41).

13
RUOTA ANTERIORE PIROETTANTE
Il passeggino è dotato di ruota anteriore piroettante/ssa. Si con-
siglia di utilizzare la ruota ssa quando si percorrono terreni parti-
colarmente accidentati. La ruota in modalità piroettante è invece
consigliata per aumentare la manovrabilità del passeggino.
42. Per azionare la modalità“ruota ssa”, ruotare verso l’alto la leva di
sinistra con il simbolo no alla posizione di blocco (g. 42).
43. Per azionare la modalità “ruota piroettante”, premere il pulsante
posto al centro della leva (g. 43).
AMMORTIZZATORI REGOLABILI POSTERIORI
Il passeggino è dotato di ammortizzatori posteriori regolabili in due
posizioni:
44. La posizione con il simbolo “linea ondulata” indica un sistema di
ammortizzazione morbido, adatto a terreni sconnessi e passeggiate
fuoristrada (g. 44).
45. La posizione con il simbolo “linea retta”indica un sistema di am-
mortizzazione più rigido, adatto a strade asfaltate (g. 45).
46. Per regolare gli ammortizzatori agire sulla leva indicata in gura
46. Entrambi gli ammortizzatori devono essere regolati nella mede-
sima posizione.
UTILIZZO POLTRONCINA E SACCA
47. Sul passeggino Activ3, a seconda del codice del prodotto, è pos-
sibile installare sacca Chicco e poltroncina Chicco AUTOFIX FAST
oppure poltroncina Chicco KEYFIT. Sull’interno del manicotto del
passeggino è possibile vericare la compatibilità dello stesso con le
due tipologie di prodotti (g. 47A e 47B).
Codici 79270, 79541
I passeggini CHICCO che prevedono il sistema CLIK CLAK sui brac-
cioli consentono il ssaggio di sacca e/o di poltroncina Chicco AU
TOFIX FAST al telaio del passeggino senza dover utilizzare dispositivi
aggiuntivi.
Per l’aggancio e lo sgancio della sacca o della poltroncina riferirsi
alle apposite istruzioni.
ATTENZIONE: solo le poltroncine AUTOFIX FAST o le sacche
CHICCO dotate degli appositi dispositivi CLIK CLAK possono essere
agganciate al passeggino. Prima di utilizzare il passeggino in combi-
nazione con sacca o poltroncina, vericare sempre che il sistema di
aggancio sia correttamente bloccato.
UTILIZZARE ESCLUSIVAMENTE ACCESSORI DOTATI DELL’APPOSITO
DISPOSITIVO CLIK CLAK.
48. ATTENZIONE: una non corretta procedura di aggancio dell’ac-
cessorio al telaio può comportare un mal funzionamento del siste-
ma di aggancio, rendendo impossibile lo sgancio. In questo caso è
possibile sbloccare manualmente i ganci agendo con un cacciavite
sulle leve poste sotto i braccioli (g. 48).
Per l’utilizzo di sacca o poltroncina per trasporto auto, riferirsi sem-
pre alle apposite istruzioni.
Codice 79542, 79543
La poltroncina auto Chicco KEYFIT può essere agganciata al telaio
del passeggino tramite gli appositi agganci laterali senza dover uti-
lizzare dispositivi aggiuntivi.
Per l’aggancio e lo sgancio della poltroncina riferirsi alle apposite
istruzioni.
ATTENZIONE: Vericare sempre che il sistema di aggancio sia cor-
rettamente bloccato.
Per l’utilizzo della poltroncina per trasporto auto, riferirsi sempre alle
apposite istruzioni.
CAPOTTA PARASOLE
Il passeggino è dotato di capotta estate/inverno che assicura la
massima protezione dai raggi ultravioletti (UV50+).
49. Per ssare la capotta agganciare le clip di plastica in corrispon-
denza dei perni di blocco (g. 49A) e ssare gli attacchi di velcro
posteriori e laterali come mostrato in gura 49B e 49C.
ATTENZIONE: L’operazione di ssaggio della capotta deve avvenire
su entrambi i lati del passeggino. Vericare il corretto bloccaggio
della stessa.
50. Per garantire una maggiore protezione dalle intemperie, la ca-
potta può essere utilizzata anche in congurazione XL, agendo sulla
zip posta posteriormente e aprendo l’ulteriore spicchio tessile (g.
50A). E’ presente una doppia nestra trasparente sul tetto della ca-
potta per garantire un maggiore contatto e controllo del bambino
(g. 50B).
PORTAOGGETTI TESSILE
Sul tubolare del maniglione, è presente un comodo portaoggetti
tessile per il genitore, ove possibile riporre oggetti per un’immediata
utilità (biberon, chiavi, telefono, etc.). Portata massima: 1 kg.
51. Per la rimozione della parte tessile per un’eventuale lavaggio, è
necessario aprire tutti i velcri presenti nella parte a contatto con il
telaio del passeggino (g. 51A), sganciare il tondino sagomato del
portaoggetti dal telaio del passeggino tirandolo verso la parte inter-
na (g. 51B) ed inne slare il tessile dal tondino sagomato (g. 51C).
COPRIGAMBE
Il coprigambe è utilizzabile in due modalità dierenti.
52. Per montare il coprigambe occorre agganciare il bottone auto-
matico sotto la seduta come indicato il g.52.
53. Il coprigambe può essere risvoltato sopra il manicotto e ssato
con le asole, come illustrato in gura (g. 53A), oppure è possibile far
passare la parte superiore del coprigambe sotto il manicotto e s-
sarla nella posizione più alta, inserendo i bottoni nelle asole presenti
sui lati dello schienale (g. 53B).
MANTELLINA PARAPIOGGIA
Il passeggino può essere dotato di mantellina parapioggia.
54. Fissare la mantellina parapioggia come indicato in gura 54. A
ne utilizzo, lasciare asciugare all’aria la mantellina (qualora si ba-
gnasse) prima di ripiegare e riporre la mantellina.
ATTENZIONE: La mantellina parapioggia non può essere utilizzata
sul passeggino sprovvisto di capotta, poiché può provocare il soo-
camento del bambino.
ATTENZIONE: Quando la mantellina parapioggia è montata sul
passeggino non lasciare mai lo stesso esposto al sole con dentro il
bambino per evitare il rischio di surriscaldamento.
Nota importante: le immagini e le istruzioni contenute in questo
libretto si riferiscono ad una versione del passeggino; alcune com-
ponenti ed alcune funzionalità qui descritte possono variare a se-
conda della versione da voi acquistata.
GARANZIA
Il prodotto è garantito contro ogni difetto di conformità in normali
condizioni di utilizzo secondo quanto previsto dalle istruzioni d’uso.
La garanzia non sarà applicata, dunque, in caso di danni derivanti da
un uso improprio, usura o eventi accidentali.
Per la durata della garanzia sui difetti di conformità si rinvia alle
speciche previsioni delle normative nazionali applicabili nel paese
d’acquisto, dove previste.

14
IMPORTANT WARNING
IMPORTANT – KEEP THESE
INSTRUCTIONS FOR FUTURE
REFERENCE
WARNING: BEFORE USE, REMOVE
AND DISPOSE OF ALL PLASTIC BAGS
AND PACKAGING MATERIALS AND
KEEP THEM OUT OF REACH OF
CHILDREN.
WARNINGS
•WARNING: Never leave your child
unattended.
•WARNING: Ensure that all the lock-
ing devices are engaged before use
•WARNING: To avoid injury ensure
that your child is kept away when
unfolding and folding this product.
•WARNING: Do not let your child
play with this product
•WARNING: Always use the re-
straint system.
•WARNING: the product must be
assembled by an adult.
•WARNING: This product is not
suitable for running or skating.
•WARNING: Check that the pram
body or seat unit or car seat at-
tachment devices are correctly en-
gaged before use
•The stroller is intended for use with
children aged between 0 and 36
months, up to 15 kg of weighting
•It is recommended that the back-
rest should be used in its most re-
clined position for children from
birth to 6 months of age.
•The parking device shall be en-
gaged when placing and removing
the children.
•To avoid the risk of strangulation,
keep objects tted with strings or
laces out of reach of children.
•Ensure that during these opera-
tions the moveable parts of the
stroller do not come into contact
with your child.
•Do not overload the storage bas-
ket. Maximum weight 3 kg.
•Any load attached to the handle
and/or on the backrest and/or the
sides of the vehicle will aect the
stability of vehicle.
•Do not carry more than one child
at a time
•Do not use accessories, replace-
ment parts, or any component not
supplied or approved by the man-
ufacturer/distributor.
•For car seats used in conjunction
with a chassis, this vehicle does not
replace a cot or a bed. Should your
child need to sleep, then it should
be placed in a suitable pram body,
cot or bed.
•WARNING: before assembly, check
that the product and all of its com-
ponents have not been damaged
during transportation. Should any
part be damaged do not use and
keep out of reach of children.
•WARNING: the use of the crotch
strap and safety harness is neces-
sary to guarantee the safety of your
child. Always use the safety harness
together with the crotch strap.
•WARNING: never leave the stroller
on a sloped surface with a child
onboard, even with the brakes ap-
plied.
•
WARNING: This product must only
be pushed by an adult.
•Ensure that the person using the
stroller knows how to use it safely.

15
•Always apply the brakes whenever
the stroller is stationary.
•Do not use the stroller on stairs or
elevators: it could cause the loss of
control of the stroller.
•Pay special attention when ma-
neuvering the stroller up or down
pavements or a step.
•If the stroller is left exposed to direct
sun light for a long time, allow it to
cool before placing your child in it.
Prolonged exposure to direct sun-
light may cause the fabric to fade.
•Do not use the product if some of
its parts are broken, torn or missing.
•Prevent the stroller from coming
into contact with salt water. It may
cause the formation of rust.
•Do not use the stroller on the
beach.
CLEANING AND MAINTENANCE
The cleaning and maintenance of this product must be carried out
on a regular basis by the user. The cleaning and maintenance of the
stroller must only be carried out by an adult.
CLEANING
The cover can be removed (please refer to the section “REMOVING
THE LINING FROM THE SEAT/ RE-ASSEMBLING THE LINING ON THE
SEAT”). Please refer to the care labels for instructions on how to clean
the fabric parts. Below are the cleaning symbols and their meanings:
Wash by hand in cold water
Do not bleach
Do not tumble dry
Do not iron
Do not dry clean
Periodically wipe clean plastic parts with a soft damp cloth. Always
dry the metal parts to prevent the formation of rust if the stroller has
come into contact with water.
MAINTENANCE
Lubricate the moving parts only if necessary, with a light application
of a silicone based lubricant. Regularly check the condition of the
wheels and, keep them clean of dust and sand. To avoid friction that
may prevent the correct operation of the stroller, ensure that all the
movable plastic parts placed along the metal frame are clean of
dust, dirt or sand. Keep the stroller in a dry place.
ASSEMBLY OF THE REAR WHEELS
1. Put the wheel’s pin inside the relative housing until hearing a
locking ‘’click’’; repeat the operation for the other rear wheel (g. 1).
CAUTION: Make sure the wheel groups are properly secured.
2. It is possible to disassemble the wheels to further reduce the size
when the stroller is folded. To remove the wheels, pull the release
buttons shown in g. 2 and extract the wheel. Repeat the operation
for the other rear wheel.
ASSEMBLY OF THE FRONT WHEEL
3. First of all, assemble the front fork. To do this, align the holes on
the stroller’s frame with the fork’s holes (g. 3A). At this point put
in the supplied pin (g. 3B). Then secure the pin introduced to the
relative ring (g. 3C).
4. Lock the front fork on the frame as shown in g. 4 until hearing
a click.
5. Place the pin of the front wheel in the relative fork’s housing until
hearing a locking click (g. 5).
6. In conclusion, lower the footrest cover until hearing a locking click
(g. 6).
7. To disassemble the front wheel, act on the lever located under the
footrest and then pull the wheel out (g. 7).
OPENING THE STROLLER
8. To open the stroller, press the button located on the handle’s sup-
port tube (g. 8A) and rotate the control forward (g. 8B) moving
the stroller as shown in g. 8C. CAUTION: before use, make sure that
the stroller is locked in open position, checking that the mechanism
is actually locked.
HEIGHT ADJUSTABLE HANDLE
To make the use of the stroller more ergonomic, you can adjust the
height of the handle in 4 positions. To reduce the overall size of the
stroller when folded, you can lower the handle completely.
9. To lower or raise the stroller’s handle, press the external buttons
and adjust the handle at the same time, in the most comfortable
position suitable for your use (g. 9).
ASSEMBLY OF THE SHOPPING BASKET
The stroller is equipped with a basket.
10. Secure the basket using the press stud buttons as indicated in
g. 10.
FOLDING THE STROLLER
11. To close the stroller, press the button located on the handle’s
support tube (g. 11A) and rotate the control forward (g. 11B)
moving the stroller as shown in g. 11C.
12. To further reduce the size of the product when closed, fold the
front fork by acting on the relative lever (g. 12).
CAUTION: to fold the front fork, make sure the swivel mechanism
is locked.
13. For the utmost compactness, you can further reduce the overall
size by removing the rear wheels and the front wheel (see section
‘’Wheels assembly’’).
REMOVING THE SEAT
To make the stroller lighter, the seat can be removed when installing
the carrycot or car seat.
14. To remove the seat, detach rst of all the hood from the seat’s
fabric part, releasing the relative Velcro straps located at the rear (g.
14A) and on the sides (g. 14B) of the hood.
15. Open the zip located on the fabric part that wraps the tube lo-
cated below the handle (g. 15A) and remove the two plastic inserts
located on the stroller’s side tubes (g. 15B), by pressing the buttons.
16. Untie the straps located on the rear, shown in g. 16A and re-
move the fabric part from the leg rest 16B.
17. Finally, lift at the same time the two levers located on the seat’s
rear side (g. 17) and pull towards you.
18. You can use the stroller’s hood without the seat, by wrapping
the rear fabric strap of the hood to the tube, and securing it with the
Velcro straps on the internal side of the hood (g. 18).
ASSEMBLY OF THE SEAT
19. To assemble the seat, slide the plastic parts of the seat on the
stroller’s frame as shown in g. 19A until hearing a double click for
locking (g. 19B).

16
At this point, secure the fabric parts as follows:
20. Introduce the plastic inserts in the relative housing located on
the side tubes of the stroller (g. 20);
21. Secure the straps located on the rear, as shown in g. 21;
22. Close the zip located on the fabric part that wraps the tube po-
sitioned below the handle (g. 22);
23. Secure the hood to the seat’s fabric part by pressing the relative
Velcro straps located on the rear (g. 23A) and on the sides (g. 23B)
of the hood.
REMOVING THE LINING FROM THE SEAT
The stroller’s fabric lining can be completely removed. To remove
the fabric part, follow the steps described in points 15 and 16.
24. Then, release the buckles and remove the 2 fabric straps under
the seat (g. 24), threading the latter through the relative plastic
slots.
25. At this point, pull the fabric part upward to remove it from the
backrest’s frame (g. 25).
RE-ASSEMBLING THE LINING ON THE SEAT
To re-assemble the fabric lining on the seat after washing it, you
must:
26. Fit the backrest’s fabric part on the relative frame (g. 26)
27. Thread the 2 fabric straps located on the seat through the rela-
tive plastic slots (g. 27).
28. Fasten the buckles located under the seat (g. 28A) and intro-
duce the fabric part onto the leg rest (g. 28B).
Finally, follow the steps described in points 20, 21, 22 and 23.
USE OF THE SAFETY HARNESS
29. The stroller is equipped with a safety harness retaining system
with ve anchoring points, consisting of two shoulder straps, a waist
belt and a crotch strap with buckle. CAUTION: To use it with children
from birth to approx. 6 months of age, you must use the shoulder
straps by threading them rst through the two adjusting slots (g. 29).
30. Make sure that the shoulder straps are at a suitable height for
your child: otherwise, adjust the height (g. 30).
31. After placing your child into the harness, put the two forks in the
buckle and adjust the width of the waist belt if needed, pressing on
the buckles (g. 31).
32. To unfasten the waist belt press the two lateral forks at the same
time (g. 32).
CAUTION: To ensure the safety of your child, use the 5-point safety
harness at all times.
CAUTION: To ensure the safety of your child, you must use the
crotch strap and safety harness belts at the same time.
CAUTION: After removing the waist belt (e.g. to wash it), make sure
to re-assemble it properly using the relative slots. The belt must be
adjusted again.
ADJUSTING THE BACKREST
33. By pressing the button located on the stroller’s backrest, you
can adjust the inclination in 4 positions; by releasing the button, the
backrest will lock in the nearest position.
CAUTION: these steps may be hard to execute with the weight of
your child in the seat.
ADJUSTING THE LEG REST
The stroller’s leg rest can be adjusted in 2 positions for your child’s
improved comfort.
34. Press at the same time the two side buttons as shown in g. 34
to adjust the leg rest to the required position.
REMOVABLE BUMPER BAR
CAUTION: Never use the bumper bar to lift the stroller with your
child in it!
Codes 79270, 79541
35. To remove the bumper bar, push the two levers located on the
lower edges of the arms (g. 35) and pull the bar upward.
36. For a more practical conguration, it is also possible to remove
the arms by pressing the levers located at their central part (g. 36).
37. To re-attach the arms, introduce the end plastic part of the right
arm in the relative slot and rotate downward until hearing a locking
click (g. 37). Repeat the same operation for the other arm.
Codes 79542, 79543
38. To remove the bumper bar, press the levers located at the centre
under the arms (Fig. 38).
39. To re-attach the bumper bar, introduce the end plastic parts of
the bar in the relative slot and rotate downward until hearing a lock-
ing click (g. 39).
PARKING BRAKE
The parking brake is located near the stroller’s handle and acts on
both rear wheels at the same time.
40. To stop the stroller, rotate the right lever with the symbol
upward, until the locking position (g. 40). CAUTION: After engaging
the brake’s lever, make sure this is properly enabled on both rear
wheel groups.
41. To release the parking brake, press the button located at the cen-
tre of the lever (g. 41).
SWIVEL FRONT WHEEL
The stroller is equipped with swivel/ xed front wheel. It is sug-
gested to use the xed wheel on particularly uneven surfaces. The
wheel in swivel mode instead, can be used to improve the stroller’s
handling.
42. To engage the ‘’xed wheel’’ mode, rotate the left lever with the
symbol upward, until the locking position (g. 42).
43. To enable the ‘’swivel wheel’’ mode, press the button located at
the centre of the lever (g. 43).
REAR ADJUSTABLE SHOCK ABSORBERS
The stroller is equipped with rear shock absorbers adjustable in two
positions:
44. The position with the‘’wavy line’’ symbol indicates a soft setting
for the shock absorbing system, suitable for uneven ground and o-
road walks (g. 44).
45. The position with the‘’straight line’’symbol indicates a more rigid
setting for the shock absorbing system, suitable for asphalted roads
etc. (g. 45).
46. To adjust the shock absorbers, press the lever shown in g. 46.
Both shock absorbers must be adjusted to the same position.
USING THE CARRYCOT AND CAR SEAT
47. According to the product code, of Activ3 stroller, it is possible to
install Chicco carrycot and Chicco Autox Fast or Chicco KeyFit car
seat. Inside the stroller’s bar, you can check the compatibility of the
stroller with the two types of product (g. 47A and 47B).
Codes 79270, 79541
CHICCO strollers that have the CLIK CLAK system on the arms, allow
the securing of a carrycot and/or Chicco Autox Fast car seat to the
stroller’s frame without using any additional device.
To fasten and release the carrycot or car seat, refer to the relative
product instructions.
CAUTION: Only Autox Fast car seats or CHICCO carrycots equipped
with suitable CLIK CLAK devices can be secured to the stroller. Be-
fore using the stroller with the carrycot or car seat, always make sure
that the fastening system is properly locked. USE EXCLUSIVELY AC-
CESSORIES EQUIPPED WITH THE RELATIVE CLIK CLAK DEVICE.
48. CAUTION: If the accessory is not attached properly to the frame,
this could cause damage the fastening system, thus hindering fas-
tening. In this case, you can manually release the hooks by pressing
on the levers located under the arms using a screwdriver (g. 48).
To use the carrycot or car seat when travelling by car, always refer to
the relative product instructions.
Codes 79542, 79543
Chicco KeyFit car seat can be attached to the stroller’s frame using
the relative side hooks without using any additional device. To fas-
ten and release the car seat, refer to the relative product instruc-
tions.

17
CAUTION: Always make sure the fastening system is properly locked.
To use the car seat when travelling by car, always refer to the relative
product instructions.
HOOD
The strollers is equipped with summer/ winter hood that ensures
utmost protection against UV rays (UV50+)
49. To secure the hood, fasten the plastic clips to the locking pins
(g. 49A) and secure the rear and side Velcro straps as shown in g.
49B and 49C.
CAUTION: The hood must be anchored to both sides of the stroller.
Make sure it is secured properly.
50. To ensure further protection against the weather, the hood can
also be used in an XL conguration, open the zip located on the
side and release additional fabric to enlarge the hood (g. 50A). A
clear double window is present on the hood’s top to ensure further
contact and monitoring of your child (g. 50B).
FABRIC BASKET
A convenient fabric basket for the parent is present on the handle’s
tube, where objects can be stored for immediate use (bottle, keys,
phone, etc...). Maximum capacity: 1 kg.
51. To remove the fabric lining to wash it, release all Velcro straps
located on the part in contact with the stroller’s frame (g. 51A),
release the shaped round part of the basket from the stroller’s fame,
pulling it inward (g. 51B) and nally, remove the fabric part from
the shaped round part (Fig. 51C).
LEG COVER
The leg cover can be used in two dierent ways.
52. To t the leg cover, hook the press stud buttons placed under
the seat as indicated in g.52.
53. The leg cover can be placed over the bumper bar and fastened
within the slots as illustrated in gure (g. 53A). Otherwise, you can
pass the leg cover’s upper part under the bumper bar and fasten it
by inserting the buttons through the slots at the sides of the back-
rest (g. 53B).
RAIN COVER
The stroller may be equipped with rain cover.
54. Secure the rain cover.as shown in g. 54. After use, dry the rain
cover outdoors (if wet) before folding and storing.
CAUTION: The rain cover cannot be used on the stroller without the
hood; it may represent a suocation hazard for the child.
CAUTION: When the rain cover is on the stroller, never leave the
stroller exposed to the sun with your child inside of it, to avoid over-
heating hazards.
Important note:The images and instructions contained in this book-
let refer to a version of the stroller; some components and functions
described herein may vary according to the version you purchase.
WARRANTY
The product is guaranteed against any conformity defect in normal
conditions of use as provided for by the instructions for use.
The warranty shall not therefore apply in the case of damages
caused by improper use, wear or accidental events.
For the duration of warranty on conformity defects please refer to
the specic provisions of national laws applicable in the country of
purchase, where provided.

18
AVIS IMPORTANT
IMPORTANT: CONSERVER CES INS-
TRUCTIONS POUR CONSULTATION
ULTÉRIEURE.
AVERTISSEMENT : AVANT L’EM-
PLOI, ENLEVER ET ELIMINER TOUS
LES SACS EN PLASTIQUE ET ELE-
MENTS QUI FONT PARTIE DE L’EM-
BALLAGE DU PRODUIT ET LES TENIR
HORS DE PORTEE DES ENFANTS.
AVERTISSEMENTS
•AVERTISSEMENT : Ne jamais lais-
ser votre enfant sans surveillance
•AVERTISSEMENT : S’assurer que
tous les dispositifs de verrouillage
sont enclenchés avant utilisation
•AVERTISSEMENT : Pour éviter
toute blessure, maintenir votre en-
fant à l’écart lors du dépliage et du
pliage du produit
•AVERTISSEMENT : Ne pas laisser
votre enfant jouer avec ce produit
•AVERTISSEMENT : Toujours utili-
ser le système de retenue.
•AVERTISSEMENT : Utiliser l’entre-
jambe et les harnais de sécurité
pour garantir la sécurité de l’enfant.
Toujours accrocher le harnais de
sécurité.
•AVERTISSEMENT : Ce produit ne
convient pas pour faire du jogging
ou des promenades en rollers.
•AVERTISSEMENT : Vérier que les
dispositifs de xation de la nacelle,
du siège ou du siègeauto sont cor-
rectement enclenchés avant utili-
sation
•L’utilisation de la poussette est au-
torisée avec les enfants d’un âge
compris entre 0 et 36 mois, jusqu’à
un poids maximum de 15 kg.
•De la naissance de l’enfant à ses 6
mois environ, le dossier doit être
utilisé complètement incliné.
•Le système de freinage doit être
actionné avant de positionner ou
retirer l’enfant.
•Utiliser le système de freinage à
chaque arrêt.
•Ne jamais laisser la poussette sur
un plan incliné si l’enfant se trouve
dedans, y compris avec les freins
serrés.
•Ne pas mettre dans le panier de
poids supérieur à 3 kg.
•Tout poids suspendu aux poignées
et/ou au dossier et/ou sur les côtés
de la poussette pourrait compro-
mettre sa stabilité.
•Ne pas transporter plus d’un enfant
à la fois.
•Ne pas monter sur la poussette
d’accessoires, pièces de rechange
ou composants non fournis ou non
approuvées par le constructeur.
•Lorsque le siège-auto est installé
sur la poussette, il ne remplace pas
un berceau ou un lit. Si l’enfant a
besoin de dormir, il devrait être
placé dans une nacelle, un berceau
ou un lit.
•AVERTISSEMENT : Vérier avant
l’utilisation que le produit et tous
ses composants n’aient pas été en-
dommagés pendant le transport,
auquel cas ne pas utiliser le produit
et le mettre hors de portée des en-
fants.
•AVERTISSEMENT : Pendant les
opérations de réglage, s’assurer
que les parties mobiles de la pous-
sette n’entrent pas en contact avec
FR

19
le corps de l’enfant.
•AVERTISSEMENT : Ne pas utiliser
la poussette sur des escaliers ou des
escaliers mobiles car elle pourrait
être déséquilibrée à l’improviste.
•AVERTISSEMENT : ce produit
doit être utilisé uniquement par un
adulte.
•Le produit doit être monté unique-
ment par un adulte.
•S’assurer que les utilisateurs de la
poussette connaissent le fonction-
nement exact de celle-ci.
•Pour éviter tout risque d’étrangle-
ment, ne pas donner à l’enfant ni
poser près de l’enfant d’objets mu-
nis de cordes.
•Faire AVERTISSEMENT quand on
monte ou descend un degré ou le
trottoir.
•En cas d’exposition prolongée au so-
leil, attendre que la poussette refroi-
disse avant d’y mettre l’enfant. Une
exposition prolongée au soleil peut
provoquer des variations de couleur
des matériaux et des tissus.
•Ne pas utiliser la poussette si des
parties sont cassées, arrachées ou
manquantes.
•Eviter tout contact de la poussette
avec de l’eau salée pour empêcher
la formation de rouille.
•Ne pas utiliser de la poussette à la
plage.
CONSEILS POUR LE NETTOYAGE ET L’ENTRETIEN
Ce produit a besoin d’un entretien régulier.
Les opérations de nettoyage et d’entretien doivent être réalisées uni-
quement par un adulte.
NETTOYAGE
La poussette est déhoussable (consulter le chapitre “COMMENT ENLE-
VER LE REVÊTEMENT DE L’ASSISE/ COMMENT REMETTRE LE REVÊTE-
MENT DE L’ASSISE”).
Pour nettoyer les parties en tissu, consulter les étiquettes de lavage.
Nous indiquons ci-dessous les symboles de lavage et leur signication:
Laver à la main et à l’eau froide
Ne pas utiliser d’eau de javel ou autres agents oxydants
Ne pas utiliser de sèche-linge
Ne pas repasser
Ne pas laver à sec
Nettoyer régulièrement les parties en plastique avec un chion humide.
Sécher les parties métalliques, après tout contact éventuel avec l’eau,
pour éviter la formation de rouille.
ENTRETIEN
En cas de besoin, lubrier les parties mobiles à l’huile sèche de silico-
ne. Contrôler régulièrement l’état d’usure des roues et en nettoyer la
poussière et le sable. S’assurer que toutes les parties en plastique qui
coulissent le long des tubes métalliques ne soient pas couvertes de
poussière, de saleté ou de sable pour empêcher que d’éventuels frot-
tements ne compromettent le bon fonctionnement de la poussette.
Ranger la poussette dans un endroit sec.
MONTAGE DES ROUES ARRIÈRE
1. Enler le tube de la roue dans son logement jusqu’au déclic
de xation ; répéter cette opération pour l’autre roue arrière (g.
1). ATTENTION : Vérier que les groupes de roues sont xés
correctement.
2. Il est possible de démonter les roues pour réduire davantage les
dimensions de la poussette une fois pliée. Pour enlever les roues, tirer
sur les boutons de relâchement de la gure 2 et extraire la roue. Répéter
cette opération pour l’autre roue arrière.
MONTAGE DE LA ROUE AVANT
3. Avant tout, il est nécessaire de monter la fourche avant. Pour cela,
il faut aligner les trous présents sur le châssis de la poussette avec les
trous de la fourche (g. 3A). Il faut maintenant introduire le goujon
(g. 3B) fourni. Ensuite, bloquer le goujon inséré à l’aide de l’anneau
prévu à cet eet (g. 3C).
4. Bloquer la fourche avant sur le châssis comme sur la gure 4
jusqu’au déclic.
5. Introduire la tige de la roue avant dans le siège de la fourche
jusqu’au déclic de xation (g. 5).
6. Pour nir, baisser le couvercle du repose-pieds jusqu’au déclic de
xation (g. 6).
7. Pour démonter la roue avant, il faut agir sur le levier situé sous le
repose-pieds et extraire ensuite la roue (g. 7).
OUVERTURE DE LA POUSSETTE
8. Pour ouvrir la poussette, appuyer sur le bouton situé sur le tube
de la poignée (g. 8A) et tourner la poignée vers l’avant (g. 8B), en
bougeant la poussette comme sur la gure 8C.
ATTENTION : avant d’utiliser la poussette, vérier qu’elle est
bloquée en position ouverte, en contrôlant que le mécanisme est
eectivement bloqué.
POIGNÉE RÉGLABLE EN HAUTEUR
Pour une utilisation de la poussette plus ergonomique, il est
possible de régler la hauteur de la poignée sur 4 positions. Pour
réduire les dimensions de la poussette pliée, il est possible de
baisser complètement la poignée.
9. Pour baisser ou relever la poignée de la poussette, appuyer en
même temps sur les boutons externes et régler la poignée dans la
position la plus confortable (g. 9).
MONTAGE DU PANIER
La poussette est équipée d’un panier.
10. Fixer le panier à l’aide des boutons-pression comme sur la gure
10.

20
FERMETURE DE LA POUSSETTE
11. Pour plier la poussette, appuyer sur le bouton situé sur le tube
de la poignée (g. 11A) tout en tournant la poignée vers l’avant (g.
11B), en bougeant la poussette comme sur la gure 11C.
12. Pour une compacité supérieure du produit fermé, il est possible
de plier la fourche avant à l’aide du levier correspondant (Fig. 12).
Attention: pour plier la fourche avant, vérier que le mécanisme
pivotant est bloqué.
13. Enn, pour obtenir une compacité maximum, il est possible
d’ôter les roues arrière et la roue avant (voir la partie «Montage des
roues»).
COMMENT ENLEVER L’ASSISE
Pour alléger le poids de la poussette lors de l’installation de la
nacelle ou du siège-auto, il est possible d’enlever l’assise.
14. Pour enlever l’assise, il faut avant tout détacher la capote du
revêtement de l’assise à l’aide des rubans velcro situés à l’arrière (g.
14A) et sur le côté (g. 14B) de la capote.
15. Ouvrir la fermeture éclair du revêtement qui enveloppe le
tube situé sous la poignée (g. 15A) et ôter les deux éléments en
plastique situés sur les tubes latéraux de la poussette (g. 15B) à
l’aide des boutons.
16. Détacher les rubans présents à l’arrière indiqués sur la gure 16A
et enlever le revêtement du repose-jambes 16B.
17. Enn, soulever en même temps les deux leviers situés au dos de
l’assise (g. 17) et tirer vers soi.
18. Il est possible d’utiliser la capote de la poussette sans l’assise, en
enveloppant le rabat en tissu arrière de la capote sur le tube et en
le xant à l’aide des rubans velcro présents à l’intérieur de la capote
(g. 18).
MONTAGE DE L’ASSISE
19. Pour installer l’assise, il faut faire coulisser les parties en plastique
de l’assise sur le châssis de la poussette comme sur la gure 19
jusqu’au double déclic de xation (g. 19B).
Il faut maintenant xer les parties en tissu de la façon suivante:
20. Introduire les éléments en plastique dans leurs logements situés
sur les tubes latéraux de la poussette (g. 20) ;
21. Attacher les rubans présents à l’arrière comme sur la gure 21;
22. Fermer la fermeture éclair située sur le tissu qui enveloppe le
tube situé sous la poignée (g. 22);
23. Fixer la capote au tissu de l’assise à l’aide des rubans velcro
placés à l’arrière (g. 23A) et sur le côté (g. 23B) de la capote.
COMMENT ENLEVER LE REVÊTEMENT DE L’ASSISE
Le revêtement de la poussette est complètement amovible. Pour
l’enlever, il faut avant tout suivre les opérations décrites aux points
15 et 16.
24. Ensuite, détacher les boucles et enlever les 2 rubans en tissu
présents sous l’assise (g. 24), en les faisant passer dans les fentes en
plastique prévues à cet eet.
25. Tirer maintenant le revêtement vers le haut pour l’enlever du
châssis du dossier (g. 25).
COMMENT REMETTRE LE REVÊTEMENT DE L’ASSISE
Pour remettre le revêtement de l’assise, après l’avoir éventuellement
lavé, il faut :
26. Enler le revêtement du dossier sur le châssis (g. 26).
27. Introduire les 2 rubans en tissu présents sur l’assise dans les
fentes en plastique prévues à cet eet (g. 27).
28. Accrocher les boucles situées sous l’assise (g. 28A) et enler le
revêtement sur le repose-jambes (g. 28B).
Enn, suivre les opérations décrites aux points 20, 21, 22 et 23.
UTILISATION DES CEINTURES DE SÉCURITÉ
29. La poussette est équipée d’un système de retenue à cinq points
de xation constitué de deux épaulières, une ceinture abdominale
et un entrejambe avec une boucle.
ATTENTION : en présence d’enfants de 0 à environ 6 mois, il est
nécessaire d’utiliser les épaulières en les faisant tout d’abord passer
dans les deux fentes de réglage (g. 29).
30. Vérier que les épaulières sont à une hauteur idéale pour votre
enfant: si ce n’est pas le cas, régler leur hauteur (g. 30).
31. Après avoir installé l’enfant, enler les 2 fourchettes dans la
boucle et régler si nécessaire la largeur de la ceinture abdominale à
l’aide des boucles (g. 31).
32. Pour détacher la ceinture abdominale, appuyer en même temps
sur les deux crans latéraux (g. 32).
ATTENTION : pour garantir la sécurité de votre enfant, il est
indispensable de toujours attacher les ceintures de sécurité.
ATTENTION : pour garantir la sécurité de votre enfant, il est
indispensable d’utiliser simultanément l’entrejambe et les ceintures
de sécurité.
ATTENTION : après avoir enlevé la ceinture abdominale (par ex.
pour la laver), vérier qu’elle a été réintroduite correctement dans
les fentes prévues à cet eet. La sangle doit de nouveau être réglée.
RÉGLAGE DU DOSSIER
33. En appuyant sur le bouton situé sur le dossier de la poussette, il
est possible de régler son inclinaison sur 4 positions ; en relâchant le
bouton, le dossier se bloque dans la position la plus proche.
ATTENTION : avec le poids de l’enfant, les opérations peuvent être
plus diciles.
RÉGLAGE DU REPOSEJAMBES
Le repose-jambes de la poussette peut être xé sur 2 positions, pour
orir plus de confort à l’enfant.
34. Appuyer en même temps sur les deux boutons latéraux comme
sur la gure 34 pour régler le repose-jambes dans la position
souhaitée.
ARCEAU AMOVIBLE
ATTENTION : ne jamais utiliser l’arceau pour soulever la poussette
lorsque l’enfant est dedans.
Codes 79270, 79541
35. Pour ôter l’arceau de protection, pousser les deux leviers situés
en bas des accoudoirs (g. 35) et tirer l’arceau vers soi.
36. Pour plus de praticité, il est possible d’enlever les accoudoirs, à
l’aide des leviers situés au centre en dessous des accoudoirs (g. 36).
37. Pour remettre les accoudoirs, il faut introduire dans la fente
prévue à cet eet la partie en plastique terminale de l’accoudoir
de droite et tourner vers le bas jusqu’au déclic de xation (g. 37).
Répéter cette opération pour l’autre accoudoir.
Codes 79542, 79543
38. Pour ôter l’arceau de protection, utiliser les leviers situés au
centre en dessous des accoudoirs (g. 38).
39. Pour remettre l’arceau de protection, il faut introduire dans la fente
prévue à cet eet les parties en plastique terminales de l’arceau et
tourner vers le bas jusqu’au double déclic de xation (g. 39).
FREIN DE STATIONNEMENT
Le frein de stationnement est situé près de la poignée de la
poussette et intervient sur les deux roues arrière en même temps.
40. Pour freiner la poussette, tourner vers le haut le levier de droite
portant le symbole jusqu’au blocage (g. 40).
ATTENTION : Après avoir actionné le levier du frein, vérier qu’il
est correctement enclenché sur les deux groupes de roues arrière.
41. Pour débloquer le frein de stationnement, appuyer sur le bouton
situé au centre du levier (g. 41).
ROUE AVANT PIVOTANTE
La poussette est équipée d’une roue avant pivotante/xe. Il est
conseillé d’utiliser la roue xe en cas de terrains particulièrement
accidentés. La roue en mode pivotant est en revanche conseillée
pour améliorer la manœuvrabilité de la poussette.
42. Pour actionner le mode «roue xe», tourner vers le haut le levier
de gauche portant le symbole jusqu’au blocage (g. 42).
43. Pour actionner le mode « roue pivotante », appuyer sur le
bouton situé au centre du levier (g. 43).
Other manuals for Activ3
5
Table of contents
Languages:
Other Chicco Stroller manuals

Chicco
Chicco Neuvo User manual

Chicco
Chicco London User manual

Chicco
Chicco Goody Plus User manual

Chicco
Chicco London User manual

Chicco
Chicco SIMPLICITY User manual

Chicco
Chicco Snappy User manual

Chicco
Chicco STYLEGO up User manual

Chicco
Chicco MULTIWAY 2 User manual

Chicco
Chicco Neuvo User manual

Chicco
Chicco Snappy User manual

Chicco
Chicco ENJOY FUN

Chicco
Chicco SEETY User manual

Chicco
Chicco SIMPLICITY User manual

Chicco
Chicco Echo User manual

Chicco
Chicco SPRINT User manual

Chicco
Chicco PASSEGGINO S3 User manual

Chicco
Chicco Bravo User manual

Chicco
Chicco Best Friend Light User manual

Chicco
Chicco FULLY User manual

Chicco
Chicco LITE WAY User manual