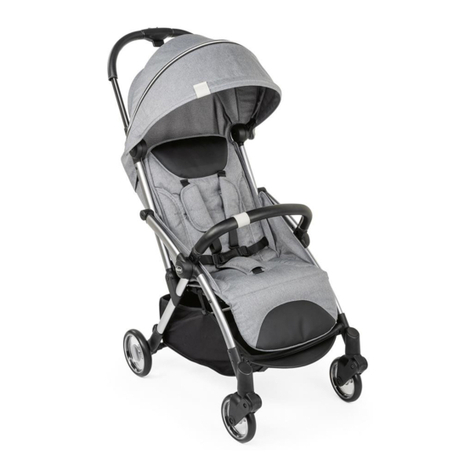
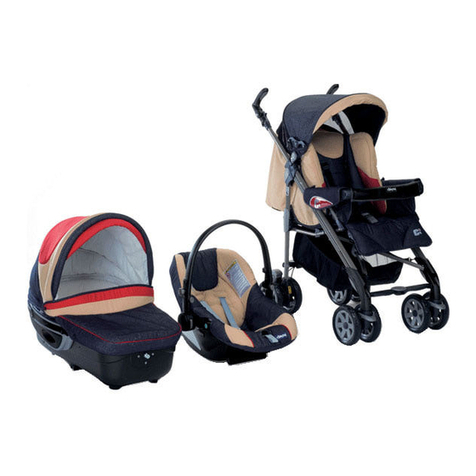
Chicco I-Move User manual

• INSTRUCTIONSFORUSE
composit chicco con trapping sul pallino rosso
logo chicco con trapping sul pallino rosso
logo chicco senza trapping sul pallino rosso
rosso:
pantone 186 C
blu:
pantone 2747 C

3
4
21
5A
8B 8C
6 7 8A
5B
9

11
12
14
15 16 A
13 D
13 B
13 C
10 A 10 B
13 A

16 B
21
23
24
17
19 20
18
22 A 22 B
25 A 25 B

26
27
29
31
25 C
30
32
28 C
28 A 28 B

35
34 A 34 B
39 B 40 A
38
33
36 37
39 A

43
41 42
44 B44 A
46 A
46 C
46 B
40 B
45
47

8
GB
IMPORTANT: KEEP FOR FUTURE
REFERENCE - READ CAREFULLY
IMPORTANT INFORMATION
IMPORTANT: READ THESE INSTRUC-
TIONS CAREFULLY BEFORE USE AND
KEEP
THEMFORFUTUREREFERENCE.
YOURCHILD’SSAFETYMAYBEAFFECT-
EDIFYOUDONOTFOLLOWTHESEIN-
STRUCTIONS.
WARNING:BEFOREUSE,REMOVEAND
DISPOSE OF ALL PLASTIC BAGS AND
PACKAGING MATERIALS AND KEEP
THEMOUTOFREACHOFCHILDREN.
WARNINGS
•WARNING: A CHILD’S SAFETY IS
YOURRESPONSIBILITY.
•WARNING: children should be har-
nessedinatalltimesandshouldnever
beleftunattended
•WARNING: keep children away from
allmovingpartswhilstyouadjustthe
stroller.
•WARNING:The child should be clear
ofmovingpartswhilemakingadjuste-
ments.
•This vehicle requires regular mainte-
nancebytheuser
•Overloading,incorrectfoldingandthe
useofnon-approvedaccessories may
damageorbreakthisvehicle.
•WARNING: It may be dangerous to
leaveyourchildunattended
•WARNING: before assembly, check
thatneithertheproductnoranyofits
componentshavebeendamageddur-
ing transportation; if this is the case,
donotusetheproductandkeepitout
ofthereachofchildren.
•Thisstrollerisintendedforuseforchil-
drenagedbetween0and36months,
weighinguptoamaximumof15kg.
•When used for children from 0 to 6
months of age,the backrest must be
reclinedasataspossible.
•WARNING: Ensure that all locking
devices are engaged before use. In
particular, ensure that the Stroller is
lockedintheopenposition.
•Do not overload the basket with
weightsofover2kg.
•Donotcarrymorethanonechildata
timeinsidetheseat.
•WARNING:itmaybeunsafetousere-
placementpartsotherthanthosesup-
pliedorapprovedbythemanufacturer
ordistributor.
•WARNING:itmaybeunsafetouseac-
cessories, e.g. child seats, bag hooks,
raincoversetc.otherthanthosesup-
pliedorapprovedbythemanufacturer
ordistributor.
•WARNING: any load attached tothe
handleaffectsthestabilityofthepram
/pushchair.
•WARNING:theuseofthecrotchstrap
and safety harness is necessary to
guaranteethesafetyofyourchild.Al-
waysusethecrotchstrapincombina-
tionwiththewaistbelt
•Ensure that the persons using the
strollerknowhowtouseitsafelyand
howitworks.
•WARNING:Toavoidinjuryensurethat
yourchildiskeptawaywhenunfolding
andfoldingthisproduct.
•Do not attempt toopen or closethe
strollerwithachildsittinginit.When
adjusting the stroller, make surethat
no moving parts come into contact
withyourchild.
•Alwaysapplythebrakeswheneverthe
strollerisstationary.
•WARNING:neverleavethestrolleron
a sloping surface with a child inside,
evenwiththebrakesapplied.
•WARNING:Donotletyourchildplay
withthisproduct.
•Toavoidallrisksofstrangulation,nev-
9

8
9
er give childrenobjects with cordsor
stringsattached,orleavethemwithin
theirreach.
•WARNING: never use the stroller on
staircasesorescalators:youcouldsud-
denlylosecontrolofit.Alwayspayat-
tentionwhengoingupanddownsteps
orpavements.
•Ifthestrollerisleftexposedtodirect
sun light for a long time, allow it to
cooldownbeforeplacingyourchildin-
side.Prolongedexposuretodirectsun
lightmaycausethecolourofthema-
terialsandfabrictofade.
•Donotusetheproductifanypartsare
broken,tornormissing.
•WARNING:Checkthattheprambody
or seat unit attachment devices are
correctlyengagedbeforeuse
•WARNING:whenitisnotbeingused,
thestrollershouldbekeptoutofchil-
dren’sreach.
•WARNING:Thisproductisnotsuitable
forrunningorskating
•Preventthe strollerfromcoming into
contactwith saltwater.It maycause
theformationofrustandcorrosion.
•Donotusethestrolleronthebeach.
•WARNING:thisproductmustonlybe
usedbyanadult.
TIPS FOR CLEANING AND MAINTENANCE
Thisproductrequiresperiodicmaintenance.Thecleaning
andmaintenanceoperationsmustonlybecarriedoutby
anadult.
CLEANING
The stroller has a removable lining (please referto the
“Removablelining”section).Pleaserefertothecarelabel
forinstructionson cleaningthefabricparts. Pleasend
belowthewashingsymbolsandrelativemeanings:
Handwashincoldwater
Donotbleach
Donottumbledry
Donotiron
Donotdryclean
Useasoftclothtocleantheplasticpartsonaregularba-
sis.Always dry any metal partsthat come into contact
withwatertopreventtheformationofrust.
MAINTENANCE
Lubricatethemovingparts, if necessary,withadrysili-
conoil.Periodicallychecktheconditionofthewheelsand
keepthemcleanofdust,dirtandsand.Makesureallplas-
ticpartsthat slide alongthemetaltubes are clean and
freefromdust,dirtandsand;thiswillavoidfrictionthat
maypreventthestrollerfromworkingproperly.Keepthe
strollerinadryplace.
OPENING THE STROLLER
WARNING: when opening the stroller, make sure that
yourchildandallotherchildrenareatasafedistance.En-
surethatduringtheseoperationsthemovingpartsofthe
strollerdonotcomeintocontactwithyourchild.
1.Raisethehandlebaruntilitlocksinplace(diag.1).
2.Lifttheframe until it reachesthepositionillustrated
inDiagram2.
3. Pressthe open/close lever (A)following the instruc-
tionsbelow:moveittotheleft(1)andthenupwards(2)
asseenindiagram3.
4.Pushtherearlegoutwardsuntilitreachesthelockpo-
sition(diagram4).
WARNING:makesuretheStrollerislockedintheopen
position.
5. Releasethe snap-clasps on the handle (diagram 5A)
andmovethehandlebartothepositionillustratedindia-
gram5B.
FITTING AND REMOVING THE WHEELS
6.Insertthewheelpinintotheholeontherearlegtube,
asillustratedindiagram6.Repeattheoperationforboth
wheels.
7.Therearwheelscanberemoved.Pressthebuttoninthe
centreofthewheelandslideitoffthepin(diagram7).
FITTING THE SEAT
8.Toassembletheseatontothestrollerframe,graspboth
sidesoftheseatwithtwohandsandconnectthebaseto
the frame (diagrams 8A and 8B) sothat the groove on
theseat(A)isalignedwiththearrowsontheframe(B)
(diagram8C).Adjustthepositionoftheseatuntilitclicks
securelyintoplace.
SAFETY HARNESS
Thestrollercomeswithave-pointsafetyharnesswhich
consists in two shoulder straps, a lap belt and a crotch
strapwithabuckle.
WARNING:alwaysusetheshoulderstrapwhencarrying
childrenfrom0to6monthsofage.
9.Threadthesafetyclaspsthroughthefabricloops(diag.
9) and check thatthe shoulder straps aretted at the
rightheightforthechild:ifthisisnotthecase,adjustthe
heightasnecessary.
10.Bringtheupperharnessstrapclasp(A)inlinewiththe
triangleonthelapbeltclasp(B)(Diagram10)andthenin-
sertthembothintheharnessbuckle(C).Slidetheharness
strapsalongtheplasticringsuntiltheyaretightenough.
Pressthecentrebutton(D)toreleasethesafetyharness
straps.
Forextrasafety,thestrolleristtedwithD-ringswhich
can be used tot a separate safety harness, compliant
withBS6684Standards.Theringsarettedinternallyon
therightandleftsideofthestrollerseat(diag.10B).
WARNING:thesafetyharnessmustalwaysbefastened
toguaranteecompletesafetyforyourchild.
PARKING BRAKE
The parking brake control lever is tted onthe stroller
handlebar,
11.Toactivatethebrake,turnthelevercounterclockwise
untilitlocksinplace,andtheredbrakeONindicatoris

10
11
visible.Thebrakingdeviceisnowfullyoperational(Dia-
gram11).
12.Toreleasethebrakes,pressthecentralbuttononthe
lever(diagram12).ThegreenbrakeOFFindicatorwillnow
bevisible.
WARNING:Alwaysapplythebrakeswheneverthestroller
isstationary.Neverleavethestrolleronaslopingsurface
withachildinside,evenwiththeparkingbrakeON.
USER MODES
13. The stroller can be used in either parent-facing or
front-facingmode.
Thestrollercanbeswitchedfromoneusermodetoan-
otherby:
-rotatingtheseat(diag.13Afront-facing,diag.13Bpar-
ent-facing)
- inverting the handlebar (diag. 13C front-facing, diag.
13Dparent-facing)
ROTATING THE SEAT
WARNING:When performing the operations illustrated
below,alwaysplacethestrolleronaatevensurfaceand
removeanyweightsattachedtothehandlebartoavoid
compromisingitsstability.
Toswitchfromparent-facingmodetofront-facingmode,
orvice-versa,applythebrakesandproceedasfollows:
14. Release both snap-clasps on the handle simultane-
ously,andmovethehandgripsectionupwards,asseen
indiagram14.
15. Useyourfoot to releasethe rotation lock pedal as
seenindiagram15.
16.Theseatcannowberotatedineitherdirection(diag.
16A).Selecttheusermode(parent-facingorfront-facing)
andpullthehandlebarbacktowardsyou(diagram16B).
INVERTING THE HANDLEBAR
Theusermodecanalsobeswitchedbysimplyinverting
thehandlebar.
WARNING:removeallweightsattachedtothe handle-
bar.
Applythestrollerbrakeandproceedasfollows:
17. Release both snap-clasps on the handle and move
thehandgripsectiontotheoppositesideuntilitlocksin
place(diagram17).
WARNING:whenthestrolleris used inthis user mode,
the swivel wheel option must be blocked (see “swivel
wheels”paragraph)
WARNING:thestrollermaybecomeslightlylesseasyto
manoeuvrewhenusedinthismode.
RECLINING THE BACKREST
18.Pullthebutton(A)onthestrollerbackresttoreclineit
tothepositionyouneed(diagram18).Releasethebutton
andthebackrestwillclickintotheclosestlockposition.
Simplypushthebackrestupwardstoraiseitagain.
WARNING:theseoperationscan become moredifcult
whenthechildissatintheseat.
LEG-REST / FOOT-REST
Thestrolleristtedwithapracticaladjustableleg-rest/
foot-rest.
19.Toadjusttheleg-rest/foot-rest,usethetwobuttons
locatedoneachsideoftheleg-rest,asindicatedindia-
gram19,untilyoundtherightposition.Itisnotneces-
saryto pressthe buttons to raisethe leg-rest/foot-rest
again.
BUMPER BAR
20.Toassemblethebumperbar,slidethesidepinsinto
theslotsandpushthemallthewayin(diagram20).
21.Rotatethebumperbartoanuprightpositionandpress
itdownwardsuntilyouhearitclickintoplace(diag.21).
22.Toremovethebumperbar,pressthebuttonindicated
indiagram22Aandpullitupwards.Thenpullthebumper
barintoahorizontalposition.
Thispositioncanbeusedtomakeiteasiertoplacethe
babyinsidethestroller.
To remove the bumper bar completely, pull it until it
slidesoutoftheslotsontheseat(diag.22B).
WARNING:Alwaysrestrainthechildusingthesafetyhar-
ness.ThebumperbarisNOTachildrestraintdevice.
WARNING:neverusethebumperbartoliftthestrollerup.
HAND GRIP
Thehandgripcanbeadjustedinheight.
23.Releasetheadjusterleversonthesidesofthehand
grip,asseenindiagram23,andadjustthehandlebarto
thedesiredheight.Locktheadjusterleversinplace.
SWIVEL WHEELS
The stroller has swivel/xed front wheels. It is recom-
mended to usethe xedwheels on particularly uneven
ground.It is recommendedto usethe swivelwheelson
normalroadsurfacesasitmakesiteasiertomanoeuvre.
24.Toswitchthefrontwheelstoswivelmode,pressthe
front button withyour foot, as seen in diagram 24.To
switchbacktoxedmode,pressthesamebuttonagain
with your foot. Whatever the current position of the
wheel,itwilllockinastraightposition.
WARNING:Bothwheels must be lockedorunlockedat
thesametime.
WARNING: When using the stroller with the swivel
wheelsattheback,theymustbelockedinthexedmode.
REMOVING THE SEAT
WARNING:whenclosingthestroller,makesurethatyour
childandallotherchildrenareatasafedistance.Ensure
that during these operations the moving parts of the
strollerdonotcomeintocontactwithyourchild.
25.Toremovetheseat,raisethebackresttoanupright
position.Useonehandtopressthebackrestadjusterbut-
ton,andtheothertopressthetriangularshapedorange
buttonatthebottomofthe backrest(Diag.25A).Push
thebackrestforwardtowardstheseatuntiltherstsetof
fastenersarereleased.Theseatcannowberotatedallthe
waytowardsthefrontsectionofthestroller(Diag.25B).
Pulltheorangehandlelocatedundertheseattoremove
itfromtheframe(Diag.25C).
CLOSING THE STROLLER
WARNING:whenclosingthestroller,makesurethatyour
childandallotherchildrenareatasafedistance.Ensure
that during these operations the moving parts of the
strollerdonotcomeintocontactwithyourchild.
Positionthestrollerinfront-facingmode,asseenindia-
gram13A.
26.Releasethemetalhingesasseenindiagram26and
fold the hood;then followthe instructions provided in
sections25Aand25B.
27.Shortenthehandlemakingitmorecompact(1).Re-
leasebothsnap-claspsonthehandleandturnthehand
grip(2)tothepositionillustratedindiagram27.
Presstheopen/closelevertofoldthestroller,asillustrat-
edindiagram3.
28.With the open/close lever stilldisengaged, now re-
leasethelockdevicepushingittowardsthecentreofthe
frame(Diag.28A).Liftitupwardsandcloseit(Diag.28B)
sotherearwheelsapproachthefrontwheelsandlockin
place(Diag.28C).
Attention:werecommendclosingthehandlebartowards
thefrontwheelstomakeitmorecompactwhenfolded.
10
11
29.Tomaketheframeevenmorecompact,youcanalso
removetheseatfromtheframebypressingtheorange
leverlocatedundertheseat(diag.25C)asillustratedin
diagram29.
USING THE CHILD CAR SEAT AND CARRYCOT
TheI-MOVEcarrycotandtheI-MOVEcarseatcanalsobe
assembledontheCHICCOI-MOVEstrollerframe.Please
consulttherelativeinstructionsforinformationonhow
totandremovethecarrycotorchildseat.
WARNING:onlytheCHICCOI-MOVEchildcarseatand
carrycot can befastened onto the I-MOVE stroller. Be-
foreusing the strollerin combinationwiththecarrycot
orchildcarseat,alwayscheckthatthehook-onsystem
iscorrectlyclosedandlockedinplace.ONLYUSEACCES-
SORIESFITTEDWITHTHERELATIVEI-MOVEHOOK-ON
DEVICE.
REMOVABLE COVERS
30.Toremovetheseatcover,openthevelcrofastenerun-
dertheseat,asillustratedindiagram30.
31.Toremovethebackrestcover,openthetwovelcrofas-
tenersbehindtheseat,asillustratedindiagram31.
32.To removethe main cover,openthevelcrofastener
(A)underthetriangularorangebutton,andthezip(B)as
illustratedindiagram32.
33.Removethesideseatcoverfromthebodywork(diag.
33)
34.Openthe zip located underthe foot-rest(diagrams
34Aand34B).
35.Removethecoverfromthestrollerbypullingitover
thebackrest(diag.35)
ACCESSORIES
WARNING:Theaccessoriesdescribedbelowarenotnec-
essarilyavailableonsomeversionsoftheproduct.
WARNING: Please read the instructions relative to the
accessories ttedon thetype of strolleryou purchased
carefully.
TRANSFORMABLE HOOD
Atransformablehoodcanalsobettedonthestroller.
36.Theseathastwoxturesonthesidesofthebackrest
whichareusedtotthehood.Tot/removethehood,
slidetheclip-onsystemintothextures,asillustratedin
diagram36.
37.Closetheziponthebackoftheseat(Diag.37).
WARNING:The hood must be tted correctly on both
sidesofthestroller.Checkthatitissecurelyfastened.
38.Toopenthehood,pressthefrontarchforwardsand
fastenitinplaceusingthesidehinges,asseenindiagram
38.
39.Touseitasasummersun-hood,simplyopentherear
zip(diagram39A)andadjustthehoodtothedesiredpo-
sition(diag.39B).
40. When the backrest is full reclined, it is possible to
opentheziponthebacktoexpandtherangeofthehood
andguaranteeextraprotection(diag.40Aand40B).
COMFORT KIT
ThestrollercanalsobettedwithaComfortKit.
41.TheComfortKitcomeswith2shoulderstrappadsA,a
crotchstrapcoverBandacushionC(diagram41).
42. Slide the shoulder pads onto the straps as seen in
diagram42.Thestrapscanbeadjustedtosuitthechild’s
height.
43.Slidethecrotchstrapintotheslotinthematerialas
seenindiagram43.
WARNING:thesafetyharnessmustalwaysbefastened
toguaranteecompletesafetyforyourchild.
RAINCOVER
Araincovercanalsobettedontothestroller.
44.Fittheraincoverbyfasteningittothehoodusingthe
elasticatedsectionatthetop(diag44A)andxinplace
attaching theVelcrofasteners to the ends of the front
frametubes,asillustratedin44B.Whenyouhavenished
usingit,allowittodryproperly(ifitiswet)beforeyou
folditaway.
WARNING:payparticularattentionwhenusingtherain-
cover.
WARNING: the raincover cannot be used on a stroller
whichhasnohoodorsun-hoodasitcouldsuffocatethe
child.Whentheraincoveristtedonthestroller,never
leaveitexposedtodirectsunlightwiththechildinside,as
thetemperaturewillriseconsiderably.
SLEEP SACK / LEG COVER
TheStrollercanbettedwithababysleepsackwhichcan
alsobeusedasalegcover.
45. Start by removing the bumper bar, then place the
babysleepsackontheseat.Slidethebumperbarthrough
theslotsonthebabysleepsackandfastenittotheseat
(diag.45).
Thesleepsackhasazipatthebacktodivideitintoamat-
tress and leg coverwhich can be used individually.The
standardsleepsackuserinstructionsarethesamewhen
usedonthestroller.
CARRY-ALL BASKET
Thestrollercanbettedwithapracticalcarry-allbasket.
46.Toassemblethebasketonthestroller,attachthevel-
crofasteners,onthethreeendsofthebasket,tothethree
slotsonthestroller(diagrams46Aand46B);thenthread
the2straps,foundonthetoppart,aroundthetubeand
fasteninplaceasseenindiagrams46Aand46C.
WARNING:Do notoverloadthebasketwithweightsof
morethan2kg.Youmustremoveallcontentsfromthe
basketbeforeyouclosethestroller.
BAG
The stroller can also betted with a practical carry-all
bag,whichincludesachangingmat.
47. To make the bag even more practical, both the in-
sideandoutsidehavelotsofpocketsandcompartments
whichcanbeusedtostoreanumberofdifferentitemsin
anorderlymanner(diagram47).
WARNING:donotoverloadthebagwithweightsofover
2kg.
WARNING:exceedingthislimitmaycompromisethesta-
bilityofthestrollerandcauseittotoppleover.
Importantnote:theimagesandinstructionscontainedin
thishandbookrefertooneversionofthestroller;some
componentsandfunctionsdescribedhereinmayvaryac-
cordingtotheversionofthestrolleryouhavepurchased.
FOR FURTHER INFORMATION
ARTSANA UK Ltd.
Prospect Close - Lowmoor Road
Industrial Estate - Kirby in Ashfield
Nottingham NG 17/7 LF - England U.K.
Tel. +44 1623 750870 (office hours)
www.chicco.com

0-36
BS 7409: 1996
EN 1888:2005
46 79191 000 093 92804.L.1
ARTSANA S.p.A. - Via Saldarini Catelli, 1 - 22070 Grandate (CO) - Italy
Tel. (+39) 031 382 111 - Fax (+39) 031 382 400 - www.chicco.com
0-6
composit chicco con trapping sul pallino rosso
logo chicco con trapping sul pallino rosso
logo chicco senza trapping sul pallino rosso
rosso:
pantone 186 C
blu:
pantone 2747 C
Enable the QR player with your mobile phone or your OC webcam, frame the code and
discover the demo!
GB
Other manuals for I-Move
3
Table of contents
Other Chicco Stroller manuals

Chicco
Chicco LITE WAY User manual

Chicco
Chicco ENJOY FUN

Chicco
Chicco URBAN PLUS User manual

Chicco
Chicco London User manual

Chicco
Chicco Capri User manual

Chicco
Chicco trioLove User manual

Chicco
Chicco Cortina Magic User manual

Chicco
Chicco Bravo User manual

Chicco
Chicco SIMPLICITY User manual

Chicco
Chicco active User manual

Chicco
Chicco One4Ever Snuggle Pod User manual

Chicco
Chicco SPRINT User manual

Chicco
Chicco I-Mowe User manual

Chicco
Chicco Miinimo 3 User manual

Chicco
Chicco TrioMYCITY User manual

Chicco
Chicco CORTINA User manual

Chicco
Chicco VIARO User manual

Chicco
Chicco Echo User manual

Chicco
Chicco SIMPLICITY User manual

Chicco
Chicco Urban User manual