Chopin Infraneo Instruction sheet

Quick installation and rst test
Installation rapide et premier test
Instalación rápida y primer test
Ʉɪɚɬɤɨɟɪɭɤɨɜɨɞɫɬɜɨɩɨɭɫɬɚɧɨɜɤɟ
ɢɩɪɨɜɟɞɟɧɢɸɩɟɪɜɨɝɨɚɧɚɥɢɡɚ

INSTALL YOUR INFRANEO
A. Contents
B. Unpacking
C. Installation
1. Install the Infraneo on a stable, horizontal surface.
•Do not place the Infraneo behind a window, especially
if it is in direct sunlight.
•The ambient temperature should be around 20°C.
2. Connect the unit with the power cable.
•To avoid any problem related to electrical loads, we recommend that you connect power
conditioner between the Infraneo and the power supply.
3. If necessary, connect the printer to the USB port, which is located on the lower part of
the front panel of the device.
Keep this packaging. It is essential to use it to transport the device.
RJ45
connector
Dedicated USB
port for the
printer
Free USB ports
Infraneo
Universal
sliding cell
USB stick with software
and user’s manual
Cleaning kit
USB stick for data
backup
Grain and/or milling kit
(depending on version)
Printer
(option)
Power cable

D. Initialization
A. Choose the sliding cell to use
B. Prepare the sample
1. Power up the Infraneo using the I/O switch located
at the rear of the device.
2. Wait a few seconds for Windows to start up
(appearance of the blue screen).
3. The messages corresponding to the start-up phase
of the device will appear (duration:10 minutes).
4. A series of self-tests will be performed during the
start-up. One of the two sliding cells must be in
place to ensure the correct setting of the device.
Universal sliding cell
A. Compartment for powder products (analyzed with a
Neocup which is included in the milling kit).
B. Cleaning accessory compartment.
C.Compartment for medium-size grain (e.g. wheat).
For grain
1. Place the sliding cell in the Infraneo.
2. Fill the hopper with grain only.
Grain sliding cell
A. Compartment for small grain (e.g. rapeseed).
B. Compartment for large grain (e.g. maize).
C.Compartment for medium-size grain (e.g. wheat).
Follow this sequence for each start-up of the Infraneo.
This sliding cell is required to clean the Infraneo.
PERFORM A FIRST TEST
A
A
B
B
C
C
For meal or other powdered products
Choose the appropriate Neocup: the one marked «BRAN»
for crushed products, and the unmarked Neocup for flour
and other powdered products.
1. Fit the lower cup onto the Neofix bracket.
2. Place 1 spoonful of flour (or other powdered product) in
the lower cup.
3. Level the product by positioning the scraper at an angle
of 45° to the lower cup.
4. Assemble the cups: rotate the upper cup by 90° until
the end stop and remove the Neocup.
5. Place the Neocup in the sliding cell toward the direction
of the arrow.
6. Place the sliding cell in the device.
1 2 3 4
1 2
5 6

C. Start the test
E. Export the results
D. Print the results
A. Select the product to be analyzed from the drop-
down menu in the main window of the application.
B. Click on ‘‘Analyze’’.
C.Name the sample.
D.Press ‘‘Measure’’.
It is possible to manually export the results at the end
of the analysis:
A. Select the analyses to export by clicking the
corresponding boxes in the first column (or select
all the tests by clicking on ‘‘All’’).
B. Click on ‘‘Export results’’.
C.Enter the name of the file in which the results will be
exported.
D.Connect a USB stick to a USB port of the front
panel (other than the printer port).
E. If necessary, select the location on the stick where
the exported file is to be saved and click on ‘‘OK’’.
The file copied on the stick with a .csv extension
is compatible with a spreadsheet program such as
ExcelTM.
If a printer is connected and enabled (left USB port on the front panel), the results
are automatically printed at the end of the analysis.
Click on to enable printing.
Click on to disable it.
To change or remove the sliding cell, click on
‘‘Unlock sliding cell’.
A
B
It is recommended to switch off the device
every day.
C
D
Click on to enable the
zoom mode.
Click on to return to the
standard display.
A. Press the ‘‘Exit’’ button to stop the application.
B. Press ‘‘Start/Stop’’ in the operating system to turn
off the screen.
C.Power off the Infraneo device using the I/O switch
located at the rear of the device.
TURN OFF THE INFRANEO
A
Program shutdown
B
D
E
C

INSTALLER VOTRE INFRANEO
A. Composition
B. Déballage
C. Installation
1. Poser l’Infraneo sur une surface horizontale et
stable.
•Ne pas placer l’Infraneo derrière une vitre, surtout
si celle-ci est particulièrement exposée au soleil.
•La température ambiante doit être d’environ 20°C.
2. Brancher l’appareil au secteur à l’aide du câble d’alimentation.
•Pour éviter tout problème lié aux charges électriques nous vous conseillons de brancher
un onduleur entre l’Infraneo et la source de courant.
3. Si besoin, brancher l’imprimante sur le port USB qui se trouve sur la partie inférieure de
la face avant de l’appareil.
Conservez cet emballage. Il est à utiliser impérativement pour tout transport de l’appareil.
Connecteur
RJ45
Port USB
dédié au
raccordement
de l’imprimante
Port USB libres
Infraneo
Navette universelle
Clé USB avec logiciel
et mode d’emploi
Kit de nettoyage
Clé USB pour
la sauvegarde
de données
Navette grain et/ou kit meunier
(selon version)
Imprimante
(option)
Câble
d’alimentation

D. Initialisation
A. Choisir la navette à utiliser
B. Préparer l’échantillon
1. Mettre l’Infraneo sous tension à l’aide du bouton
I/O qui se trouve à l’arrière de l’appareil.
2. Attendre quelques secondes l’initialisation de
Windows (apparition de l’écran bleu).
3. Apparition des messages de la phase de démarrage
de l’appareil (durée: 10 minutes).
4. Lors du démarrage, une série d’auto-test s’effectue.
Afin d’assurer le bon calage de l’appareil, l’une des
deux navettes doit être introduite.
Navette Universelle
A. Compartiment pour les produits pulvérulents (analysés
avec une Neocup qui est incluse dans le Kit meunier).
B. Compartiment accessoire nettoyage.
C.Compartiment pour les graines de taille moyenne (ex. blé).
Pour le grain
1. Introduire la navette dans l’Infraneo.
2. Remplir la trémie avec du grain uniquement.
Navette Grain
A. Compartiment pour les petites graines (ex. colza).
B. Compartiment pour les grosses graines (ex. maïs).
C.Compartiment pour les graines de taille moyenne (ex. blé).
Respecter cette séquence à chaque mise en route de l’Infraneo.
L’utilisation de cette navette est obligatoire pour le
nettoyage de l’Infraneo.
RÉALISER UN PREMIER TEST
ett
oyage
d
e
l’I
n
f
raneo.
A
A
B
B
C
C
Pour les farines ou autres pulvérulents
Choisir la Neocup appropriée: celle marquée «BRAN» pour
les produits broyés et celle sans marquage pour la farine et
autres pulvérulents.
1. Mettre en place la coupelle inférieure sur le support
Néofix.
2. Mettre 1 cuillère de farine (ou autre pulvérulent) dans la
coupelle inférieure.
3. Araser le produit en positionnant la raclette à 45° par
rapport à la coupelle inférieure.
4. Assembler les coupelles : faire pivoter la coupelle
supérieure de 90° jusqu’à arriver en butée et retirer la
Neocup.
5. Mettre la Neocup dans la navette en respectant le sens
(flèche vers le bas).
6. Introduire la navette dans l’appareil.
1 2 3 4
1 2
5 6

C. Lancer le test
E. Export des résultats
D. Impression des résultats
A. A partir de la fenêtre principale de l’application,
sélectionner le produit à analyser dans le menu
déroulant.
B. Cliquer sur Analyser.
C.Nommer l’échantillon.
D.Appuyer sur mesure.
Il est possible d’exporter manuellement les résultats
en fin d’analyse :
A. Sélectionner les analyses à exporter en cochant les
cases correspondantes dans la première colonne
(ou tous les essais en cliquant sur «Tous»).
B. Cliquer sur «Exporter résultats».
C.Saisir le nom du fichier dans lequel seront exportés
les résultats.
D.Connecter la clé USB verte sur un port USB libre de
la face avant (sauf port USB imprimante).
E. Sélectionner si nécessaire l’emplacement où sera
exporté le fichier sur la clé et cliquer sur «OK».
Le fichier copié sur la clé qui porte l’extension .csv est
compatible avec un tableur de type ExcelTM.
Si une imprimante est connectée et activée (port USB de gauche en façade), les
résultats sont automatiquement imprimés en fin d’analyse.
Cliquer sur pour activer l’impression.
Cliquer sur pour la désactiver.
Pour changer ou sortir la navette, cliquer sur
«Déverrouiller navette».
A
B
Il est recommandé d’éteindre l’appareil tous
les jours.
C
D
Cliquer sur pour activer le
mode loupe
Cliquer sur pour revenir à
l’affichage standard.
A. Appuyer sur le bouton «Sortir» pour arrêter
l’application.
B. Appuyer sur «Démarrer/Arrêter» dans le système
d’exploitation pour éteindre l’écran.
C.Arrêter complétement l’appareil l’Infraneo à l’aide
du bouton I/O qui se trouve à l’arrière de l’appareil.
ETEINDRE L’INFRANEO
A
Arrêt du programme
B
D
E
C

INSTALAR EL INFRANEO
A. Composición
B. Desembalaje
C. Instalación
1. Colocar el Infraneo sobre una superficie horizontal
y estable.
•No colocar el Infraneo detrás de un cristal, sobre
todo si está particularmente expuesto al sol.
•La temperatura ambiente debe ser de alrededor
de 20°C.
2. Conectar el equipo a la corriente con la ayuda del cable de alimentación.
•Para evitar cualquier problema relacionado con la carga eléctrica, es aconsejado
conectar un convertidor entre el Infraneo y la toma de corriente.
3. Si es necesario, conectar la impresora en el puerto USB que se encuentra en la parte
inferior de la parte delantera del aparato.
Conservar el embalaje. A utilizar imperativamente para el transporte del equipo.
Conector RJ45 Puerto USB
para conectar
la impresora
Puertos USB
libres
Infraneo
Célula universal
Memoria USB con software
y modo de empleo
Kit de limpieza
Memoria USB para
guardar los datos
Célula grano y/o kit para harina
(según versión)
Impresora
(opcional)
Cable
de alimentación

D. Inicialización
A. Elegir la célula de análisis
B. Preparar la muestra
1. Encender el Infraneo con la ayuda del botón I/O
que se encuentra en la parte trasera del aparato.
2. Esperar unos segundos a que se inicie Windows
(aparición de la pantalla azul)
3. Aparición de los mensajes de inicio del aparato
(duración: 10 minutos)
4. Durante la fase de inicialización, se realizan una
serie de autotests. Con el fin de garantizar la buena
sincronización del aparato, una de las células de
análisis debe ser introducida.
Célula universal
A. Compartimento para los productos pulverulentos
(analizados con la Neocup que está incluida en el kit para
harina).
B. Compartimento accesorio de limpieza.
C.Compartimento para los granos de tamaño medio (ej. trigo).
Para el grano
1. Introducir la célula en el Infraneo.
2. Llenar la tolva únicamente con grano.
Célula Grano
A. Compartimento para los granos pequeños (ej. colza).
B. Compartimento para los granos grandes (ej. maíz).
C.Compartimento para los granos de tamaño medio (ej. trigo).
Respetar esta secuencia cada vez que se arranca el equipo.
La utilización de esta célula es obligatoria para la
limpieza del Infraneo.
REALIZAR UN PRIMER TEST
m
p
i
eza
d
e
l
I
n
f
raneo
.
A
A
B
B
C
C
Para las harinas y otros productos en polvo
Elegir la Neocup apropiada: con la marca ‘‘BRAN’’ para
los productos molidos y sin marca para la harina y otros
productos en polvo.
1. Colocar la copela inferior sobre el soporte Néofix.
2. Poner 1 cuchara de harina (u otro polvo) en la copela
inferior.
3. Enrasar el producto posicionando el rascador a 45° en
relación a la copela inferior.
4. Unir las copelas: pivotar la copela superior 90° hasta
llegar al tope y retirar la Neocup.
5. Poner la Neocup en la célula respetando el sentido
(flecha hacia abajo).
6. Introducir la célula en el aparato.
1 2 3 4
1 2
5 6

C. Iniciar el test
E. Exportar los resultados
D. Impresión de resultados
A. A partir de la ventana principal de la aplicación,
seleccionar el producto a analizar en el menú
desplegable.
B. Hacer clic en ‘‘Análisis’’.
C.Poner nombre a la muestra.
D.Hacer clic en ‘‘Medición’’.
Es posible exportar de forma manual los resultados al
finalizar el análisis:
A. Seleccionar los análisis a exportar activando las
casillas correspondientes en la primera columna (o
todos los ensayos haciendo clic en “todos”).
B. Hacer clic en ‘‘Exportar resultados’’.
C.Elegir el nombre del archivo al que serán exportados
los resultados.
D.Conectar la llave USB verde en un puerto libre de la
parte delantera (diferente al USB de la impresora).
E. Seleccionar, si es necesario, la ubicación en la que
será exportado el archivo en la llave USB y hacer
clic en ‘‘OK’’.
El archivo copiado en la llave USB que lleva la
extensión.csv es compatible con ExcelTM.
Si hay una impresora conectada y activa (puerto USB de la izquierda de la parte
delantera), los resultados se imprimen de forma automática al terminar el análisis.
Hacer clic en para activar la impresión.
Hacer clic en para desactivarla.
Para cambiar o sacar la célula, hacer clic en
“desbloquear célula”.
A
B
Se recomienda apagar el aparato todos los
días
C
D
Hacer clic en para activar
el modo lupa
Hacer clic en para volver al
modo estándar.
A. Hacer clic en el botón ‘‘Salir’’ para salir la aplicación.
B. Cerrar la interfaz del sistema para apagar la
pantalla.
C.Detener completamente el Infraneo con la ayuda
del botón I/O que se encuentra en la parte trasera
del aparato.
APAGAR EL INFRANEO
A
Salir del programa
B
D
E
C

ɍɋɌȺɇɈȼɂɌɖ,1)5$1(2
Ⱥ Ʉɨɦɩɥɟɤɬɧɨɫɬɶ
%Ɋɚɫɩɚɤɨɜɤɚ
&ɍɫɬɚɧɨɜɤɚ
1.ɍɫɬɚɧɨɜɢɬɟ ,QIUDQHR ɧɚ ɭɫɬɨɣɱɢɜɨɣ
ɝɨɪɢɡɨɧɬɚɥɶɧɨɣɩɨɜɟɪɯɧɨɫɬɢ
Ɂɚɩɪɟɳɚɟɬɫɹ ɭɫɬɚɧɚɜɥɢɜɚɬɶ ,QIUDQHR ɩɟɪɟɞ
ɨɤɧɨɦ ɨɫɨɛɟɧɧɨ ɩɨɞ ɩɪɹɦɵɦɢ ɫɨɥɧɟɱɧɵɦɢ
ɥɭɱɚɦɢ
Ɍɟɦɩɟɪɚɬɭɪɚ ɨɤɪɭɠɚɸɳɟɣ ɫɪɟɞɵ ɞɨɥɠɧɚ ɛɵɬɶ
ɩɪɢɛɥɢɡɢɬɟɥɶɧɨ&
ɉɨɞɤɥɸɱɢɬɟɭɫɬɪɨɣɫɬɜɨɩɪɢɩɨɦɨɳɢɤɚɛɟɥɹɩɢɬɚɧɢɹ
ȼɨɢɡɛɟɠɚɧɢɟɩɪɨɛɥɟɦɢɡɡɚɧɟɫɬɚɛɢɥɶɧɨɣɷɥɟɤɬɪɢɱɟɫɤɨɣɧɚɝɪɭɡɤɢɪɟɤɨɦɟɧɞɭɟɦ
ɭɫɬɚɧɨɜɢɬɶ ɢɫɬɨɱɧɢɤ ɫɬɚɛɢɥɢɡɢɪɨɜɚɧɧɨɝɨ ɷɧɟɪɝɨɩɢɬɚɧɢɹ ɦɟɠɞɭ ,QIUDQHR ɢ
ɢɫɬɨɱɧɢɤɨɦɩɢɬɚɧɢɹ
3.ɉɪɢɧɟɨɛɯɨɞɢɦɨɫɬɢɩɨɞɤɥɸɱɢɬɟɩɪɢɧɬɟɪɤ86%ɩɨɪɬɭɪɚɫɩɨɥɨɠɟɧɧɨɦɭɜɧɢɠɧɟɣ
ɱɚɫɬɢɩɟɪɟɞɧɟɣɩɚɧɟɥɢɭɫɬɪɨɣɫɬɜɚ
ɋɨɯɪɚɧɢɬɟɭɩɚɤɨɜɤɭɈɧɚɧɟɨɛɯɨɞɢɦɚɞɥɹɞɚɥɶɧɟɣɲɟɣɬɪɚɧɫɩɨɪɬɢɪɨɜɤɢɭɫɬɪɨɣɫɬɜɚ
5-
ɤɨɧɧɟɤɬɨɪ
ȼɵɞɟɥɟɧɧɵɣ
86%ɩɨɪɬɞɥɹ
ɩɪɢɧɬɟɪɚ
ɋɜɨɛɨɞɧɵɟ
86%ɩɨɪɬɵ
,QIUDQHR
ɍɧɢɜɟɪɫɚɥɶɧɵɣ
ɜɫɬɚɜɧɨɣɦɨɞɭɥɶ
Ʉɨɩɢɹɩɪɨɝɪɚɦɦɧɨɝɨɨɛɟɫɩɟɱɟɧɢɹɢ
ɪɭɤɨɜɨɞɫɬɜɨɩɨɷɤɫɩɥɭɚɬɚɰɢɢ
ɍɫɬɪɨɣɫɬɜɨɞɥɹ
ɨɱɢɫɬɤɢ
86%ɧɚɤɨɩɢɬɟɥɶɞɥɹ
ɪɟɡɟɪɜɧɨɝɨɯɪɚɧɟɧɢɹ
ɢɧɮɨɪɦɚɰɢɢ
Ʉɨɦɩɥɟɤɬɞɥɹɡɟɪɧɚɢɢɥɢɤɨɦɩɥɟɤɬ
ɞɥɹɢɡɦɟɥɶɱɟɧɧɨɝɨɩɪɨɞɭɤɬɚɜ
ɡɚɜɢɫɢɦɨɫɬɢɨɬɦɨɞɟɥɢɨɛɨɪɭɞɨɜɚɧɢɹ
ɉɪɢɧɬɟɪ
ɨɩɰɢɹ
Ʉɚɛɟɥɶɩɢɬɚɧɢɹ

'Ɂɚɩɭɫɤ
Ⱥȼɵɛɟɪɢɬɟɩɨɞɯɨɞɹɳɢɣɜɫɬɚɜɧɨɣɦɨɞɭɥɶ
%ɉɨɞɝɨɬɨɜɤɚɨɛɪɚɡɰɚ
1.ȼɤɥɸɱɢɬɟ,QIUDQHRɩɪɢɩɨɦɨɳɢɩɟɪɟɤɥɸɱɚɬɟɥɹ
,2ɧɚɡɚɞɧɟɣɩɚɧɟɥɢɭɫɬɪɨɣɫɬɜɚ
ɉɨɞɨɠɞɢɬɟ ɧɟɫɤɨɥɶɤɨ ɫɟɤɭɧɞ ɞɥɹ ɡɚɝɪɭɡɤɢ
:LQGRZVɩɨɹɜɥɟɧɢɟɝɨɥɭɛɨɝɨɷɤɪɚɧɚ
ɇɚ ɷɤɪɚɧɟ ɩɨɹɜɹɬɫɹ ɫɨɨɛɳɟɧɢɹ ɨ ɡɚɩɭɫɤɟ
ɭɫɬɪɨɣɫɬɜɚɩɪɨɞɨɥɠɢɬɟɥɶɧɨɫɬɶɦɢɧɭɬ
4.ȼɨɜɪɟɦɹɡɚɩɭɫɤɚɜɵɩɨɥɧɹɟɬɫɹɫɚɦɨɞɢɚɝɧɨɫɬɢɤɚ
ɭɫɬɪɨɣɫɬɜɚ Ⱦɥɹ ɤɨɪɪɟɤɬɧɨɣ ɧɚɫɬɪɨɣɤɢ ɨɞɢɧ
ɢɡ ɞɜɭɯ ɜɫɬɚɜɧɵɯ ɦɨɞɭɥɟɣ ɞɨɥɠɟɧ ɛɵɬɶ
ɭɫɬɚɧɨɜɥɟɧɜɭɫɬɪɨɣɫɬɜɨ
ɍɧɢɜɟɪɫɚɥɶɧɵɣɜɫɬɚɜɧɨɣɦɨɞɭɥɶ
A.Ɉɬɞɟɥɟɧɢɟ ɞɥɹ ɩɨɪɨɲɤɨɨɛɪɚɡɧɵɯ ɩɪɨɞɭɤɬɨɜ ɞɥɹ
ɚɧɚɥɢɡɚɢɫɩɨɥɶɡɭɟɬɫɹɫɩɟɰɢɚɥɶɧɚɹɤɸɜɟɬɚ1HRFXS
ɤɨɬɨɪɚɹ ɜɯɨɞɢɬ ɜ ɤɨɦɩɥɟɤɬ ɞɥɹ ɢɡɦɟɥɶɱɟɧɧɨɝɨ
ɩɪɨɞɭɤɬɚ
%Ɉɬɞɟɥɟɧɢɟɭɫɬɪɨɣɫɬɜɚɞɥɹɨɱɢɫɬɤɢ
&Ɉɬɞɟɥɟɧɢɟɞɥɹɡɟɪɧɚɫɪɟɞɧɟɝɨɪɚɡɦɟɪɚɧɚɩɪɢɦɟɪ
ɩɲɟɧɢɰɵ
Ⱦɥɹɡɟɪɧɚ
1.ȼɫɬɚɜɶɬɟɦɨɞɭɥɶɜ,QIUDQHR
Ɂɚɩɨɥɧɢɬɟɜɨɪɨɧɤɭɡɟɪɧɨɦɜɨɪɨɧɤɚɩɪɟɞɧɚɡɧɚɱɟɧɚ
ɬɨɥɶɤɨɞɥɹɡɟɪɧɚ
ȼɫɬɚɜɧɨɣɦɨɞɭɥɶɞɥɹɡɟɪɧɚ
A.Ɉɬɞɟɥɟɧɢɟ ɞɥɹ ɡɟɪɧɚ ɧɟɛɨɥɶɲɨɝɨ ɪɚɡɦɟɪɚ
ɧɚɩɪɢɦɟɪɫɟɦɹɧɪɚɩɫɚ
%Ɉɬɞɟɥɟɧɢɟɞɥɹɡɟɪɧɚɛɨɥɶɲɨɝɨɪɚɡɦɟɪɚɧɚɩɪɢɦɟɪ
ɤɭɤɭɪɭɡɵ
&Ɉɬɞɟɥɟɧɢɟɞɥɹɡɟɪɧɚɫɪɟɞɧɟɝɨɪɚɡɦɟɪɚɧɚɩɪɢɦɟɪ
ɩɲɟɧɢɰɵ
ɗɬɚɩɨɫɥɟɞɨɜɚɬɟɥɶɧɨɫɬɶɞɟɣɫɬɜɢɣɜɵɩɨɥɧɹɟɬɫɹɩɪɢɤɚɠɞɨɦɡɚɩɭɫɤɟ,QIUDQHR
ɗɬɨɬɜɫɬɚɜɧɨɣɦɨɞɭɥɶɧɟɨɛɯɨɞɢɦɞɥɹɨɱɢɫɬɤɢ
,QIUDQHR
ȼɕɉɈɅɇȿɇɂȿɉȿɊȼɈȽɈȺɇȺɅɂɁȺ
ɨɬ
ɜɫɬɚɜɧɨɣ
ɦɨɞɭɥɶ
ɧɟɨɛɯɨɞɢɦ
ɞ
ɥ
U
D
Q
HR
A
A
B
B
C
C
Ⱦɥɹɦɭɤɢɢɩɪɨɱɢɯɩɨɪɨɲɤɨɨɛɪɚɡɧɵɯɩɪɨɞɭɤɬɨɜ
ȼɵɛɟɪɢɬɟ ɩɨɞɯɨɞɹɳɭɸ ɤɸɜɟɬɭ 1HRFXS ɤɸɜɟɬɚ
ɫ ɧɚɞɩɢɫɶɸ ©%5$1 ɈɌɊɍȻɂª ɩɪɟɞɧɚɡɧɚɱɟɧɚ ɞɥɹ
ɪɚɡɦɟɥɶɱɟɧɧɵɯ ɩɪɨɞɭɤɬɨɜ ɤɸɜɟɬɚ ɛɟɡ ɧɚɞɩɢɫɢ
ɩɪɟɞɧɚɡɧɚɱɟɧɚ ɞɥɹ ɦɭɤɢ ɢ ɩɪɨɱɢɯ ɩɨɪɨɲɤɨɨɛɪɚɡɧɵɯ
ɩɪɨɞɭɤɬɨɜ
1.Ɂɚɤɪɟɩɢɬɟ ɧɢɠɧɸɸ ɱɚɫɬɶ ɤɸɜɟɬɵ ɧɚ ɞɟɪɠɚɬɟɥɟ
1HRIL[
Ɂɚɫɵɩɶɬɟ ɩɨɥɧɭɸ ɥɨɠɤɭ ɦɭɤɢ ɢɥɢ ɞɪɭɝɨɝɨ
ɩɨɪɨɲɤɨɨɛɪɚɡɧɨɝɨ ɩɪɨɞɭɤɬɚ ɜ ɧɢɠɧɸɸ ɱɚɫɬɶ
ɤɸɜɟɬɵ
3.Ɋɚɡɪɨɜɧɹɣɬɟ ɩɨɜɟɪɯɧɨɫɬɶ ɩɪɨɞɭɤɬɚ ɫɤɪɟɛɤɨɦ
ɪɚɫɩɨɥɨɠɟɧɧɵɦɩɨɞɭɝɥɨɦ
4.ɋɨɟɞɢɧɢɬɟ ɨɛɟ ɱɚɫɬɢ ɤɸɜɟɬɵ ɩɨɜɟɪɧɭɜ ɜɟɪɯɧɸɸ
ɱɚɫɬɶ ɧɚ ɞɨ ɭɩɨɪɚ ɢ ɫɧɢɦɢɬɟ 1HRFXS ɫ
ɞɟɪɠɚɬɟɥɹ
5.ȼɫɬɚɜɶɬɟɤɸɜɟɬɭ1HRFXSɜɦɨɞɭɥɶɩɨɧɚɩɪɚɜɥɟɧɢɸ
ɫɬɪɟɥɤɢ
6.ȼɫɬɚɜɶɬɟɦɨɞɭɥɶɜɭɫɬɪɨɣɫɬɜɨ
1 2 3
4
1 2
5 6

&ɇɚɱɚɥɨɚɧɚɥɢɡɚ
(ɗɤɫɩɨɪɬɪɟɡɭɥɶɬɚɬɨɜɚɧɚɥɢɡɚ
'Ɋɚɫɩɟɱɚɬɤɚɪɟɡɭɥɶɬɚɬɨɜ
A.ȼɵɛɟɪɢɬɟɩɪɨɞɭɤɬɞɥɹɚɧɚɥɢɡɚɢɡɜɵɩɚɞɚɸɳɟɝɨ
ɫɩɢɫɤɚɜɝɥɚɜɧɨɦɨɤɧɟɩɪɢɥɨɠɟɧɢɹ
%ɇɚɠɦɢɬɟɧɚµµ$QDO\]HȺɧɚɥɢɡ¶¶
&ȼɜɟɞɢɬɟɧɚɡɜɚɧɢɟɨɛɪɚɡɰɚ
'ɇɚɠɦɢɬɟµµ0HDVXUHɂɡɦɟɪɟɧɢɟ¶¶
ɉɨɫɥɟɡɚɜɟɪɲɟɧɢɹɚɧɚɥɢɡɚɦɨɠɧɨɷɤɫɩɨɪɬɢɪɨɜɚɬɶ
ɪɟɡɭɥɶɬɚɬɵɜɪɭɱɧɨɦɪɟɠɢɦɟ
A.ȼɵɛɟɪɢɬɟ ɚɧɚɥɢɡ ɪɟɡɭɥɶɬɚɬɵ ɤɨɬɨɪɨɝɨ ɧɭɠɧɨ
ɷɤɫɩɨɪɬɢɪɨɜɚɬɶ ɨɬɦɟɬɢɜ ɫɨɨɬɜɟɬɫɬɜɭɸɳɢɟ
ɫɬɪɨɱɤɢ ɜ ɩɟɪɜɨɣ ɤɨɥɨɧɤɟ ɢɥɢ ɜɵɛɟɪɢɬɟ ɜɫɟ
ɚɧɚɥɢɡɵɧɚɠɚɜɧɚµµ$OOȼɫɟ¶¶
%ɇɚɠɦɢɬɟ ɧɚ µµ([SRUW UHVXOWV ɗɤɫɩɨɪɬɢɪɨɜɚɬɶ
ɪɟɡɭɥɶɬɚɬɵ¶¶
&ȼɜɟɞɢɬɟ ɧɚɡɜɚɧɢɟ ɮɚɣɥɚ ɜ ɤɨɬɨɪɨɦ ɧɭɠɧɨ
ɫɨɯɪɚɧɢɬɶɪɟɡɭɥɶɬɚɬɵ
D.ɉɨɞɤɥɸɱɢɬɟ 86%ɧɚɤɨɩɢɬɟɥɶ ɤ 86% ɩɨɪɬɭ
ɧɚ ɩɟɪɟɞɧɟɣ ɩɚɧɟɥɢ ɧɟ ɩɨɞɤɥɸɱɚɣɬɟ 86%
ɧɚɤɨɩɢɬɟɥɶɤɩɨɪɬɭɞɥɹɩɪɢɧɬɟɪɚ
(ɉɪɢ ɧɟɨɛɯɨɞɢɦɨɫɬɢ ɭɤɚɠɢɬɟ ɩɚɩɤɭ ɧɚ 86%
ɧɚɤɨɩɢɬɟɥɟ ɜ ɤɨɬɨɪɨɣ ɫɥɟɞɭɟɬ ɫɨɯɪɚɧɢɬɶ
ɷɤɫɩɨɪɬɢɪɭɟɦɵɟɮɚɣɥɵɢɧɚɠɦɢɬɟ2.
Ɏɚɣɥɵ ɫɤɨɩɢɪɨɜɚɧɧɵɟ ɧɚ 86%ɧɚɤɨɩɢɬɟɥɶ ɫ
ɪɚɫɲɢɪɟɧɢɟɦ FVY ɫɨɜɦɟɫɬɢɦɵ ɫ ɩɪɨɝɪɚɦɦɚɦɢ
ɨɛɪɚɛɨɬɤɢɷɥɟɤɬɪɨɧɧɵɯɬɚɛɥɢɰɧɚɩɪɢɦɟɪ([FHO70.
ȿɫɥɢ ɩɪɢɧɬɟɪ ɩɨɞɤɥɸɱɟɧ ɢ ɝɨɬɨɜ ɤ ɪɚɛɨɬɟ ɥɟɜɵɣ 86% ɩɨɪɬ ɧɚ ɩɟɪɟɞɧɟɣ
ɩɚɧɟɥɢ ɪɟɡɭɥɶɬɚɬɵ ɚɜɬɨɦɚɬɢɱɟɫɤɢ ɪɚɫɩɟɱɚɬɵɜɚɸɬɫɹ ɩɨɫɥɟ ɡɚɜɟɪɲɟɧɢɹ
ɚɧɚɥɢɡɚ
ɇɚɠɦɢɬɟɧɚ ɞɥɹɪɚɫɩɟɱɚɬɤɢ
ɇɚɠɦɢɬɟɧɚ ɞɥɹɨɬɤɥɸɱɟɧɢɹɮɭɧɤɰɢɢɪɚɫɩɟɱɚɬɤɢ
Ⱦɥɹ ɡɚɦɟɧɵ ɢɥɢ ɢɡɜɥɟɱɟɧɢɹ ɜɫɬɚɜɧɨɝɨ
ɦɨɞɭɥɹ ɧɚɠɦɢɬɟ ɧɚ µµ8QORFN VOLGLQJ FHOO
Ɋɚɡɛɥɨɤɢɪɨɜɚɬɶɜɫɬɚɜɧɨɣɦɨɞɭɥɶ¶¶
A
B
Ɋɟɤɨɦɟɧɞɭɟɬɫɹ ɨɬɤɥɸɱɚɬɶ ɭɫɬɪɨɣɫɬɜɨ
ɤɚɠɞɵɣɞɟɧɶ
C
D
ɇɚɠɦɢɬɟɧɚ
ɞɥɹɭɜɟɥɢɱɟɧɢɹɢɡɨɛɪɚɠɟɧɢɹ
ɇɚɠɦɢɬɟɧɚ ɞɥɹɜɨɡɜɪɚɬɚ
ɤɫɬɚɧɞɚɪɬɧɨɦɭɦɚɫɲɬɚɛɭ
ɷɤɪɚɧɚ
$ɇɚɠɚɬɶɧɚɤɧɨɩɤɭµµ([LWȼɵɯɨɞ¶¶ɞɥɹɩɪɟɤɪɚɳɟɧɢɹ
ɪɚɛɨɬɵɩɪɢɥɨɠɟɧɢɹ
%ɇɚɠɦɢɬɟµµ6WDUW6WRSɋɬɚɪɬɋɬɨɩ¶¶ɨɩɟɪɚɰɢɨɧɧɨɣ
ɫɢɫɬɟɦɵɞɥɹɨɬɤɥɸɱɟɧɢɹɷɤɪɚɧɚ
&ȼɵɤɥɸɱɢɬɟ,QIUDQHRɩɪɢɩɨɦɨɳɢɩɟɪɟɤɥɸɱɚɬɟɥɹ
,2ɧɚɡɚɞɧɟɣɩɚɧɟɥɢɭɫɬɪɨɣɫɬɜɚ
ɈɌɄɅɘɑȿɇɂȿ,1)5$1(2
A
ɉɪɟɤɪɚɳɟɧɢɟɪɚɛɨɬɵ
ɩɪɨɝɪɚɦɦɵ
B
D
E
C

Notes / Notas /ǽȞȖȚHȥȎțȖȭ

ǽȞȖȚHȥȎțȖȭ/ Notas / Notes

Non-contractual documentation, produced by
C
H
O
PIN Technologie
s
©
,
a KPM Analytics company. 2018 - Pictures: CHOPIN Technologie
s
©
CHOPIN Technologies
Distributors
CHOPIN Technologies
20 avenue Marcellin Berthelot
92390 Villeneuve-la-Garenne France
www.chopin.fr
CHOPIN Technologies Inc.
19955 West 162nd. Street
Olathe, KS 66062 - USA
CHOPIN (BEIJING)
Trading Company LTD
R804, Unit B, 1# Building, Jia 5#, Lianhuachi
East Rd. Xicheng District,
Beijing, 100038 - CHINA
APPLICATIONS LABORATORY
Research, loans and training
Tel. : +33 1 41 47 17 15
AFTER-SALES SERVICE
Preventive and curative maintenance
Tel. : +33 1 41 47 50 33
SALES DEPARTMENT
Tel. : +33 1 41 47 50 48
Other manuals for Infraneo
2
Table of contents
Languages:
Other Chopin Laboratory Equipment manuals
Chopin
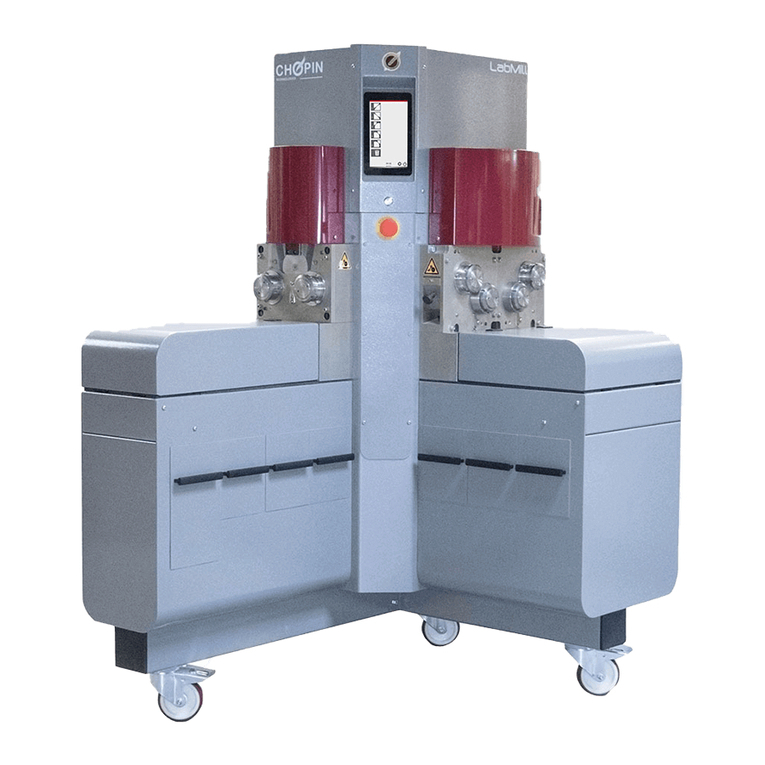
Chopin LabMill Instruction sheet
Chopin
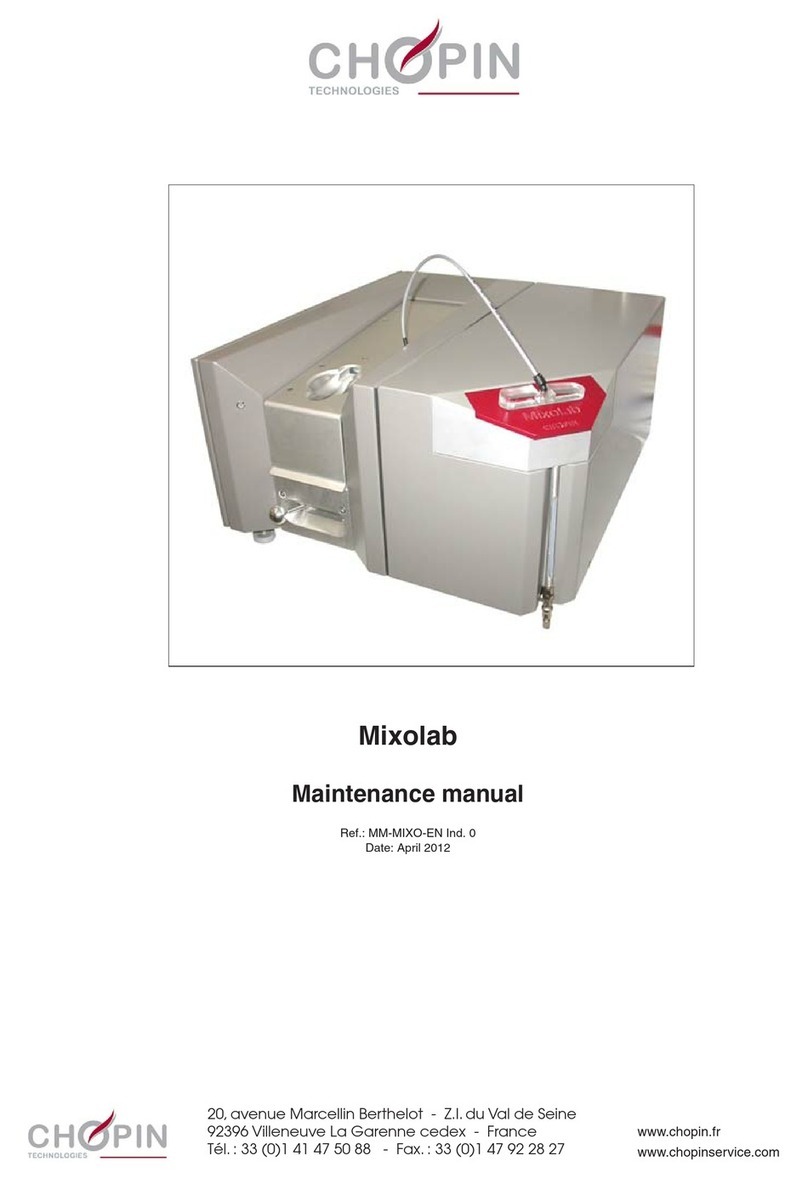
Chopin Mixolab User manual

Chopin
Chopin Mixolab 2 Instruction sheet
Chopin
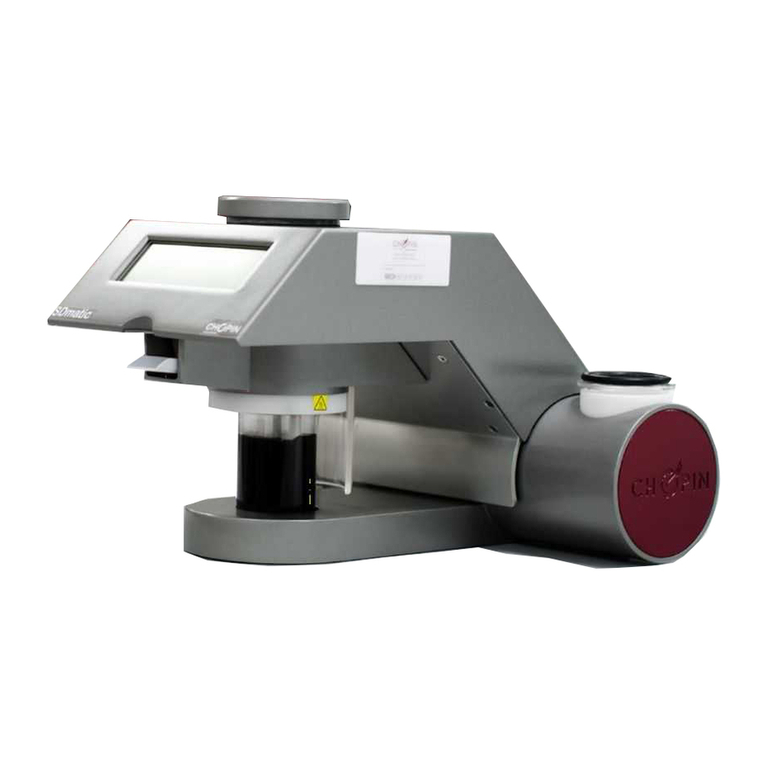
Chopin SDmatic Instruction sheet
Chopin
Chopin RHEO F4 Instruction sheet
Chopin
Chopin Alveo PC graph Instruction sheet
Chopin
Chopin AlveoLabgraph Instruction sheet
Chopin
Chopin Mixolab 2 User manual
Popular Laboratory Equipment manuals by other brands

Woson
Woson DOLPHINN Operation manual
logos biosystems
logos biosystems LUNA-II user manual

Thermo Scientific
Thermo Scientific Orbitrap Fusion Lumos MS Getting connected guide

Civco
Civco GUS G10VPL Operator's manual
Agilent Technologies
Agilent Technologies 6890N Troubleshooting
Wassermann
Wassermann Polyquick 260 user manual
