Chopin RHEO F4 User manual

20, avenue Marcellin Berthelot - Z.I. du Val de Seine
92396 Villeneuve La Garenne cedex - France
www.chopin.fr
Rheo F4
User’s manual
07/2015

Table of contents
1 Introduction.................................................................................................................................................7
2 Installation and start-up............................................................................................................................10
3 Use.............................................................................................................................................................18
4 Maintenance..............................................................................................................................................32
Appendix 1: Standard curves.............................................................................................................................36
Appendix 2: Improving flour quality..................................................................................................................39
Appendix 3: CHOPIN protocol...........................................................................................................................41

Rheo F4
User’s manual 3
07/2015
WARNING
The technical elements that constitute this manual (text and illustrations) are not contractual,
their only target being to bring assistance for using the Rheo F4.
Use, duplication or disclosure of subject data, for any purpose other than relating to the use or
servicing of the equipment, is strictly prohibited without the written authorisation of CHOPIN
Technologies.

Rheo F4
4 User’s manual
07/2015
Rheo F4
User’s manual 5
07/2015

Rheo F4
6 User’s manual
07/2015

Rheo F4
User’s manual 7
07/2015
1 Introduction
1.1 Measurement principle
Development of wheat and rye products during baking depends
both on the quantity of CO2in the dough aqueous phase and on
the rheological properties of the actual dough.
This development depends both on the capacity of the protein
network to be deformed under gas pressure and on the capacity of
the dough to retain this internal pressure until thermal denaturation
of the proteins and starch gelling. Measurement of flour proofing
ability is thus linked to the quality of the dough protein network
during its development.
1.2 Operating principle
The Rheo F4 analyses the development of a dough sample placed
in a test bowl and that will ferment under the conditions imposed by
the protocol used (temperature, weights placed on it, etc.).
Place the piston on the dough, which will
rise progressively as it ferments.
According to the test type conducted, the
piston is loaded by weights.
1
2
3
4
1 Proofing basket 2 Weight
3 Dough 4 Piston
The piston is directly connected to a height sensor that will
measure dough development. Moreover, the device bowl is
connected to a pressure sensor by means of a pneumatic circuit
that measures the pressure increase of the fermenting dough. The
result of a test is thus made up of two plots: the dough
development curve and the gas release curve.
The dough development curve is obtained by measurements taken
at regular intervals by the dough development sensor.
To plot the gas release curve, the pneumatic circuit runs pressure
measurement cycles. These pressure measurements are
converted into flow rates by the microprocessor.

Rheo F4
8 User’s manual
07/2015
The cycle principle consists in measuring total gas release and gas
release less its carbon dioxide trapped in the soda lime cartridge.
The difference between the two gas release curves gives the
quantity of carbon dioxide given off by the dough during the test.
zCycle description:
1. Direct cycle
Electrovalves B and B’ isolating the absorbent (soda lime
cartridge) in the direct circuit are closed, as well as circuit
bleed electrovalve C. Direct circuit isolation electrovalve A is
open. Pressure increase due to swelling of the fermenting
dough is measured by the electronic sensor.
2. Bleed cycle
Once the pressure measurement has been recorded,
electrovalves A,B,B’ are closed and electrovalve C opens to
bleed the circuit and set it to atmospheric pressure.
Electrovalve C then closes.
3. Indirect cycle
Direct circuit isolation electrovalve A and bleed electrovalve C
are closed. Electrovalves B and B’ isolating the soda lime
cartridge and the indirect circuit are open. The increase in
pressure due to dough swelling is measured without the
carbon dioxide that has been trapped by the soda lime.
4. Bleed cycle
A new bleed cycle is run just as described in point 2.
5. A direct cycle is then activated and so on until completion of the
time programmed in the protocol.
Cuve
Absorbant
Volume tampon
Pressure
sensor

Rheo F4
User’s manual 9
07/2015
1.3 Device characteristics
zGeneral characteristics
Power supply: 220/240 Vac - 50 /60 Hz - 150 W
Noise level: < 70 dB
Dimensions: Width x Depth x Height: 415 x 265 x 545 mm
Net weight: 12 kg
Gross weight: 20 kg
zFuse
Fuse 5x20 T 1.6A 250 V
zEnvironment
Indoor use
Storage temperature: – 25 to + 55° C
Device usage temperature: 10 to 35° C
Use: laboratory ambient temperature 3°C less than that of the
protocol used.
Hygrometry: RH<85% at 20° C
Fluctuation in supply voltage: < ± 10%
Degree of pollution as per EN 61010: 2
Installation category as per EN 61010: II
(overvoltage category)
Supply source characteristics:
Connection by 2P + earth / 16A power socket
The electrical network must comprise, upstream from the Rheo,
an RCD with a sensitivity 30mA, class AC.

Rheo F4
10 User’s manual
07/2015
2 Installation and start-up
2.1 Unpacking
The device is protected by a specific packaging. We strongly
recommend that you keep this packaging for transfers from
workstation to workstation or for return for service (re-dispatching
to CHOPIN Technologies or your distributor).
This packaging contains the Rheo F4 with its accessories.
1 2
3 4
5
Rheo F4
User’s manual 11
07/2015
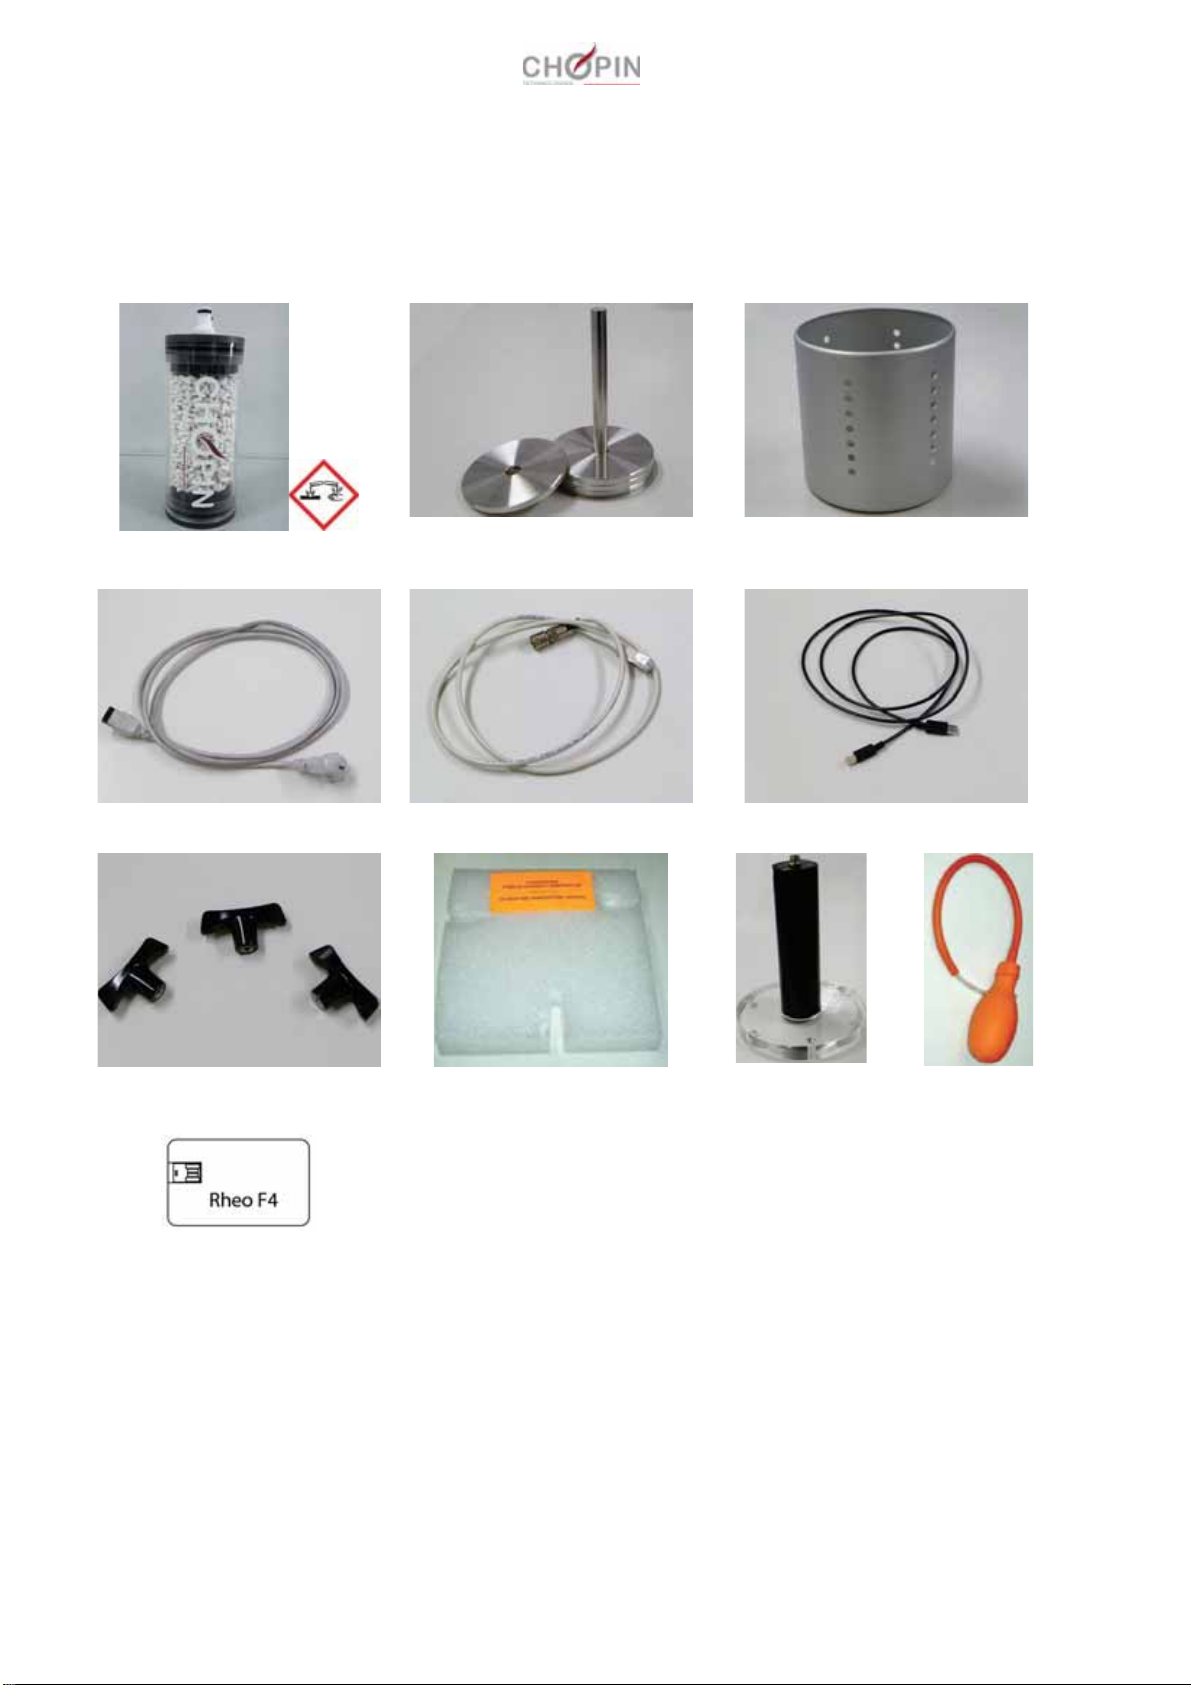
2.2 Part lists
The Rheo F4 package contains the following parts in addition to
the device:
Soda lime cartridge
500 gr weights and standard support
piston assembly
Proofing basket
Power cable
Dough development sensor cable
Cable to computer
Bowl tightening nut
Temperature control support
Dough development
sensor
Pump
USB memory stick (user's
manual and software)

Rheo F4
12 User’s manual
07/2015
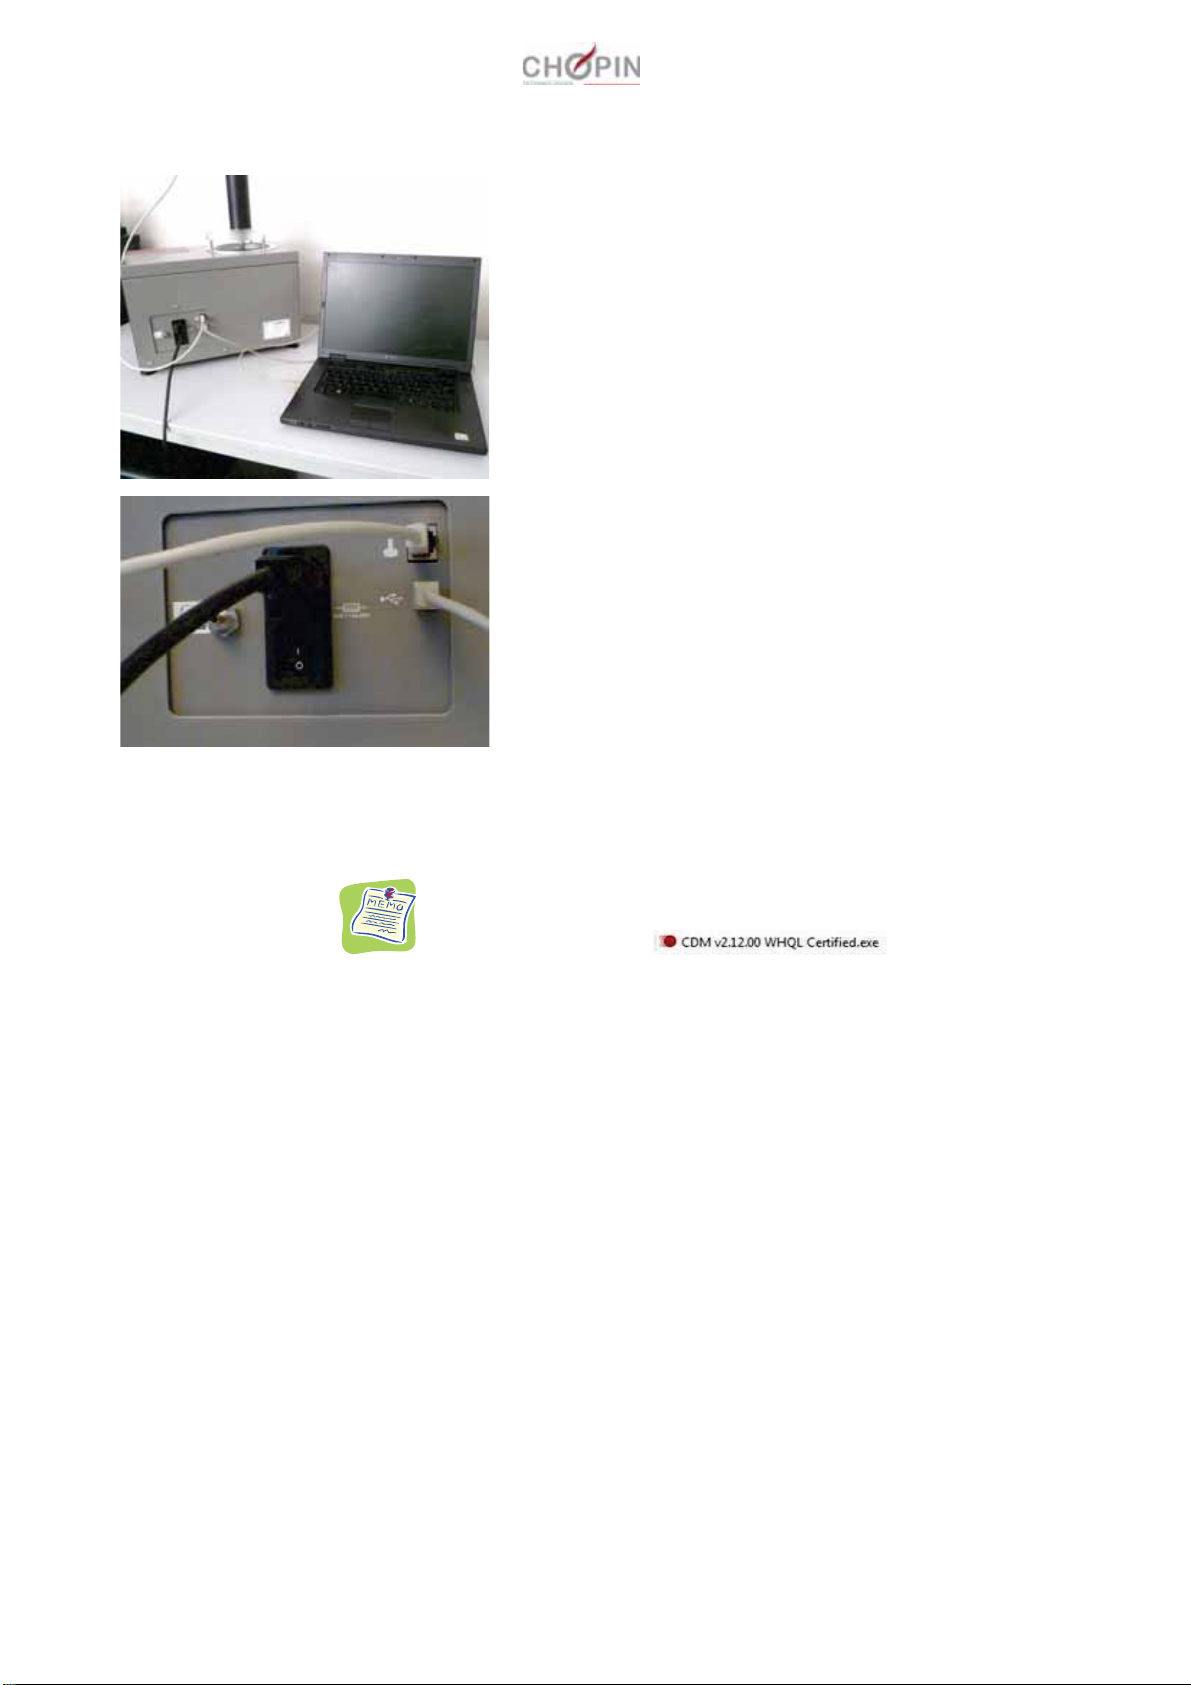
2.3 Connections
The Rheo F4 has the following connections.
1
5
4
3
2
1 Dough development sensor port 2 Computer port
3 I/O switch 4 Pneumatic circuit bleed
5 Power supply port
Connect the power cable to the supply port (5)
Connect the dough development sensor cable to the
Rheo F4 using port RJ (1), then connect the other side of
the cable to the dough development sensor.
Rheo F4
User’s manual 13
07/2015
The device must also be connected (2) to a computer.
Once all the connections have been made, press the I/O
switch.
Please wait for the Rheo F4 peripheral to be fully installed, this can
take a few minutes.
If the installation is incomplete, double click the executable on
the CDROM of the instrument.
Rheo F4
14 User’s manual
07/2015
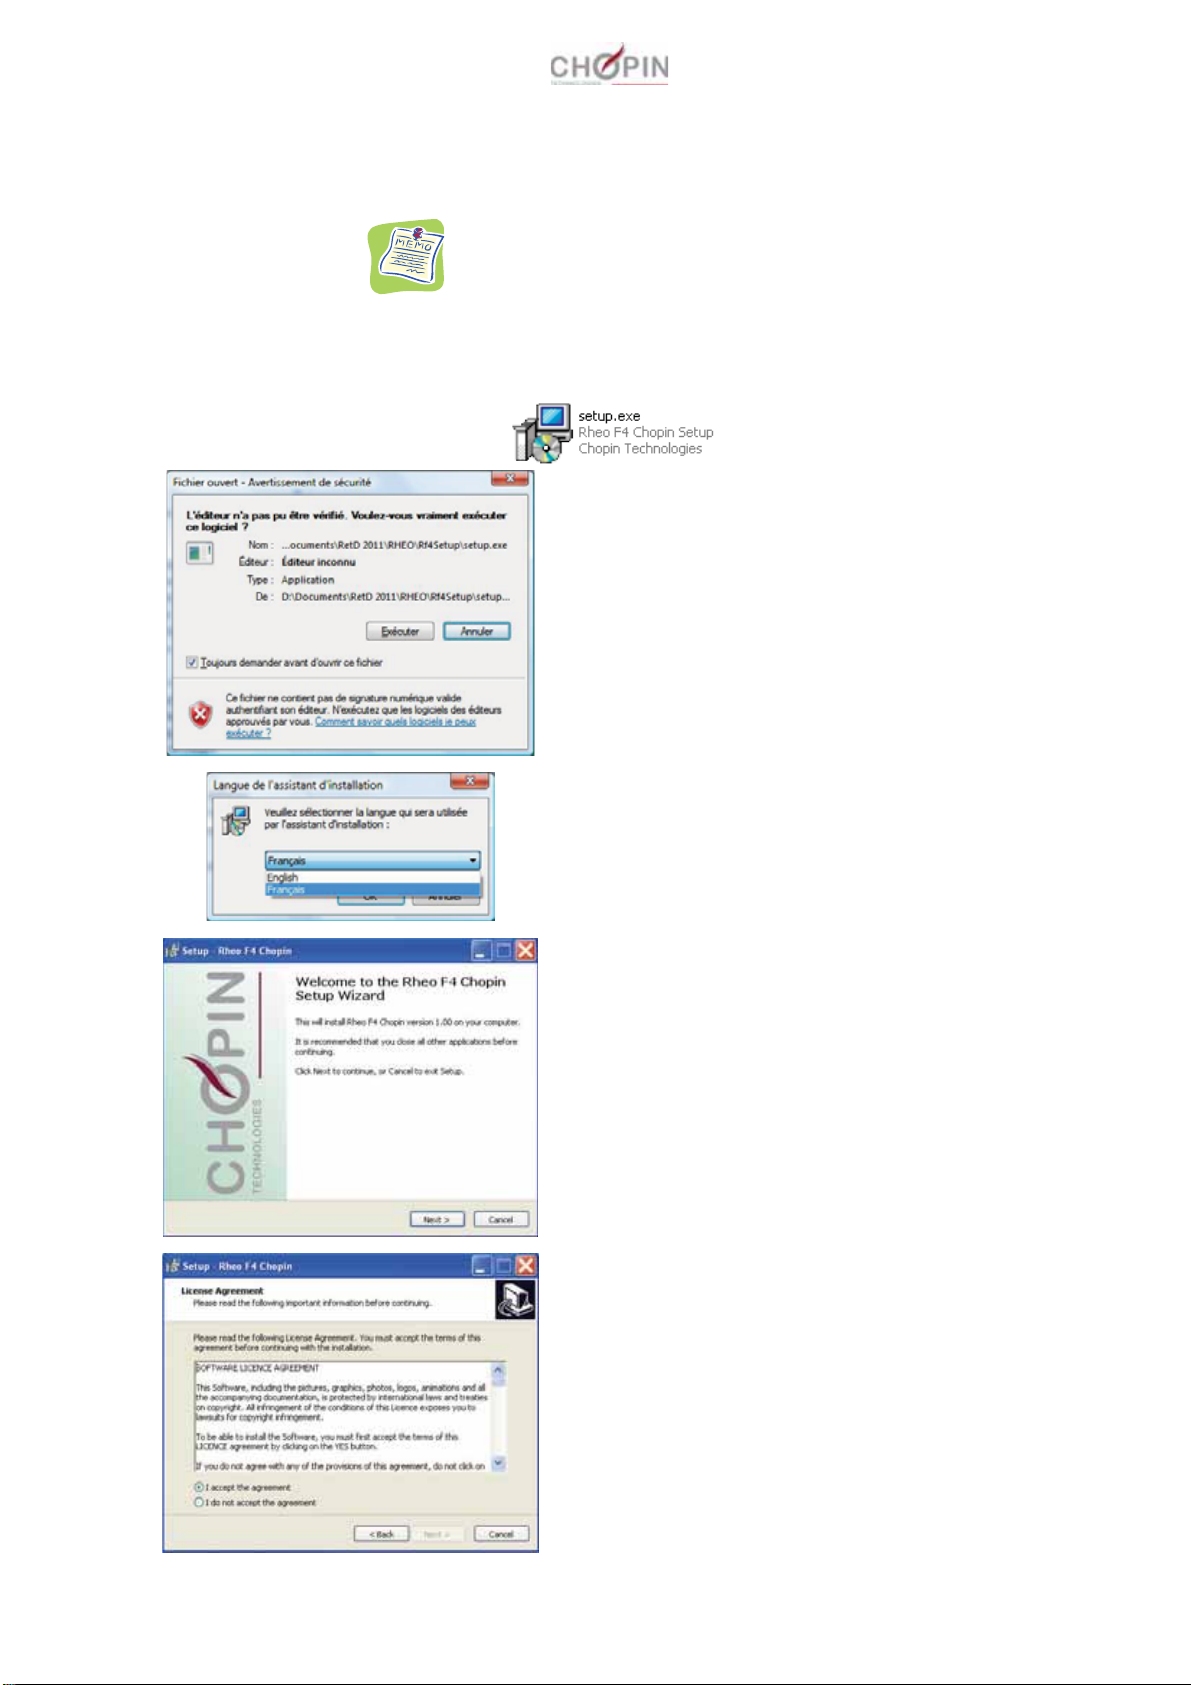
2.4 Installing the software
Before installing the software, please refer to the file "Read me
first" available on the USB stick provided.
Plug the USB stick supplied with the Rheo F4 on your computer.
Click on the software icon and then on setup.exe.
Click on [Exécuter].
Choose the installation wizard language and click
on [OK].
Installation starts, click on [Next].
Accept the license agreement and click on [Next].

Rheo F4
User’s manual 15
07/2015
Choose the installation folder and click on [Next].
Choose the folder where the icon will appear in the
start menu and click on [Next].
You can choose to create an icon on the desktop by
ticking the box. Click on [Next] to validate
installation.
Rheo F4
16 User’s manual
07/2015
2.5 Conditions of use
The Rheo F4 must be installed on a flat, clean and tidy bench.
The device must not be installed close to a water source (taps).
The device must not be exposed to sunlight or heat sources.
Ambient temperature must be at least three degrees below the
temperature of the protocol used.
2.6 Start-up of the Rheo F4
The Rheo F4 is a measurement device.
To display and interpret results, it must be connected to a
computer.
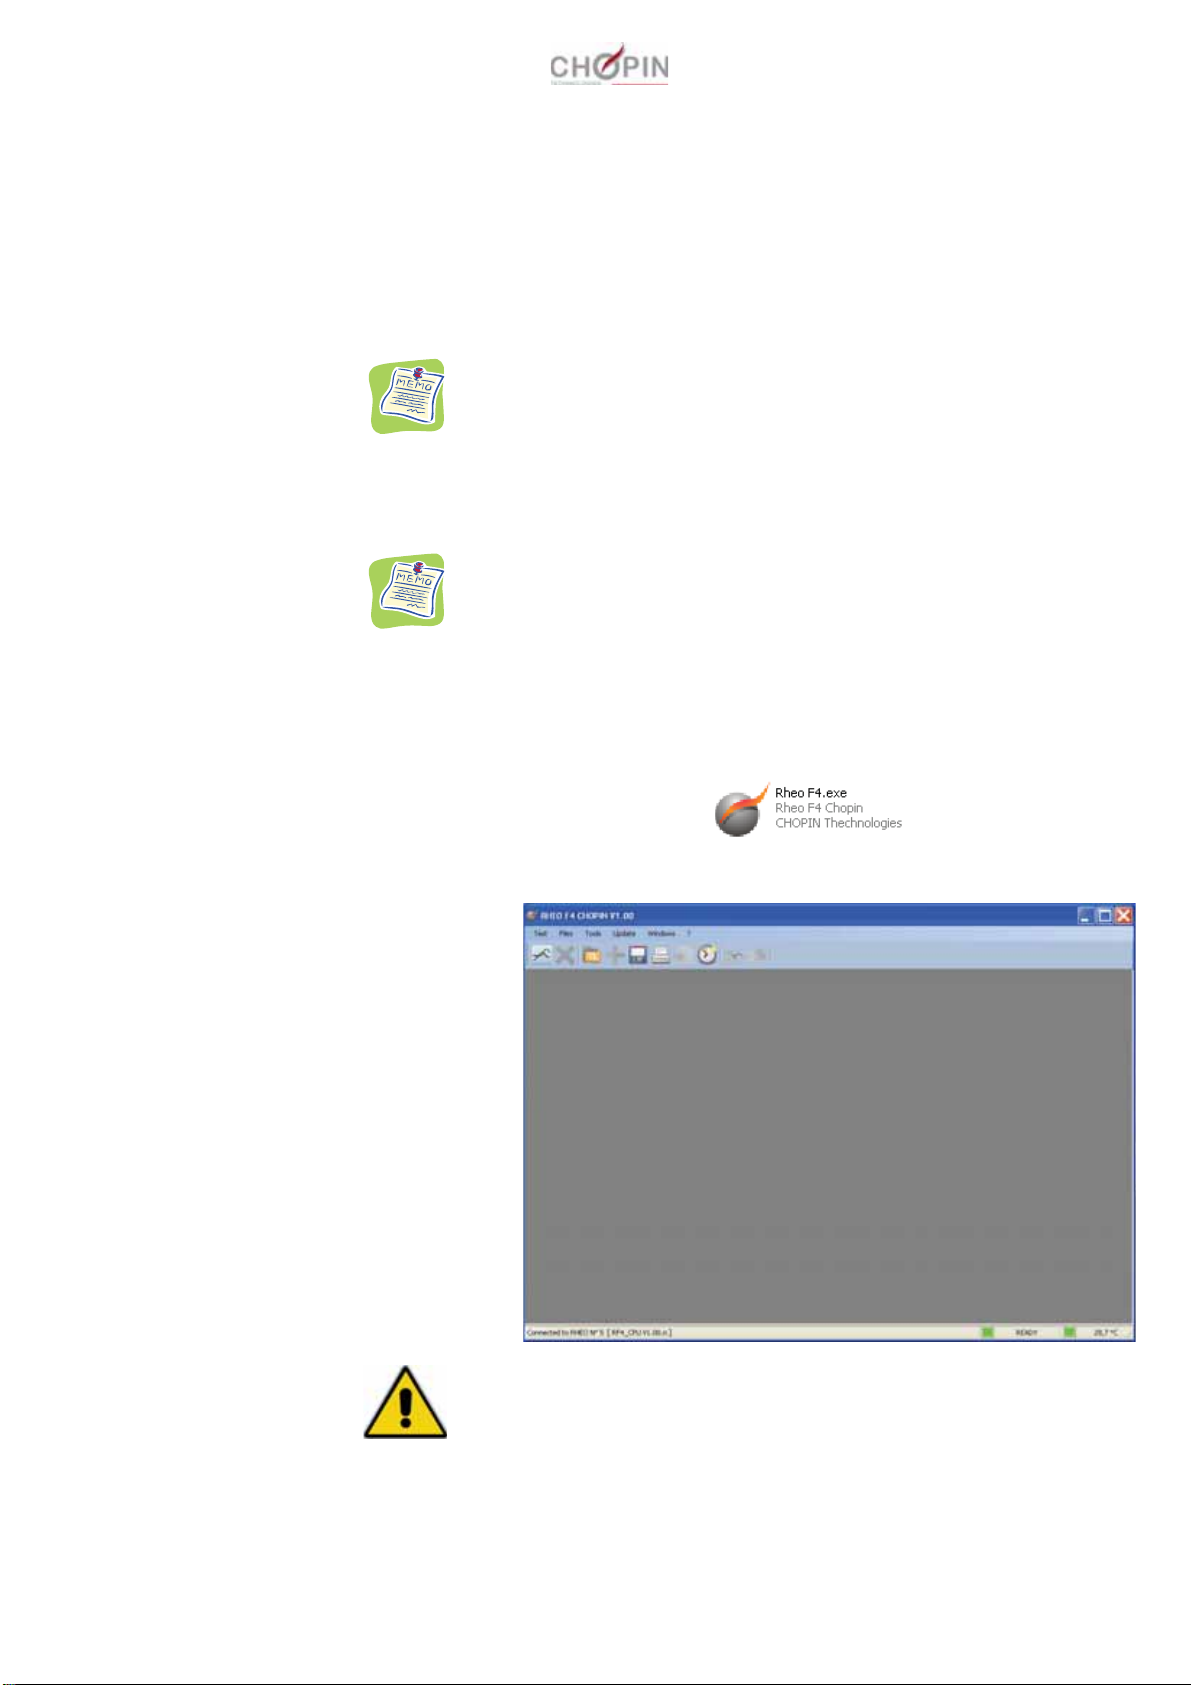
Switch on the computer to which the Rheo F4 is connected. Once
the operating system has been launched, start the software by
clicking on the icon:
The software opens:
Check that the device is connected to the computer.

Rheo F4
User’s manual 17
07/2015
To access the connection configuration menu, click on the icon:
[Connection]
The following window is displayed:
Select the COM port corresponding to the connection of your
device.
If you do not know your connection port, you can try them one
by one until the device is connected.
Once connected to the device, the software displays the message
at the bottom of the screen and enables the machine status LEDs.
The device is now ready to perform the tests.
Rheo F4
18 User’s manual
07/2015
3 Use
3.1 Preliminary parameter settings for running a test
When using the software for the first time, we recommend you
check the following parameters: customers, protocols and
configuration.
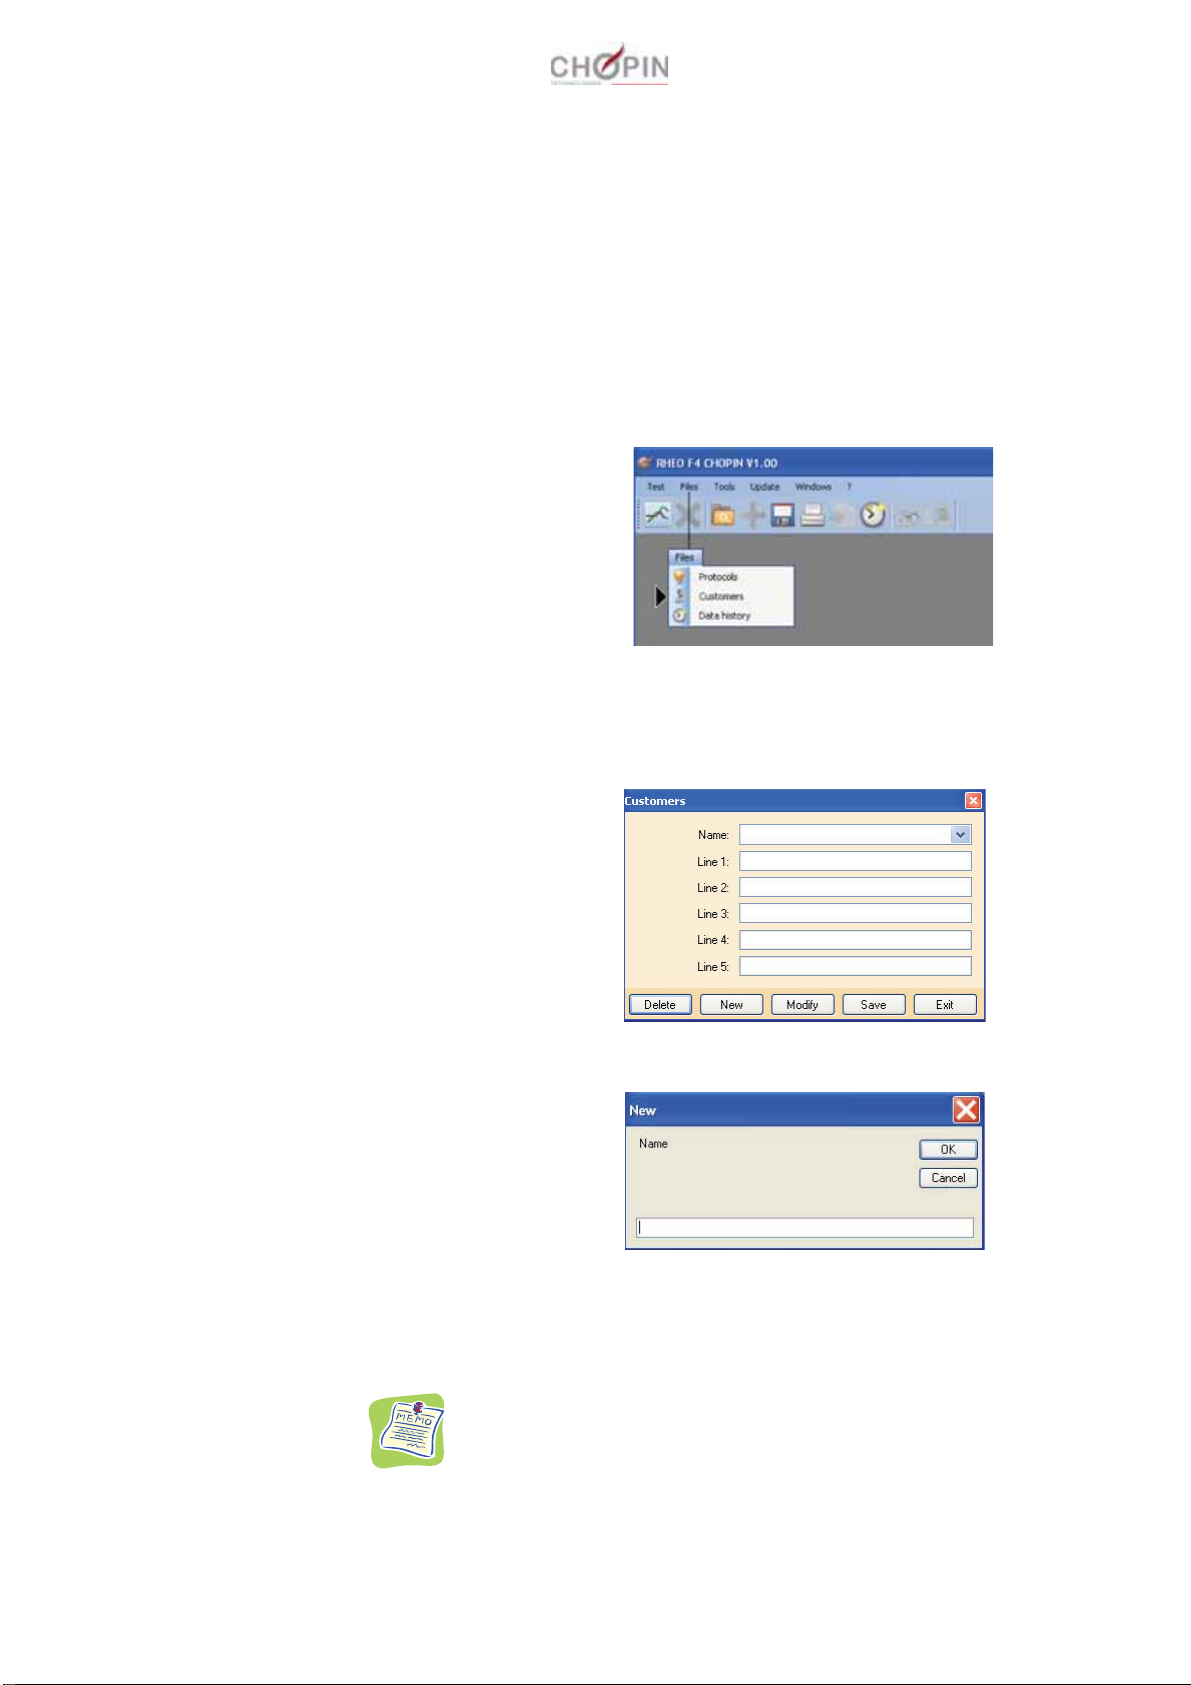
zCustomer parameters
To access customer parameters, click on the tab [Files] followed by
[Customers].
The following window is displayed:
You can thus define your various customers by clicking on [New].
Enter the customer name and click on [OK]. You can now enter
customer data using the 5 lines.
Click on [Save] then [Exit] once data entry is complete.
Existing customer file can be deleted or modified using this
window.

Rheo F4
User’s manual 19
07/2015
zProtocol parameters
To access protocol parameters, click on the tab [Files] followed by
[Protocols].
The following window is displayed:
You can thus define your own protocols by clicking on [New].
Enter the protocol name and click on [OK]. You can now enter the
protocol values. These values are (in order):
Test bowl temperature,
test duration in minutes,
weight of the dough sample used for the test in grams,
load weight placed on the sample in grams,
type of mixer used for dough kneading,
type of yeast used,
quantity of yeast in %.
Once the protocol values have been entered, press [Save] to save
the protocol. Once the protocols have been entered, you can click
on [Exit].
Rheo F4
20 User’s manual
07/2015
Existing protocols file can be deleted or modified using this
window.
You cannot edit the CHOPIN protocol. When this protocol is
selected in the drop-down menu, you cannot click on
[Delete] or [Modify]
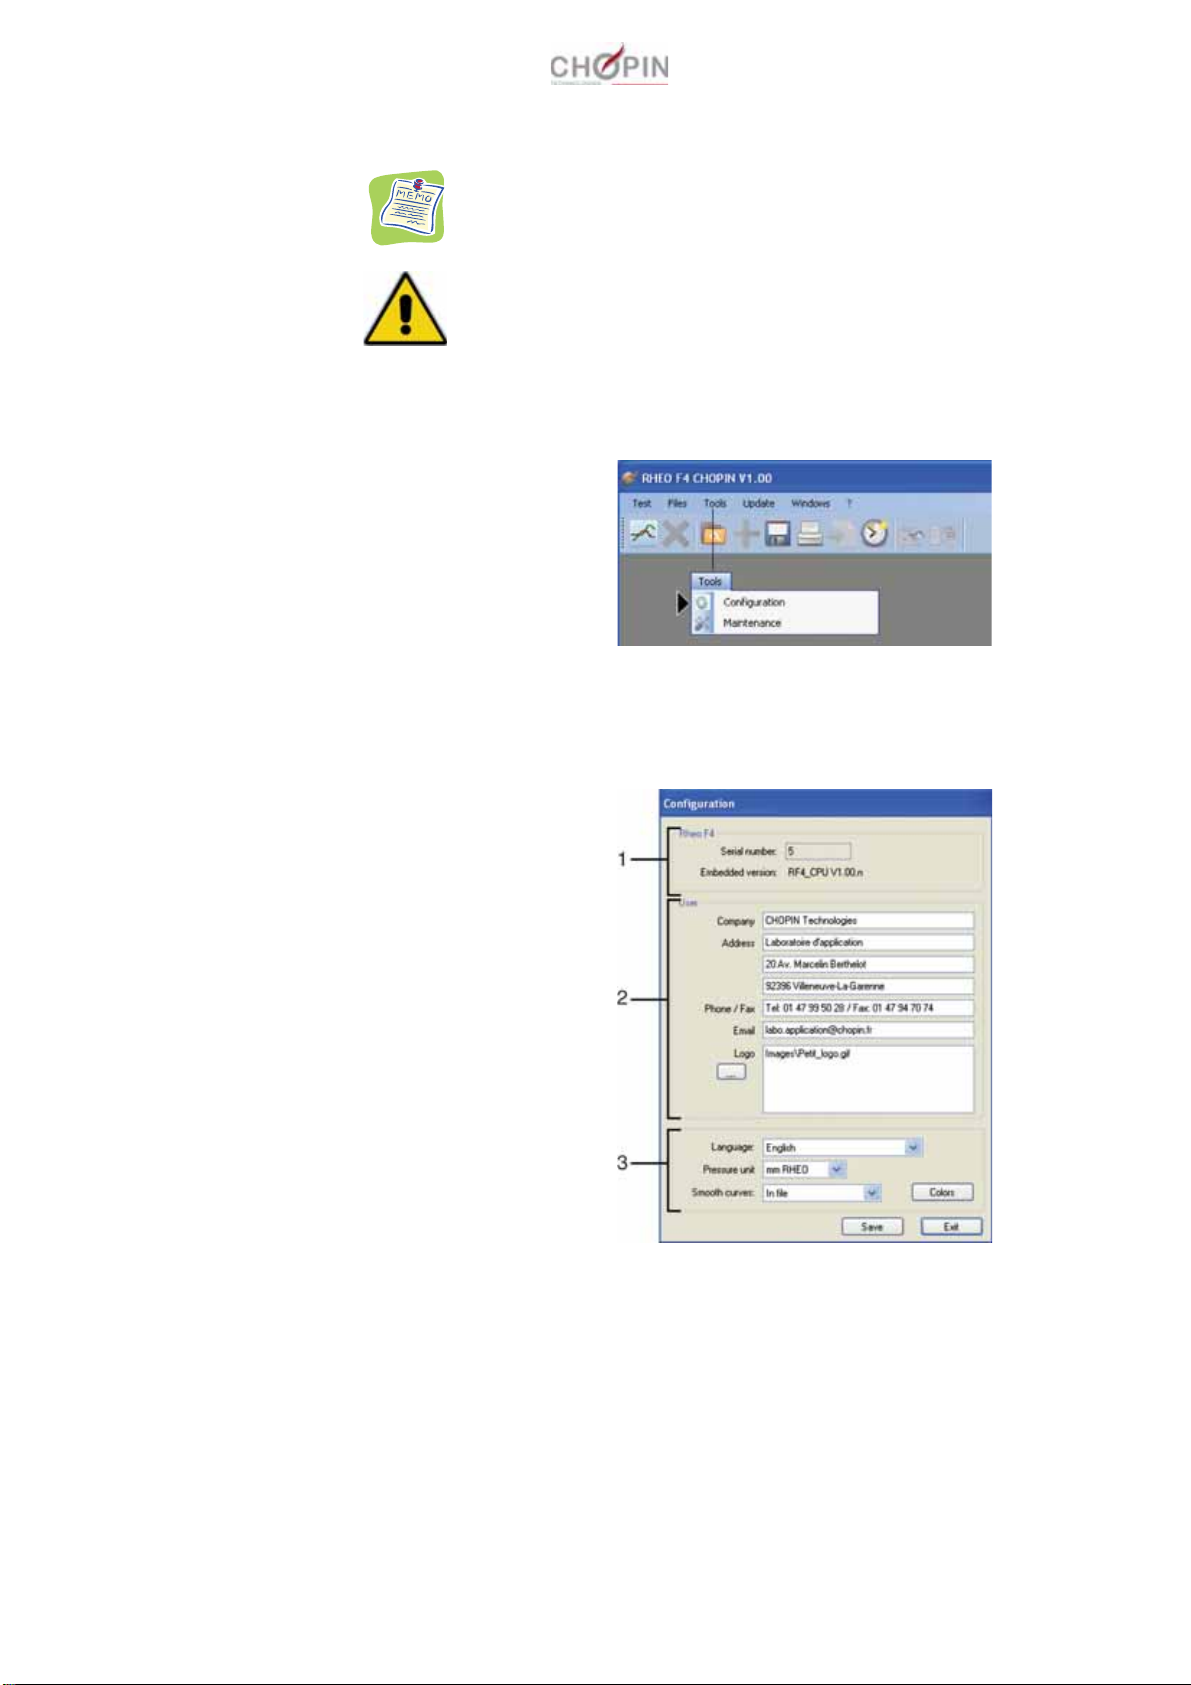
zConfiguration parameters
To access the configuration parameters, click on the tab [Tools]
followed by [Configuration].
The following window is displayed:
The Rheo F4 section (1) gives the device serial number and the
version of the embedded software.
The User section (2) lets you enter your personal information such
as your address, phone and fax numbers, and lets you choose a
picture for the logo.
Section (3) lets you choose the software language, the pressure
unit, and the curve smoothing process.
Other manuals for RHEO F4
2
Table of contents
Other Chopin Measuring Instrument manuals


