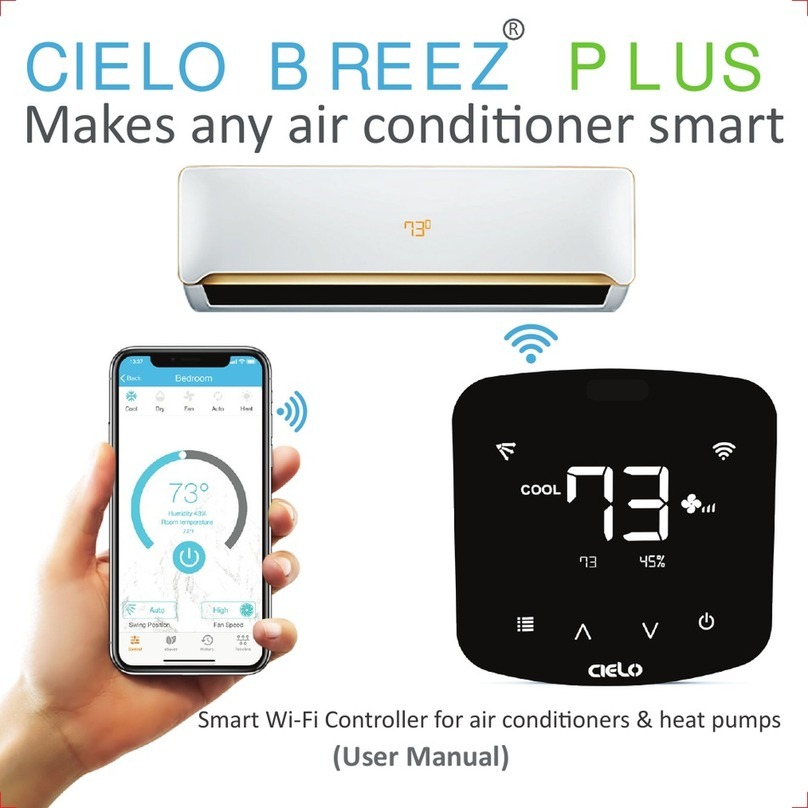
Cielo BREEZ PLUS User manual

Step 1A: Mounting & placement
Cielo Breez Plus can be wall mounted using the wall mounting kit or placed on a table using
table stand (both included in the box). Before finalizing the placement, it is recommended to first
power up, register & test the device to find optimal location from where signals can easily reach
the AC. To ensure this place your Breez Plus in ACs line of sight & power it up.
For optimal placement and control:
•Place Breez Plus within 13 feet (4 meters) and in the line of sight of your air conditioner. If
signal is not reaching the AC, please place it at another suitable location within the room.
•To avoid deviated sensor readings, do not place Breez Plus where it may be exposed to
excessive sunlight or other heat sources.
Step 1B: Powering up options
•Breez Plus can be powered up using a 5V adapter (always use the provided power adapter and
USB cable for optimal results).
OR
•Through wired connection options of 24V or 12V (from your existing thermostat wiring). For
details on wired connections, please refer to Wired Connection
Please DO NOT use any other voltage level to power up Breez Plus.
Please choose ONLY ONE power up option i,e, either 5V OR 24/12V.
Special Note: It is strongly advised that whenever there is a need to use remote control for
AC/Heat Pump, point it towards Breez Plus while performing any action. This way, your
AC/Heat Pump and Cielo Home App will always be in sync.
Step 1C: Prior to app installation
Your Smart Phone
•Make sure that your smart phone’s Wi-Fi is turned ON.
•Make sure that your smart phone has internet access.
Your Wi-Fi Router
•Make sure that you have working internet connection on your Wi-Fi router
•Make sure that there is no proxy server or authentication server configured on your internet
connection.
•Make sure that there is no captive portal on your Wi-Fi router.

Important: Make sure that IP isolation or client isolation is turned OFF on your Wi-Fi router.
Step 2A: App Installation
•Go to the App Store / Play Store.
•In ‘search’ section type ‘Cielo Home’.
•Once ‘Cielo Home’ App is displayed, download it.
•Open the App after installation is complete.
Step 2B: Login/Register
•You can either create a new user account or login as an existing user.
•As an existing user, enter username and password and tap the ‘Sign In’ button.
•If you are a new user, tap the ‘Sign Up’ button and fill in the information.

Step 3A: Registration - iOS users
Note: Registration process is meant to connect the Breez Plus to your home Wi-Fi network
through the ‘Cielo Home’ App.
Note: For iOS 13.0 & above, location permission is required to complete the registration
process. You may disable it later.
Note: Please turn offLTE/mobile data on your phone during the registration process to ensure
seamless registration. You may enable it later.
Step 1: After successful login, you are at the Home screen.
Step 2: Tap the ‘+’ icon as shown in the red circle.
Step 3: Go to your phone’s Wi-Fi settings.
Step 4: Connect your phone to Cielo Device Wi-Fi (Cielo_xxxx_xxxxxx).
Step 5: Go back to ‘Cielo Home’ App.

Step 6: Your phone will show the list of available Wi-Fi networks.
Step 7: Select your Wi-Fi network from the list (there should be No captive portal or port
blocking on your selected network).
Step 8: Enter the password of your Wi-Fi network and tap the ‘Connect’ button.

Step 9: Customize your device with a name of your choice (for example, Bedroom, Lounge,
Office, etc.) and tap on ‘Done’.
Step 10: If the circle around AC icon is not green please refresh the home screen by swiping
downwards (Pull-to-refresh).
Step 11: Once the circle around AC icon is green, tap on it to start AC’s remote control
configuration proce.

Step 12: Get hold of your AC’s remote and tap ‘Next’.
Step 13: Point your AC's remote at Cielo Device and press remote’s 'Power Button' once. It will
tart proceing configuration.

Registration process is complete. Enjoy the unlimited controls!
Quick Tip: All four buttons at the bottom of Breez Plus will blink once at the same time after
receiving the remote control's signal. If they do not blink, please check the batteries of remote
control.
Step 3B: Registration - Android users
Note: Registration process is meant to connect the Breez Plus to your home Wi-Fi network
through the ‘Cielo Home’ App.
Note: For Android OS 8.1 & above, location permission is required to complete the registration
process. You may disable it later.
Note: Please turn offLTE/mobile data on your phone during the registration process to ensure
seamless registration. You may enable it later.
Step 1: After successful login, you are at the home screen.
Step 2: Tap the ‘+’ button as shown in the red circle.

Step 3: Tap the ‘Wi-Fi Settings’ button as shown in red rectangle.
Step 4: Connect your phone to Cielo Device Wi-Fi (Cielo_xxxx_xxxxxx).
Step 5: Go back to ‘Cielo Home’ App.

Step 6: Select your Wi-Fi from the drop down list (there should be No captive portal or port
blocking on your selected network).
Step 7: Enter the password of your Wi-Fi network and tap the ‘Connect’ button.
Step 8: Customize your device with a name of your choice (for example, Bedroom, Lounge,
Office, etc.) and tap on ‘Done’.
Step 9: If the circle around AC icon is not green please refresh the home screen by swiping
downwards (Pull-to-refresh).

Step 10: Once the circle around AC icon is green, tap on it to start AC’s remote control
configuration process.
Step 11: Get hold of your AC’s remote and tap ‘Next’.
Step 12: Point your AC's remote at Cielo Device and press remote’s 'Power Button' once. It will
start processing & configuration.

Registration process is complete. Enjoy the unlimited controls!
Quick Tip: All four buttons at the bottom of Breez Plus will blink once at the same time after
receiving the remote control's signal. If they do not blink, please check the batteries of remote
control.
Your home screen
Your home screen shows the real time status of all your Cielo Devices.
A registered Cielo Device can show either of the 3 status, outlined in circles:
1 - Green - Device is online. You’re good to go!
2 - Red - Device is offline. (try following options)
- Ensure your phone is connected to a working internet connection.
- Refresh home screen by swiping downwards (Pull-to-refresh).
- Ensure device is connected to a working internet connection.
3 - Grey - Device is offline. (try following options)
- Ensure your phone is connected to a working internet connection

- Refresh home screen by swiping downwards (Pull-to-refresh).
Enjoy the unlimited functionalities

Quick tip: Configuring the right remote control for your AC
Cielo Device auto detects relevant remote control for your AC during registration process. If it is
not working with your AC, please select your remote model manually.
For manual selection, follow these steps:
1. Go to device settings by tapping 'wrench' symbol on the registered device.
2. Select 'Change Appliance'.
3. Select 'Manual Configuration'.
4. Select the 'Manufacturer' & 'Remote Control Model Number' of your AC from the drop down
lists and tap 'Update'.

Quick Tip: Remote control model number is usually found at the back side of remote control as
shown in the image.
Breez Plus - Local control options
Adjusting the temperature of your AC:
Use the up or down arrows to set the temperature of your choice.

Changing the mode of your AC:
Touch the menu button once. The menu icon will start blinking. Use the up or down arrows to
select the mode (e.g. Cool, Heat etc.). Your selected mode is set.
Changing the fan speed:
Touch the menu button twice. The fan speed icon will start blinking. Use the up or down arrows
to change the fan speed. Your selected fan speed is set.
Adjusting the swing position:
Touch the menu button thrice. The swing position icon will start blinking. Use the up or down
arrows to select the swing position. Your selected swing position is set.
Changing multiple settings in one go:
You can set mode, swing position & fan speed in one go. Touch the menu button once and select
the mode of your choice. Touch the menu button again and adjust the fan speed. Touch the menu
button again and select the swing position. All your settings are completed in one go.
Turning the display of Breez Plus On/Off:
Press the Temperature Down Button for six seconds and release.
Locking/Unlocking the display Interface:
Press and hold Temperature Up and Temperature Down buttons simultaneously for six seconds
and release.
Enabling/Disabling Wi-Fi of Breez Plus:
Press and hold the Temperature Up Button for six seconds and release.
Resetting the Wi-Fi of Breez Plus:
Press and hold Temperature Up and Power buttons simultaneously for six seconds and release.
Troubleshooting tips
Breez Plus display interface shows 3 types of Wi-Fi status:
Case 1: Stable Wi-Fi Icon - Device is connected to internet, showing the strength of Wi-Fi
signal.

Case 2: Blinking Wi-Fi Icon - Device in broadcast (AP) mode. If you have not registered the
device yet, please complete registration process as per step 3A/3B of this manual. If you have
registered the device, refer to scenario 3 at the end of this page.
Case 3: Wi-Fi Icon with small triangle - Device connected with router but has no internet access.
Please ensure you have a working internet connection and restart the device.
Changing Wi-Fi network of Cielo Device
Scenario 1:
Cielo Device & mobile are on same Wi-Fi network - Tap on wrench symbol to enter device
settings. Tap on ‘Device Wi-Fi’ then on 'Change Wi-Fi'. List of available networks will appear.
Enter password of selected network. New settings are done.
Scenario 2:
Cielo Device & mobile are on different Wi-Fi network - Go to your mobile settings and connect
your mobile with same Wi-Fi network as Cielo Device. The remaining process is same as given
in scenario 1.
Scenario 3:
Cielo Device is in broadcast (AP) mode - Connect mobile with Cielo Device Wi-Fi i.e.
Cielo_xxxx_xxxxxx in mobile Wi-Fi settings. Go back to ‘Cielo Home’ App. Tap on wrench
symbol to enter device settings. Tap on ‘Device Wi-Fi’ then on 'Change Wi-Fi' button. List of
available Wi-Fi networks will appear. Select your Wi-Fi & enter its password. Your new Wi-Fi
settings are done.
Instruction for Breez Plus wired connections (24V OR 12V)
Step 1:
Switch offpower by using the master switch or mains circuit breaker. This is very important for
your safety.

Step 2:
Find a point where 24V or 12V is available (e.g. the point where thermostat wiring is available).
Ensure that chosen point is also in the line of sight of your AC. Please DO NOT use any other
voltage level to power up Breez Plus.
Step 3:
Chose C & R wires. Pull these wires and pass them through the hole of back plate of Breez Plus.
Screw in the back plate of Breez Plus into the wall.
Step 4:

Breez Plus has two connections marked as 24V at its back. Connect C & R wires at these two
connections.
Step 5:
Pres fit te ree plu on it ac plate.

Your Installation is complete. Please switch on the power from the mains.

Note: In case of any doubt, please contact a local professional for making the wired connections.
You can also use Breez Plus with a 5V adapter (included in the box).
Step 4A: Setting up schedules for your heating and cooling -
iOS users
1. Setting up a schedule
You can schedule your Air-Conditioner / Heat Pump connected to Breez Plus by performing
following steps on your Cielo Home app:
Step 1: On the Home screen, tap on the Air-Conditioner / Heat Pump you want to schedule.
Step 2: Tap on ‘eSaver’ in the navigation bar.
Step 3: Tap on 'Schedule'.
Step 4: Tap the ‘+‘ icon as shown in the red circle.
Other manuals for BREEZ PLUS
1
Table of contents
Other Cielo Controllers manuals
Popular Controllers manuals by other brands
Interactive Technologies
Interactive Technologies CueServer 2 user manual
Edgewater Networks
Edgewater Networks EdgeMarc 250W Hardware installation guide
Entes
Entes SSRC-04P manual

Siemens
Siemens SIMATIC S7-1200 manual
Zennio
Zennio FANinBOX 110V 1CH Technical documentation
Leviton
Leviton Bitwise BWBC2 quick start guide
