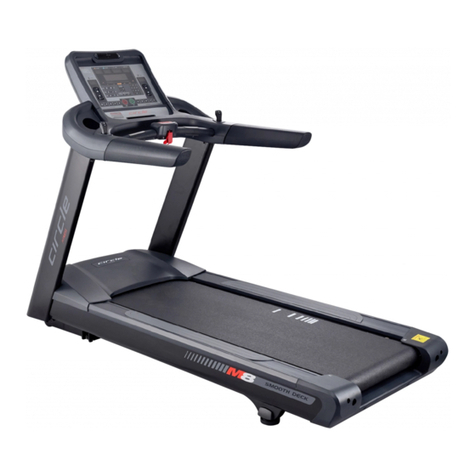
CIRCLE FITNESS M7 User manual


1
TABLE OF CONTENTS
SAFETY PRECAUTIONS ----------------------------------------------------------------- 2-5
Important voltage information, grounding instructions, how often you exercise, how
hard you exercise, how long you exercise, beginner treadmill program target heart
rate zone.
TECHNICAL SPECIFICATIONS -------------------------------------------------------- 6
UNPACKING & ASSEMBLY ----------------------------------------------------------- 7-14
Parts, hardware kit and assembly drawing
WARM UP & COOL DOWN ----------------------------------------------------------------15
SETTING ----------------------------------------------------------------------------------------16
PROGRAM --------------------------------------------------------------------------------- 17-28
OPERATION -------------------------------------------------------------------------------- 29-30
BELT ADJUSTMENT ------------------------------------------------------------------------31
CARE & MAINTENANCE ---------------------------------------------------------------32-33

2
SAFETY PRECAUTIONS
Thank you for your purchasing our products. Even though we go to great efforts to ensure the
quality of each product, occasional error, and/or omissions do occur. In any event should you find
this product to be defective or missing parts please contact us.
IMPORTANT: Read all instructions and warnings before assembly and operation.
UImportant Voltage Information
Before plugging the power cord into an electrical outlet, verify that the voltage requirements for your
area match the voltage of the treadmill that you have received. The power requirements for the
treadmill include a grounded, dedicated circuit, rated for one of the following figure. See the serial
number decal for the exact voltage requirements of your treadmill.
WARNING: Don't attempt to use this unit with a voltage adapter. Don't attempt to use this
unit with an extension cord.
UGrounding Instructions
This treadmill must be grounded. If it should malfunction or break down, grounding provides
a path of least resistance for electric current to reduce the risk of electric shock.
This product is equipped with a cord having an equipment-grounding conductor and a grounding
plug. The plug must be plugged into an appropriate outlet that is properly installed and grounded in
accordance with all local codes and ordinances.
Please make sure that the treadmill is connected to an outlet having the same configuration as the
plug. Do not use a ground plug adapter to adapt the power cord to a non-grounded outlet.
115V EURO PLUG 208-220V
NEMA 5-20 CEE 7/7 NEMA 6-15
The power requirements
for the treadmill include a
grounded, dedicated
circuit, rated for one of the
following:
115 VAC 5%, 60HZ and 20
amps; 208/220 VAC,
60HZ, 15 amps or 230 VAC
5%, 50HZ and 15amps.

3
SAFETY PRECAUTIONS
UBefore beginning
1). Only one person at a time should use this equipment. If dizziness, nausea, chest pains, or any
other abnormal symptoms are experienced while using this treadmill, stop the workout at once.
2). MAX. user weight: 182 kg (400 Ibs)
3). Always use this treadmill on a clear and level surface. Do not use outdoors or near water.
4). Don't insert any object into any openings.
5). Before using this equipment to exercise, always do stretching exercises to properly warm up.
6). Advice to replace defective components immediately and keep the equipment out of use until
repair.
7). Always wears appropriate workout clothing and shoes when exercising. Do not wear loose fitting
clothing that could get caught in the equipment.
8). Place on a level surface, with 2mx1m of clearance behind it. Do not place the treadmill on any
surface that blocks air openings. To protect the floor or carpet from damage, place a mat under
the treadmill.
9). Contact your physician before starting a workout or training program. Have your doctor review
your training and diet programs to advise you of a workout routine you should adopt.
UImportant Safety Instructions
1). Keep children and pets away from this equipment at all times.
2). Make sure that all bolts and nuts are tightened when equipment is in use. Periodic maintenance
is required on all exercise equipment to keep it in good condition.
3). Deposit the safety key properly in order to avoid children to get the safety key and re-start the
treadmill.
4). Stop the treadmill accordingly and take a rest while any discomfort happens during the exercise.
5). Correct steps of stopping your treadmill:
Press STOP button→ both hands hold the handlebars → Feet step on the side reins → Leave the
treadmill
6). If there is any error sign shown on the monitor before/during exercising, please refer to the
Trouble Shooting section in your owner's manual according to the code number of the error sign.
7).Turn off the power after using.
8). If the power cord is damaged; it must be replaced by the manufacturer or its service agent or a
similarly qualified person in order to avoid a hazard.
9). Warning: Incorrect or excessive training may be in juried to health.
4
SAFETY PRECAUTIONS
USAFETY KEY
The safety key is to prevent falling down or any other
emergencies from runner's not familiar with the speed
of the treadmill. Please always wear safety key in
case of any accident.
UCONSULT A PHYSICIAN IMMEDIATELY
Warning: before starting any exercise
program consult your physician. This is
especially important for individuals over the
age of 35 or persons with preexisting health
problems. Read all instructions before using any fitness equipment. We assume no
responsibility for personal injury damage sustained by or through the use of this treadmill.
UHow often you exercise:
You should exercise three to four times a week to improve your cardiovascular and muscle fitness.
UHow hard you exercise:
Intensity of exercise is reflected in your heart rate. Exercise must be sufficiently rigorous to
strengthen your heart muscle and condition your cardiovascular system.
Only your doctor can prescribe the target training heart range for you. Before starting any exercise
program consult your physician.
UHow long you exercise:
Sustained exercise conditions your heart, lungs and muscles. The longer you are able to sustain
exercise within your target heart range, the greater the aerobic benefits. To begin maintain 2~3
minutes of steady, rhythmic exercise, then check your heart rate.
UEmergency Stop switch
The function of the emergency stop can help the user to get off the treadmill safety in case of
emergency happened, in case of emergency, press the safety key, hold the handrails and get off
when the band stops.
Attach the safety key
to your waist.
Safety key

5
SAFETY PRECAUTIONS
BEGINNER TREADMILL PROGRAM
EXERTION LEVEL
DURATION
WEEK 1
Easy
6~12 minutes
WEEK 2
Easy
10~16 minutes
WEEK 3
Moderate
14~20 minutes
WEEK 4
Moderate
18~24 minutes
WEEK 5
Moderate
22~28 minutes
WEEK 6
Slightly higher or slightly lower
20 minutes
WEEK 7
Add interval training
3 minutes at moderate exertion with 3 minutes at
higher exertion for 24 minutes
UTARGET HEART RATE ZONE
220-your age = maximum heart zone
101
*This appliance is not intended for use by persons (including children) with reduced physical
sensory or mental capabilities, or lack of experience and knowledge, unless they have been given
supervision or instruction concerning use of the appliance by a person responsible for their safety.
*The noise value list below is when it is at top speed with unloading status : LpAeq(dB) < 70dB
You do not want to workout at your
maximum heart rate. The recommended
Heart Rate Zone is a percentage of your
maximum heart rate. Between 60% and
80%of your maximum heart rate.
* Lower limit of Target Heart Rate Zone
=maximum heart rate X 0.6
* Upper limit of Target Heart Rate Zone
=Maximum heart rate X 0.8
(This is recommended by American Heart
Association. Before starting exercise
program, please consult your physician
to understand your physical situation)

6
TECHNICAL SPECIFICATIONS
USPECIFICATIONS:
Length: 215 cm
Width: 92.9 cm
Running area: 55cm x 153cm
Weight of product: 167 kg ( 367.4 lbs)
Power elevation: 0~18 motorized (front incline)
Programs: 6 Prest Program, 3 Goal, 4 HRC, 7 Phsical Test, Virtual Go
Standard features: Time Reminding, Time Elapsed, Speed, Incline, Heart rate, Max Heart rate, Ave
Heart rate, Distance, Calories, Calories/h, Program Profile, Pace Avg. Pace

7
UNPACKING & ASSEMBLY
UPARTSU
Main body
Packing
Handlebar set
(Left Handlebar with
transparent bag)
#3-10
#3-6
#3-5
#3-9
#3-2
#3-1
Console
Console mast set
Right console
mast cover
Left console
mast cover
(Packing via
transparent
bag)

8
UNPACKING & ASSEMBLY
UHARDWARE KIT
M8x25mm / 4pcs
(Console /
Handlebar set)
M8 / 4pcs
(Console /
Handlebar set)
M5x15mm / 4pcs
(Console mast set)
M8X15mm / 10pcs
(Console mast set)
#3-3
#3-4
#3-7
#3-8
M8 curve
Washer / 10pcs
#3-15
#3-16
End cap / 4pcs
(Lower console
cover)
Allen wrench /
1pcs(6mm)
Allen wrench /
1pcs(5mm)
M8X15mm / 8pcs
(Console set)
#3-19
Power cord
/1pcs
M8 curve
Washer / 8pcs
#3-15
Step2
Step4
Step5
Step6
PALAdaptor /
1pcs
M8 S Washer
/ 10pcs
#3-21
M8 S Washer
/ 8pcs
#3-21
M8 S Washer
/ 4pcs
#3-21
Cable Connector
/1pcs

9
UNPACKING & ASSEMBLY
Be careful to unpack your treadmill where will be using it for avoiding damage. Put down the
treadmill before covering cushion on a flat floor.
*Notice: Please get more than two people to assemble the treadmill because it’s way too heavy.
Step1:
Take off the screws on the motor cover and then take the motor cover away.

10
UNPACKING & ASSEMBLY
Step2: Assemble the console mast on the base.
1). Put the Console wire into the right mast and make it through out of the bottom by using the
Guide wire. (The left mast is with transparent bag.)
2). Use the Allen wrench (6mm) to lock on 10 screws (M8*15), 10 pcs S washers and 10 Curve
washers for fixing the mast on the base. (Don’t have to lock on these screws tightly in this
phase.)
X10
#3-15
X10
M8x15mm
#3-8
M8 curve
washe
Allen wrench
6mm
M8 S washe
#3-21
X10

11
UNPACKING & ASSEMBLY
Step 3: Set into the cover on the console mast.
1).Slide the console mast cover and packing into two sides of console mast.
X1
X1
X1
#3-6
#3-5
X1
#3-9

12
UNPACKING & ASSEMBLY
Step 4: Attach the console to the console mast
1).Remove the guiding wire from the right console mast, then connect TV cable and console cable.
2).Assemble the console into the console mast.
3).Fasten console mast and console by using hex wrench (5mm) to lock on 8pcs M5x15mm screws ,
8 pcs S washers and 8pcs curve washers.
4).Put 4pcs end cap into console lower cover.
5).Use hex wrench (6mm) to tighten the bolt for making console mast fix to base frame.
6).Assemble the motor cover and lock on the screws.
M8x15mm
X8
#3-15
X8
X4
#3-16
M8 curve
washer
TV CABLE wire
Console wire
#3-19
Allen wrench
6mm
Allen wrench
5mm
M8 S washe
#3-21
X8

13
UNPACKING & ASSEMBLY
Step 5: Assemble the console mast cover
1).Slide the console mast cover and packing down, and secure using the M5*15mm bolt.
Use hex wrench (5mm) to lock on 4pcs M5*15mm for making mast cover fix to base frame.
M5x15mm
X4
#3-7
Allen wrench
5mm

14
UNPACKING & ASSEMBLY
Step6: Slide handlebars onto console
1).Slide handlebar onto console, use hex wrench (6mm) to lock on 4pcs M8*25mm screws, 4 pcs S
washers and 4 pcs M8 washers.
M8x25mm
X4
M8
#3-3
#3-4
X4
Allen wrench
6mm
M8 S washe
#3-21
X4

15
WARM UP & COOL DOWN
A successful exercise program consists of a warm up, aerobic exercise, and a cool down. Warming
up is an important part of your workout, and should begin every session. It prepares your body for
more strenuous exercise by heating up and stretching out your muscles. At the end of your workout,
repeat these exercises to reduce sore muscle problems. We suggest the following warm-up and
cool-down exercises:
UHEAD ROLLS
Rotate your head to the right for one count, feeling the stretch up the left side of
your neck. Next rotate your head back for one count, stretching your chin to the
ceiling and letting your mouth open. Rotate your head to the left for one count, and
finally, drop your head to your chest for one count .
Repeat this action for several times.
11BUSHOULDER LIFTS
Lift your right shoulder up
toward your ear for one count.
Then lift your left shoulder up
for one count as you lower
your right shoulder.
Repeat this action for several times.
12BUSIDE STRETCHES
Open your arms to the side and
continue lifting them until they
are over your head. Reach your
right arm as far upward toward
the ceiling as you can for one
count. Feel the stretch up your
right side. Repeat this action with
your left arm.
13BUINNER THIGH STRETCH
Sit with the soles of your feet
together with your knees pointing
outward. Pull your feet as close
into your groin as possible. Gently
push your knees toward the floor.
Hold for 15 seconds.
Repeat this action 3-5 times.
14BUHAMSTRING STRETCHES
Keep your right leg straight and the left foot on the floor; try to stretch your right
hand toward the toe, hold this posture for 15 seconds.
15BRelax, then repeat the action for left leg.
20B
UQUADRICEPS STRETCH
With one hand against a wall for
balance, reach behind you and
pull your right foot up. Bring your
heel as close to your buttocks as
possible. Hold for 15 seconds and
repeat with left foot up.
UCALF/ACHILLES STRETCH
Step your right foot in front of your
body. Lean against a wall with
your arms and stretch your left foot
backward your body. Bend
forwards your right foot, and
slightly push your buttock toward
to the wall for 15 seconds.
Repeat the action with front left
foot and rear right foot for another
15 seconds.
UTOE TOUCHES
Slowly bend forward from
your waist, letting your back
and shoulder relax as you
stretch toward your toes.
Reach down as far as you
can and hold for 15 seconds.

16
SETTING
WiFi Setting
1. Connect WiFi before using multimedia Internet and Bulletined Board .
2. Press logo for 5 second to enter engineering mode. Select Ethernet and choose Enable WiFi:
ON. Press SCAN to scan available network, enter Password then pressAPPLY to connect. The
Status column will show connection status.
TV Setting.
1. Scan TV channel after connecting TV cable.
2. Press logo for 5 second to enter engineering mode. Select TV and choose MENU , press
UP/Down button to AUTO TUNING then press OK to start SCAN TV channel. (For European
Countries, before scan please choose your located country).

17
PROGRAMS
1. Main Page:
1.1. The Entertainment Plus has a full integrated touch screen display. All information required
for workouts is explained on screen. Programs included Quick Start/ Training Courses/ Goal
Training/ Heart Rate Control/ Physical Test/ Virtual Connect/ Multimedia.
1.2. The Entertainment Plus support FitGoal application, please free download FitGoal from
Apple Store or Google Play.
1.3. The Entertainment Plus support Nike+ : compatible iPod or i-Phone 30 Pin connector (see
www.apple.com/nikeplus for more information.
Before syncing your Apple device to your computer, you must first create a free Nike+
account a www.nikerunning.com and download the latest iTunes software
(www.apple.com/itunes).
2. Contents:
2.1. Explanation about function:
2.1.1. Speed and incline adjustment:Side speed bar or incline bar to adjust speed or incline,
touch screen again and showing “v” to confirm speed and incline. Or change by
up/down button.

18
PROGRAMS
2.1.2.
Display
Function
Distance
Indicate accumulative traveled distance.
Time Elapsed
Indicate time you workout.
Time Remaining
Indicate workout time left from setting.
Calories
Indicate estimated calories burned.
Calories/ Hour
Estimated calories burned per hour
Heart Rate
Measure current heart rate.
Max Heart Rate
Indicate Max Heart Rate during workout
Ave. Heart Rate
Indicate Average Heart Rate during workout
Pace
Indicate time per km under current speed.
Best Pace
Indicate shortest time per km during workout
Ave. Pack
Indicate average time per km during workout.
Target Heart Rate
Indicate target heart rate, only showing in HRC program
Target Time
Indicate target time, only showing in Goal Training program
Target Distance
Indicate target distance, only showing in Goal Training program
Target Calories
Indicate target calories, only showing in Goal Training program
2.1.3. Display window can switch in Sport Mode:Press arrow of Display window to change
information. Calories: Calories, Calories/Hour, Pace: Pace, Ave. Pace, Best Pace,
Heart Rate: Heart Rate, Max Heart Rate, Ave. Heart Rate.

19
PROGRAMS
Buttons
Function
Incline ▲ / ▼
Adjust incline when exercising.
Speed ┼ / ─
Adjust running speed when exercising.
Cool Down
Puts treadmill into Cool Down mode. Cool Down time is dependent on the
length of the workout. After 5 min end of cool down.
Stop
Ends workout and shows workout summary data.
Pause
Press Pause to stop temperately
Resume
Pause button change to resume after press pause
Fan
To switch off/ low/ high of the fan.
Emergency Stop/
Immobilization
To stop all functions and immobilize the unit. The emergency stop on this
treadmill must be returned to its original position in order to allow normal
operation of the unit.
2.1.4. Sport Mode:
2.1.4.1. PROFILE:shows workout information and graphic
2.1.4.2. LAP:Shows workout information via Lap
Other manuals for M7
2
This manual suits for next models
2
Table of contents
Other CIRCLE FITNESS Treadmill manuals

CIRCLE FITNESS
CIRCLE FITNESS M7 User manual

CIRCLE FITNESS
CIRCLE FITNESS M8 LED User manual

CIRCLE FITNESS
CIRCLE FITNESS Run 3.0i User manual

CIRCLE FITNESS
CIRCLE FITNESS M8 User manual

CIRCLE FITNESS
CIRCLE FITNESS E6 User manual

CIRCLE FITNESS
CIRCLE FITNESS M7 User manual

CIRCLE FITNESS
CIRCLE FITNESS M-7 SERIES E TYPE User manual

CIRCLE FITNESS
CIRCLE FITNESS M-7 SERIES E TYPE Quick start guide

CIRCLE FITNESS
CIRCLE FITNESS M6 AC User manual