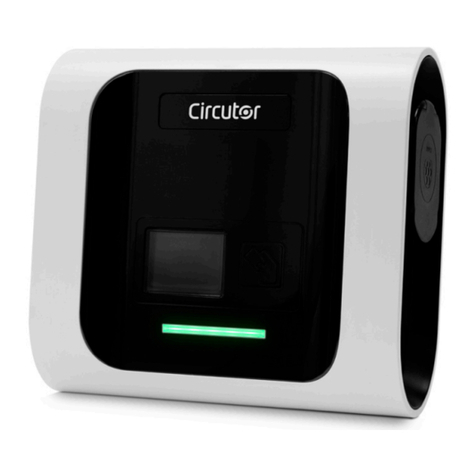
Circutor Wallbox eNext Series User manual

Wallbox eNext Series
INSTRUCTION MANUAL
(M255B01-03-19B)

Wallbox eNext
Instruction manual
2
CIRCUTOR, SA reserves the right to make modifications to the device or the unit specifi-
cations set out in this instruction manual without prior notice.
CIRCUTOR, SA on its web site, supplies its customers with the latest versions of the de-
vice specifications and the most updated manuals.
www.circutor.com
Disclaimer
Revision log
Date Revision Description
06/19 M255B01-03-19A Initial Version
11/19 M255B01-03-19B
Changes in the following sections:
1.- 2. - 3.A. - 3.C. - 4. - 5. - 6. - 7. - 8. - 9. - 10. - 11.
- 12.

Wallbox eNext
Instruction manual 3
Wallbox eNext
Instruction Manual
COPYRIGHT INFORMATION
This document is copyrighted, 2019 by Circutor, S.A. All rights are reserved.
Circutor, S.A. reserves the right to make improvements to the products described in
this manual at any time without notice.
No part of this manual can be reproduced, copied, translated or transmitted
in any form or by any means without the prior written permission of the original
manufacturer. Information provided in this manual is intended to be accurate and
reliable. However, the original manufacturer assumes no responsibility for its use, or
for any infringements upon the rights of third parties athat may result from its use.
All other product names or trademarks are properties of their respective owners.

Wallbox eNext
Instruction manual
4

Wallbox eNext
Instruction manual 5
Here’s your
guide to use and
configure eNext.
Disclaimer ....................................................................................................................................................2
Revision log...................................................................................................................................................2
Here’s your guide to use and configure eNext....................................................................................5
1.-So,hello!....................................................................................................................................................8
2.-Features.................................................................................................................................................10
3.- First steps............................................................................................................................................12
A. Download “HiCharger” App.......................................................................................................12
B. QRSCAN...........................................................................................................................................14
C. MANUAL...........................................................................................................................................14
4.- How to use it? - Plug&Charge.........................................................................................................16
A. Standby............................................................................................................................................16
B. Start charging................................................................................................................................16
C. Charging...........................................................................................................................................16
D. Charge stopped..............................................................................................................................16
E. EV fully charged.............................................................................................................................17
F. Stop charging..................................................................................................................................17
5.- How to use it? - Presence recognition.........................................................................................18
A. Standby............................................................................................................................................18
B. User identification.........................................................................................................................19
C. Start charging.................................................................................................................................19
D. Charging................................................... ......................................................................................20
E. Charge stopped....................................... ......................................................................................20
F. EV fully charged.............................................................................................................................20
F. Stop charging..................................................................................................................................21
6.- “HiCharger” App - List.......................................................................................................................22
A. Overview..........................................................................................................................................22
B. Status...............................................................................................................................................23

Wallbox eNext
Instruction manual
6
7.- “HiCharger” App -Dashboard..........................................................................................................24
A. Overview..........................................................................................................................................24
B. Status...............................................................................................................................................25
C. Error information..........................................................................................................................26
D.Managementoptions.....................................................................................................................27
8.- “HiCharger” App -Charger Options................................................................................................28
A. Overview..........................................................................................................................................28
B. Identification method....................................................................................................................29
C. Time schedule.................................................................................................................................29
D. Diagnostic........................................................................................................................................30
E. Firmware.........................................................................................................................................32
F. Advanced settings.........................................................................................................................33
9.- “HiCharger” App -Settings................................................................................................................36
A. Overview..........................................................................................................................................36
B. About.................................................................................................................................................37
C. General.............................................................................................................................................38
10.- Factory reset.......................................................................................................................................40
11.- LED beacon notifications - Legend..............................................................................................42
A. Blinking red errors........................................................................................................................44
B. Blinking yellow status..................................................................................................................45
12.- Technical Data...................................................................................................................................46
Need help?..................................................................................................................................................49
Guarantee....................................................................................................................................................49

Wallbox eNext
Instruction manual 7

Wallbox eNext
Instruction manual
8
This manual provides information about the usability and configuration of the
Wallbox eNext, which has been designed and tested to allow electric vehicle
charging, specified in IEC 61851.
It contains all the necessary information for safe use and help to get the best
performance from it with step-by-step configuration instructions.
ATTENTION!
Indicates that damage to property can occur if appropriate
precautions are not taken.
1
• Complies with IEC 61851-1, Electric vehicle conductive charging
system (IES 61851-1:2017)
• Complies with IEC 62196, Plugs, socket-outlets, vehicle couplers
and vehicle inlets (IEC 62196-1 and IEC 62196-2).
• Standards: 2014/35/UE, LVD;2014/30/UE, EMC.
THE FOLLOWING SYMBOLS ARE USED FOR IMPORTANT
SAFETY INFORMATION IN THIS DOCUMENT

Wallbox eNext
Instruction manual 9
So, hello!
The Charge Point may not include elements of electrical protection.
• Read all the instructions before
using and configurating this
product.
• Do not use this unit for anything
other than electric vehicle
charging.
• Do not modify this unit. If
modified, CIRCUTOR will reject
all responsibility and the warranty
will be void.
• Comply strictly with electrical
safety regulations according to
your country.
• Do not make repairs or
manipulations with the unit
energised.
• Use only CIRCUTOR supplied
spare parts.
• Only trained and qualified
personnel should have access to
electrical parts inside the device.
• Check the installation annually by a
qualified technician.
• Remove from service any item that
has a fault that could be dangerous
for users (broken plugs, caps that
don’t close...).
• Do not use this product if the
enclosure or the EV connector is
broken, cracked, open, or shows
any other indication of damage.
• Do not use any adapter, except
those approved by the EV
manufacturer
IMPORTANT SAFETY INFORMATION
Read carefully all the instructions before manipulating
the unit.

Wallbox eNext
Instruction manual
10
2
1 — LED beacon light
2 — Cable glands
3 — Plugs(1)
4 — Wall support holes
5 — Closing box holes
(1) Plugs may vary depending on the model
1
2
3
52
4
4
4
5

Wallbox eNext
Instruction manual 11
Features
Charge Point may not include elements of electrical protection.
• ABS plastic housing: Robust
Plastic material to resist severe
environmental conditions including UV
rays and mechanical stress
• Connector Lock: Type 2 connector has
a lock system to avoid an EV unduly
disconnection.
• LED Beacon Light: Colour LED system
that indicates the status of the Charge
Point.
• Bluetooth: Bluetooth v4.2 + BLE
wireless communications for remote
charge activation and charge point
configuration
• App: Easy software interface to set
up the language configuration, user
authentification, Wallbox diagnosis and
firmware upgrades, among others.
MAIN FEATURES OF THE UNIT

Wallbox eNext
Instruction manual
12
2. Enable smartphone bluetooth.
3. Open the mobile app ‘HiCharger’.
1. Download the app ‘HiCharger’,
3
Compatible with Android version 4.4.2 or latest and IOS
version 9 or latest
ADownload “HiCharger” App

Wallbox eNext
Instruction manual 13
6. Select the mode.
• QRSCAN: This option allows to perform the pairing
automatically, by only scanning the QR code. For further
information please refer to section B.- QRSCAN of this
chapter.
• MANUAL: This option allows to perform the pairing
by choosing manually the Charge Point from a list and
entering its password. For further information please
refer to section “C - MANUAL” of this chapter.
5. Tap the “Add” button in order to pair a new Charge Point.
First steps
4. Select your language

Wallbox eNext
Instruction manual
14
Scan the QR code provided.
There are two identification labels containing
the same unique QR code for each charge
point. One of them is attached to the
installation manual and the other one is
patched inside the charge point as shown:
BQRSCAN
Select the charge point and introduce the password.
The MAC to identify the charge point and the password
can be found on the two identification labels as shown
in the picture beside. One of them is attached to the
installation manual and the other one is patched
inside the charge point.
801F12B2XXXX;2;YYYY
MAC: 80:1F:12:B2:XX:XX
PASSWORD: YYYY
Push to refresh the devices detected
throught the smartphone’s bluetooth.
CMANUAL

Wallbox eNext
Instruction manual 15
8. Once the charge point is paired, its connectivity status is visible on the ‘List’ screen.
From now on, the charge point can be managed following the instructions of this manual.
The password is required after selecting the charge point.
7. The charger point name can be customized.

Wallbox eNext
Instruction manual
16
4
AStandby
When the Charge Point LED beacon light is green in a fade-in/
fade-out eect, it means that the unit is available and ready to
start a charge transaction.
BStart charging
To start the charge transaction, plug the cable that connects the vehicle to the Charge
Point.
CCharging
Once the charge transaction is started, the LED beacon light will
turn blue in a fade-in/fade-out eect.
In some cases the charge transaction can be stopped due to
dierent causes such as:
DCharge stopped
Plug&Charge identification method is set by factory default and enables the user to start
a charging transaction without an identification. This configuration could be adequate for
equipment placed in private areas where only reliable users have access.

Wallbox eNext
Instruction manual 17
How to use it ? -
Plug&Charge
To finish the charge transaction, stop the charge through the ‘HiCharger’ App (see Section
“D - Management options” in Chapter 7) or stop the charge through the Vehicle.
Once the charge transaction has been stopped, the user will be able to un-plug the
connector.
E
F
EV fully charged
Stop charging
Once the connector is un-pluged, the LED beacon light bar turns
back to green in a fade-in/fade-out eect.
In this status, the Charge Point is available to start a new charge
transaction.
• The EV batteries are too warm to continue the charge transaction.
• A “Stop Charging” was programmed through the Time Schedule in ‘HiCharger’ App.
• Not enough power available in the installation managed by the CirBEON device.
• The Remote Control is not enabling the charge transaction.
• The user has requested to stop the charge transaction through ‘HiCharger’ App.
When the EV is fully charged, the LED beacon light shows a
fixed blue light.
The behaviour described is for a Charge Point set with
Plug&Charge identification method. The work flow could
be different depending on the Charge Point settings.

Wallbox eNext
Instruction manual
18
Presence recognition allows the user to perform the same actions as described in the
previous chapter by means of smartphone proximity as identification method. The
presence recognition by smartphone proximity is achieved when the Charge Point detects
the ‘HiCharger’ app paired via Bluetooth. The Charge Point allows the start of charge
transaction. This configuration could be adequate for equipment placed in non private
areas where unauthorised users could access the Charge Point.
5
Users must enable the Presence recognition Identification
method through the ‘HiCharger’ App to use this functionality.
See Section “B - Identication method”in Chapter 8 for further
information about configuration.
AStandby
When LED beacon lights are fixed green, it means that the unit is
available and ready to start a charge transaction.

Wallbox eNext
Instruction manual 19
How to use it? -
Presence recognition
C
B
Start charging
User identification
User identification takes place when the presence recognition is performed. Being the
Charge Point and the smartphone paired, the Charge Point will notify the smartphone
presence with three purple light blinks. Afterwards, LED beacon light will turn green in a
fade-in/fade-out eect notifying that the charge transaction is available.
To start the charge transaction, plug the cable that connects the Vehicle to the Charge
Point. Charge Point LED beacon light will turn blue in a fade-in/fade-out eect when the
charge transaction has been started. If the blue LED beacon light remains fixed, the Charge
Point is waiting for Presence recognition to start the charge transaction.

Wallbox eNext
Instruction manual
20
When the charge transaction starts, the LED beacon light
turns blue in a fade-in/fade-out eect.
Presence recognition needs ‘HiCharger’ App running on the
smartphone (at least in the background) and Bluetooth activated.
ECharge stopped
When the EV is fully charged, the LED beacon light shows a fixed
blue light.
FEV fully charged
DCharging
In some cases the charge transaction can be stopped due to
dierent causes such as:
•The EV batteries are too warm to continue the charge transaction.
•A “Stop Charging” was programmed through the Time Schedule in ‘HiCharger’ App.
•There is not enough power available in the installation managed by the CirBEON device.
•The Remote Control is not enabling the charge transaction.
•The user has requested to stop the charge transaction through ‘HiCharger’ App.
Other manuals for Wallbox eNext Series
2
Table of contents
Other Circutor Automobile Accessories manuals
Circutor
Circutor URBAN User manual
Circutor
Circutor URBAN M11 User manual
Circutor
Circutor Raption 50 Series User manual

Circutor
Circutor Wallbox ePark Series User manual
Circutor
Circutor Raption Series User manual
Circutor
Circutor ePARK M-S2 User manual
Circutor
Circutor Raption 150 Series User manual
Circutor
Circutor URBAN Series User manual
Circutor
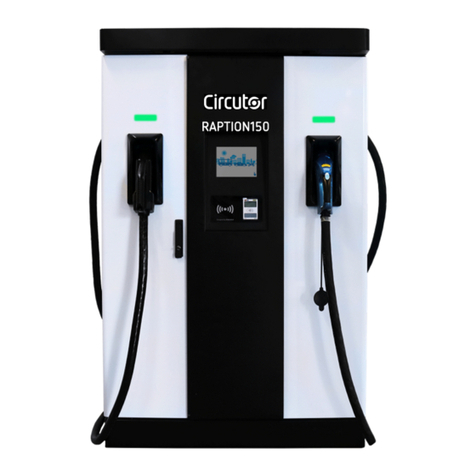
Circutor Raption 150C Series User manual

Circutor
Circutor URBAN Series User manual
