Circutor URBAN User manual

URBAN - URBAN WB
INSTRUCTION MANUAL
(M177B01-03-19A)

URBAN - URBAN WB
Instruction Manual
2
Date Revision Description
06/17 M177B01-03-17A Initial Version
10/19 M177B01-03-19A
The WB model is introduced.
Changes in the following sections:
2. - 5. - 6. - 7. - 8.- 9.
Disclaimer
CIRCUTOR, SA reserves the right to make modifications to the device or the unit specifi-
cations set out in this instruction manual without prior notice.
CIRCUTOR, SA on its web site, supplies its customers with the latest versions of the de-
vice specifications and the most updated manuals.
www.circutor.com
Revision log

URBAN - URBAN WB
Instruction Manual 3
URBAN - URBAN WB
Instruction Manual
COPYRIGHT INFORMATION
This document is copyrighted, 2019 by CIRCUTOR. All rights are reserved. CIRCUTOR
S.A. reserves the right to make improvements to the products described in this manual
at any time without notice.
No part of this manual can be reproduced, copied, translated or transmitted in any form
or by any means without the prior written permission of the original manufacturer.
Information provided in this manual is intended to be accurate and reliable. However,
the original manufacturer assumes no responsibility for its use, or for any infringements
upon the rights of third parties athat may result from its use.
All other product names or trademarks are properties of their respective owners

URBAN - URBAN WB
Instruction Manual
4
Here’s your
guide to use and
configure URBAN
Disclaimer ...................................................................................................................................................2
Revision log..................................................................................................................................................2
Here's your guide to use and configure URBAN.................................................................................4
1.-So, hello!...................................................................................................................................................6
2.-General view...........................................................................................................................................8
3.- How to use it?......................................................................................................................................12
A. Start Charging ................................................................................................................................12
B. Stop Charging ................................................................................................................................13
4.- How to configure it?...........................................................................................................................14
A. Introduction .....................................................................................................................................14
B. What's needed ................................................................................................................................14
C.Connection.........................................................................................................................................15
5.- Setup web page..................................................................................................................................16
A.Dashboard........................................................................................................................................16
B.Network..............................................................................................................................................23
C.Modem................................................................................................................................................25
D.Security..............................................................................................................................................27
E.Locale..................................................................................................................................................28
F.Time.....................................................................................................................................................29
G.Integrations.......................................................................................................................................30
H.Firmware...........................................................................................................................................31
I.ConfigurationUpdate........................................................................................................................32
6.- OCPP 1.5..............................................................................................................................................34
A.Introduction.......................................................................................................................................34
B.Beforestarting.................................................................................................................................35
C.Configuration....................................................................................................................................37
D.Checkup..............................................................................................................................................45
7.- OCPP 1.6................................................................................................................................................46
A.Introduction.......................................................................................................................................46
B.Before starting..................................................................................................................................47
C. License activation...........................................................................................................................49
D.Configuration....................................................................................................................................51
E.Checkup..............................................................................................................................................59

URBAN - URBAN WB
Instruction Manual 5
8. Monitoring.............................................................................................................................................60
9. Technical Data......................................................................................................................................62
Need help?.................................................................................................................................................66
Guarantee..................................................................................................................................................66

URBAN - URBAN WB
Instruction Manual
6
This manual provides information about the usability and configuration of
the URBAN, which has been designed and tested to allow electric vehicle
charging, specified in IEC 61851.
It contains all the necessary information for safe use and help to get the best
performance from it with step-by-step configuration instructions.
ATTENTION!
Indicates that the damage to property can occur if appropiate
precautions are not taken.
1
THE FOLLOWING SYMBOLS ARE USED FOR IMPORTANT
SAFETY INFORMATION IN THIS DOCUMENTE
• Complies with IEC 61851, Electric vehicle conductive charging
system (IEC 61851-1 and IEC 61851-22)
• Complies with IEC 62196, Plugs, socket-outlets, vehicle couplers and
vehicle inlets (IEC 62196-1 and IEC 62196-2).
• Standards: 2014/35/UE, LVD;2014/30/UE, EMC.
• RFID complies with ISO 14443A/B
URBAN - URBAN WB
Instruction Manual 7
So, hello!
The Charge Point may not include elements of electrical protection.
• Read all the instructions before
using and configurating this
product.
• Do not use this unit for anything
other than electric vehicle
charging.
• Do not modify this unit. If
modified, CIRCUTOR will reject
all responsibility and the warranty
will be void.
• Comply strictly with electrical
safety regulations according to
your country.
• Do not make repairs or
manipulations with the unit
energised.
• Only trained and qualified
personnel should have access to
electrical parts inside the device.
• Check the installation annually by a
qualified technician.
• Remove from service any item that
has a fault that could be dangerous
for users (broken plugs, caps that
don’t close...).
• Use only CIRCUTOR supplied
spare parts.
• Do not use this product if the
enclosure or the EV connector is
broken, cracked, open, or shows
any other indication of damage.
IMPORTANT SAFETY INFORMATION
Read carefully all the instructions before manipulat-
ing the unit.
URBAN - URBAN WB
Instruction Manual
8
2
12
6
3
4
5
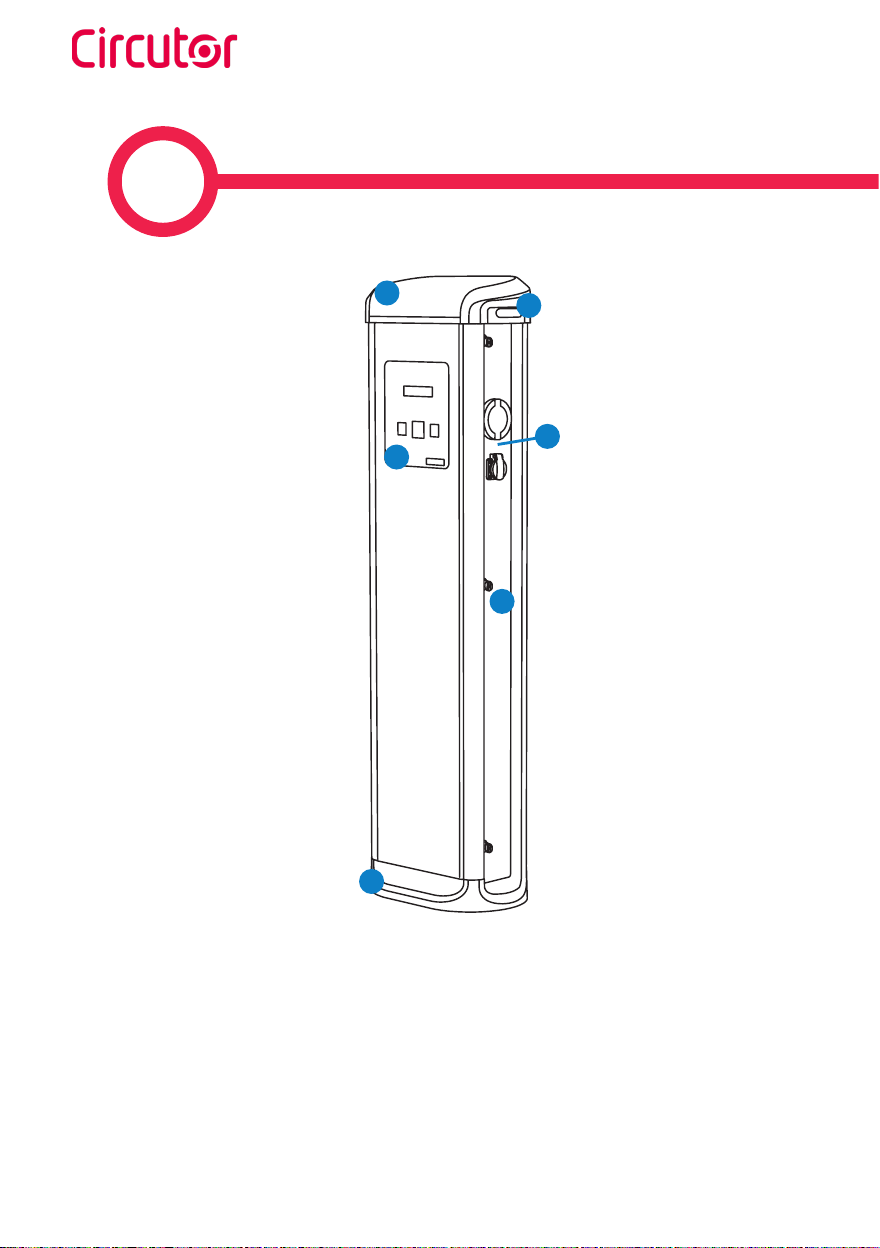
(1) Plugs may vary depending on the model
URBAN M21 - T21 - M22 - T22 - T22-C - T24-MIX
1.- Hat 4.- Key lock
2.- LED Beacons 5.- Base
3.- Plugs (1) 6.- Display and RDIF Lector

URBAN - URBAN WB
Instruction Manual 9
General view
4
1
2
3
5
6
1
2
3
4
5
6
URBAN WB SMALL
URBAN WB BIG
1.- Hat 4.- Plugs (1)
2.- Key lock 5.- Wall bracket
3.- Display and RDIF Lector 6.- Base

URBAN - URBAN WB
Instruction Manual
10
The charge point may not include electrical protection elements.
• Display: Information about the
status of the connectors and
detailed information such as kWh
and duration time.
• Connector Lock: Type 2 connector
has a lock system to avoid
disconnection of EV meanwhile is
charging.
• Light beacon:Three colour
led indicates the status of the
connectors.
• RFID: User authentication
ISO14443A/B.
• Ethernet: TCP/IP communication
for remote supervision and
configuration.
• 3G Modem (optional): For
those places where wired
communications are not sucient.
• Energy metering: Integrated
meter built is measuring power
and energy consumed by the EV
during a charge transaction.
• Remote access: For supervision
and control from everywhere.
• Charge transaction historics:
Charge Point is capable of storing
information about the charge
transactions.
• OCPP: Open standard
communication protocol, allows
communication between the
Charge Point and the Central
System.
MAIN CHARACTERISTICS OF THE DEVICE

URBAN - URBAN WB
Instruction Manual 11

URBAN - URBAN WB
Instruction Manual
12
3
AStart Charging
1. The first step is to show the proximity card to the reader(2)
Once done, the Led Beacon turns Blue and the Display shows the following
sequence of messages:
2. Plug the cable to the vehicle, choose one available socket (in case there
are more than one) and plug the cable to the Charge Point.
Once done, the Display shows the following sequence of messages:
(2)If the proximity card reader is disabled, charge transaction starts
automatically when a vehicle is detected.

URBAN - URBAN WB
Instruction Manual 13
How to use it?
BStop Charging
1. The first step is to show the proximity card to the reader(3)
Once done, the Led Beacon turns Green and the Display shows the summary
of the charge transaction:
2. Unplug the cable from both sides.
Once done, the connector becomes available and the Display shows the fol-
lowing sequence of messages:
(3)If the proximity card reader is disabled, charge transaction stops automatically
when a cable is disconnected from the vehicle.
URBAN - URBAN WB
Instruction Manual
14
4
AIntroduction
The Charge Point can be configured and monitorized to establish preferenc-
es or specific setup using integrated Ethernet communication port allocated
in the main controller device.
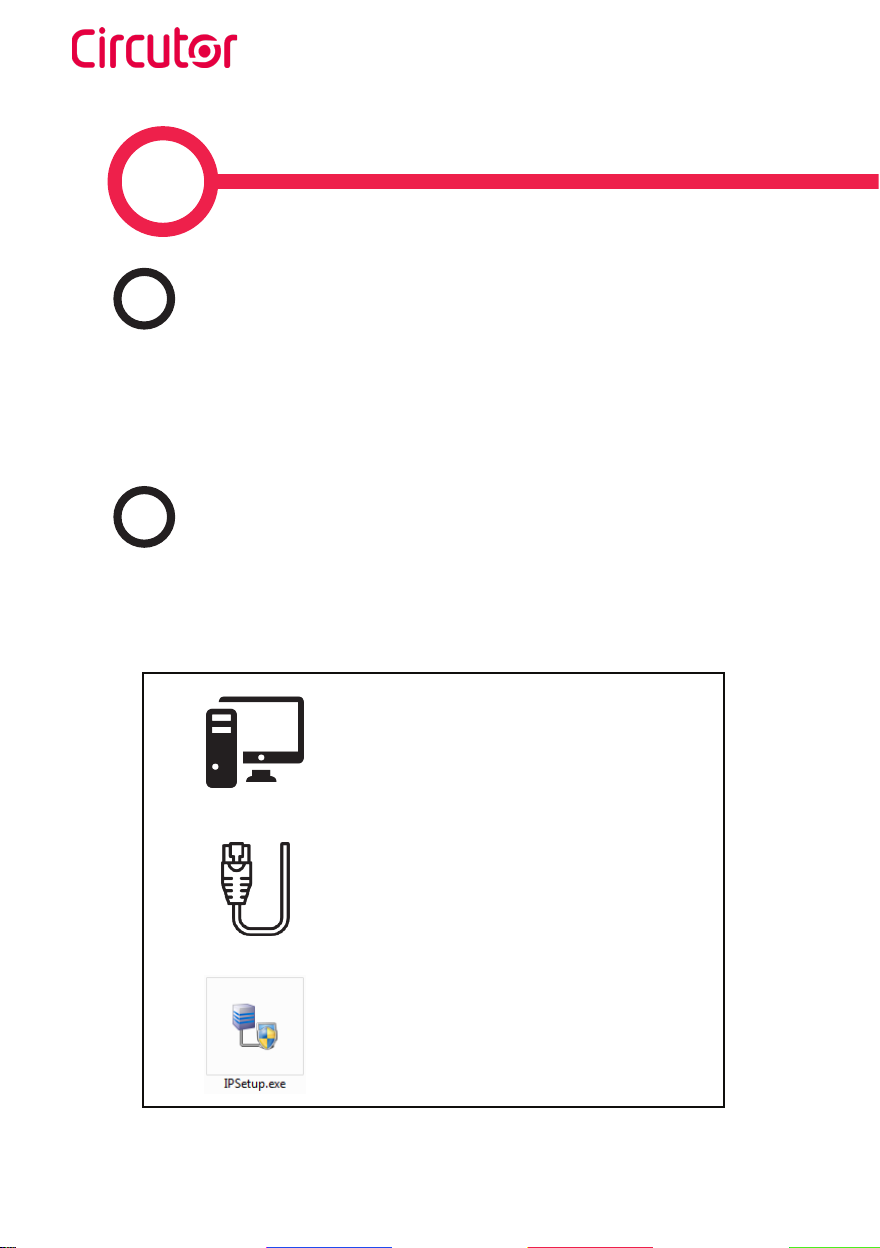
BWhat's needed
Before proceeding with the configuration, make sure all the following is
ready:
Computer running Microsoft Windows, at
least Windows XP .
UTP Cable
IPSetup.exe (Software provided by
CIRCUTOR)

URBAN - URBAN WB
Instruction Manual 15
How to configure it?
Charge Point is delivered with default network setting of “DHCP enabled”.
It means that the charge station will try to obtain an IP address from a DHCP
server available on the network.
Connecting a PC directly with the Charge Point needs to be done with static
IP address. The PC and the Charge Point must be in the same network and
in the same range.
CConnection
In order to change the IP of the Charge Point, use «IPSetup».
• Enter the MAC of the device
• Enter the desired IP address
• Click on «Configure»
Once this is done, the configuration web page will automatically open in the
default web browser.
URBAN - URBAN WB
Instruction Manual
16
5
Setup webpage allows managing networking setup, upgrading devices and
other options.
To access the setup web page, open a web browser and enter the IP address
previously configured.
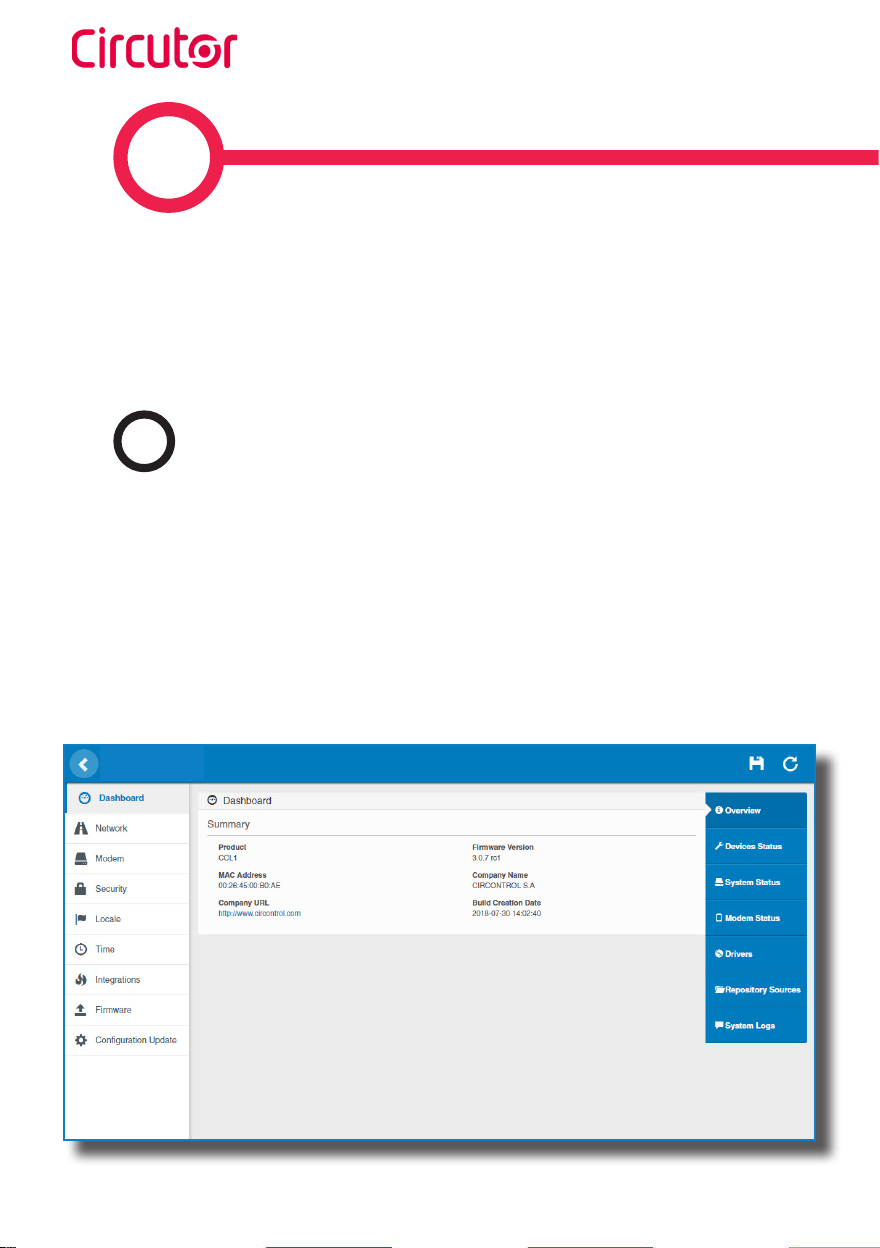
ADashboard
Overview
As a relevant information, the ‘Summary’ shows:
• Firmware version: Version of the firmware currently working in the Charge Point
• MAC Address: Identifier of the network card of the Charge Point

URBAN - URBAN WB
Instruction Manual 17
Setup web page
Devices Status
As a relevant information, the ‘Devices Status’ shows:
• Device name: Name of the devices inside the Charge Point
• Status: OK (online) / NOT OK (oine)
URBAN - URBAN WB
Instruction Manual
18
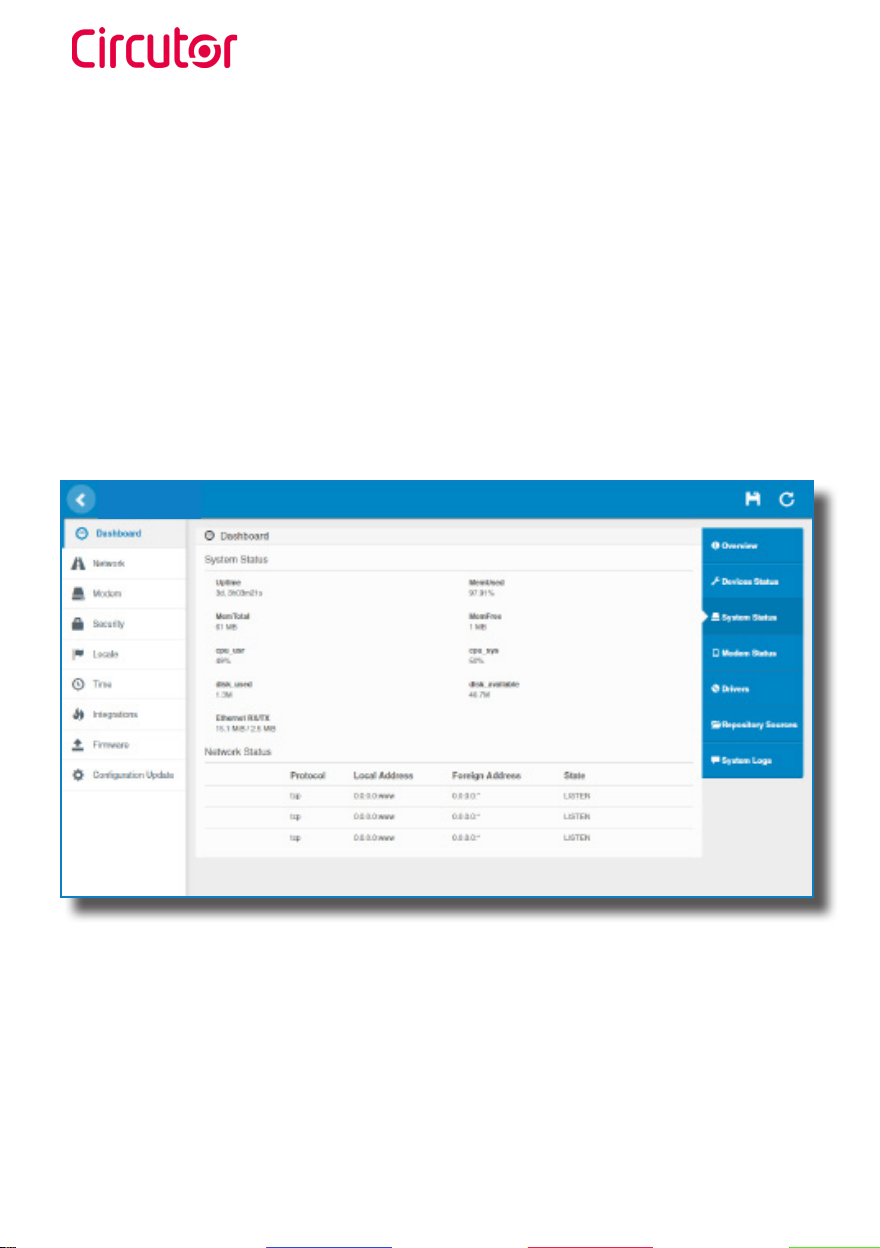
System Status
The information shown in this section is basically relative to the state of the
Control Board of the Charge Point
This is necessary for the technical service sta but does not show any
information regarding the external connection of the Charge Point or the
charging session.

URBAN - URBAN WB
Instruction Manual 19
Modem Status
When the connection is successful, this section shows the public IP, the signal
strength and other information related to the SIM card.
Good signal Bad signalModerate signal
-80 dBm -90 dBm-50 dBm -100 dBm
The following diagram shows an approximate range of the signal strength that
can be obtained depending on the location of the Charge Point:

URBAN - URBAN WB
Instruction Manual
20
Drivers
The information shown in this section is regard to the drivers that the Charge
Point needs in order to recognize the dierent devices inside the Charge Point,
such as the meters, the Mode 3 controller, the RFID reader, etc.
Other manuals for URBAN
1
This manual suits for next models
1
Table of contents
Other Circutor Automobile Accessories manuals

Circutor
Circutor Raption 150 Series User manual

Circutor
Circutor URBAN Series User manual

Circutor
Circutor ePARK M-S2 User manual

Circutor
Circutor Wallbox eNext Series User manual

Circutor
Circutor Raption 50 HV User manual

Circutor
Circutor Wallbox ePark Series User manual

Circutor
Circutor Raption Series User manual

Circutor
Circutor Raption 50 Series User manual

Circutor
Circutor Raption 150C Series User manual

Circutor
Circutor Raption 50 Series User manual


