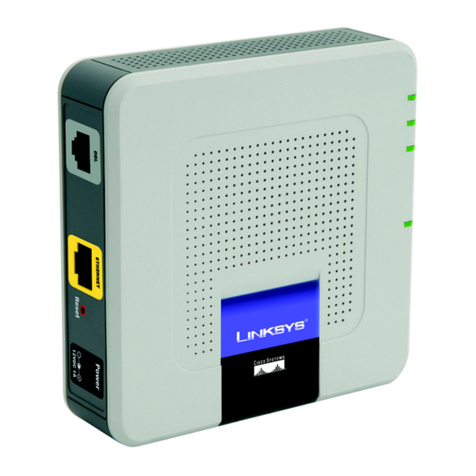
Cisco LINKSYS ADSL2MUE User manual

Model No.
Quick Installation Guide
A Division of Cisco Systems, Inc.
®
WIRED
ADSL2MUE (EU/LA)
with USB and Ethernet
ADSL2 Modem
Package Contents
•ADSL2Modem
• Power Adapter
•USBCable
• CAT 5 Ethernet Network Cable
• RJ-11 Phone Cable
• User Guide and USB Drivers CD-ROM
• Quick Installation

2
In Step 1, you will connect the Modem to your ADSL line and to a computer
in your home or business. Use Step 1A to connect the Modem using an
Ethernet connection or use Step 1B to connect the Modem using a USB
connection.
First, make sure that all the devices that you’ll be working with are powered
down, including your PC and the Modem.
Connect the Modem with Ethernet
AConnect one end of the
provided phone cable to the
ADSL (RJ-11 phone) port that is
on the back of the Modem.
BConnect the other end of the
phone cable to the wall jack
with ADSL service. (A splitter
may be required. Contact your
Internet Service Provider for
more information.)
CConnect one end of the
provided Ethernet cable to
your PC’s Ethernet port. (C1)
A
B
C1
1Connecting the Modem
1A

3
Connect the other end of the
cable to the Ethernet port on
the back of the Modem. (C2)
DConnect the power adapter to
the Modem and to the
electrical outlet. Turn on the
Modem.
ETurn on your PC.
The installation of the Modem with
an Ethernet Connection is
complete. If you need to configure
your Modem, refer to Section 3.
C2
D
IMPORTANT:
Based upon the
requirements in your country, you should
make sure to only place the microfilters
between the phone and the wall jack and
not between the Modem and the wall jack.
NOTE:
A small device called a microfilter
(not included) may be necessary between
each phone and wall jack to prevent
interference. Contact your ISP if you have
any questions.

4
AConnect one end of the phone
to the ADSL (RJ-11 phone) port
on the back of the Modem.
BConnect the other end of the
phone to the wall jack with ADSL
service.
CConnect the power adapter to
the Modem (C) and to the
electrical outlet.
DConnect one end of the USB to
the USB port on the back of the
ADSL Modem and the other
end to the USB port on your PC.
ETurn on the Modem.
Proceed to Step 2: Installing the USB
Driver.
Connect the Modem with USB
A
NOTE: To use a USB connection, your
PC must use Windows 98SE, Me,
2000, or XP. The USB port is not
supported on other operating systems.
B
C
D
IMPORTANT:
Based upon the
requirements in your country, you should
make sure to only place the microfilters
between the phone and the wall jack and
not between the Modem and the wall jack.
NOTE:
A small device called a microfilter
(not included) may be necessary between
each phone and wall jack to prevent
interference. Contact your ISP if you have
any questions.
1B

5
Model No.
If you are connecting the Modem to
your computer using the USB port,
then you will need to install the USB
driver. Proceed to the section for
your PC’s Windows operating system.
Windows XP
APower on your computer.
BWindows XP will automatically
detect the Modem. Insert the
User Guide and USB Drivers CD-
ROM into your computer’s CD-
ROM drive.
COn the first screen of the Found
New Hardware Wizard, select
Install the software
automatically
(Recommended), and click
Next.
DPlease wait while Windows XP
finds and automatically installs
the driver. When Windows XP
has finished installing the driver,
the screen shown in Figure D
will disappear.
Installation is complete. If you
need to configure your Modem,
refer to refer to Section 3.
D
C
Installing the USB Driver
2

6
Windows 2000
APower on your computer.
BWindows 2000 will
automatically detect the
Modem. Insert the User Guide
and USB Drivers CD-ROM into
your computer’s CD-ROM
drive.
COn the first screen of the Found
New Hardware Wizard, click
Next.
DSelect Search for a suitable
driver for my device
(recommended). Then click
Next.
ESelect CD-ROM drives, and
click Next.
FOn the Driver Files Search
Results screen, click Next.
GYou may see a Windows Digital
Signature warning. As this
product has been tested to
work with Windows, you may
continue.
HWhen Windows 2000 has
finished installing the driver,
click Finish.
Installation is complete. If you
need to configure your Modem,
refer to refer to Section 3.
D
C
E
F

7
C
Windows Millennium
APower on your computer.
BWindows Millennium will
automatically detect the
Modem. Insert the User Guide
and USB Drivers CD-ROM into
your computer’s CD-ROM
drive.
COn the first screen of the Add
New Hardware Wizard, select
Automatic search for a better
driver (Recommended). Then
click Next.
DPlease wait while Windows
Millennium finds and
automatically installs the driver.
When Windows Millennium has
finished installing the driver,
click Finish.
Installation is complete. If you
need to configure your Modem,
refer to refer to Section 3.
D

8
Windows 98
APower on your computer.
BWindows 98 will automatically
detect the Modem. Insert the
User Guide and USB Drivers CD-
ROM into your computer’s CD-
ROM drive.
COn the first screen of the Add
New Hardware Wizard, click
Next.
DSelect Search for the best
driver for your device
(Recommended). Then click
Next.
ESelect CD-ROM drive. Then
click Next.
FSelect The updated driver
(Recommended). Then click
Next.
GAfter Windows 98 has found
the driver, click Next.
HWhen Windows 98 has finished
installing the driver, click Finish.
Installation is complete. If you
need to configure your Modem,
refer to refer to Section 3.
D
E

9
Overview
The ADSL2 Modem has been
designed to be functional right out
of the box, with the default settings.
However, if you'd like to change
these settings, the ADSL2 Modem
can be configured through your
web browser with the Web-Based
Utility. This chapter explains how to
configure the ADSL2 Modem in this
manner.
Open your web browser and enter
192.168.1.1. in the web browser’s
Address field. (It is all right if you get
an error message at this point.) Press
the Enter key and the following
screen will appear. Enter admin in
lowercase letters in the User Name
field, and enter admin in lowercase
letters in the Password field (admin is
the default user name and
password.) You can set a new
password from the Security tab.
Configuring the Modem
3
NOTE:Before you open your web browser,
you may need to set your PC to a static IP
Address. Refer to the Troubleshooting
section in the User Guide.
Login screen
NOTE: Contact your Internet Service
Provider for the Internet setup information.

10
Basic Setup
The first screen that appears displays
the Setup tab. This allows you to
change the ADSL2 Modem's general
settings. Change these settings as
described here and click the Save
Settings button to apply your
changes or Cancel Changes to
cancel your changes.
Internet Setup
Based on the setup instructions from
your ISP, you may need to provide
the following information.
Virtual Circuit ID (VPI and VCI).
These fields consist of two items: VPI
(Virtual Path Identifier) and VCI (Virtual
Channel Identifier). Your ISP will
provide the correct settings for each
field.
Multiplexing. Select LLC or VC ,
depending on your ISP.
Encapsulation. The Modem
supports four Encapsulations
(Internet connection types): RFC
1483 Bridged, RFC 2516 PPPoE, RFC
2364 PPPoA, and Bridged Mode
Only. Each Basic Setup screen and
available features will differ
depending on what type of
encapsulation you select. The
encapsulations are described
below.

11
RFC 1483 Bridged
Dynamic IP
IP Settings. Select Obtain IP Address
Automatically (DHCP) if your ISP says
you are connecting through a
dynamic IP address.
Static IP
If you are required to use a
permanent (static) IP address to
connect to the Internet, then select
Set Static IP Manually.
• Internet IP Address. This is the
Modem’s IP address, when seen from
the WAN, or the Internet. Your ISP will
provide you with the IP Address you
need to specify here.
• Subnet Mask. This is the Modem’s
Subnet Mask. Your ISP will provide you
with the Subnet Mask.
• Default Gateway. Your ISP will provide
you with the default Gateway Address,
which is the ISP server’s IP address.
• Primary DNS. (Required) and
Secondary DNS (Optional). Your ISP will
provide you with at least one DNS
(Domain Name System) Server IP
Address.
When finished making your changes
on this tab, click the Save Settings
button to save these changes, or
click the Cancel Changes button to
undo your changes.
Dynamic IP (DHCP)
Static IP

12
RFC 2516 PPPoE
Some DSL-based ISPs use PPPoE
(Point-to-Point Protocol over Ethernet)
to establish Internet connections.
Check with your ISP to see if they use
PPPoE. If they do, you will have to
enable PPPoE.
• User Name and Password. Enter the User
Name and Password provided by your ISP.
• Keep Alive: Redial Period. When he radio
button next to
Keep Alive
is selected, if
you are disconnected, the Modem will
automatically re-establish your
connection. In the Redial Period field,
specify how often you want the Modem to
check the Internet connection. The
default Redial Period is one minute.
Choose this option if your ISP charges you
a flat, monthly fee.
• Connect on Demand: Max Idle Time. You
can configure the Modem to disconnect
the Internet connection after a period of
inactivity (Max Idle Time). If this occurs,
Connect on Demand enables the Modem
to automatically re-establish your
connection as soon as you attempt to
access the Internet again. If you wish to
activate
Connect on Demand
, click the
radio button. In the Max Idle Time field,
enter the number of minutes you want to
have elapsed before your Internet
connection terminates. Choose this
option if your ISP charges you by the hour
or minute.
When finished making your changes
on this tab, click Save Settings to
save these changes, or click Cancel
Changes to undo your changes.
PPPoE

13
RFC 2364 PPPoA
Some DSL-based ISPs use PPPoA
(Point-to-Point Protocol over ATM) to
establish Internet connections.
Check with your ISP to see if they use
PPPoA. If they do, you will have to
enable PPPoA.
• User Name and Password. Enter the User
Name and Password provided by your ISP.
• Keep Alive: Redial Period. When he radio
button next to
Keep Alive
is selected, if
you are disconnected, the Modem will
automatically re-establish your
connection. In the Redial Period field,
specify how often you want the Modem to
check the Internet connection. The
default Redial Period is one minute.
Choose this option if your ISP charges you
a flat, monthly fee.
•
Connect on Demand: Max Idle Time. You
can configure the Modem to disconnect
the Internet connection after a period of
inactivity (Max Idle Time). If this occurs,
Connect on Demand enables the Modem
to automatically re-establish your
connection as soon as you attempt to
access the Internet again. If you wish to
activate
Connect on Demand
, click the
radio button. In the Max Idle Time field,
enter the number of minutes you want to
have elapsed before your Internet
connection terminates. Choose this
option if your ISP charges you by the
hour or minute.
When finished making your changes
on this tab, click Save Settings to
save these changes, or click Cancel
Changes to undo your changes.
PPPoA

14
Bridged Mode Only
If you would like to use your Modem
as a bridge, which makes the
Modem act like a standalone
modem (without NAT or Routing),
select Bridged Mode Only.
When finished making your changes
on this tab, click the Save Settings
button to save these changes, or
click the Cancel Changes button to
undo your changes.
Optional Settings (Required by some ISPs)
Some of these settings may be
required by your ISP. Verify with your
ISP before making any changes.
Host Name and Domain Name.
These fields allow you to supply a
host and domain name for the
Router. Some ISPs require these
names as identification. You may
have to check with your ISP to see if
your broadband Internet service has
been configured with a host and
domain name. In most cases,
leaving these fields blank will work.
Status. The status of your connection
is displayed.
Bridged Mode Only

15
Network Setup
Modem IP. The values for the
Modem’s Local IP Address and
Subnet Mask are shown here. In
most cases, keeping the default
values will work.
• Local IP Address. The default value is
192.168.1.1.
• Subnet Mask. The default value is
255.255.255.0.
Network Address Server Settings
(DHCP). A Dynamic Host
Configuration Protocol (DHCP) server
automatically assigns an IP address
to each computer on your network
for you. Unless you already have
one, it is highly recommended that
you leave the Modem enabled as a
DHCP server.
• Local DHCP Server. If you enable the
DHCP Server or DHCP Relay for the
Local DHCP server, enter the IP adresss
for the DHCP server in the fields.
• Start IP Address. Enter a value for the
DHCP server to start with when issuing
IP addresses. This value must be
192.168.1. 2 or greater, because the
default IP address for the Modem is
192.168.1.1.
• Number of Address. Enter the
maximum number of computers that
you want the DHCP server to assign IP
addresses to. This number cannot be
greater than 253. By default, as shown
in Figure 5-9, the range is 192.168.1.2
to 192.168.1.254.
Network Setup

16
• IP Address Range. The range of DHCP
addresses is displayed here.
• Client Lease Time. Enter the hours and
minutes in the fields.
When finished making your changes
on this tab, click the Save Settings
button to save these changes, or
click the Cancel Changes button to
undo your changes.
For more advanced information,
refer to the User Guide (English Only)
on the CD-ROM.
Installation of the modem is now
complete.
Linksys is a registered trademark or trademark of
Cisco Systems, Inc. and/or its affiliates in the U.S.
and certain other countries. Copyright © 2004
Cisco Systems, Inc. All rights reserved.
ADSL2MUE-QIG-EUUKLA-50324A BW
For additional information or troubleshooting
help, refer to the User Guide on the User
Guide and USB Drivers CD-ROM or the
Technical Support Insert. You can also e-mail
for further support.
Website
http://www.linksys.com/international
Product Registration
http://www.linksys.com/registration

Modelnr.
Installationsvejledning
A Division of Cisco Systems, Inc.
®
KABEL-
BASERET
ADSL2MUE (DK)
med USB og Ethernet
ADSL2-modem
Pakkens indhold
•ADSL2-modem
• Strømforsyning
• USB-kabel
• CAT 5 Ethernet-netværkskabel
• RJ-11-telefonledning
• Cd-rom med brugervejledning og
USB-drivere
• Installationsvejledning

2
I trin 1 tilslutter du modemet til ADSL-linjen og til en computer i dit hjem/din
virksomhed. Brug trin 1A for at tilslutte modemet ved hjælp af en Ethernet-
tilslutning eller trin 1B for at tilslutte modemet ved hjælp af en USB-tilslutning.
Kontroller først, at alle de involverede enheder er slukket, herunder din pc
og modemet.
Tilslutning af modem til Ethernet
ATilslut den ene ende af
den medfølgende
telefonledning til ADSL-porten
(RJ-11-telefonstikket) bag på
modemet.
BTilslut den anden ende af
telefonledningen til ADSL-stikket
i væggen. (Det kan være
nødvendigt med en fordeler.
Kontakt din internetudbyder for
at få yderligere oplysninger).
CTilslut den ene ende af det
medfølgende Ethernet-kabel til
pc'ens Ethernet-port. (C1)
A
B
C1
1Tilslutning af modemet
1A

3
Slut den anden ende af kablet
til Ethernet-porten bag på
modemet. (C2)
DSlut strømforsyningen til
modemet og stikkontakten.
Tænd modemet.
ETænd pc'en.
Installationen af modemet til en
Ethernet-tilslutning er færdig. Læs
afsnit 3, hvis du skal konfigurere dit
modem.
C2
D
VIGTIGT:
Afhængigt af kravene i dit land
bør du kun placere mikrofiltre mellem
telefonen og vægstikket og ikke mellem
modemet of vægstikket.
BEMÆRK:
Det kan være nødvendigt at
placere en lille enhed, kaldet et mikrofilter,
mellem hver telefon og vægstik for at
undgå interferens. Kontakt din
internetudbyder, hvis du har spørgsmål.

4
ATilslut den ene ende af
telefonledningen til ADSL-porten
(RJ-11-telefonstikket) bag på
modemet.
BSlut den anden ende af
telefonledningen til ADSL-stikket
i væggen.
CSlut strømforsyningen til
modemet (C) og stikkontakten.
DSlut den ene ende af USB-
ledningen til USB-porten bag på
ADSL-modemet og den anden
ende til USB-porten på pc'en.
ETænd modemet.
Fortsæt til trin 2: Installation af
USB-driveren.
Tilslutning af modem til USB
A
BEMÆRK: For at kunne bruge en
USB-tilslutning skal din pc bruge
Windows 98SE, Me, 2000 eller XP.
USB-porten understøttes ikke af andre
operativsystemer.
B
C
D
VIGTIGT:
Afhængigt af kravene i dit land
bør du kun placere mikrofiltre mellem
telefonen og vægstikket og ikke mellem
modemet of vægstikket.
BEMÆRK:
Det kan være nødvendigt at
placere en lille enhed, kaldet et mikrofilter,
mellem hver telefon og vægstik for at
undgå interferens. Kontakt din
internetudbyder, hvis du har spørgsmål.
1B
Table of contents
Languages:
Other Cisco Modem manuals

Cisco
Cisco DPC3216 User manual

Cisco
Cisco DPX2203 User manual

Cisco
Cisco MX250 User manual

Cisco
Cisco LINKSYS AM200 Original operating instructions

Cisco
Cisco 3848 User manual

Cisco
Cisco Meraki MX95 Series Manual

Cisco
Cisco SE680 WiMAX User manual

Cisco
Cisco DPC3202 User manual

Cisco
Cisco WAP300N User manual

Cisco
Cisco WCM300 - Channel Bonded Cable Modem User manual

Cisco
Cisco DPC2203 User manual

Cisco
Cisco DPC3848 User manual

Cisco
Cisco BWX360 WiMAX User manual

Cisco
Cisco DPC3212 User manual

Cisco
Cisco UC540W-BRI-K9 User manual

Cisco
Cisco SPA122 ATA User manual

Cisco
Cisco BWX360 WiMAX User manual

Cisco
Cisco EPC3212 User manual

Cisco
Cisco uBR904 Assembly instructions
Cisco
Cisco DPC3848 Instruction Manual