manuals.online logo
Brands
  1. Home
  2. •
  3. Brands
  4. •
  5. Cisco
  6. •
  7. Telephone Accessories
  8. •
  9. Cisco WBP54G - Small Business Pro Wireless-G... User manual

Cisco WBP54G - Small Business Pro Wireless-G... User manual

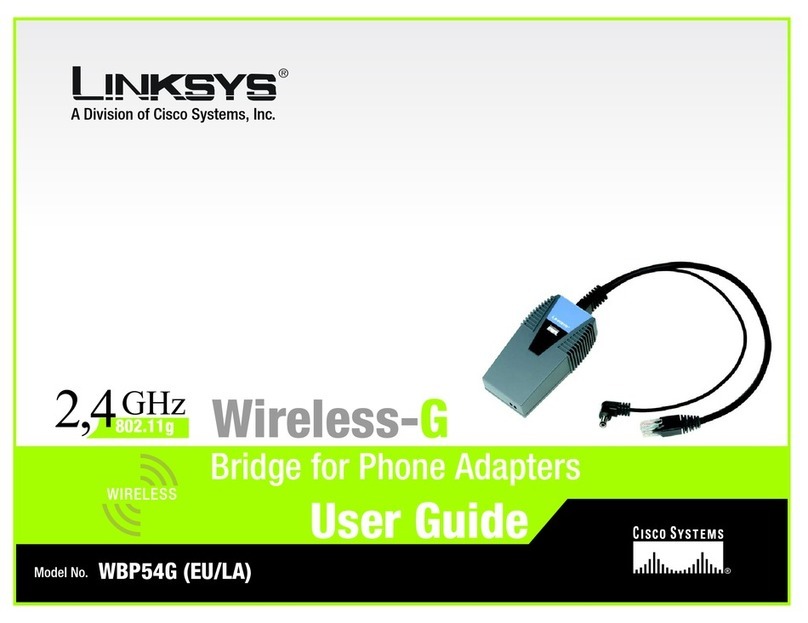
Model No.
Quick Installation
A Division of Cisco Systems, Inc.
®
Model No.
Wireless
Bridge for Phone Adapters
Wireless-G
Package Contents
• Wireless-G Bridge for Phone Adapters (with
Attached Combo-power/Ethernet Cable)
• CD-ROM with Setup Wizard and User Guide
• Quick Installation Guide
• Registration Card
1
NOTE:The power adapter for your
Linksys phone adapter or IP phone
will be used to power the Bridge.
NOTE:If you connect the Bridge to a
router, make sure the Bridge and PC
running the Setup Wizard are
connected to the Ethernet network
(LAN) ports of the same router.
The Setup Wizard will guide you
through the steps to configure
and connect the Bridge.
AInsert the Setup CD-ROM
into your CD-ROM drive. The
Setup Wizard should run
automatically, and the
Welcome screen should
appear. If it does not, click
Start and choose Run. In
the field that appears, enter
D:\setup.exe (if “D” is the
letter of your CD-ROM
drive).
BClick Click Here to Start on
the Welcome screen.
CAfter reading the License
Agreement, click Next if you
agree, or click Cancel to
end the installation.
DThis screen will inform you
about which Linksys phone
adapters and IP phones
work with the Bridge. Make
sure your phone adapter or
IP phone is listed on-screen.
Click Next.
EYou will use the PC running
this Setup Wizard to set up
the Bridge. Disconnect the
power jack from the back of
the Linksys phone adapter
or IP phone. (You will use this
power adapter to power the
Bridge.) If your network
router or this PC is in a
different room, disconnect
the power adapter from the
electrical outlet. Move the
power adapter and Bridge
to the room where your
router or PC is located.
Click Next.
FConnect the power jack to
the Power port of the Bridge.
Then plug the power
adapter into an electrical
outlet.
Click Next.
GYou will use the
combination Ethernet
network and power cable
attached to the Bridge.
Connect the Ethernet
network cable of the Bridge
to an Ethernet network (LAN)
port of the router or PC. (Do
not use the power cable
now; you will use it later.)
Make sure the Bridge’s
Ethernet LED is solidly lit or
flashing. Click Next.
HA list of all Bridges for Phone
Adapters that can be
detected by the Setup
Wizard will be displayed.
Select the Bridge you are
installing and click Next. If
the Bridge you want is not
displayed, click the Refresh
List button to search again.
IThis screen will display a list
of wireless networks that can
be detected. Select the
wireless network you want.
If the network you want is
not displayed, click the
Refresh List button to
search again.
To manually enter the SSID
of the network you want,
click the SSID radio button
and enter the SSID of your
wireless network.
Click Next.
JConfigure the wireless
security settings. Select the
method your network is
using, WPA, WPA2,
WEP (128-Bit), or WEP (64-
Bit). Then proceed to the
appropriate instructions. If
you are not using wireless
security, select Disabled,
and proceed to step K.
Set up and Connect the Bridge
GH
z
2.4
802.11g
WBP54G
IMPORTANT:Some wireless
access points or routers do not
broadcast their status information. If
you do not see the network you
want, click the SSID radio button
and manually enter its SSID.
C
D
B
F
G
E
I
H
enter a Passphrase, enter
the WEP key and select the
appropriate number from
the Key Index drop-down
menu. Click Next.
Key 1-4 - The WEP key(s) you
enter must match the WEP
key(s) of your wireless
network. For 64-bit
encryption, enter 10
hexadecimal characters.
For 128-bit encryption, enter
26 hexadecimal
characters. Valid
hexadecimal characters
are “0” to “9” and “A” to “F”.
Key Index - If your access
point or wireless router uses
a different transmit key
number, select that number
from the index.
KReview the new settings.
Click Next to save them.
LThe Bridge will attempt to
connect to the wireless
network using the new
settings.
Make sure the Bridge’s
Wireless LED is solidly lit or
flashing. This indicates that
the Bridge has connected
to the wireless network. If the
attempt succeeds,
proceed to step M.
If the attempt fails, you
have two options offered by
a pop-up screen. Click Yes
to save the new settings
and proceed, or click No to
reconfigure the settings.
MDisconnect the Ethernet
network cable of the Bridge
from the router or PC.
Click Next.
NIf the phone adapter or IP
phone is in a different room,
disconnect the power
adapter from the electrical
outlet. Move the power
adapter and Bridge to the
location of the phone
adapter or IP phone.
Click Next.
ODisconnect the Ethernet
network cable from the
phone adapter or IP phone.
You will use the
combination Ethernet
network and power cable
attached to the Bridge.
Connect the Ethernet
network cable of the Bridge
to the phone adapter or IP
phone.
Click Next.
WPA
TKIP is automatically
selected as the encryption
method. Enter a
Passphrase, also called a
pre-shared key, of 8-63
characters. Click Next.
WPA2
AES is automatically
selected as the encryption
method. Enter a
Passphrase, also called a
pre-shared key, of 8-63
characters. Click Next.
WEP (128-Bit) or WEP (64-Bit)
To automatically generate
a WEP key, enter a
passphrase. To manually
enter a WEP key, leave the
Passphrase field blank.
Then click Next.
NOTE:The passphrase is case-
sensitive and should not
be longer than 16
alphanumeric characters.
It must match the
passphrase of your
wireless network.
A new screen will appear. If
you entered a Passphrase,
the WEP key will be
displayed. If you did not Linksys is a registered trademark or trademark of Cisco Systems, Inc. and/or its affiliates in the U.S. and
certain other countries. Copyright © 2005 Cisco Systems, Inc. All rights reserved.
PConnect the power cable
of the Bridge to the Power
port of the phone adapter
or IP phone. Then connect
the power adapter to an
electrical outlet.
Make sure the Bridge’s
Ethernet and Wireless LEDs
are solidly lit or flashing.
Click Next.
QMake sure your cable
connections match the
cable connections shown
on-screen. Click Next.
ROn the Congratulations
screen, click Exit to exit the
Setup Wizard, or click
Online Registration to
register the Bridge at
www.linksys.com/registration
.
Congratulations! The installation
of the Wireless-G Bridge for
Phone Adapters is complete.
WPA
WPA2
WEP
WEP Keys
K
N
O
M
L
Q
P
For additional information or troubleshooting help, refer to the User Guide on the Setup CD-ROM. You can also
call or e-mail for further support.
24-hour Technical Support 800-326-7114 (toll-free from US or Canada)
E-mail Support [email protected]
Website http://www.linksys.com or
http://support.linksys.com
RMA (Return Merchandise Authorization) http://www.linksys.com/support
FTP Site ftp://ftp.linksys.com
Sales Information 800-546-5797 (800-LINKSYS)
WBP54G_V2-QI-51019NC JL

Other manuals for WBP54G - Small Business Pro Wireless-G...

1

This manual suits for next models

1

Other Cisco Telephone Accessories manuals

Cisco WBP54G - Small Business Pro Wireless-G... User manual

Cisco

Cisco WBP54G - Small Business Pro Wireless-G... User manual

Cisco SPA500S User manual

Cisco

Cisco SPA500S User manual

Cisco SPA500S User manual

Cisco

Cisco SPA500S User manual

Cisco 7916 User manual

Cisco

Cisco 7916 User manual

Cisco BEKEM User manual

Cisco

Cisco BEKEM User manual

Cisco Small Business SPA2102 User manual

Cisco

Cisco Small Business SPA2102 User manual

Cisco UC 520 User manual

Cisco

Cisco UC 520 User manual

Cisco Small Business Pro SPA9000 Instruction Manual

Cisco

Cisco Small Business Pro SPA9000 Instruction Manual

Cisco Unified IP Phone Expansion Module 7915 User manual

Cisco

Cisco Unified IP Phone Expansion Module 7915 User manual

Cisco SPA500DS User manual

Cisco

Cisco SPA500DS User manual

Cisco 8800 Series User manual

Cisco

Cisco 8800 Series User manual

Cisco Small Business Pro SPA 504G User manual

Cisco

Cisco Small Business Pro SPA 504G User manual

Cisco ATA 187 User manual

Cisco

Cisco ATA 187 User manual

Cisco PAP2T User manual

Cisco

Cisco PAP2T User manual

Cisco CP-7914 - 7914 - Key Expansion Module User manual

Cisco

Cisco CP-7914 - 7914 - Key Expansion Module User manual

Cisco 7916 User manual

Cisco

Cisco 7916 User manual

Popular Telephone Accessories manuals by other brands

Siemens Gigaset C355 manual 

Siemens

Siemens Gigaset C355 manual 

Motorola HS810 - Headset - Over-the-ear user manual

Motorola

Motorola HS810 - Headset - Over-the-ear user manual

Gigaset S810 manual

Gigaset

Gigaset S810 manual

Aristel DV-96 installation manual

Aristel

Aristel DV-96 installation manual

SwiftCam M4 Lite quick start guide

SwiftCam

SwiftCam M4 Lite quick start guide

Swisscom Handset Top S329 user guide

Swisscom

Swisscom Handset Top S329 user guide

Qualitel Eurofone C33H-B user manual

Qualitel

Qualitel Eurofone C33H-B user manual

Bpt SL/200 installation instructions

Bpt

Bpt SL/200 installation instructions

Defender Selfie Master SM-01 Operation manual

Defender

Defender Selfie Master SM-01 Operation manual

Sony Ericsson HBH-PV720 user guide

Sony Ericsson

Sony Ericsson HBH-PV720 user guide

Topcom CALLMASTER 220 operating guide

Topcom

Topcom CALLMASTER 220 operating guide

Swissvoice Eurit 435 user manual

Swissvoice

Swissvoice Eurit 435 user manual

Grandstream Networks DUAL FXS PORT HT502 user manual

Grandstream Networks

Grandstream Networks DUAL FXS PORT HT502 user manual

Mitel M695 installation guide

Mitel

Mitel M695 installation guide

Panasonic KX-TD816/1232AL User manual addendum

Panasonic

Panasonic KX-TD816/1232AL User manual addendum

Panasonic KX-T7740 Quick reference guide

Panasonic

Panasonic KX-T7740 Quick reference guide

Hunter Cypress Grove 19249 installation instructions

Hunter

Hunter Cypress Grove 19249 installation instructions

TYSTVideo TY-M2S user manual

TYSTVideo

TYSTVideo TY-M2S user manual

manuals.online logo
manuals.online logoBrands
  • About & Mission
  • Contact us
  • Privacy Policy
  • Terms and Conditions

Copyright 2025 Manuals.Online. All Rights Reserved.