manuals.online logo
Brands
  1. Home
  2. •
  3. Brands
  4. •
  5. Clarke
  6. •
  7. Cutter
  8. •
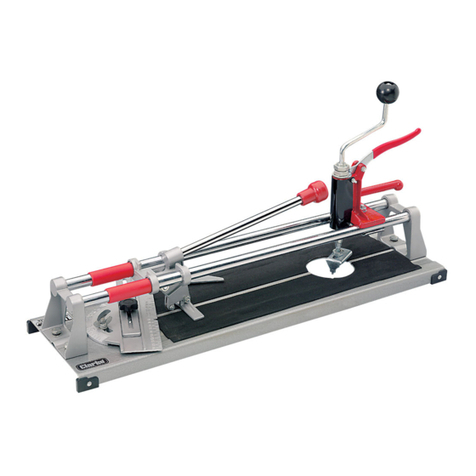
  9. Clarke TCM430 User manual

Clarke TCM430 User manual

This manual suits for next models

3

Other Clarke Cutter manuals

Clarke ETC8 Instruction Manual

Clarke

Clarke ETC8 Instruction Manual

Clarke X-Pro CAT203 Installation and operation manual

Clarke

Clarke X-Pro CAT203 Installation and operation manual

Clarke 1801518 User manual

Clarke

Clarke 1801518 User manual

Clarke CMB710 Instruction Manual

Clarke

Clarke CMB710 Instruction Manual

Clarke WE6493A User manual

Clarke

Clarke WE6493A User manual

Clarke ETC400 Troubleshooting guide

Clarke

Clarke ETC400 Troubleshooting guide

Clarke ETC180 Quick reference guide

Clarke

Clarke ETC180 Quick reference guide

Clarke CAT127 Installation and operation manual

Clarke

Clarke CAT127 Installation and operation manual

Clarke ETC180 Manual

Clarke

Clarke ETC180 Manual

Clarke CLC1 User manual

Clarke

Clarke CLC1 User manual

Clarke ETC8 Instruction Manual

Clarke

Clarke ETC8 Instruction Manual

Clarke 20CI Instruction Manual

Clarke

Clarke 20CI Instruction Manual

Clarke ETC7 Installation and operation manual

Clarke

Clarke ETC7 Installation and operation manual

Clarke 30SI Installation and operation manual

Clarke

Clarke 30SI Installation and operation manual

Clarke TCM420 User manual

Clarke

Clarke TCM420 User manual

Clarke ETC6 Installation and operation manual

Clarke

Clarke ETC6 Installation and operation manual

Clarke CHT532 User manual

Clarke

Clarke CHT532 User manual

Clarke Strong-Arm CS10HC Installation and operation manual

Clarke

Clarke Strong-Arm CS10HC Installation and operation manual

Clarke CHT518 User manual

Clarke

Clarke CHT518 User manual

Popular Cutter manuals by other brands

Eraser WC600 operating instructions

Eraser

Eraser WC600 operating instructions

Husqvarna K 760 OilGuard Operator's manual

Husqvarna

Husqvarna K 760 OilGuard Operator's manual

Binding Products GuilloMax user manual

Binding Products

Binding Products GuilloMax user manual

Bms Bulut Makina BULUCUT-6 Operational manual

Bms Bulut Makina

Bms Bulut Makina BULUCUT-6 Operational manual

Westfalia 80 02 22 instruction manual

Westfalia

Westfalia 80 02 22 instruction manual

Perfecta 76 UC Service instructions

Perfecta

Perfecta 76 UC Service instructions

Bosch POF 1400 ACE Original instructions

Bosch

Bosch POF 1400 ACE Original instructions

SignWarehouse.com Bobcat BA-60 user manual

SignWarehouse.com

SignWarehouse.com Bobcat BA-60 user manual

Makita 4112HS instruction manual

Makita

Makita 4112HS instruction manual

GEISMAR STUMEC MTZ 350S manual

GEISMAR STUMEC

GEISMAR STUMEC MTZ 350S manual

Hitachi CM 4SB2 Safety instructions and instruction manual

Hitachi

Hitachi CM 4SB2 Safety instructions and instruction manual

Dexter Laundry 800ETC1-20030.1 instruction manual

Dexter Laundry

Dexter Laundry 800ETC1-20030.1 instruction manual

GCC Technologies AFJ-24S user manual

GCC Technologies

GCC Technologies AFJ-24S user manual

ARCBRO Stinger-PRO 5100 Series Install manual

ARCBRO

ARCBRO Stinger-PRO 5100 Series Install manual

DeWalt XR LI-ION DCS350N manual

DeWalt

DeWalt XR LI-ION DCS350N manual

Baudat ES1 instruction manual

Baudat

Baudat ES1 instruction manual

Makita 4100NH instruction manual

Makita

Makita 4100NH instruction manual

CAB PCU400 instructions

CAB

CAB PCU400 instructions

manuals.online logo
manuals.online logoBrands
  • About & Mission
  • Contact us
  • Privacy Policy
  • Terms and Conditions

Copyright 2025 Manuals.Online. All Rights Reserved.

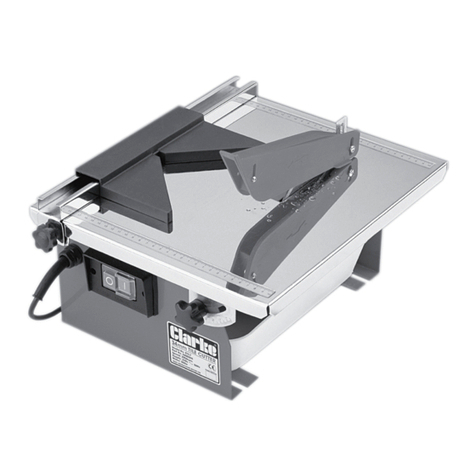
TILE CUTTER
Model Nos
TCM420 & TCM430
Thank you for purchasing this Clarke Tile Cutter.
Both TCM420 and TCM430 tile cutters are ideal for professional and DIY users alike.
Ceramic tiles up to 400mm (16”) in length, and 14mm (1/2”) thick, may be cut perfectly straight. Model TCM430
has the additional capability of cutting to any angle, accurately, (max. diagonal cut - 400mm), AND cutting holes
up to 80mm in diameter using a special hole cutting attachment.
Please read this leaflet thoroughly before use. This will ensure not only the safety of both yourself and those around
you, but also accuracy of operation and long and trouble free service from your Tile Cutter.
GUARANTEE
This product is guaranteed against faults in manufacture for 12 months from purchase date. Please keep
your receipt as proof of purchase.
This guarantee is invalid if the product has been abused or tampered with in any way, or not used for the
purpose for which it is intended. The reason for return must be clearly stated.
This guarantee does not affect your statutory rights.
STRAIGHT CUTTING
• First, thread the handle into the Slide housing as indicated
in the illustration opposite, and tighten.
• Place the tile on the work table, with the line to be scored exactly
in line with the zero mark on the scale. A guide plate is provided
to ensure the tile is held in a square position. (Ensure the angle
gauge (Model TCM430) is set to zero degrees). Adjust the position
of the guide to accommodate the tile and hold the tile firmly in
place with the left hand, as shown.
• Raise the handle and draw the slide back, past the edge of the
tile, then lower the handle so that the tungsten carbide scoring
wheel comes into contact with the leading edge of the tile.
• Apply a firm pressure (not too heavily) down on to the handle
whilst pushing forward, smoothly and evenly, in the direction of
the arrow, so that the tile is scored along its complete length.
• Raise the handle and reposition the slide so that the breaker
bars are approximately half way along the tile. DO NOT MOVE
THE TILE
• Pressing down on the handle again will cause the tile to break.
NOTE: It is necessary to score the tile ONCE ONLY.
MODEL TCM430 is provided with an angle gauge so that the tile may be secured at any angle for cutting in a straight line. Simply
adjust the angle gauge to the required angle and place the tile so that it is held firmly against the angle gauge guide plate
WARNING! ALWAYS wear protective eye goggles when using the Tile Cutter
Part Numbers 3400660 & 3400655
All manuals and user guides at all-guides.com
HOLE CUTTING (Model TCM430 only)
NOTE:
When cutting thicker tiles It may be necessary to set the
cutter higher to begin with, to avoid the possibility of the
cutter digging into the tile too fiercly.
Cutting through the tile will take a little time and considerable
dust will be generated. Pouring water in the groove produced
will prevent this, and help to keep the tip cool.
If the cutter does not break through the tile, readjust the
column position by unlocking the adjuster nuts, then turn
the lower adjuster nut anticlockwise one turn. Remember
to lock the adjuster nuts once again before proceeding to
turn the operating handle.
REMEMBER, if the column is positioned too low, the cutter,
under spring pressure, will break through the tile forcefully
and create a jagged back edge to the hole. This may or
may not be a problem, depending upon requirements, as
the front edge of the hole will be clean.
Model TCM430 is also provided with a hole cutting attachment which is assembled and used as follows:
2
Slacken off the upper
adjuster nut fully.
Screw the lower nut up or
down so that the cutting tip is
approx. 2.5mm (3/32 - 1/8in)
3
Assemble the Hole
Cutting Attachment to
the frame as shown,
ensuring the pilot drill is as
near central over the
hole in the work
table as possible.
Tighten the
clamping nut.
SPARE PARTS
The following spare parts are available from your Clarke dealer.
1. Scoring Wheel .......................... Part No. TCM43001
2. Cutting Assembly complete ... Part No. TCM43002
Or call Clarke Parts department on 020 8988 7500
or e-mail Parts@clarkeinternational.com
Screw the cutter assembly
into the end of the column,
and tighten.
14
Unlock the Column Height Adjuster Nuts then screw the
lower nut clockwise to raise, or anticlockwise to lower,
the column, (and hence the cutter), so that the tip of
the Cutter is approximately level with, or VERY slightly
below, the top surface of the work table.
higher than the
pilot drill tip.
Screw down the upper adjuster nut and lock in place
firmly, ensuring the distance from the centre of the
pilot drill tip to the outside edge of the cutting tip is
set to the desired radius for the hole to be cut.
Depress the spring
loaded Lever, to raise
the column. Place
the tile on the work
table. Position it so
that the centre of the
desired hole is
directly beneath the
pilot drill tip, then
gently release the
Lever.
5
Hold the tile firmly, (or the Steadying Handle, as the
operation permits), and begin to turn the Operating
Handle CLOCKWISE. The pilot drill will begin to drill a pilot
hole, and eventually the cutter will come into contact
with the tile and a circle will be scored. Continue to turn
the handle until the cutter finally breaks through the tile.
All manuals and user guides at all-guides.com