manuals.online logo
Brands
  1. Home
  2. •
  3. Brands
  4. •
  5. Clarke
  6. •
  7. Heater
  8. •
  9. Clarke DEVIL 340 Instruction Manual

Clarke DEVIL 340 Instruction Manual

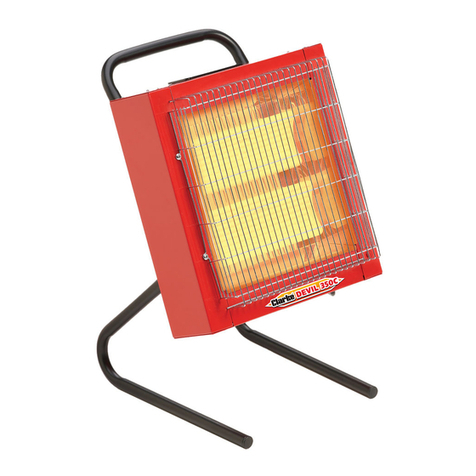
CERAMIC HEATER
OPERATING & MAINTENANCE
INSTRUCTIONS 0803
Model: DEVIL 340
CERAMIC HEATER
© Copyright Clarke International. All rights reserved Feb. 2002
7
SPARE PARTS
No. Description Part No.
1 Handle DA34001
2 Leg Assy DA34002
3 Reflector DA34003
4 Element DA34004
5 Securing Clip Outer DA34005
6 Securing Clip Inner DA34006
7 Switch Assy DA34007
8 Indicator Lamp Assy DA34008
9 Trip Switch Assy (230V) DA34009
- Guard Assy DA34010
2
3
Thank you for purchasing this Clarke Ceramic Heater.
Before attempting to operate the unit please read this instruction leaflet and carefully
follow all directions given. By doing so you will ensure safe operation of the unit and you
can also look forward to it providing you with long and trouble free service.
GUARANTEE
This CLARKE product is guaranteed against faults in manufacture for 12 months
from purchase date. Please keep your receipt as proof of purchase.
This guarantee is invalid if the product has been found to have been abused in
any way, or not used for the purpose for which it was intended, or to have been
tampered with in any way. The reason for return must be clearly stated.
This guarantee does not affect your statutory rights.
SAFETY PRECAUTIONS
• NEVER use electrical equipment in the presence of combustible gases.
• This heater is for INDOOR USE ONLY.
• ALWAYS disconnect from the mains supply before moving or performing any
maintenance tasks.
• ALWAYS use in an upright position ONLY.
• Inspect the mains cable regularly for signs of damage. DO NOT use if it is
damaged, and ALWAYS keep it away from the source of heat.
• NEVER switch ON the heater if the guard is removed.
• NEVER locate the heater near combustible materials such as curtains, furniture
etc. Allow at least 2 metres distance.
• DO NOT use this heater in a bathroom or shower room or any wet environment.
• DO NOT locate the heater close to an adjacent wall or ceiling...allow a
distance of at least 1 metre from a wall or ceiling.
• NEVER cover the heater, or block any of the vents.
• DO NOT use if the heater elements are damaged or broken.
• NEVER touch the heater for at least 15 minutes after it is switched off.
• DO NOT use this heater in the vicinity of a swimming pool.
• DO NOT leave the heater unnattended.
• If children are present.....ALWAYS use with a fireguard.
• Do NOT use in a paint spray booth or any explosive environment.
6
PARTS & SERVICE TEL: 020 8988 7400
or e-mail as follows:
PARTS: [email protected]
SERVICE: [email protected]
PARTS & SERVICE
MAINTENANCE
Allow the heater to cool down for at least 15 minutes after switching off, before
performing any maintenance tasks.
Periodically.
• Disconnect from the mains supply, remove the guard and wipe the reflector
and elements with a clean damp cloth. DO NOT use abrasive cleaners.
• Inspect the mains cable for damage. Heat damage will cause the cable to
stiffen and crack. If this is found, have the cable replaced (refer to your CLARKE
dealer), check cable routing and ensure it is well away from the heat source.
Ceramic Element Replacement
Ceramic Elements are long lasting and should not need replacing under normal
circumstances. Should this become necessary however, the method of
replacement is as follows:
1. Ensure the heater is disconnected from the mains supply, and has cooled
sufficiently for work to commence, then remove the guard.
2. Remove the four screws securing the reflector.
3. Disconnect the leads from the damaged element to the ceramic connector
block.
4. Carefully remove the clip, securing the element, by sliding it to the side, and
retain, together with the spring clip.
5. Replace in the reverse order.
IMPORTANT
IF IN ANY DOUBT, ALWAYS CONSULT A QUALIFIED TECHNICIAN. DO NOT
CARRY OUT ANY REPAIRS YOURSELF.
4
ELECTRICAL CONNECTIONS
This model is provided with a 13 amp BS 1363 plug, fitted with a 13amp fuse and
MUST be connected to a standard, 230 Volt (50Hz) electrical supply, preferably
through an approved , or a suitably fused isolator switch.
WARNING! THIS APPLIANCE MUST BE EARTHED
IMPORTANT: The wires in the mains lead are coloured in accordance with the
following code:
Green & Yellow ........................ Earth
Blue ............................................ Neutral
Brown ........................................ Live
As the colours of the flexible lead of this appliance may not correspond with the
coloured markings identifying terminals in your plug, or your mains supply, pro-
ceed as follows:
• Connect GREEN & YELLOW coloured cord to plug terminal marked with a
letter “E” or Earth symbol “ ” or coloured GREEN or GREEN & YELLOW.
• Connect BROWN cord to terminal marked with a letter “L” or coloured RED.
• Connect BLUE cord to terminal marked with a letter “N” or coloured BLACK.
Fuse Rating
The fuse in the plug must be replaced with one of the same rating (13 amps) and
this replacement must be ASTA approved to BS1362.
This appliance is fitted with a plug which is moulded on to the electric cable (i.e.
non-rewireable) please note:
1. The plug must be thrown away if it is cut from the electric cable. There is a
danger of electric shock if it is subsequently inserted into a socket outlet.
2. Never use the plug without the fuse cover fitted.
3. Should you wish to replace a detachable fuse carrier, ensure that the correct
replacement is used (as indicated by marking or colour code).
4. Replacement fuse covers can be obtained from most DIY or electrical stores.
230 Volt Models
110 Volt Model
This model is fitted with a 110V, 32amp 3-pin plug, and must be connected to a
protected 110V supply with a fused rating of 20amps.
Should the plug subsequently be cut from the mains lead, it must be thrown
away as there is a danger of electric shock if it is subsequently inserted
into a socket outlet.
5
ASSEMBLY
Attach the handle and legs to the heater body in the manner shown in the drawing
below, using the 6 M6x20mm screws provided.
SPECIFICATIONS
Part Number 6920266 6920267
Input 230V 50hz 1ph 110V 50hz 1ph
Output Rating 2800W (2x1400W) 2000W (2x1000W)
Fuse Rating 13A 20A
Dimensions (HxWxD) 550x360x390mm 550x360x390mm
Gross Weight 7kg 7kg
NOTE: If a portable 110V transformer is used, make sure it has a rated capacity
sufficient to take the load of the heater.
In the event that the heater is hard wired into the electrical system, it must be
carried out in accordance with IEE regulations.
OPERATION
When the appliance is plugged in to the mains supply, the lamp on the front
panel will illuminate.
Each of the elements is controlled by a switch, which will illuminate when switched ON.
NOTE: The 230 Volt model incorporates a trip switch which will operate should the
heater fall over, switching off the heater. It will automatically reset once the heater
is on its feet. IMPORTANT!: This must NOT be seen as afailsafe, as residual heat can
still cause a fire.

Other Clarke Heater manuals

Clarke DEVIL 7003 Instruction Manual

Clarke

Clarke DEVIL 7003 Instruction Manual

Clarke DEVIL 9000PTC Instruction Manual

Clarke

Clarke DEVIL 9000PTC Instruction Manual

Clarke Devil 6003 Manual

Clarke

Clarke Devil 6003 Manual

Clarke DEVIL 370SPD Installation and operation manual

Clarke

Clarke DEVIL 370SPD Installation and operation manual

Clarke DEVIL 6025 Instruction Manual

Clarke

Clarke DEVIL 6025 Instruction Manual

Clarke XR60DV Instruction Manual

Clarke

Clarke XR60DV Instruction Manual

Clarke IRD20 Instruction Manual

Clarke

Clarke IRD20 Instruction Manual

Clarke DEVIL 2000PTC-B Instruction Manual

Clarke

Clarke DEVIL 2000PTC-B Instruction Manual

Clarke OFR 9/90 Instruction Manual

Clarke

Clarke OFR 9/90 Instruction Manual

Clarke CONTRACTOR DEVIL 351C Installation and operation manual

Clarke

Clarke CONTRACTOR DEVIL 351C Installation and operation manual

Clarke Devil 370P Installation and operation manual

Clarke

Clarke Devil 370P Installation and operation manual

Clarke DEVIL 2000PTC Instruction Manual

Clarke

Clarke DEVIL 2000PTC Instruction Manual

Clarke DEVIL 4035 Installation and operation manual

Clarke

Clarke DEVIL 4035 Installation and operation manual

Clarke IRD40 6920415 Installation and operation manual

Clarke

Clarke IRD40 6920415 Installation and operation manual

Clarke XR55 Installation and operation manual

Clarke

Clarke XR55 Installation and operation manual

Clarke DEVIL 2800PTC Instruction Manual

Clarke

Clarke DEVIL 2800PTC Instruction Manual

Clarke Devil 370B Series Installation and operation manual

Clarke

Clarke Devil 370B Series Installation and operation manual

Clarke GRH15 Instruction Manual

Clarke

Clarke GRH15 Instruction Manual

Clarke DEVIL 4003 Instruction Manual

Clarke

Clarke DEVIL 4003 Instruction Manual

Clarke BR13/250 Instruction Manual

Clarke

Clarke BR13/250 Instruction Manual

Clarke DEVIL 350 230V Installation and operation manual

Clarke

Clarke DEVIL 350 230V Installation and operation manual

Clarke CONTRACTOR GSH15 Instruction Manual

Clarke

Clarke CONTRACTOR GSH15 Instruction Manual

Clarke DEVIL 371PC Installation and operation manual

Clarke

Clarke DEVIL 371PC Installation and operation manual

Clarke XRV100 Troubleshooting guide

Clarke

Clarke XRV100 Troubleshooting guide

Popular Heater manuals by other brands

AGI NECO 04HC24NGV Assembly, operation and parts manual

AGI

AGI NECO 04HC24NGV Assembly, operation and parts manual

TESY CN 03 050 MIS F Operation and storage manual

TESY

TESY CN 03 050 MIS F Operation and storage manual

Zephir ZCRB900 instruction manual

Zephir

Zephir ZCRB900 instruction manual

air choice OH12 owner's manual

air choice

air choice OH12 owner's manual

DeLonghi HBP Series instruction manual

DeLonghi

DeLonghi HBP Series instruction manual

Haverland HE600 manual

Haverland

Haverland HE600 manual

Space-Ray PBF 60-15 Installation and operation instructions

Space-Ray

Space-Ray PBF 60-15 Installation and operation instructions

Bio Green Palma 2.0 operating instructions

Bio Green

Bio Green Palma 2.0 operating instructions

NOBOCOOL Q100 Installation and operating instructions

NOBOCOOL

NOBOCOOL Q100 Installation and operating instructions

Vasco ZANA ZV-1 Mounting instructions

Vasco

Vasco ZANA ZV-1 Mounting instructions

Frico CIR105 Original instructions

Frico

Frico CIR105 Original instructions

Goldair GCT340 operating instructions

Goldair

Goldair GCT340 operating instructions

Clatronic KH 3433 N instruction manual

Clatronic

Clatronic KH 3433 N instruction manual

Sealey SPACE WARMER LP41.V manual

Sealey

Sealey SPACE WARMER LP41.V manual

Goelst Qurails G-Motion GM-4 Quick manual

Goelst

Goelst Qurails G-Motion GM-4 Quick manual

FRANCO BELGE 634 13 42 Technical manual

FRANCO BELGE

FRANCO BELGE 634 13 42 Technical manual

HOMCOM 820-317V90 manual

HOMCOM

HOMCOM 820-317V90 manual

Brentwood Appliances H-Q801W Operating and safety instructions

Brentwood Appliances

Brentwood Appliances H-Q801W Operating and safety instructions

manuals.online logo
manuals.online logoBrands
  • About & Mission
  • Contact us
  • Privacy Policy
  • Terms and Conditions

Copyright 2025 Manuals.Online. All Rights Reserved.