clearviewaccessories.com.au
2
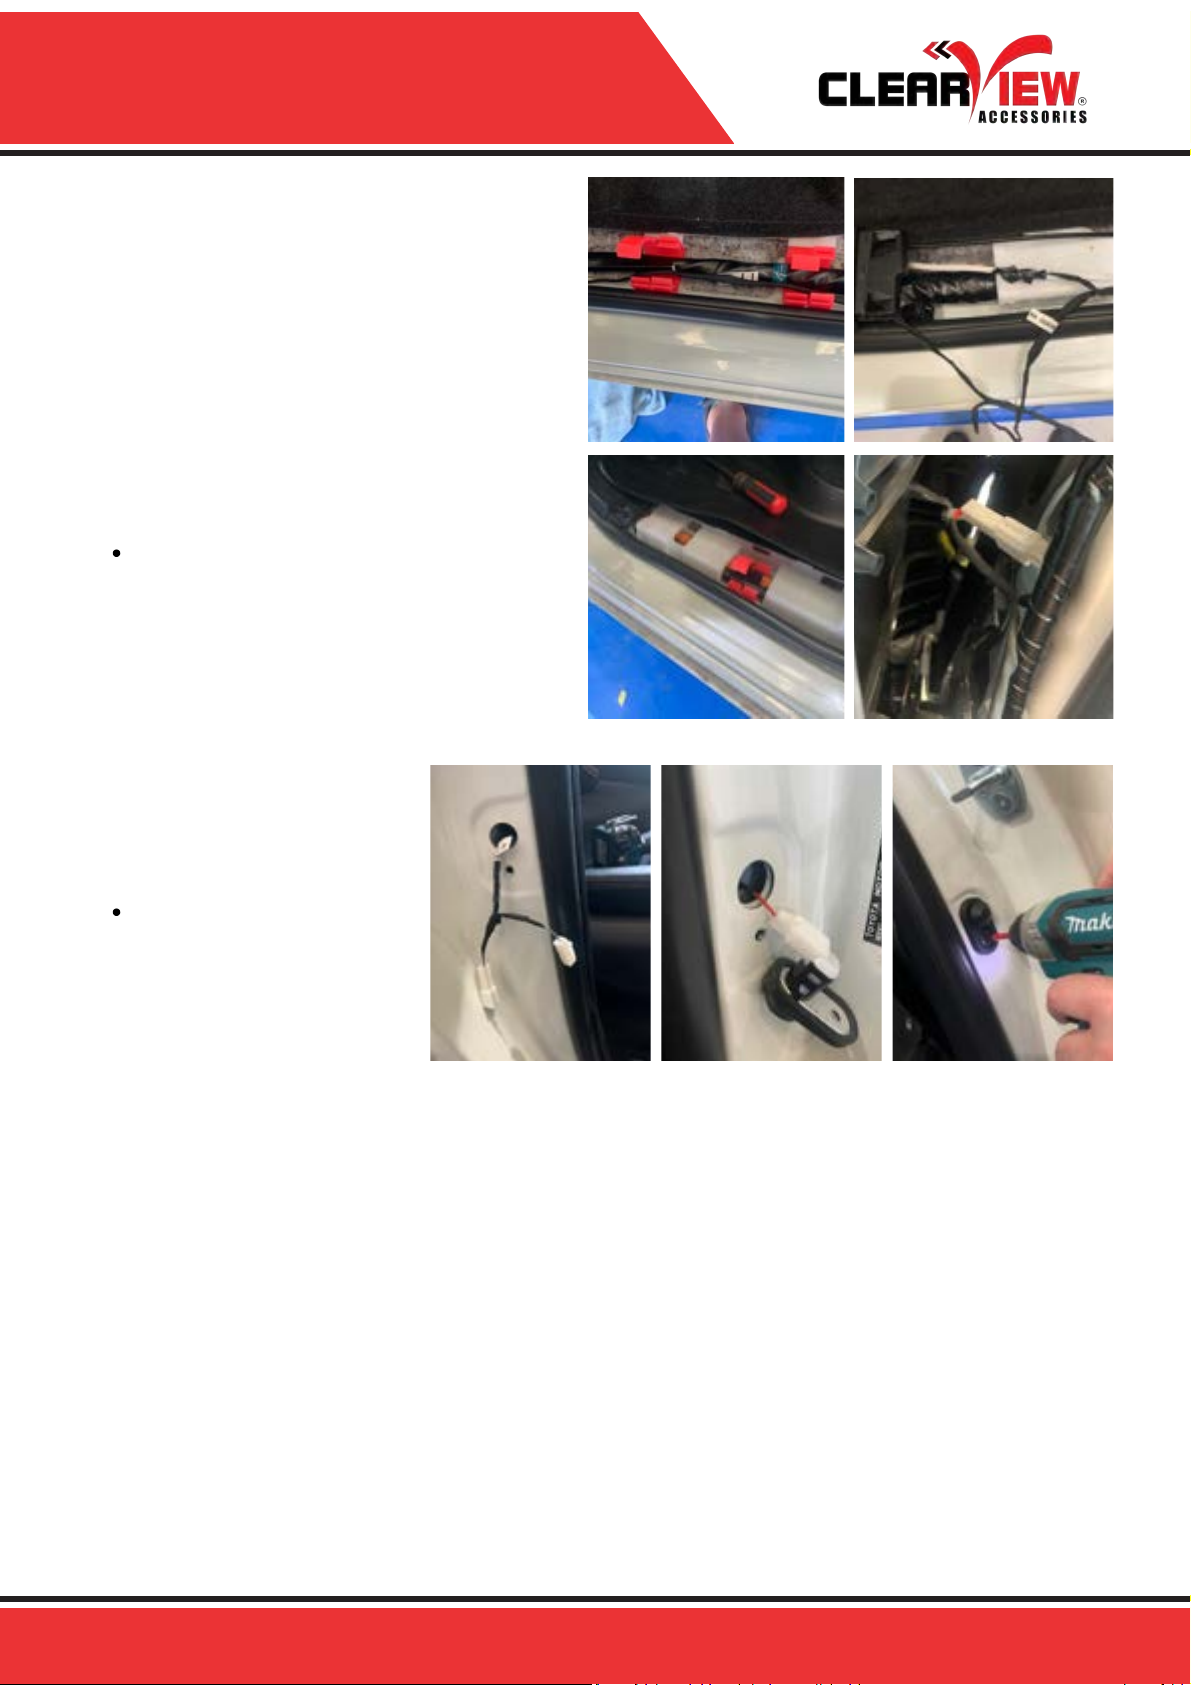
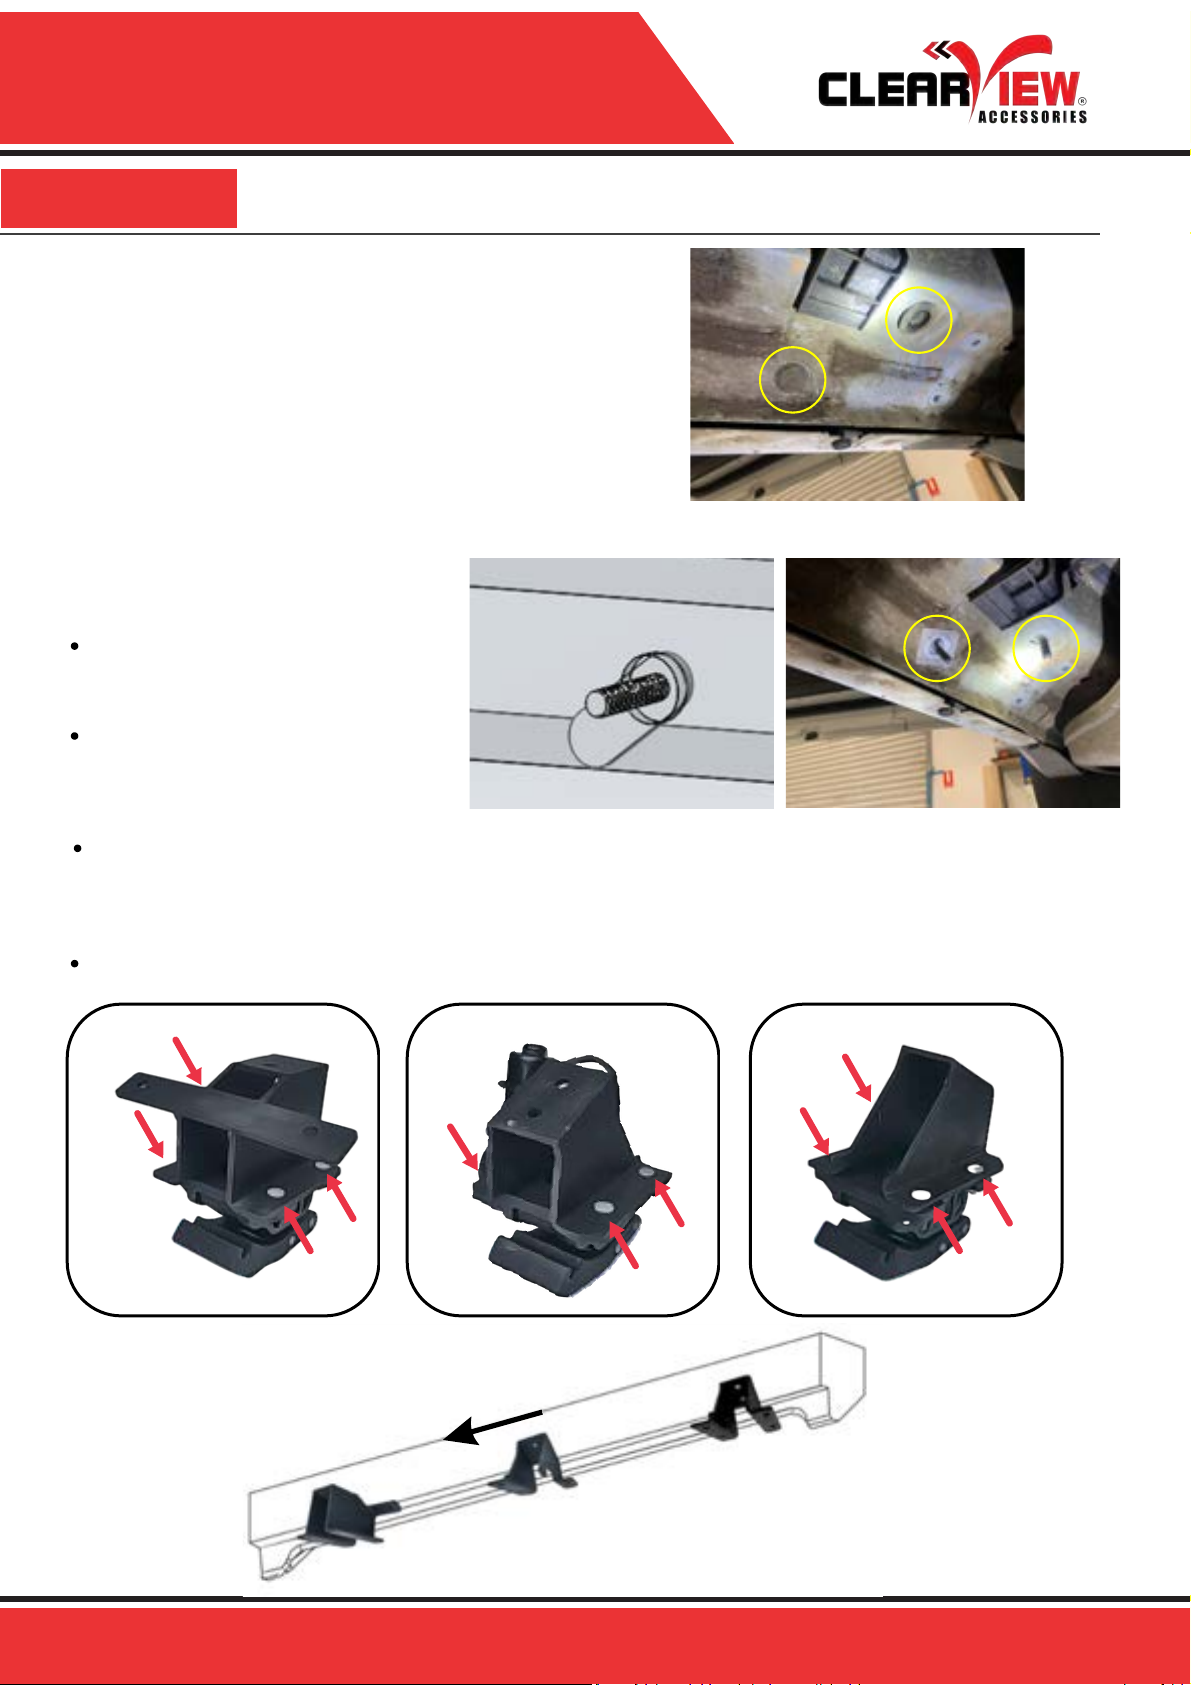
Introduction
Clearview Accessories began in 2006, as a family run business owned by entrepreneur,
Mike Cowan and his son-in-law, Jay Praag. In the years that followed, Mike and Jay
turned their small family business with three full-time employees, into one of Australia’s
most respected 4WD and Touring Brands.
With a strong passion for the automotive industry, quality design and discipline in
professional workmanship, our trust is built within our values of creating high quality
ADR compliant designs.
Since our inception, our unrelenting commitment to creating solutions found nowhere
else, has helped us establish our position as a leader in manufacturing unique 4wd and
touring accessories. With an entrenched enterprising spirit, we are dedicated to
creating value for, and delighting our customers.
From humble beginnings, Clearview Accessories has grown and today manufactures a
range of unique, quality products for your next off-road adventure!
Contact us:
Clearview Accessories
3 Frog Court, Craigieburn VIC 3064
Phone: (03) 8351 9933
Website: clearviewaccessories.com.au
Due to Clearview's Continuous Improvement Program, information may change without notice.
Clearview takes no responsibility for the result of incorrect use of these installation instructions.
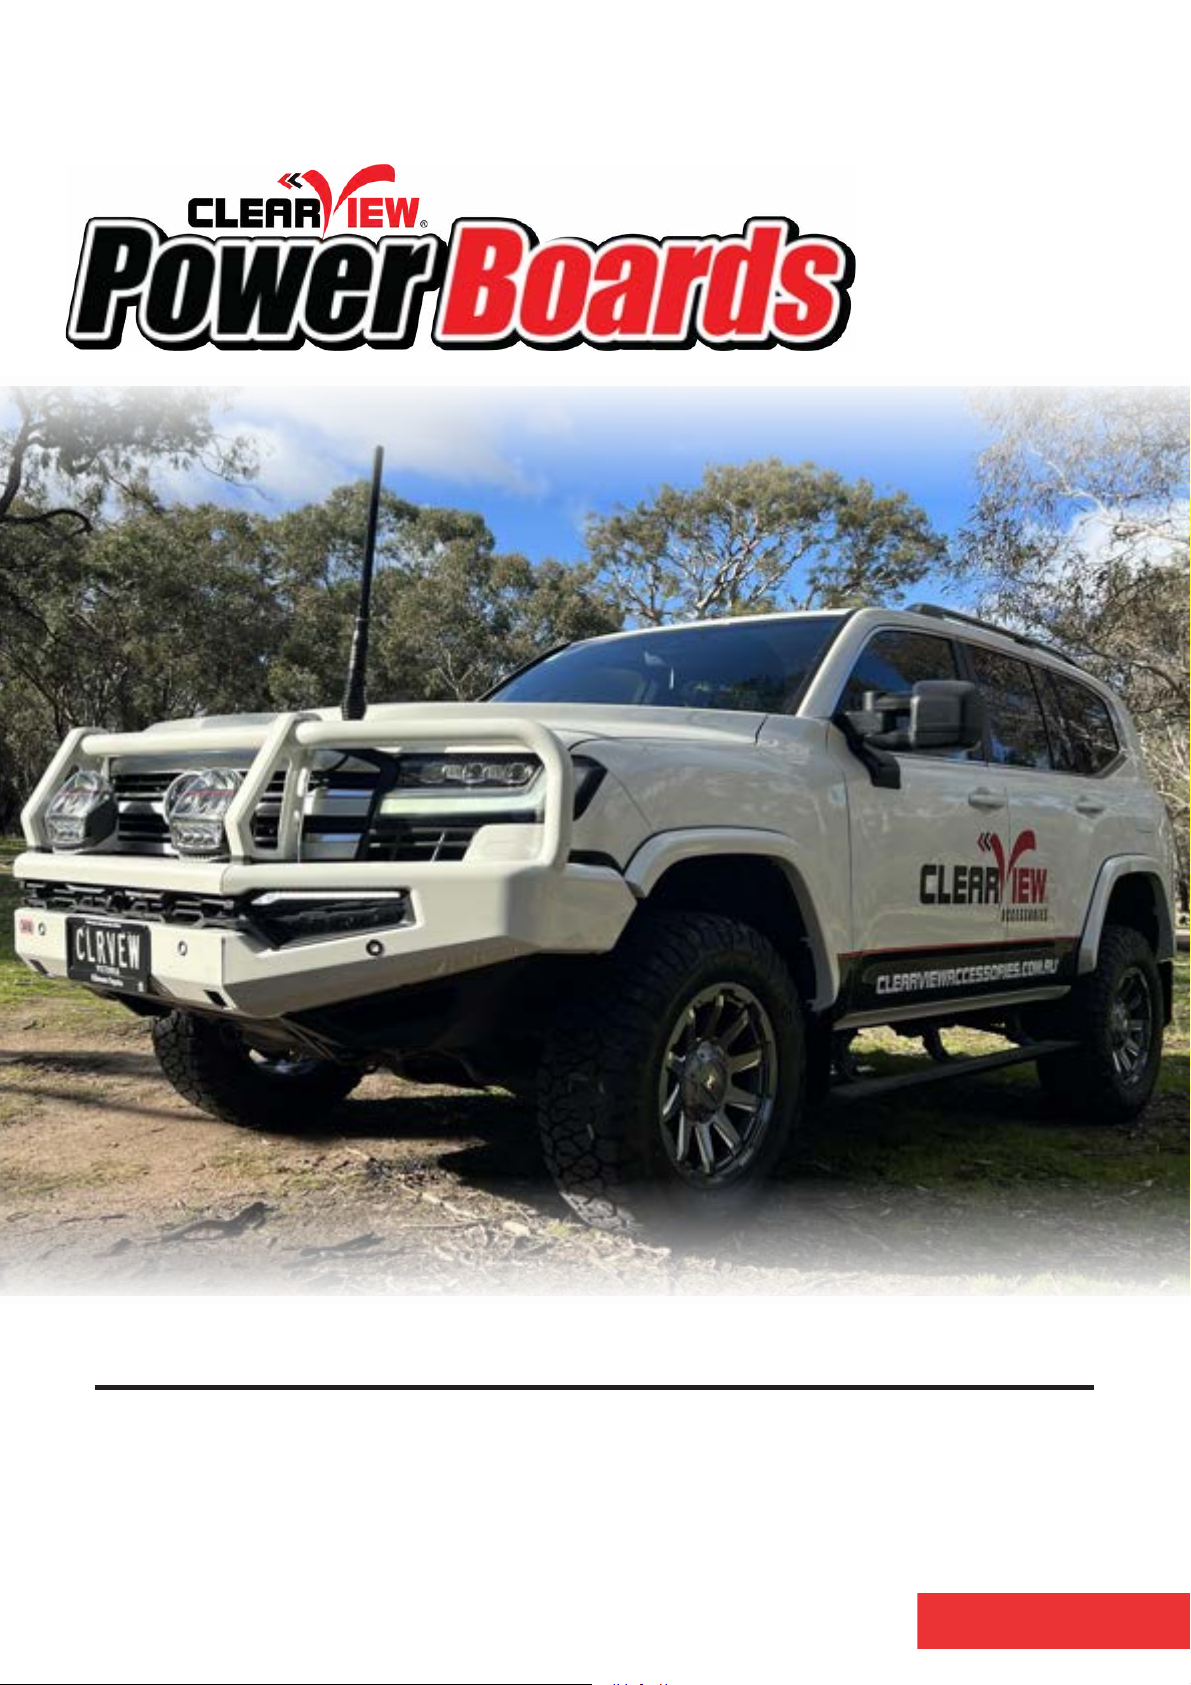
Thank you
for choosing
Clearview Accessories®
facebook.com/clearviewaccessories
instagram.com/clearviewaccessories
youtube.com/clearviewaccessories
Find us on social media