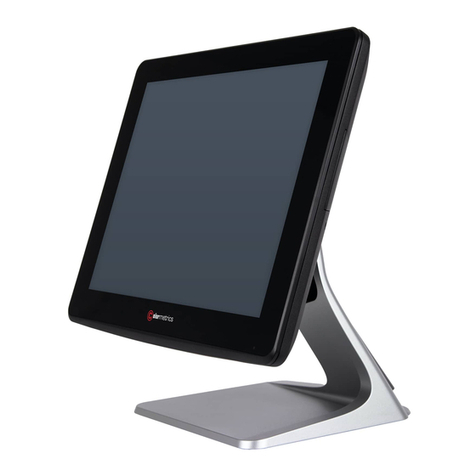
Colormetrics P2500 User manual

Errors excepted; subject to change www.colormetric.net
P2500
User Manual
Version 1.0

3
www.colormetric.net Colormetrics P2500
TABLE OF CONTENTS
COPYRIGHT 4
SAFETY INSTRUCTIONS 5
1 PACKING LIST 6
1-1 Standard Accessories 6
1-2 Optional Accessories 6
2 SYSTEM VIEW 7
2-1 Rear View 7
2-2 Specification 8
2-3 Internal Layout 9
2-4 Touch Panel Life Test Condition 10
3 PIN DEFINITION 11
4 REAR I/O INTERFACE 13
5 SYSTEM ASSEMBLY & DISASSEMBLY 15
5-1 HDD 15
5-2 CF- Card 15
5-3 MSR 17
5-4 Cable Cover 17
5-5 8”/15” 2nd Display 18
5-6 Internal VFD 21
5-7 Wi-Fi 22
5-8 8” 2nd Display 23
5-9 1D / 2D / iButton with RFID Module 27
5-10 Pole type VFD VD1220 28
6 DEVICE DRIVER INSTALLATION 30
6-1 Resistive Type Touch Panel & P-CAP 30
6-2 MagStripe Card Reader Configuration Utility 36
6-3 Fingerprint Reader 51
6-4 RFID 61
6-5 Internal VFD 71
6-6 Configuration Utility of I-Button Reader 75
6-7 Installation and Testing of Smart Card Reader 86
6-8 WiFI 91
6-9 Pole type VFD VD1 94
7 BIOS/UTILITY SETUP 99
8 LCD SURFACE CLEANING 110

4www.colormetric.netColormetrics P2500
COPYRIGHT
Copyright 2015 Publishing. All Rights Reserved.
This manual, software and firmware described in it are copyrighted by their respective owners and
protected under the laws of the Universal Copyright Convention. You may not reproduce, transmit,
transcribe, store in a retrieval system, or translate into any language, in any form or by any means,
electronic, mechanical, magnetic, optical, chemical, biological, molecular, manual, or otherwise, any part
of this publication without the express written permission of the publisher.
All products and trade names described within are mentioned for identification purpose only. No
affiliation with or endorsement of the manufacturer is made or implied. Product names and brands
appearing in this manual are registered trademarks of their respective companies.
The information published herein has been checked for accuracy as of publishing time. No representation
or warranties regarding the fitness of this document for any use are made or implied by the publisher. We
reserve the right to revise this document or make changes in the specifications of the product described
therein at any time without notice and without obligation to notify any person of such revision or change.

5
www.colormetric.net Colormetrics P2500
SAFETY INSTRUCTIONS
1. Read these instructions carefully. Keep these instructions for future reference.
2. Please disconnect this equipment from AC outlet before cleaning. Don’t use liquid or sprayed
detergent for cleaning. Use moisture sheet or cloth for cleaning.
3. Please keep this equipment from humidity.
4. Lay this equipment on a reliable surface when install. A drop or fall could cause injury.
5. Make sure power cord such a way that people can not step on it. Do not place anything over the
power cord.
6. All cautions and warnings on the equipment should be noted.
7. If the equipment is not used for long time, disconnect the equipment from main to avoid being
damaged by transient over voltage.
8. Never pour any liquid into opening, this could cause fire or electrical shock.
9. If one of the following situations arises, get the equipment checked by a service personnel:
a. The power cord or plug is damaged.
b. Liquid has penetrated into the equipment.
c. The equipment has been exposed to moisture.
d. The equipment does not work well or you can not get it work according to user manual.
e. The equipment has dropped and damaged.
10. Do not leave this equipment in an environment unconditioned, storage temperature below -20°C or
above 60°C, it may damage the equipment.
11. Unplug the power cord when doing any service or adding optional kits.
Lithium Battery Caution:
Danger of explosion can happen if the battery is incorrectly replaced, Replace only the original or equivalent
type recommended by the manufacture. Dispose used batteries according to the manufacture’s instructions.
Do not remove the cover, and ensure no user serviceable components are inside. Take the unit to the
service center for service and repair.
6www.colormetric.netColormetrics P2500
PACKING LIST
1-1 Standard Accessories
a. System (with stand)
b. Power Adapter
c. Power Cord
d. Driver Bank
e. Screw
f. Cable Cover
1-2 Optional Accessories
Modules*:
MSR
1D/2D barcode scanner
RFID (13,56 MHz, 125 Khz)
iButton
Smart card reader
Addimat waiter key
Fingerprint reader
Accessories:
Build-in VFD
Pole VFD
8” pole customer display
15” pole customer display
UPS battery
*Note: Nearly all modules are also available as 2-in-1 or 3-in-1 solution.

7
www.colormetric.net Colormetrics P2500
2 SYSTEM VIEW
2-1 Rear View
Item
1. Mic
2. Line-Out
3. RJ11 (Cash Drawer)
4. RJ45(LAN)
5. USB 2.0 x2
USB 3.0 x2
6. COM2
7. VG A
8. COM1
9. RJ45 (COM 3 external)
10. PS2(K/B)
11. 19V DC Input
12. Parallel port (Option)
13. Power Button
14. MSR/Smart Card/ i-Button/
Fingerprint/ RFID (Option)
15. VFD (Option)
16. HDD/CFast CARD

8www.colormetric.netColormetrics P2500
2-2 Specification
Processor
Chipsets: North Bridge
Memory
Audio
Network
USB
Storage
BIOS
Power
Thermal Solution
Dimension
Operating Temperature
Storage Temperature
Storage Humidity
Display
LCD Panel Size
Resolution
Brightness
Touch Panel
Intel® Core™ i5-4570TE 2.7GHz (optional)
Intel® Core™ i3-4330TE 2.4GHz (optional)
Intel® Pentium G3320TE 2.3GHz (optional)
Intel® Celeron G1820TE 2.2GHz
H81
One SO-DIMM socket supports DDR3 1600MHZ up to 8GB
Line-out/Mic-in
RJ45 10/100/1000 Base-T
USB 2.0 x2
USB 3.0 x2
CFast card / 2.5” SATA III HDD / SSD
Insyde BIOS
DC 19V 180W Adaptor
Heat sink + Fan x 2
368 (W) x 264.2 (H) x 285 (D) mm
0°C ~ 35°C
-20°C ~ 60°C
20% ~ 80%, non-condensing
15-inch TFT LED LCD
1024*768 Pixels
350 cd/m2
5-wire Resistive Type / Projected Capacitive Type (optional)

9
www.colormetric.net Colormetrics P2500
Processor
Chipsets: North Bridge
Memory
Audio
Network
USB
Storage
BIOS
Power
Thermal Solution
Dimension
Operating Temperature
Storage Temperature
Storage Humidity
Display
LCD Panel Size
Resolution
Brightness
Touch Panel
Intel® Core™ i5-4570TE 2.7GHz (optional)
Intel® Core™ i3-4330TE 2.4GHz (optional)
Intel® Pentium G3320TE 2.3GHz (optional)
Intel® Celeron G1820TE 2.2GHz
H81
One SO-DIMM socket supports DDR3 1600MHZ up to 8GB
Line-out/Mic-in
RJ45 10/100/1000 Base-T
USB 2.0 x2
USB 3.0 x2
CFast card / 2.5” SATA III HDD / SSD
Insyde BIOS
DC 19V 180W Adaptor
Heat sink + Fan x 2
368 (W) x 264.2 (H) x 285 (D) mm
0°C ~ 35°C
-20°C ~ 60°C
20% ~ 80%, non-condensing
15-inch TFT LED LCD
1024*768 Pixels
350 cd/m2
5-wire Resistive Type / Projected Capacitive Type (optional)
2-3 Internal Layout

10 www.colormetric.netColormetrics P2500
2-4 Touch Panel Life Test Condition
Hit it thirty five million times with a silicon rubber of R 0.8, Hs 60 and measure it. The measurement
must satisfy the under-metioned items. Hitting force shall be 250g and hitting speed 3 times per
second.
- Resistance state should the same 5.1
- Linearity should the same 5.2
- Insulation resistance should the same 5.3
Write one hundred thousand times of 40mm straight line to and fro (counts as twice) with and
engineering plastic stylus in AA area. The measurement items must satisfy the under-mentioned items.
Writing force shall be 250g and writing speed 3,000 times per hour.
- Resistance state should the same 5.1
- Linearity should the same 5.2
- Insulation resistance should the same 5.3
2-4-1 Pointing life test
2-4-2 Hand Writing test

11
www.colormetric.net Colormetrics P2500
2. Parallel J8
Pin NO. Pin Name Description
1 STB# Printer Strobe
2 PD0 Parallel Port DATA0
3 PD1 Parallel Port DATA1
4 PD2 Parallel Port DATA2
5 PD3 Parallel Port DATA3
6 PD4 Parallel Port DATA4
7 PD5 Parallel Port DATA5
8 PD6 Parallel Port DATA6
9 PD7 Parallel Port DATA7
10 ACK# Printer Acknowledge
11 BUSY Printer Busy
12 PE Printer Paper End
13 SLCT Printer Select
4. VFD Connector COM4
Pin NO. Pin Name Description
1 5V +5V
2 NDSR DSR
3 GND Ground
4 NDTR DTR
5 NRTS RTS
6 NCTS CTS
7 NTXD TXD
8 NRXD RXD
9 GND Ground
10 12C +12V
Pin NO. Pin Name Description
14 AFD# Printer Auto Line Feed
15 ERR# Printer Error
16 INIT# Printer Initialize
17 SLIN# Printer Select Input
18 GND Ground
19 GND Ground
20 GND Ground
1. COM 4 for Touch Panel (CN 8)
Pin Function Pin Func-
tion
Pin Function
1 T_UR 3 T_SG 5 T_LR
2 T_UL 4 T_LL
Pin NO. Pin Name Description
1 GND Ground
2 GND Ground
3 Line OUT R Line out
4 Line OUT L Line out
5 Detect Detect
3. Line-out J4
3 PIN DEFINITION

12 www.colormetric.netColormetrics P2500
Pin NO. Pin Name Description
1 GND Ground
2 GND Ground
3 DATA 3+ LVDS Output DATA3+
4 DATA 3- LVDS Output DATA3-
5 GND Ground
6 CLK+ LVDS CLK+
7 CLK- LVDS CLK-
8 GND Ground
9 DATA 2+ LVDS Output DATA2+
10 DATA 2- LVDS Output DATA2-
11 GND Ground
12 DATA 1+ LVDS Output DATA1+
13 DATA 1- LVDS Output DATA1-
8. Inverter CN1 9. Extra USB CN6
Pin NO. Pin Name Description
1 VCC +12V
2 GND Ground
3 NC NC
4 BKL_CTL Back Light Brightness
5 BKL_EN Back Light Enable
Pin NO. Pin Name Description
1 VCC +5V
2- DATA D-
3+ DATA D+
4 GND Ground
5 GND Ground
Pin NO. Pin Name Description
14 GND Ground
15 DATA 0+ LVDS Output DATA0+
16 DATA 0- LVDS Output DATA0-
17 GND Ground
18 GND Ground
19 LVDVCC +3.3V
20 LVDVCC +3.3V
5. Mic J3
6. Speaker SPK1
7. LVDS
Pin Pin Name Description
1 + Speaker +
2 - Speaker -
Pin NO. Pin Name Description
1 GND Ground
2 GND Ground
3 Mic R Mic right
4 Mic L Mic left
5 Detect Detect

13
www.colormetric.net Colormetrics P2500
1. COM1’ COM2’ port
Pin Signal Function Pin Signal Function
1 CD Carrier Detect (IN) 6 DSR Data Set Ready (In)
2 RD Receive Data (IN) 7 RTS Request To Send (OUT)
3 TD Transmit Data(OUT) 8 CTS Clear To Send (IN)
4 DTR Data Terminal Ready(OUT) 9 Ring/5V/12V Setting by BIOS
5 GND Ground
4 REAR I/O INTERFACE
NOTICE:
Warning!! COM 3 (RJ45 Connector) is for external VFD use only. Do not use on network device. If you use
on the network device, it would cause the device damaged. COM 3 port can not be connected if POS has
built-in internal VFD. (Alternative of COM 3 or internal VFD.)
Pin 1: +5V / +12V
Pin 2: DSR#
Pin 3: GND
Pin 4: DTR#
Pin 5: RTS#
Pin 6: CTS#
Pin 7: TxD
Pin 8: RxD
Jumper for COM3 Voltage Setting
2. VGA port
3. USB port
Pin I/O Function Pin I/O Function
1 Out Red Video 9 - Key (Plugged Hole)
2 Out Green Video 10 - Sync Ground
3 Out Blue Video 11 In Monitor ID 0
4 In Monitor ID 2 12 In Monitor ID 1
5 - TTL Ground (Monitor Self Test) 13 Out Horizontal Sync
6 - Red Analogue Ground 14 Out Vertical Sync
7 - Green Analogue Ground 15 In Monitor ID 3
8 - Blue Analogue Ground
Pin Signal Name Wire Colour Comment
1 VCC Red Cable Power
2 - Data White Data Transfer
3 + Data Green Data Transfer
4 Ground Black Cable Ground
Shell Shield - Drain Wire

14 www.colormetric.netColormetrics P2500
Pin Signal Name
1 Data from Device
2 Not Connected
3 Ground
4 +5V DC
5 Clock
6 Not Connected
4. PS/2 K/B port
5. LAN port
7. DC Jack
6. RJ11 port (for Cash Drawer)
Pin Wire Colour Description
1 White/Orange Transmit
2 Orange Transmit
3 White/Green Receive
4 Blue Not Used
5 White/Blue Not Used
6 Green Receive
7 White/Brown Not Used
8 Brown Not Used
Pin Signal Name
1 DC IN 19V
2 Ground
3 DC IN 19V
Pin Signal Name Direction
1 Frame GND -
2 Drawer Kick-out drive signal 1 Output
3 Cash Drawer Status Input
4 +12V -
5 N/C -
6 Signal GND -
Example DOS COMMAND for Cash Drawer:
1. Create the file: TEST.T XT
2. Input below contents in TEST.TX T
CONTEXT-"000.0”
MODE COM5:300
3. Run COMMAND under DOS mode
COPY TEST.TXT COM 5

15
www.colormetric.net Colormetrics P2500
5 SYSTEM ASSEMBLY & DISASSEMBLY
5-1 HDD
5-2 CF-Card
1. Unfasten the HDD cover screw*2
2. Pull out the HDD bracket
3. Fasten the screw*4
4. Place the HDD bracket back to the module
1. Please notice the unnotched CFast Card . This side up.

16 www.colormetric.netColormetrics P2500
2. Before Installing CF Card.
3. After Installing CF Card.

17
www.colormetric.net Colormetrics P2500
5-3 MSR
1. Open the MSR cover
2. Single MSR or 3-in-1 MSR
3. Screw*2 M3x10L
4. Fasten the screw
Assemble the cable cover from bottom and make sure the two latches are on the right position.
Then fasten 2 screws (M3*5L).
5-4 Cable cover

18 www.colormetric.netColormetrics P2500
* Power supply must be replaced to 120W above power adapter.
(1) Remove the plastic pole cover from
the stand.
(3) Fasten the four screws (M4*8L) to joint the
VESA bracket and the rear cover.
(2) Install the pole into the socket in clockwise
direction.
5-5 8"/15" 2nd Display

19
www.colormetric.net Colormetrics P2500
(8) Route the cables through the opening of stand
front cover and cable clip at the bottom and route
the cables into the tube of pole.
(10) Mount the VESA bracket on the pole and
route cables out of the tube of VESA
bracket. Fasten the thumb screw to fix the
VESA bracket.
(4) Connect the COM port, DC cable as shown
in figure (1). (Please refer to page 12 to set
the COM port pin9 with 12V DC output.)
(5) Connect the VGA cable as shown in figure (2).
(6) Connect the audio cable as shown in figure(3).
(7) Assemble the cable cover from bottom and
make sure the two latches are on the right
position, and fasten the two screws (M3*5L).
(9) Reeve the cables out of the tube.

20 www.colormetric.netColormetrics P2500
(11) Connect the DC power cable as shown in
figure (1).
(12)
Connect the VGA cable as shown in figure (2).
(13) Connect the Audio cable as shown in
figure (3).
(14) Put the cable cover on the hinge of VESA
bracket.

21
www.colormetric.net Colormetrics P2500
5-6 Internal VFD
Item Operation procedure Remark
1 Prepare all components as Fig 1
2 Assemble holder & hinge assy by TAPPING SCREW P/H 2.6 *5 x2 pcs(As Fig 2) Torque 2Kgf
3 Fix VFD module on holder assy by TAPPING SCREW P/H 2.6 *5 x4 pcs as Fig 3 Torque 2Kgf
4 Screw VFD module on VFD cover by TAPPING SCREW P/H 2.6 *5 x 2pcs AS fig 4) Torque 2Kgf
5 Fix VFD module on rear cover by TAPPING SCREW R/H M3*8L x 2pcs (As Fig 5) Torque 2Kgf
6 The VFD cable must be around to capacitor H below, so as not to interfere with
hinge action (As Fig 6)
Item P/N and Component
1 20D990002-000B DISPLAY MODULE VFD *1
2 68D350235-000B COVER FOR VFD *1
3 78D300021-000B HOLDER FOR VFD *1
4 26D100005-000B HINGE ASSY FOR VFD *1
5 64D426051-000T SCREW TAPPING P/H 2.6 *5 *8
6 64D430088-000T SCREW TAPPING R/H M3*8L *2
7 35D510480-000B CABLE 16P femail TO 8P female*1
Item Action item
1 Wear cotton gloves, wrist strap and may not wear watches, rings, etc.
2 Screws to lock in place and can not lost
3 Electric screwdriver Torque to be regularly calibrated,
Alternative of external COM3 (RJ45 Connector) or Internal VFD.
Table of contents
Other Colormetrics Touch Terminal manuals

Colormetrics
Colormetrics PS1000 User manual

Colormetrics
Colormetrics P4500 User manual

Colormetrics
Colormetrics P5100 User manual

Colormetrics
Colormetrics V1200 User manual

Colormetrics
Colormetrics C1400 User manual

Colormetrics
Colormetrics V1506 User manual

Colormetrics
Colormetrics C1000 mPOS User manual

Colormetrics
Colormetrics P4500 User manual

Colormetrics
Colormetrics P2000 User manual

Colormetrics
Colormetrics Vion User manual