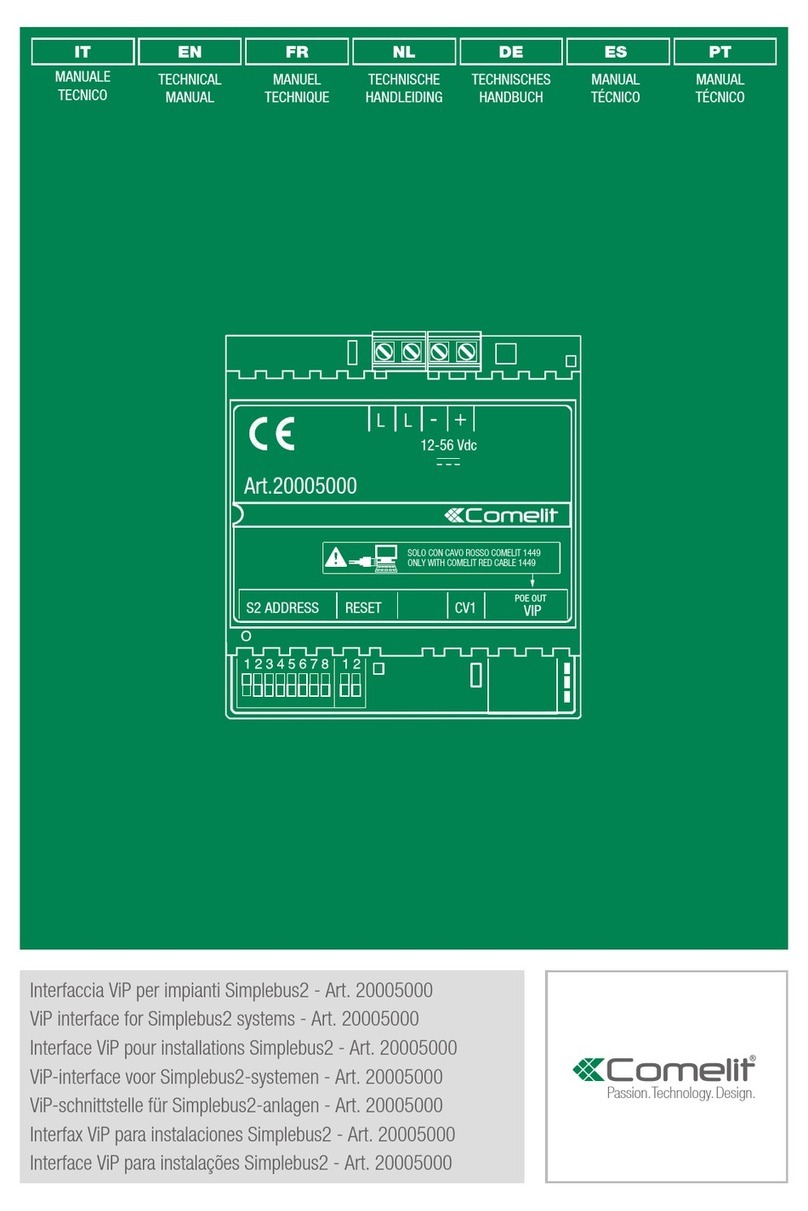
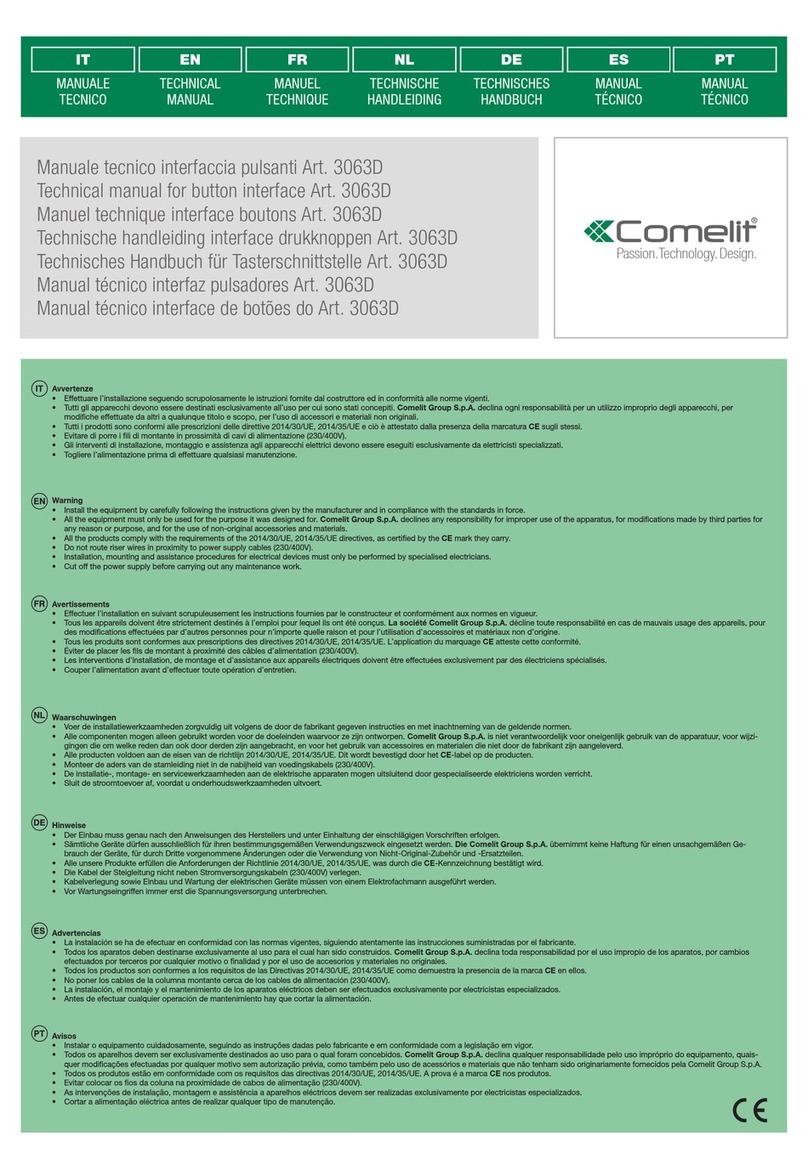
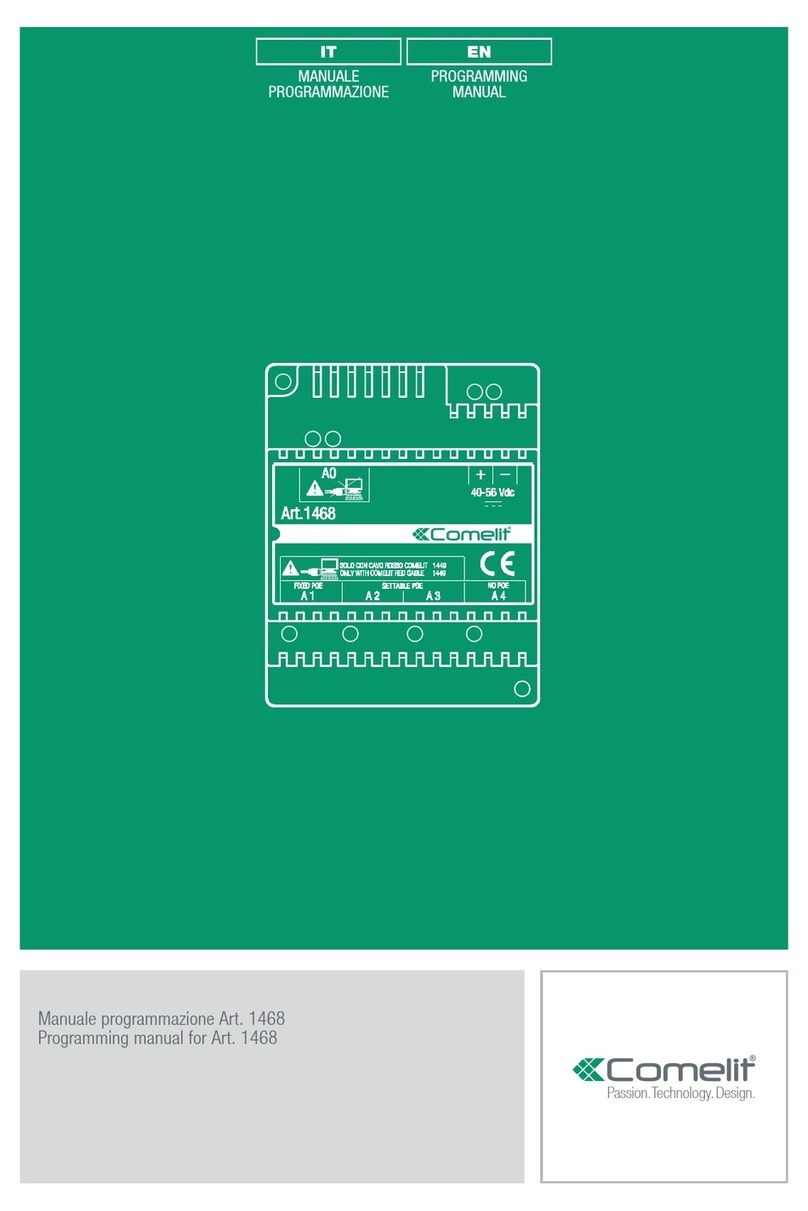
manuals.online logo
Brands
  1. Home
  2. •
  3. Brands
  4. •
  5. Comelit
  6. •
  7. Recording Equipment
  8. •
  9. Comelit 3063U User manual

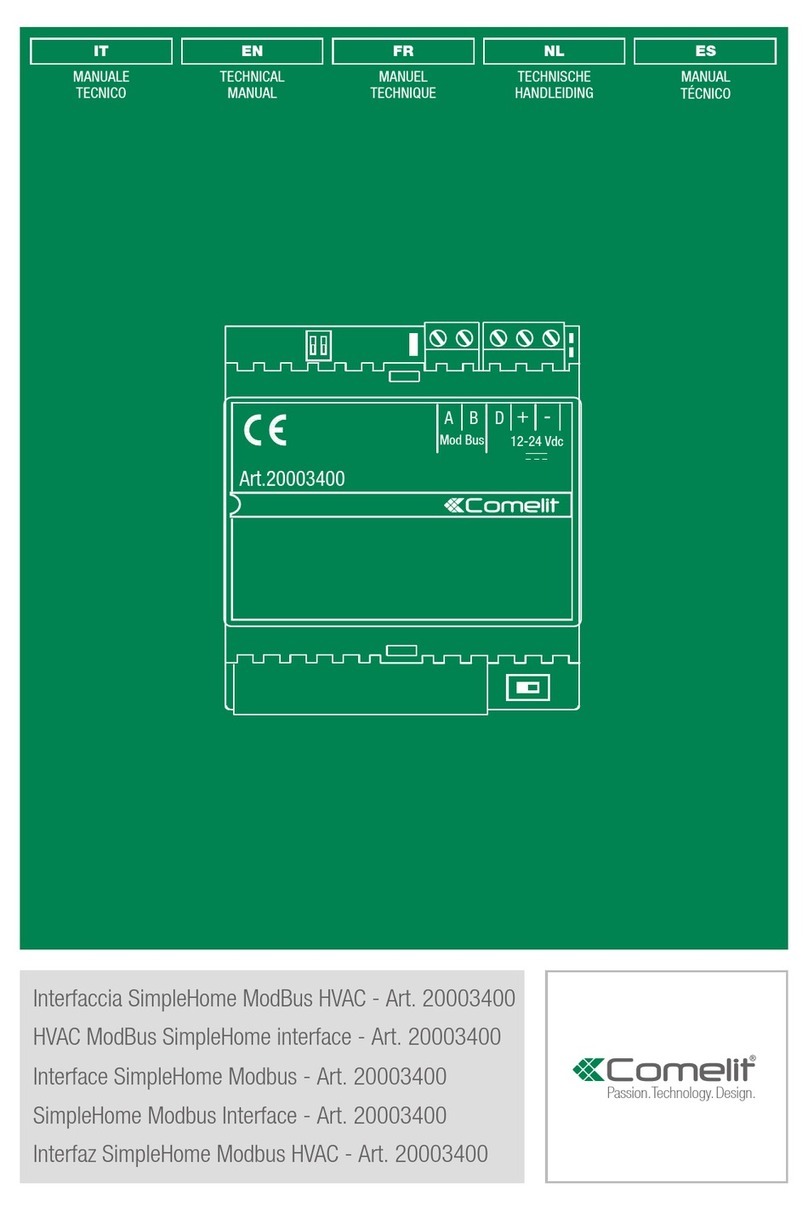
Comelit 3063U User manual

IT
MANUALE
TECNICO
EN
TECHNICAL
MANUAL
FR
MANUEL
TECHNIQUE
RU
ТЕХНИЧЕXСКОМУ
РУКОВОДСТВУ
NL
TECHNISCHE
HANDLEIDING
TR
TEKNIK
KILAVUZU
DE
TECHNISCHES
HANDBUCH
PL
INSTRUKCJA
TECHNICZNA
ES
MANUAL
TÉCNICO
PT
MANUAL
TÉCNICO
Passion.Technology.Design.
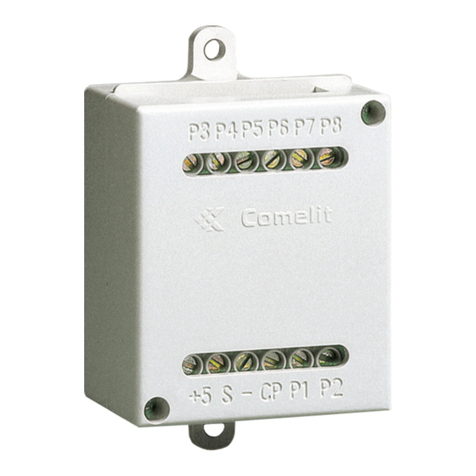
Art. 3063U
Interfaccia 8 pulsanti. Simplebus1, Simplebus2, ViP
8-button interface. Simplebus1, Simplebus2, ViP
Interface 8 boutons. Simplebus1, Simplebus2, VIP
Interface 8 drukknoppen. Simplebus1, Simplebus2, ViP
Schnittstelle 8 Tasten. Simplebus1, Simplebus2, ViP
Interfaz de 8 pulsadores. Simplebus1, Simplebus2 y ViP
Interface de 8 botões. Simplebus1, Simplebus2, ViP
8-кнопочный интерфейс. Simplebus1, Simplebus2, ViP
8 Düğmeli arayüz. Simplebus1, Simplebus2, ViP
Interfejs 8 przycisków Simplebus1, Simplebus2, ViP
2
Avvertenze
• Questo prodotto Comelit è progettato e realizzato con lo scopo di
essere utilizzato nella realizzazione di impianti per comunicazione
audio e video in edifici residenziali, commerciali, industriali e in edifici
pubblici o ad uso pubblico.
• Tutte le attività connesse all’installazione dei prodotti Comelit devono
essere realizzate da personale tecnicamente qualificato, seguendo
attentamente le indicazioni di manuali / istruzioni dei prodotti stessi.
• Togliere l’alimentazione prima di effettuare qualsiasi operazione.
• Utilizzare conduttori con sezione adeguata in funzione delle distanze,
rispettando le indicazioni riportate nel manuale di sistema.
• Si consiglia di non posare i conduttori per l’impianto nella stessa
tubazione dove transitano i cavi di potenza (230V o superiori).
• Per l’utilizzo sicuro dei prodotti Comelit è necessario: seguire con
attenzione le indicazioni di manuali e istruzioni; curare che l’impianto
realizzato con i prodotti Comelit non sia manomesso / danneggiato.
• I prodotti Comelit non prevedono interventi di manutenzione ad
eccezione delle normali operazioni di pulizia, da effettuarsi comunque
secondo quanto indicato in manuali / istruzioni. Eventuali riparazioni
devono essere effettuate: per i prodotti, esclusivamente da Comelit
Group S.p.A., per gli impianti, da personale tecnicamente qualificato.
• Comelit Group S.p.A. non assume alcuna responsabilità per usi
differenti da quello previsto e mancato rispetto di indicazioni ed
avvertenze presenti in questo manuale / istruzioni. Comelit Group
S.p.A. si riserva comunque il diritto di modificare in qualsiasi momento
e senza preavviso quanto descritto nel presente manuale / istruzioni.
Warning
• This Comelit product was designed for use in the creation of audio and
video communication systems in residential, commercial or industrial
settings and in public buildings or buildings used by the public.
• All activities connected to the installation of Comelit products must be
carried out by qualified technical personnel, with careful observation
of the indications provided in the manuals / instruction sheets supplied
with those products.
• Cut off the power supply before carrying out any maintenance
procedures.
• Use wires with a cross-section suited to the distances involved,
observing the instructions provided in the system manual.
• We advise against running the system wires through the same duct as
the power cables (230V or higher).
• To ensure Comelit products are used safely: carefully observe the
indications provided in the manuals / instruction sheets and make sure
the system created using Comelit products has not been tampered
with / damaged.
• Comelit products do not require maintenance aside from routine
cleaning, which should be carried out in accordance with the
indications provided in the manuals / instruction sheets. Any repair
work must be carried out: for the products themselves, exclusively by
Comelit Group S.p.A., for systems, by qualified technical personnel.
• Comelit Group S.p.A. does not assume any responsibility for: any
usage other than the intended use; non-observance of the indications
and warnings contained in this manual / instruction sheet. Comelit
Group S.p.A. nonetheless reserves the right to change the information
provided in this manual / instruction sheet at any time and without
prior notice.
Avertissements
• Ce produit Comelit a été conçu et réalisé pour être utilisé dans la
réalisation d'installations de communication audio et vidéo dans
des bâtiments résidentiels, commerciaux, industriels et publics ou
à usage public.
• Toutes les opérations liées à l'installation des produits Comelit sont
réservées à des techniciens qualifiés qui devront suivre attentivement
les consignes des Manuels / Instructions desdits produits.
• Couper l'alimentation avant d'effectuer toute opération.
• Utiliser des conducteurs d'une section adéquate en fonction des
distances et en respectant les explications contenues dans le manuel
du système.
• Il est conseillé de ne pas poser les conducteurs destinés à
l’installation dans la canalisation destinée aux câbles de puissance
(230 V ou plus).
• Pour utiliser les produits Comelit en toute sécurité : suivre
attentivement les consignes contenues dans les Manuels /
Instructions; s'assurer que l’installation réalisée avec les produits
Comelit n'est pas sabotée / endommagée.
• Les produits Comelit sont sans maintenance, exception faite pour
les opérations de nettoyage qui devront être effectuées selon
les consignes contenues dans les Manuels / Instructions. Les
réparations concernant : les produits, sont réservées exclusivement
à Comelit Group S.p.A., les installations, sont réservées à des
techniciens qualifiés.
• Comelit Group S.p.A. ne sera pas tenue pour responsable en cas
d'utilisation contraire aux indications, de non-respect des indications
et des recommandations présentes dans ce Manuel / Instructions.
Comelit Group S.p.A. se réserve le droit de modifier à tout moment
et sans préavis le contenu de ce Manuel / Instructions.
Waarschuwingen
• Dit product van Comelit is ontworpen en ontwikkeld om te worden
gebruikt bij de realisatie van audio- en videocommunicatiesystemen In
woningen, winkels, bedrijven en openbare gebouwen of in openbare
ruimtes.
• Alle functies die zijn aangesloten op de installatie van de Comelit-
producten moeten zijn uitgevoerd door gekwalificeerd technisch
personeel, volgens de aanwijzingen in de handleiding/instructies van
de betreffende producten.
• Sluit de voeding af voordat u onderhoudswerkzaamheden uitvoert.
• Gebruik geleiders met een geschikte doorsnede, afhankelijk van
de afstanden, volgens de aanwijzingen in de handleiding van de
installatie.
• Het is raadzaam om de kabels voor de installatie niet in dezelfde
leiding te plaatsen als die waar de vermogenskabels (230v of hoger)
doorheen lopen.
• Voor een veilig gebruik van de producten Comelit is het volgende
noodzakelijk: het zorgvuldig opvolgen van de aanwijzingen in de
handleiding/instructies, ervoor zorgen dat de installatie die met de
Comelit-producten is uitgevoerd niet wordt gesaboteerd / beschadigd
raakt.
• De producten van Comelit hebben geen onderhoud nodig, behalve de
normale reiniging, welke moet worden uitgevoerd zoals is aangegeven
in de handleiding/instructies. Eventuele reparaties moeten worden
uitgevoerd voor de producten, uitsluitend door Comelit Group S.p.A.,
voor de installatie, door gekwalificeerd technisch personeel.
• Comelit Group S.p.A. is niet verantwoordelijkheid voor andere
toepassingen dan het beoogde gebruik, het niet in acht nemen van
de aanwijzingen en waarschuwingen in deze handleiding/instructies.
Comelit Group S.p.A. behoudt zich het recht voor om op elk moment,
zonder waarschuwing vooraf, wijzigingen aan te brengen in deze
handleiding/instructies.
Hinweise
• Dieses Comelit-Produktist für den Einsatz in Anlagen für Audio-
und Video-Kommunikation in Wohngebäuden, Gewerbe- und
Industrieanlagen, in öffentlichen Gebäuden und für den öffentlichen
Gebrauch konzipiert.
• Die Installation der Comelit-Produkte darf nur durch Fachkräfte unter
genauer Befolgung der Anweisungen in den technischen Handbüchern
/ den Bedienungsanleitungen erfolgen.
• Vor Eingriffen an der Anlage immer die Spannungsversorgung
unterbrechen.
• Leiter mit einem für die Entfernung bemessenen Querschnitt verwenden
und die im Handbuch der Anlage aufgeführten Anweisungen einhalten.
• Es wird empfohlen, die Leiter derAnlage nella nicht in den Rohren der
Leistungskabel (230 V oder höher) zu verlegen.
• Sicherer Umgang mit Comelit-Produkten: Halten Sie sich
strikt an die Angaben in den technischen Handbüchern / den
Bedienungsanleitungen, Nehmen Sie keine Änderungen an der Anlage
mit Comelit-Produkten vor und vermeiden Sie Beschädigungen.
• Die Comelit-Produkte erfordern keine Wartungsarbeiten, abgesehen
von der normalen Reinigung, die entsprechend den Anweisungen
in den technischen Handbüchern / den Bedienungsanleitungen
auszuführen ist. Eventuelle Reparaturen dürfen für die Produkte nur
durch die Firma Comelit Group S.p.A., an der Anlage nur durch
Fachkräfte ausgeführt werden.
• Comelit Group S.p.A. lehnt jede Haftung ab bei Schäden durch
bestimmungsfremden Gebrauch, Missachtung der Anweisungen
und Hinweise in dem vorliegenden technischen Handbuch / den
Bedienungsanleitungen. Comelit Group S.p.A. behält sich vor, jeder
Zeit und ohne Vorankündigung Änderungen an dem vorliegenden
technischen Handbuch / den Bedienungsanleitungen vorzunehmen.
Advertencias
• Este producto Comelit ha sido diseñado y realizado para usarse
en instalaciones de comunicación audio y vídeo tanto en edificios
residenciales, comerciales e industriales como en edificios públicos
o de uso público.
• Todos los productos Comelit deben ser instalados por personal
técnicamente cualificado, siguiendo con atención las indicaciones de
los manuales / las instrucciones proporcionados con cada producto.
• Antes de efectuar cualquier operación hay que cortar la alimentación.
• Utilizar conductores de sección adecuada teniendo en cuenta las
distancias y respetando las instrucciones del manual de sistema.
• Se aconseja no colocar los conductores de la instalación en el mismo
3
conducto eléctrico por donde pasan los cables de potencia (230 V
o superiores).
• Para el uso seguro de los productos Comelit, es necesario seguir
con atención las indicaciones de los manuales / las instrucciones e
garantizar que la instalación realizada con los productos Comelit no
pueda ser manipulada ni dañada.
• Los productos Comelit no prevén intervenciones de mantenimiento,
salvo las normales operaciones de limpieza, que se deben efectuar
siempre según lo indicado en los manuales / las instrucciones. Las
reparaciones deben ser efectuadas: exclusivamente por Comelit
Group S.p.A. cuando afecten a productos, por personal técnicamente
cualificado cuando afecten a instalaciones.
• Comelit Group S.p.A. quedará libre de cualquier responsabilidad
en caso de usos diferentes a los previstos e incumplimiento de las
indicaciones y advertencias proporcionadas en el manual / las
instrucciones. Comelit Group S.p.A. se reserva siempre el derecho
de modificar en cualquier momento y sin preaviso el manual / las
instrucciones.
Avisos
• Este produto Comelit foi concebido e realizado com o intuito de ser
utilizado na realização de instalações para comunicação áudio e
vídeo em edifícios residenciais, comerciais, industriais, públicos ou de
utilização pública.
• Todas as actividades relacionadas com a instalação de produtos
Comelit devem ser realizadas por pessoal tecnicamente qualificado,
seguindo atentamente as indicações dos manuais/instruções dos
respectivos produtos.
• Cortar a alimentação eléctrica antes de realizar qualquer tipo de
operação.
• Utilizar condutores de secção adequada em função das distâncias e
respeitando as indicações no manual do sistema.
• Recomenda-se não colocar condutores para a instalação nas mesmas
condutas onde se encontram os cabos de energia (230 V ou superior).
• Para a utilização segura dos produtos Comelit é necessário: Seguir
com atenção as indicações dos manuais/instruções, Certificar-se de
que a instalação realizada com produtos Comelit não é adulterada/
danificada.
• Os produtos Comelit não requerem intervenções de manutenção além
das normais operações de limpeza, que devem ser realizadas segundo
as indicações nos manuais/instruções. Eventuais reparações devem
ser realizadas: no caso de produtos, exclusivamente pela Comelit
Group S.p.A., no caso de instalações, por pessoal tecnicamente
qualificado.
• Comelit Group S.p.A. não assume qualquer responsabilidade por
utilizações diferentes das previstas e desrespeito pelas indicações
e avisos presentes neste manual/instruções. Comelit Group S.p.A.
reserva-se o direito de modificar a qualquer momento e sem aviso
prévio o descrito no presente manual/instruções.
Предупреждения
• Данное изделие Comelit было разработано и изготовлено с
целью его дальнейшего использования при реализации систем
аудио- и видеосвязи в жилых, коммерческих, промышленных
и общественных зданиях или помещениях для общественного
пользования.
• Все работы, связанные с установкой продукции Comelit, должны
выполняться квалифицированным техническим персоналом
в тщательном соблюдении инструкций/ руководств на саму
продукцию.
• Отключайте электропитание перед выполнением любых работ.
• Используйте кабели соответствующего сечения в зависимости от
расстояний, соблюдая указания, приведенные в руководстве по
эксплуатации системы.
• Рекомендуется не располагать кабели для системы в той же
трубе, где проходят силовые кабели (230 В или выше).
• Для безопасного использования продукции Comelit необходимо:
внимательно следовать указаниям руководств/инструкций;
заботиться о предупреждении несанкционированного
вмешательства/повреждения оборудования, реализованного с
использованием продукции Comelit.
• Продукция Comelit не предусматривает технического
обслуживания, за исключением обычных операций по очистке,
которые, в любом случае, должны проводиться согласно
указаниям руководств/инструкций. Ремонтные работы должны
выполняться: на продукции - исключительно компанией Comelit
Group S.p.A., на системах - квалифицированным техническим
персоналом.
• Comelit Group S.p.A. не несет никакой ответственности в
случае использования, отличающегося от предусмотренного;
несоблюдения инструкций и предупреждений, приведенных в
данном руководстве/инструкциях. Comelit Group S.p.A., тем
не менее, оставляет за собой право в любой момент вносить
изменения в содержание данного руководства/инструкций без
предварительного уведомления.
Uyarılar
• Bu Comelit ürünü, konutlar, ticari, endüstriyel binalarda ve kamu
binaları veya kamusal kullanıma açık binalarda işitsel ve görsel
iletişim sistemlerinin gerçekleştirilmesi amacıyla tasarlanmış ve
gerçekleştirilmiştir.
• Comelit ürünlerinin kurulumu ile ilgili tüm faaliyetler, teknik açıdan
kalifiye personel tarafından, bu ürünler için düzenlenmiş Kullanım/
Talimat Kılavuzlarında yer alan hususlar dikkatle izlenerek
yürütülmelidir.
• Herhangi bir işlem yapmadan önce beslemeyi kesiniz.
• Sistem kullanım kılavuzunda yer alan talimatlara uyarak, mesafeye
göre uygun kesitli kablolar kullanınız.
• Tesis kablolarını güç kablolarının (230V veya daha yüksek) geçtiği
borularla aynı boruların içine döşememeniz önerilir.
• Comelit ürünlerinin güvenli kullanımı için aşağıdaki hususlara
uyulmalıdır: kılavuzları/talimatları dikkatle takip etmek, Comelit ürünleri
ile gerçekleştirilen sistemin kurcalanmamış/hasar görmemiş olmasına
dikkat etmek.
• Comelit ürünleri, Kılavuzlarda/Talimatlarda verilen bilgilere göre
gerçekleştirilmesi gereken normal temizlik işlemleri haricinde bakım
müdahaleleri gerektirmemektedir. Olası tamiratlar aşağıdaki yetkililerce
yapılmalıdır: ürünler için sadece Comelit Group S.p.A. tarafından,
sistemler için, teknik açıdan kalifiye personel tarafından.
• Comelit Group S.p.A., aşağıdaki durumlarda herhangi bir sorumluluk
kabul etmemektedir öngörülenlerden farklı kullanımlarda, bu Kılavuz/
Talimat kitapçığında yer alan talimatlara ve uyarılara uyulmaması
durumunda. Comelit Group S.p.A. istediği zaman ve önceden
herhangi bir uyarıda bulunmaksızın bu Kılavuz/Talimat Kitapçığındaki
bilgilerde değişiklikler yapabilir.
Ostrzeżenia
• Ten produkt Comelit został zaprojektowany i wykonany w celu
wykorzystania go do instalacji komunikacji audio i video w budynkach
mieszkalnych, handlowych, przemysłowych oraz w budynkach
publicznych lub użyteczności publicznej.
• Wszelkie czynności dotyczące instalacji produktów Comelit muszą
być wykonane przez personel technicznie wykształcony, stosując się
skrupulatnie do zaleceń zawartych w Podręcznikach / Instrukcjach
obsługi produktów.
• Przed wykonaniem jakiejkolwiek czynności odłączyć zasilanie.
• Stosować przewody o przekroju odpowiednim do odległości,
przestrzegając zaleceń zawartych w instrukcji systemu.
• Zaleca się, aby nie kłaść przewodów dla instalacji w tym samym
przewodzie rurowym, w którym przebiegają kable elektryczne (230V
lub większej mocy).
• Aby bezpiecznie użytkować produkty, należy: uważnie przestrzegać
zaleceń podanych w Podręcznikach / Instrukcjach obsługi, pilnować,
aby instalacja, w której stosowane są produkty Comelit, nie została
naruszona / uszkodzona.
• Produkty Comelit nie wymagają czynności konserwacyjnych, za
wyjątkiem zwykłego czyszczenia, które należy wykonać zgodnie
z wytycznymi podanymi w Podręcznikach / Instrukcjach obsługi.
Ewentualne naprawy muszą być wykonane: dla produktów, wyłącznie
przez Comelit Group S.p.A., dla instalacji, przez personal technicznie
wykształcony.
• Comelit Group S.p.A. nie ponosi żadnej odpowiedzialności w
przypadku użytkowania różnego od dozwolonego, nieprzestrzegania
zaleceń oraz ostrzeżeń zawartych w niniejszym Podręczniku /
Instrukcji obsługi. Jednakże spółka Comelit Group S.p.A. zastrzega
sobie prawo do zmiany w jakimkolwiek momencie i bez uprzedzenia
treści w niniejszym Podręczniku / Instrukcji obsługi
ON
C CP1 P2 P3 P4 P5 P6 P7 P8
1 65432
78 mm
70 mm
39.6 mm
29 mm
Ø4.3 mm
1.
3.
2.
4.
Art. 3063U
4
Interfaccia per la gestione di 8 pulsanti da utilizzare
con pulsantiere da esterno monoplacca. Compatibile
con tutti i sistemi. Funziona in abbinamento ai moduli
audio o audio/video della pulsantiera della serie
Ultra.
Completa di cavo (lunghezza 475 mm) con connettori
per il collegamento al modulo audio o audio/video o
alle altre interfaccia pulsanti.
1. DIP-switch di indirizzamento
2. Morsettiera di connessione:
CContatto comune dei pulsanti di chiamata
P1-P8 Contatti pulsanti 1-8
CContatto comune dei pulsanti di chiamata
3. Cavo per il collegamento al modulo precedente
4. Connettore per il collegamento al modulo succes-
sivo
Interface for the management of 8 buttons, for
use with single-plate outdoor entrance panels.
Compatible with all systems. Works in conjunction
with audio or audio/video modules for the Ultra
series entrance panel.
Complete with cable (length 475 mm) with
connectors for connection to the audio or audio/
video module, or to other button interfaces.
1. Addressing DIP-switches
2. Terminal block for connection:
CCommon contact for call buttons
P1-P8 Contacts for buttons 1-8
CCommon contact for call buttons
3. Cable for connection to the previous module
4. Connector for connection to the next module
Interface pour la gestion de 8 boutons à utiliser avec
les platines de rue mono-plaque. Compatible avec
tous les systèmes. Fonctionne en combinaison avec
les modules audio ou audio/vidéo de la platine de la
série Ultra.
Munie d’un câble (longueur 475 mm) avec
connecteurs pour le branchement au module audio
ou audio/vidéo ou aux autres interfaces boutons.
1. Dip-switch d’adressage
2. Bornier de connexion:
CContact commun des boutons d’appel
P1-P8 Contacts boutons 1-8
CContact commun des boutons d’appel
3. Câble pour le branchement au module précédent
4. Connecteur pour le branchement au module
suivant
Interface voor het beheer van 8 drukknoppen te
gebruiken met enkelvoudig deurstation. Compatibel
met alle systemen. Werkt in combinatie met de
audio- of audio/videomodules van het deurstation
Ultra.
Compleet met kabel (lengte 475 mm) met connectors
voor aansluiting op de audio- of audio/videomodule
of op andere drukknoppeninterfaces.
1. Dipswitch voor adressering
2. Klemmenblok:
C
Gemeenschappelijk contact van de beldrukkers
P1-P8
Contacten drukknoppen 1-8
C
Gemeenschappelijk contact van de beldrukkers
3. Kabel voor aansluiting op de vorige module
4. Connector voor aansluiting op de volgende module
5
Schnittstelle für die Steuerung von 8 Tasten zur
Verwendung mit Außensprechstellen mit einteiligem
Tastenfeld. Mit allen Systemen kompatibel. Sie
funktioniert in Kombination mit den Audio- oder
Audio/Video-Modulen der Türstation der Ultra-
Serie.
Komplett mit Kabel (Länge 475 mm) mit Steckern
zum Anschluss an das Audio- oder Audio/Video-
Modul oder andere Tastenschnittstellen.
1. DIP-Schalter zur Adressierung
2. Anschlussklemmleiste:
CGemeinsamer Kontakt für Ruftasten
P1-P8 Kontakte der Tasten 1-8
CGemeinsamer Kontakt für Ruftasten
3. Kabel für die Verbindung mit dem vorherigen
Modul
4. Steckverbinder zum Verbinden des nachfolgenden
Moduls
Interfaz para gestionar 8 pulsadores, que se debe
utilizar con placa de calle monobloque de exterior.
Compatible con todos los sistemas. Funciona con
los módulos audio o audio/vídeo de la placa de
calle de la serie Ultra.
Posee un cable (475 mm de longitud) con
conectores para la conexión al módulo audio o
audio/vídeo o a otras interfaces de pulsadores.
1. DIP-switch de direccionamiento
2. Regleta de conexiones:
C
Contacto común de los pulsadores de llamada
P1-P8
Contactos de los pulsadores 1-8
C
Contacto común de los pulsadores de llamada
3. Cable para la conexión al módulo anterior
4. Conector para la conexión al módulo posterior
Interface para a gestão de 8 botões para utilizar
com postos externos monobloco. Compatível com
todos os sistemas. Funciona em conjunto com os
módulos áudio ou áudio/vídeo da botoneira da
série Ultra.
Fornecida com cabo (475 mm de comprimento)
com conectores para a ligação ao módulo áudio ou
áudio/vídeo ou às restantes interfaces de botões.
1. Dip-switch de endereçamento
2. Bateria de bornes de ligação:
CContacto comum dos botões de chamada
P1-P8 Contactos botões 1–8
CContacto comum dos botões de chamada
3. Cabo para a ligação ao módulo anterior
4. Conector para a ligação ao módulo seguinte
Интерфейс для управления 8 кнопками для
использования с однопанельными кнопочными
клавиатурами для наружной установки.
Совместим со всеми системами. Работает вместе
с аудио- или аудио/видеомодулями кнопочной
панели серии Ultra.
Поставляется в комплекте с кабелем (длиной
475 мм) с разъемами для подключения к аудио
или аудио/видеомодулю или другим кнопочным
интерфейсам.
1. DIP-переключатель для адресации
2. Соединительная клеммная колодка:
CОбщий контакт кнопок вызова
P1-P8 Контакты кнопок 1-8
CОбщий контакт кнопок вызова
3. Кабель для подключения к предыдущему
модулю
4. Разъем для подключения к следующему модулю
Mono-plak dış ünite tuşları ile kullanmak için 8 tuş
yönetim arayüzü. Tüm sistemlerle uyumludur. Ultra
serisi tuş panelinin ses veya ses/video modülleri ile
kombinasyon halinde çalışır.
Ses veya ses/video modülüne ya da diğer tuş paneli
arayüzüne bağlantı için konnektörlerle birlikte komple
kablo (uzunluk 475 mm).
1. Adresleme için DIP anahtarı
2. Bağlantı klemens kutusu:
CÇağrı tuşları ortak kontağı
P1-P8 Düğme kontakları 1-8
CÇağrı tuşları ortak kontağı
3. Önceki modüle bağlantı için kablo
4. Sonraki modüle bağlantı için konnektör
Interfejs do zarządzania 8 przyciskami do
zastosowania z jednopłytkowymi zewnętrznymi
panelami przycisków. Kompatybilny z wszystkimi
systemami. Działa w połączeniu z modułami audio
lub audio/video paneli przycisków należących do serii
Ultra.
Zestaw zawiera przewód (długość 475 mm) ze
złączami do podłączenia do modułu audio lub audio/
video lub innych interfejsów przycisków.
1. Przełącznik DIP adresowania
2. Listwa zaciskowa połączenia:
CStyk wspólny przycisków dzwonienia
P1-P8 Styk przycisków 1-8
CStyk wspólny przycisków dzwonienia
3. Przewód do podłączania do poprzedniego modułu
4. Złącze do podłączania do następnego modułu
2
1
2
1
2
1
2
1
6
1
2
3
ON
1 2 3 4 65
ON
1 2 3 4 65
ON
1 2 3 4 65
1
ON
1 2 3 4 65
2
ON
1 2 3 4 65
3
4
5
7
Programmazione indirizzo interfaccia
DIP 1-5: Indirizzamento interfaccia pulsanti di
chiamata (vedi TAB. A)
L'indirizzamento dell'interfaccia pulsanti di
chiamata permette, in caso di sostituzione, di
non riprogrammare gli indirizzi dei pulsanti. È
sufficiente assegnare alla nuova interfaccia lo
stesso indirizzo della precedente.
DIP 6: Non utilizzato
Programming the interface address
DIP 1-5: Addressing the call button interface (see
TAB. A)
Addressing the call button interface means
that, in the event of replacement, the button
addresses do not need to be reprogrammed.
Simply assign the same address as used for
the previous interface to the new one.
DIP 6: Not used
Programmation adresse interface
DIP 1-5 : Adressage interface boutons d’appel
(voir TAB. A)
L'adressage de l’interface des boutons
d’appel permet, en cas de remplacement,
de ne pas reprogrammer les adresses des
boutons. Il suffit d’attribuer à la nouvelle
interface l’adresse qu'avait la précédente.
DIP 6 : Non utilisé
Programmering adres interface
DIP 1-5: Adressering interface beldrukkers (zie
TAB. A)
Bij adressering van de interface van de
beldrukkers hoeft, bij vervanging van de
module, de adressering van de drukknoppen
niet opnieuw te worden geprogrammeerd.
Het is voldoende om aan de nieuwe interface
hetzelfde adres toe te kennen als daarvoor.
DIP 6: Niet in gebruik
Programmierung der Schnittstellenadresse
DIP 1-5: Adressierung der Ruftastenschnittstelle
(siehe TAB. A)
Die Adressierung der Ruftastenschnittstelle
erlaubt es, im Falle eines Austausches, die
Tastenadressen nicht neu zu programmieren.
Es genügt, der neuen Schnittstelle einfach
die gleiche Adresse wie der vorherigen
zuzuweisen.
DIP 6: Nicht verwendet
Programación de la dirección de la interfaz
DIP 1-5: direccionamiento de la interfaz de los
pulsadores de llamada (véase TABLA A)
En caso de sustitución, el direccionamiento
de la interfaz de los pulsadores de llamada
evita tener que reprogramar las direcciones
de los pulsadores. Solamente se ha de asignar
la misma dirección de la interfaz precedente a
la nueva interfaz.
DIP 6: No se utiliza
Programação endereço interface
DIP 1–5: Endereçamento da interface dos botões
de chamada (consultar TAB. A)
O endereçamento da interface dos botões de
chamada permite, em caso de substituição,
não ter de voltar a programar os endereços
dos botões. É suficiente atribuir à nova
interface o mesmo endereço do anterior.
DIP 6: Não utilizado
Программирование адреса интерфейса
DIP 1-5: Адресация интерфейса кнопок
вызова (см. ТАБ. A)
Адресация интерфейса кнопок
вызова позволяет в случае замены не
перепрограммировать адреса кнопок.
Достаточно будет присвоить новому
интерфейсу адрес прежнего.
DIP 6: Не используется
Arayüz adresi programlama
DIP 1-5: Çağrı tuşları arayüzü adreslemesi (bkz.
TAB. A)
Çağrı tuşları arayüzünün adreslemesi,
değiştirilmesi durumunda tuş adreslerinin
yeniden programlanmasını sağlar. Yeni
arayüze bir önceki ile aynı adresi atamak
yeterlidir.
DIP 6: Kullanılmıyor
Programowanie adresu interfejsu
DIP 1-5: Adresowanie interfejsu przycisków
dzwonienia (patrz TAB. A)
Dzięki adresowaniu modułów przycisków
dzwonienia wyeliminowana zostaje
konieczność ponownego zaprogramowania
adresów przycisków w przypadku ich
wymiany. Wystarczy przypisać do nowego
interfejsu ten sam adres, co do poprzedniego.
DIP 6: Nieużywany
8
Programmazione indirizzi di chiamata
Simplebus1, Simplebus2
Esistono 2 modalità di programmazione:
• Programmazione smart indirizzi
consecutivi: consente la programmazione
rapida dei pulsanti con indirizzi consecutivi
(ad esempio: 1, 2, 3, 4)
• Programmazione indirizzi specifici:
consente la programmazione di indirizzi
specifici (ad esempio: 25, 37, 70, 58)
Programming Simplebus1, Simplebus2
call addresses
There are 2 programming methods:
• Programming consecutive smart
addresses: allows rapid programming of
the buttons with consecutive addresses (for
example: 1, 2, 3, 4)
• Programming of specific addresses:
allows programming of specific addresses
(for example: 25, 37, 70, 58)
Programmation des adresses d’appel
Simplebus1, Simplebus2
2 modalités de programmation sont possibles :
• Programmation smart d’adresses
consécutives : permet de programmer
rapidement les boutons donnant accès à
des adresses consécutives (par exemple :
1, 2, 3, 4)
• Programmation des adresses spécifiques
:permet de programmer des adresses
spécifiques (par exemple : 25, 37, 70, 58)
Programmering oproepadressen
Simplebus1, Simplebus2
Er bestaan twee programmeringsmethodes:
• Smart programmering van opeenvolgende
adressen: voor de snelle programmering
van de drukknoppen met opeenvolgende
adressen (bijvoorbeeld: 1, 2, 3, 4)
• Programmering specifieke adressen: voor
de programmering van specifieke adressen
(bijvoorbeeld: 25, 37, 70, 58)
Programmierung der Rufadressen
Simplebus1, Simplebus2
Es gibt 2 Programmierungsmodi:
• Smart Programmierung fortlaufender
Adressen: ermöglicht die
Schnellprogrammierung der Tasten mit
fortlaufenden Adressen (z. B.: 1, 2, 3, 4)
• Programmierung spezifischer Adressen:
ermöglicht die Programmierung spezifischer
Adressen (z. B.: 25, 37, 70, 58)
Cod.
DIP ON
11
22
31,2
43
51,3
62,3
71,2,3
84
91,4
10 2,4
11 1,2,4
12 3,4
13 1,3,4
14 2,3,4
15 1,2,3,4
16 5
17 1,5
18 2,5
19 1,2,5
20 3,5
21 1,3,5
22 2,3,5
23 1,2,3,5
24 4,5
25 1,4,5
26 2,4,5
27 1,2,4,5
28 3,4,5
29 1,3,4,5
30 2,3,4,5
31 1,2,3,4,5
TAB. A
Programación de las direcciones de llamada
Simplebus1, Simplebus2
Hay dos modos de programación:
• Programación inteligente de direcciones
consecutivas: permite programar de
forma rápida pulsadores con direcciones
consecutivas (por ejemplo: 1, 2, 3 y 4)
• Programación de direcciones específicas:
permite programar direcciones específicas
(por ejemplo: 25, 37, 70 y 58)
Programação de endereços de chamada
Simplebus1, Simplebus2
Existem dois modos de programação:
• Programação Smart de endereços
consecutivos: permite programar rapidamente
botões com endereços consecutivos (por
exemplo: 1, 2, 3, 4)
• Programação de endereços específicos:
permite programar endereços específicos (por
exemplo: 25, 37, 70, 58)
Программирование адресов вызова
Simplebus1, Simplebus2
Имеется 2 режима программирования:
• Интеллектуальное программирование
последовательных адресов: позволяет
осуществлять быстрое программирование
кнопок с последовательными адресами
(например: 1, 2, 3, 4).
• Программирование конкретных адресов:
позволяет программировать отдельные
адреса (например: 25, 37, 70, 58).
Simplebus1, Simplebus2 çağrı adresleri
programlama
Programowanie adresów dzwonienia
Simplebus1, Simplebus2
LL
1
S1 S2
2
OFF
ON
1 2 3 4 6 75 8
3
ON
1 2 3 4 6 75 8
4
9
Programmazione smart indirizzi consecutivi
Impostare l’indirizzo
dell’appartamento
che si desidera
chiamare (ad
esempio:1) tramite i
DIP-switch
(vedi “Tabella di
indirizzamento” )
Smart programming of consecutive addresses
Set the address of
the apartment you
wish to call (for
example:1) using
the DIP-switches
(see “Addressing
table” )
Programmation smart d’adresses consécutives
Définir l'adresse
de l'appartement à
appeler (par exemple
:1) à travers les dip-
switches
(voir “Tableau
d'adressage” )
Smart programmering opeenvolgende adressen
Stel het adres van
het appartement in
dat u wilt oproepen
(bijvoorbeeld:1) via
de DIP-switches
(zie
“Adresseringstabel” )
Smart Programmierung fortlaufender Adressen
Die Adresse der
Wohnung einstellen,
die Sie anrufen
möchten (z.B.:1) über
die DIP-Schalter
(siehe
“Adressiertabelle” )
Programación inteligente de direcciones
consecutivas
Configurar la
dirección de la
vivienda a la que se
desea llamar (por
ejemplo:1) mediante
los DIP-switches
(véase “Tabla de
direccionamiento” )
Programação Smart de endereços consecutivos
Configurar o
endereço do
apartamento ao qual
se pretende chamar
(por exemplo:1) com
os DIP-switches
(consultar “Tabela de
endereçamento” )
Интеллектуальное программирование
последовательных адресов
Укажите адрес
квартиры, в
которую нужно
позвонить
(например:1) с
помощью DIP-
переключателей
(см. “Таблица
индексирования” )
Ardışık akıllı adres programlama
2 programlama modu mevcuttur:
• Ardışık akıllı adres programlama:
ardışık adreslerle tuşların hızlı şekilde
programlanmasını sağlar (örnek: 1, 2, 3, 4)
• Belirli adresler programlama: belirli
adreslerin programlanmasına olanak tanır
(örnek: 25, 37, 70, 58)
Aramak istediğiniz
dairenin adresini
ayarlayın (örnek:1)
DIP-anahtarı
vasıtasıyla
(bkz. “Adresleme
tablosu” )
Inteligentne programowanie następujących
po sobie adresów
Istnieją 2 tryby programowania:
• Inteligentne programowanie następujących
po sobie adresów: umożliwia szybkie
programowanie przycisków z następującymi
po sobie adresami (na przykład: 1, 2, 3, 4)
• Programowanie specyficznych adresów:
umożliwia programowanie specyficznych
adresów (na przykład: 25, 37, 70, 58)
Ustawić adres
mieszkania, do którego
chce się zadzwonić (na
przykład:1) za pomocą
przełączników DIP
(patrz “Tabela
adresowania ” )
= 2
+1
= 5
+1
= 3
+1 = 4
+1
6
S1 S2
7
= 1
=
1
5
10
Programmazione indirizzi specifici
Premere il pulsante a
cui si desidera associare
l’indirizzo di chiamata
impostato tramite DIP-
switch
OFF
ON
1 2 3 4 6 75 8
3
Programming of specific addresses
Press the following buttons to
assign consecutive addresses.
Press the button you
want to associate with
the call address set
using the DIP-switches
Programmation des adresses spécifiques
Appuyer sur les autres boutons
pour attribuer des adresses
consécutives.
Appuyer sur le bouton
à associer à l'adresse
d'appel définie par dip-
switch.
Programmering specifieke adressen
Druk op de opeenvolgende knoppen
om opeenvolgende adressen toe te
kennen.
Druk op de drukknop
waaraan u het
ingestelde oproepadres
wilt koppelen via DIP-
switch
Programmierung spezifischer Adressen
Die folgenden Tasten drücken,
um Adressen in fortlaufender
Reihenfolge zuzuweisen.
Die Taste drücken,
welcher die über DIP-
Schalter eingestellte
Rufadresse zugeordnet
werden soll
Premere i pulsanti successivi per
assegnare indirizzi consecutivi.
LL
1
Presionar los pulsadores
sucesivos para asignar
direcciones consecutivas.
Programación de direcciones específicas
S1 S2
2
Presionar el pulsador al
que se desea asociar
la dirección de llamada
configurada mediante
los DIP-switches
Programação de endereços específicos
Premir os botões seguintes para
atribuir endereços consecutivos.
Premir o botão ao qual
se pretende associar o
endereço de chamada
configurado com o
DIP-switch
Нажимайте последующие
кнопки для присвоения
последовательных адресов.
Программирование конкретных адресов
Нажмите кнопку, с
которой вы хотите
связать адрес вызова,
заданный с помощью
DIP-переключателя.
Ardışık adresler atamak için
müteakip düğmelere basınız.
Belirli adresleri programlama
DIP-anahtarı
vasıtasıyla ayarlanan
çağrı adresi ile
ilişkilendirmek
istediğiniz tuşa basın
Programowanie specyficznych adresów
Naciskać kolejne przyciski, aby
przypisać następujące po sobie
adresy.
Nacisnąć przycisk, z
którym chce się powiązać
adres dzwonienia
ustawiony za pomocą
przełączników DIP.
ON
1 2 3 4 6 75 8
S1 S2
7
58
ON
1 2 3 4 6 75 8
ON
1 2 3 4 6 75 8
ON
1 2 3 4 6 75 8
37
70
6
= 25
5
4
11
Premere il pulsante a
cui si desidera associare
l’indirizzo di chiamata
impostato tramite DIP-
switch
Ripetere le operazioni 4 e 5 per assegnare un indirizzo specifico a ciascun pulsante
example: code 37 example: code 70 example: code 58
Impostare l’indirizzo
dell’appartamento che
si desidera chiamare (ad
esempio:25) tramite i
DIP-switch (vedi “Tabella di
indirizzamento” )
Repeat steps 4 and 5 to assign a specific address to each button
Set the address of the
apartment you wish to
call (for example:25)
using the DIP-switches
(see “Addressing
table” )
Press the button you want
to associate with the call
address set using the DIP-
switches
Répéter les opérations 4 et 5 pour attribuer une adresse spécifique à chaque bouton
Définir l'adresse
de l'appartement à
appeler (par exemple
:25) à travers les dip-
switches (voir “Tableau
d'adressage” )
Appuyer sur le
bouton à associer
à l'adresse d'appel
définie par dip-
switch.
Herhaal de stappen 4 en 5 om aan elke knop een specifiek adres toe te kennen
Stel het adres van
het appartement in
dat u wilt oproepen
(bijvoorbeeld:25) via
de DIP-switches (zie
“Adresseringstabel” )
Druk op de
drukknop waaraan
u het ingestelde
oproepadres wilt
koppelen via DIP-
switch
Die Vorgänge 4 und 5 wiederholen, um jeder Taste eine spezifische Adresse zuzuweisen
Die Adresse
der Wohnung
einstellen, die Sie
anrufen möchten
(z.B.:25) mittels
DIP-Schalter (siehe
“Adressiertabelle” )
Die Taste drücken, welcher
die über DIP-Schalter
eingestellte Rufadresse
zugeordnet werden soll
Repetir las operaciones 4 y 5 para asignar una dirección específica a cada pulsador
Configurar la dirección
de la vivienda a la que
se desea llamar (por
ejemplo:25) mediante
los DIP-switches
(véase “Tabla de
direccionamiento” )
Presionar el
pulsador al que
se desea asociar
la dirección de
llamada configurada
mediante los DIP-
switches
Repetir as operações 4 e 5 para associar um endereço específico a cada botão
Configurar o endereço
do apartamento ao qual
se pretende chamar
(por exemplo:25)
com os DIP-switches
(consultar “Tabela de
endereçamento” )
Premir o botão ao
qual se pretende
associar o endereço
de chamada
configurado com o
DIP-switch
Укажите адрес
квартиры, в которую
нужно позвонить
(например:25)
с помощью DIP-
переключателей
(см. “Таблица
индексирования” )
Нажмите кнопку, с
которой вы хотите
связать адрес
вызова, заданный
с помощью DIP-
переключателя.
Повторите шаги 4 и 5, чтобы присвоить конкретный адрес каждой кнопке.
Aramak istediğiniz
dairenin adresini
ayarlayın (örnek:25)
DIP-anahtarı
vasıtasıyla (bkz.
“Adresleme tablosu” )
DIP-anahtarı
vasıtasıyla ayarlanan
çağrı adresi ile
ilişkilendirmek
istediğiniz tuşa basın
Her bir tuşa belirli bir adres atamak için 4 ve 5 adımlarını tekrarlayın
Ustawić adres
mieszkania, do którego
chce się zadzwonić
(na przykład:25) za
pomocą przełączników
DIP (patrz “Tabela
adresowania ” )
Nacisnąć przycisk,
z którym chce
się powiązać
adres dzwonienia
ustawiony za pomocą
przełączników DIP.
Powtórzyć czynności 4 i 5, aby przypisać specyficzny adres do każdego przycisku
Cod.
DIP-switch
ON
11
22
31,2
43
51,3
62,3
71,2,3
84
91,4
10 2,4
11 1,2,4
12 3,4
13 1,3,4
14 2,3,4
15 1,2,3,4
16 5
17 1,5
18 2,5
19 1,2,5
20 3,5
21 1,3,5
22 2,3,5
23 1,2,3,5
24 4,5
25 1,4,5
26 2,4,5
27 1,2,4,5
28 3,4,5
29 1,3,4,5
30 2,3,4,5
31 1,2,3,4,5
32 6
33 1,6
34 2,6
35 1,2,6
36 3,6
37 1,3,6
38 2,3,6
39 1,2,3,6
40 4,6
41 1,4,6
42 2,4,6
43 1,2,4,6
44 3,4,6
45 1,3,4,6
46 2,3,4,6
47 1,2,3,4,6
48 5,6
49 1,5,6
50 2,5,6
51 1,2,5,6
52 3,5,6
53 1,3,5,6
54 2,3,5,6
55 1,2,3,5,6
56 4,5,6
57 1,4,5,6
58 2,4,5,6
59 1,2,4,5,6
60 3,4,5,6
61 1,3,4,5,6
62 2,3,4,5,6
63 1,2,3,4,5,6
64 7
65 1,7
66 2,7
67 1,2,7
68 3,7
69 1,3,7
70 2,3,7
71 1,2,3,7
72 4,7
73 1,4,7
74 2,4,7
75 1,2,4,7
76 3,4,7
77 1,3,4,7
78 2,3,4,7
79 1,2,3,4,7
80 5,7
81 1,5,7
82 2,5,7
83 1,2,5,7
84 3,5,7
85 1,3,5,7
86 2,3,5,7
87 1,2,3,5,7
88 4,5,7
89 1,4,5,7
90 2,4,5,7
91 1,2,4,5,7
92 3,4,5,7
93 1,3,4,5,7
94 2,3,4,5,7
95 1,2,3,4,5,7
96 6,7
97 1,6,7
98 2,6,7
99 1,2,6,7
100 3,6,7
101 1,3,6,7
102 2,3,6,7
103 1,2,3,6,7
104 4,6,7
105 1,4,6,7
106 2,4,6,7
107 1,2,4,6,7
108 3,4,6,7
109 1,3,4,6,7
110 2,3,4,6,7
111 1,2,3,4,6,7
112 5,67
113 1,5,6,7
114 2,5,6,7
115 1,2,5,6,7
116 3,5,6,7
117 1,3,5,6,7
118 2,3,5,6,7
119 1,2,3,5,6,7
120 4,5,6,7
121 1,4,5,6,7
122 2,4,5,6,7
123 1,2,4,5,6,7
124 3,4,5,6,7
125 1,3,4,5,6,7
126 2,3,4,5,6,7
127
1,2,3,4,5,6,7
128 8
129 1,8
130 2,8
131 1,2,8
132 3,8
133 1,3,8
134 2,3,8
135 1,2,3,8
136 4,8
137 1,4,8
138 2,4,8
139 1,2,4,8
140 3,4,8
141 1,3,4,8
142 2,3,4,8
143 1,2,3,4,8
144 5,8
145 1,5,8
146 2,5,8
147 1,2,5,8
148 3,5,8
149 1,3,5,8
150 2,3,5,8
151 1,2,3,5,8
152 4,5,8
153 1,4,5,8
154 2,4,5,8
155 1,2,4,5,8
156 3,4,5,8
157 1,3,4,5,8
158 2,3,4,5,8
159 1,2,3,4,5,8
160 6,8
161 1,6,8
162 2,6,8
163 1,2,6,8
164 3,6,8
165 1,3,6,8
166 2,3,6,8
167 1,2,3,6,8
168 4,6,8
169 1,4,6,8
170 2,4,6,8
171 1,2,4,6,8
172 3,4,6,8
173 1,3,4,6,8
174 2,3,4,6,8
175 1,2,3,4,6,8
176 5,6,8
177 1,5,6,8
178 2,5,6,8
179 1,2,5,6,8
180 3,5,6,8
181 1,3,5,6,8
182 2,3,5,6,8
183 1,2,3,5,6,8
184 4,5,6,8
185 1,4,5,6,8
186 2,4,5,6,8
187 1,2,4,5,6,8
188 3,4,5,6,8
189 1,3,4,5,6,8
190 2,3,4,5,6,8
191
1,2,3,4,5,6,8
192 7,8
193 1,7,8
194 2,7,8
195 1,2,7,8
196 3,7,8
197 1,3,7,8
198 2,3,7,8
199 1,2,3,7,8
200 4,7,8
201 1,4,7,8
202 2,4,7,8
203 1,2,4,7,8
204 3,4,7,8
205 1,3,4,7,8
206 2,3,4,7,8
207 1,2,3,4,7,8
208 5,7,8
209 1,5,7,8
210 2,5,7,8
211
1,2,5,7,8
212
3,5,7,8
213
1,3,5,7,8
214
2,3,5,7,8
215
1,2,3,5,7,8
216
4,5,7,8
217
1,4,5,7,8
218
2,4,5,7,8
219
1,2,4,5,7,8
220
3,4,5,7,8
221
1,3,4,5,7,8
222
2,3,4,5,7,8
223
1,2,3,4,5,7,8
224
6,7,8
225
1,6,7,8
226
2,6,7,8
227
1,2,6,7,8
228
3,6,7,8
229
1,3,6,7,8
230
2,3,6,7,8
231
1,2,3,6,7,8
232
4,6,7,8
233
1,4,6,7,8
234
2,4,6,7,8
235
1,2,4,6,7,8
236
3,4,6,7,8
237
1,3,4,6,7,8
238
2,3,4,6,7,8
239
1,2,3,4,6,7,8
*240
5,6,7,8
12
Tabella di indirizzamento
La programmazione degli indirizzi di chiamata
dei pulsanti può essere eettuata anche
tramite PC e software di configurazione
ViP Manager scaricabile dal sito
pro.comelitgroup.com
Addressing table
Call addresses can also be programmed via PC
and ViP Manager configuration software, which
is available to download from the website pro.
comelitgroup.com
Tableau d'adressage
Il est également possible de programmer les adresses
d’appel des boutons sur ordinateur, à travers le logiciel
de configuration VIP Manager, à télécharger sur le site
pro.comelitgroup.com
Adresseringstabel
De programmering van de oproepadressen van
de drukknoppen kan ook worden uitgevoerd
via pc en de configuratiesoftware ViP Manager
die kan worden gedownload via de site
pro.comelitgroup.com
Adressiertabelle
Die Programmierung der Rufadressen der Tasten kann
auch über einen PC und die Konfigurationssoftware
ViP Manager erfolgen, die über die Website pro.
comelitgroup.com heruntergeladen werden kann
Tabla de direccionamiento
Lasdireccionesdellamadadelospulsadorestambiénsepueden
programar mediante un PC y el software de configuración
ViP Manager, que se puede descargar en el sitio web
pro.comelitgroup.com
Tabela de endereçamento
A programação dos endereços de chamadas dos botões
também pode ser efectuada através de PC e do software
de configuração ViP Manager a transferir a partir do website
pro.comelitgroup.com
Таблица индексирования
Адреса вызова кнопок можно также запрограммировать
с помощью ПК и конфигурационного ПО ViP Manager,
которое можно загрузить с веб-сайта pro.comelitgroup.
com.
Adresleme tablosu
Tuşlara çağrı adresleri programlama ayrıca,
PC ve aşağıdaki siteden indirebileceğiniz ViP
Manager yazılımı kullanılarak da yapılabilir:
pro.comelitgroup.com
Tabela adresowania
Programowanie adresów dzwonienia przycisków
można również przeprowadzić za pośrednictwem
komputera i oprogramowania konfiguracyjnego ViP
Manager, które można pobrać ze strony internetowej
pro.comelitgroup.com
13
ESEMPIO impostazione codice 200
*NOTA: il codice 240 è riservato per il centralino di portineria
Per una corretta programmazione, seguire
nell’ordine le seguenti operazioni:
1. Configurare l’indirizzo ViP dei moduli art.
UT8010 e UT8020 da software ViP Manager.
2. Programmare gli indirizzi ViP di chiamata da
software ViP Manager.
Programmazione indirizzi di chiamata ViP
EXAMPLE setting code 200
*NOTE: code 240 is reserved for the porter switchboard
Programming ViP call addresses
For correct programming, perform the following
steps in order:
1. Configure the ViP address of modules
art. UT8010 and UT8020 via ViP Manager
software.
2. Program the ViP call addresses using ViP
Manager software.
EXEMPLE introduction code 200
*REMARQUE: le code 240 est réservé au standard de conciergerie
Programmation des adresses d’appel ViP
Pour une programmation correcte, respecter la
séquence des opérations suivantes :
1. Configurer l'adresse VIP des modules art.
UT8010 e UT8020 à l’aide du logiciel VIP
Manager.
2. Programmer les adresses VIP d’appel à l’aide
du logiciel VIP Manager.
*OPMERKING: de code 240 is gereserveerd voor de portierscentrale
VOORBEELD instelling code 200
Programmering ViP-oproepadressen
Voor een correcte programmering volgt u in de
juiste volgorde de volgende instructies:
1. Configureer het ViP-adres van de module
UT8010 en UT8020 vanuit ViP Manager.
2. Programmeer de ViP-oproepadressen vanuit
de software ViP Manager.
*HINWEIS: Teilnehmercode 240 ist für die Pförtnerzentrale reserviert
BEISPIEL: Einstellung von Teilnehmercode 200
Programmierung der ViP-Rufadressen
Für eine korrekte Programmierung folgen Sie der
Reihe nach den folgenden Schritten:
1. Konfigurieren Sie die ViP-Adresse der Module
Art. Ut8010 und UT8020 über die Software
ViP Manager.
2. Programmieren Sie die ViP-Rufadressen über
die Software ViP Manager.
*NOTA: el código 240 está reservado a la centralita de conserjería
EJEMPLO: configuración del código 200
Programación de las direcciones de llamada ViP
Para una correcta programación, realizar las
siguientes operaciones con el orden indicado:
1. Configurar la dirección ViP de los módulos art.
UT8010 y art. UT8020 mediante el software ViP
Manager.
2. Programar las direcciones ViP de llamada
mediante el software ViP Manager.
*NOTA: o código 240 está reservado para a central de portaria
EXEMPLO configuração do código 200
Programação de endereços de chamada ViP
Para a programação correcta, seguir as operações
seguintes pela ordem indicada:
1. Configurar o endereço ViP dos módulos art.
UT8010 e UT8020 com o software ViP Manager.
2. Programar os endereços ViP de chamada com o
software ViP Manager.
*UWAGA: kod 240 zarezerwowany jest dla centralki portierni
PRZYKŁAD ustawienie kodu 200
Программирование адресов вызова ViP
Для правильного программирования выполните
по порядку следующие действия:
1. Настройте ViP-адрес модулей арт. UT8010
и UT8020 с помощью программного
обеспечения ViP Manager.
2. Запрограммируйте ViP-адреса вызовов с
помощью программного обеспечения ViP
Manager.
*NOT: Kod 240, kapıcı ünitesine tahsis edilmiştir
ÖRNEK 200 kodunu girme
ViP çağrı adresleri programlama
Doğru programlama için, aşağıdaki işlemleri
belirtilen sırayla takip edin:
1. UT8010 ve UT8020 model modüllerin ViP
adresini ViP Manager yazılımından yapılandırın.
2. ViP Manager yazılımından çağrı ViP adreslerinin
programlanması.
*ПРИМЕЧАНИЕ: код 240 закреплен за коммутатором консьержа
ПРИМЕР установки кода 200
Programowanie adresów dzwonienia ViP
W celu prawidłowego przeprowadzenia
programowania należy wykonać w podanej
kolejności następujące czynności:
1. Skonfigurować adres ViP modułów art. UT8010
i UT8020 za pomocą oprogramowania ViP
Manager.
2. Zaprogramować adresy ViP dzwonienia za
pomocą oprogramowania ViP Manager.
SIMPLEBUS1
SIMPLEBUS2
UT2020
UT2010
UT2010VC
MAX 6
3063U
P
2
P
1
CP
3
P
4
P
5
P
6
P
7
P
8
P
2
P
1
CP
3
P
4
P
5
P
6
P
7
P
8
3063U
N°1
N°6
1210A
1210
E
T
R
GND
SE
-SE
+
NO NC
C
O
M
LL
+
VV
-
MAX 6
1172B
1172B
N°6
N°1
MAX 30
3063U
P
2
P
1
CP
3
P
4
P
5
P
6
P
7
P
8
P
2
P
1
CP
3
P
4
P
5
P
6
P
7
P
8
3063U
UT1020
4888C
E
T
R
GND
SE NO NC
C
O
M
LL
+
VV
-
120-230 V
-
+
1595
UT1010
UT1010VC
N°1
N°30
MAX 30
1172B
1172B
N°30
N°1
14
Collegamento dei moduli audio/video Ultra
Ultra audio/video module connection
Connexion modules audio/vidéo Ultra
Aansluiting Ultra audio/videomodules
Anschluss Audio/Video-Module Ultra
Conexión de los módulos audio/vídeo Ultra
Ligação módulos áudio/vídeo Ultra
Подключение аудио/видеомодулей Ultra
Ultra ses/video modüllerinin bağlanması
Podłączenie modułów audio/video Ultra
VIP
UT2020
UT2010
UT2010VC
1210A
1210
MAX 30
P
2
P
1
CP
3
P
4
P
5
P
6
P
7
P
8
3063U
P
2
P
1
CP
3
P
4
P
5
P
6
P
7
P
8
3063U
N°1
N°30
MAX 30
LL
+
VV
-
1172B
1172B
N°30
N°1
-
+
120-230 V
1595
J4
E
T
R
GND
SE
-SE
+
NO NC
C
O
M
MAX 10
3063U
P
2
P
1
CP
3
P
4
P
5
P
6
P
7
P
8
P
3
P
4
P
5
P
6
P
7
P
8
N°1
UT8020
UT8010
ORANGE
BLUE & WHITE BLUE
BROWN & WHITE BROWN
WHITE ORANGE
GREEN
WHITE GREEN
++
-
+
-
TX
1440
L N
-
+
V V
1441
OUT
43
OUTOUT
21
IN
21
IN
+
-
OUT
GND
SE- SE+
NO NC
C
O
M
R
T
E
+
-
+
VV
- - -
TX TX
+
RX RX
+
3063U
P
2
P
1
C
N°10
15
1ª edizione 07/2021
cod. 2G40002644
Passion.Technology.Design.
www.comelitgroup.com
Via Don Arrigoni, 5 - 24020 Rovetta (BG) - Italy
CERTIFIED MANAGEMENT SYSTEMS
MAX 20
3063U
P
2
P
1
CP
3
P
4
P
5
P
6
P
7
P
8
P
3
P
4
P
5
P
6
P
7
P
8
N°1
UT8020
UT8010
ORANGE
WHITE ORANGE
GREEN
WHITE GREEN
++
-
TX
1440
L N
-
+
V V
1441
OUT
43
OUTOUT
21
IN
21
IN
+
-
OUT
GND
SE- SE+
NO NC
C
O
M
R
T
E
+
-
+
VV
- - -
TX TX
+
RX RX
+
3063U
P
2
P
1
C
N°20
MAX 20
1172B
1172B
N°20
N°1
-
+
120-230 V
1595
Max 20 m. Pulsante comando apriporta locale.
Utilizzare lampada art. 1172B per l'illuminazione dei
porta cartellini; la lampada è polarizzata.
Max 20 m. Local door-opener button.
Use bulb art. 1172B for nameplate lighting. The bulb
is polarised.
Max 20 m. Bouton commande ouvre-porte local.
Utiliser l'ampoule art. 1172B pour éclairer les porte-
étiquettes. La lampe est polarisée.
Max 20 m. Bedieningsknop lokale deuropener.
Gebruik de lamp art. 1172B voor de verlichting van de
naamkaders. De lamp is gepolariseerd.
Max 20 m. Lokale Türönertaste.
Die Lampe Art. 1172B für die Beleuchtung der
Namensschilder benutzen. Die Lampe ist polarisiert.
20 m máx. Pulsador abrepuertas local.
Utilizar la lámpara art. 1172B para iluminar los tarjeteros.
La lámpara es polarizada.
20 m máx. Botão de comando abertura da porta local.
Utilizar a lâmpada art. 1172B para iluminar os porta-
etiquetas. A lâmpada é polarizada.
Макс. 20 м. Кнопка локального открытия двери.
Используйте лампочку арт. 1172B для освещения
табличек с именами. Лампочка поляризована.
Maks. 20 m. Yerel kapı açma komutu düğmesi.
İsim kartı aydınlatması için 1172B ürün numaralı lambayı
kullanın. Lamba kutupludur.
Maks. 20 m. Przycisk polecenia lokalnego otwierania drzwi
Używać lampy art. 1172B, aby podświetlić ramki z
nazwiskami. Lampa jest spolaryzowana.

Other Comelit Recording Equipment manuals

Comelit 3063D User manual

Comelit

Comelit 3063D User manual

Comelit 20002611 User manual

Comelit

Comelit 20002611 User manual

Comelit 1622 User manual

Comelit

Comelit 1622 User manual

Comelit 1469 User manual

Comelit

Comelit 1469 User manual

Comelit 3064/C User manual

Comelit

Comelit 3064/C User manual

Comelit 1468 Owner's manual

Comelit

Comelit 1468 Owner's manual

Comelit 20005000 User manual

Comelit

Comelit 20005000 User manual

Comelit 1467 User manual

Comelit

Comelit 1467 User manual

Comelit 1469 Owner's manual

Comelit

Comelit 1469 Owner's manual

Comelit 20003400 User manual

Comelit

Comelit 20003400 User manual

Popular Recording Equipment manuals by other brands

RFX MIDIBUDDY MP128 owner's manual

RFX

RFX MIDIBUDDY MP128 owner's manual

Kawai PR-1 owner's manual

Kawai

Kawai PR-1 owner's manual

Fryette Power Load PL-1 owner's manual

Fryette

Fryette Power Load PL-1 owner's manual

ENSONIQ DP/4+ Configuration manual

ENSONIQ

ENSONIQ DP/4+ Configuration manual

Cochlear Nucleus CP800 Series manual

Cochlear Nucleus

Cochlear Nucleus CP800 Series manual

Daewoo EV-VCR024R user guide

Daewoo

Daewoo EV-VCR024R user guide

audiophony X312 user guide

audiophony

audiophony X312 user guide

netvox R718H user manual

netvox

netvox R718H user manual

G&D USB-CPU Installation and operation manual

G&D

G&D USB-CPU Installation and operation manual

BookerLab F22 quick start

BookerLab

BookerLab F22 quick start

Cochlear Baha 5 SuperPower user manual

Cochlear

Cochlear Baha 5 SuperPower user manual

BAFANG DP E12.CAN user manual

BAFANG

BAFANG DP E12.CAN user manual

Gemtech HDM ACCOMPANIMENT TO THE INSTALLATION, OPERATION AND MAINTENANCE MANUAL

Gemtech

Gemtech HDM ACCOMPANIMENT TO THE INSTALLATION, OPERATION AND MAINTENANCE MANUAL

Alta Moda Unicomp Operator's manual

Alta Moda

Alta Moda Unicomp Operator's manual

ActronAir CP05 installation guide

ActronAir

ActronAir CP05 installation guide

Audioplex AT-4 installation manual

Audioplex

Audioplex AT-4 installation manual

Galaxy Audio HDR2 instruction manual

Galaxy Audio

Galaxy Audio HDR2 instruction manual

TIMPANO TPT-SP4BT user manual

TIMPANO

TIMPANO TPT-SP4BT user manual

manuals.online logo
manuals.online logoBrands
  • About & Mission
  • Contact us
  • Privacy Policy
  • Terms and Conditions

Copyright 2025 Manuals.Online. All Rights Reserved.