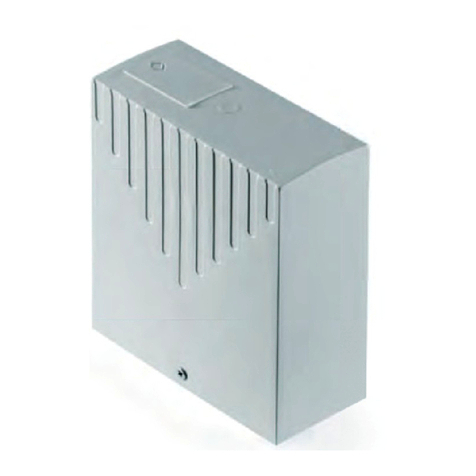
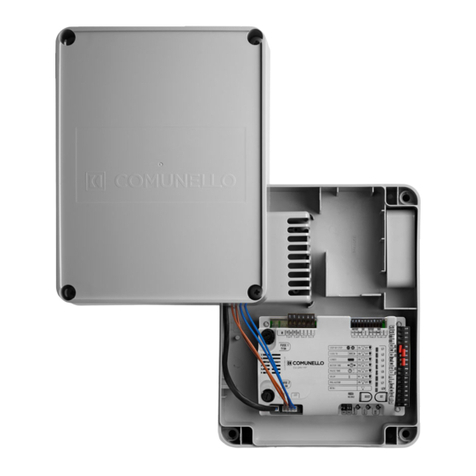
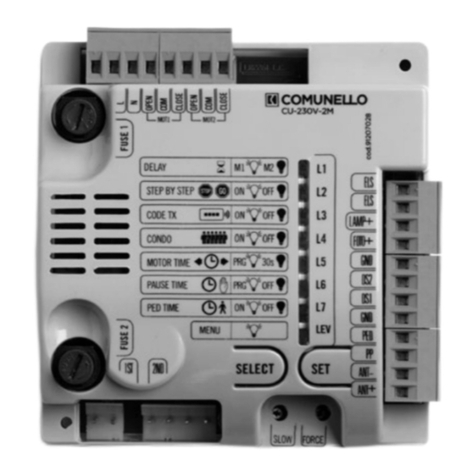
Comunello Automation CU 24V 1M User manual

GYORS TELEPÍTÉSI UTASÍTÁSOK ÉS A KÖZPONTOK PROGRAMOZÁSA:
CU 24V 1M e CU 230V 1M
A kényelmes QR-kódok szkennelésével a „lépésről lépésre” oktatóvideókhoz léphet, amelyek a Comunello TV Youtube-csatornáján elérhetők
Ebben a szakaszban az automazáció üzembe helyezésére vona-
tkozó alapvető tájékoztatást találja.
PROGRAMOZÓ GOMBOK:
SELECT gomb: válassza ki, hogy melyik funkciót szeretné elmenteni; a
választást a LED villogása jelzi.
Ha a gombot többször is megnyomja, akkor végigmehet a menün és
a kívánt funkcióra helyezkedhet.
SET gomb: a SELECT gombbal előre kiválaszto funkció pusát ak-
válja.
A programozás csak nem akv biztosítékokkal engedélyeze.
A programozás megkezdése elő készítse elő az automazációt
A) Ellenőrizze, hogy az alaphelyzetben zárt (N.C.) biztonsági BEME-
NETEK nincsenek nyitva:
1. DS1 fotocella bemenet
2. DS2 fotocella bemenet
3. BLOKK/STOPP bemenet
B) NYITÁSIRÁNY PROGRAMOZÁS:
Ha szeretné módosítani a motor nyitás
irányát a DIR (Direcon) funkció progra-
mozásával:
1. Helyezkedjen a SELECT gombbal a LED L1 „DIR” villogására;
2. Nyomja meg a SET Gombot, hogy megváltoztassa a nyitásirányt.
BEKAPCSOLT LED: balra nyit.
KIKAPCSOLT LED: jobbra nyit
(gyári konguráció).
C) TRIMMER SZABÁLYOZÁS:
CU 24V 1M
A maximális SPEED sebesség
trimmert forgassa el az óram-
utató járásával megegyező
irányba, és a SENS trimmert mi-
nimumra, a „-” jelre forgatva.
CU 230V 1M
A FORCE erő trimmert forgassa
el az óramutató járásával mege-
gyező irányba, és a SLOW trim-
mert félig, a „-” jelre forgatva.
Minden esetben a trimmer szabályozását az ütőerőre vonatkozó
EN-12453 szabvány betartásával végezze.
Az előzetes ellenőrzések után végrehajthatja a vezérlőközpont pro-
gramozását.
D) MOTOR TIME: a menet és a lassulási pontok szabályozása.
Indulási feltétel: a kapuszárny teljes zárás hely-
zetben van.
M1
1. Nyomja meg a SELECT Gombot, amíg
a „MOTOR TIME” L5 LED villogni nem
kezd;
2. A folyamat elkezdéséhez nyomja meg a
SET gombot.
1. SZ. SZÁRNY NYITÁSBAN
3. Az 1. MOTOR elkezdi kinyitni a kapu-
szárnyat;
4. Azon a ponton, amelyen elhatározta, hogy
lassítja a szárny nyitását, nyomja meg a SET
gombot (a szárny lassabb sebességgel ha-
lad tovább);
5. A maximális nyitás elérésekor ismét
nyomja meg a SET gombot.
1. SZ. SZÁRNY ZÁRÁSBAN
6. Ekkor az 1. MOTOR elkezdi bezárni a kapu-
szárnyat;
7. Azon a ponton, amelyen elhatározta, hogy
lassítja a szárny zárását, nyomja meg a SET
gombot (a szárny lassabb sebességgel ha-
lad tovább);
8. Amikor a szárny eléri a zárás teljes
ütközőt, akkor ismét nyomja meg a SET
gombot;
9. A konguráció befejeződö.
E) AUTO PROGRAM - a menet és a lassulási pont automakus
beállítása (a funkció csak CU 24 V 1 M esetén érhető el).
A MOTOR TIME helye a LED L7 funkcióval
automakusan állítja be a teljes menetet és a
lassítási pontokat.
Jelenítse meg a programozási kézikönyvet, vagy az oktató videót a
részletes lépésekhez.
F) LÉPÉSRŐL LÉPÉSRE FUNKCIÓ PROGRAMOZÁSA
Ezzel a funkcióval változtathatja meg a nyitási logika billentyűről vagy
„Lépésről lépésre” távirányítóval (gyári konguráció) küldö paranc-
csal a „Nyitás-Zárás”hoz.
LÉPÉSRŐL LÉPÉSRE LED BE NYIT-ZÁR LED OFF
1. bevitel --> NYITÁS
2. bevitel --> LEÁLLÍTÁS
3. bevitel --> BEZÁRÁS
4. bevitel --> LEÁLLÍTÁS
1. bevitel --> NYITÁS
2. bevitel --> BEZÁRÁS
3. bevitel --> NYITÁS
4. bevitel --> BEZÁRÁS
A logika megfordításához a következőképpen járjon el:
1. A vezérlőközpontban a SELECT gombbal álljon a LED L2 villo-
gásához;
2. 2. Nyomja be a SET gombot;
3.
A LED L2 a programozás befejezéséig bekapcsolva marad.
G) PAUSE TIME - Automakus zárási idő programozása
Az előre a nem hosszabb, mint 4 perces idő
lejártával az automazáció automakus
bezárását is engedélyezhe.
1. Helyezkedjen a SELECT gombbal a LED L6 villogására;
2. Egy pillanatra nyomja be a SET gombot;
3. Várjon a beállíto ideig;
4. Egy pillanatra ismét nyomja be a SET gombot;
MAX 4 MIN
5.
A LED L6 a programozás befejezéséig bekapcsolva marad.
H) TÁVIRÁNYÍTÓ KÓD elmentése (PP csatorna)
CANALE PP: az összes elmente menet ak-
válásához küldjön egy bevitelt jelet
CANALE PPED: a részleges/gyalogos elmente me-
net akválásához küldjön egy bevitelt jelet
A központ 120 távirányíto parancs el-
mentését teszi lehetővé.
A programozásukhoz a következőképpen járjon el:
1. Helyezkedjen a SELECT gombbal az L3 villogó „CODE TX” LED-
re;
2. Nyomja meg 1-szer a SET gombot, hogy elmentse az első PP
csatornát;
3. Küldje el az előre kiválaszto kódot a kongurálandó gombot a
kívánt távirányítóval megnyomva;
4. A LED L3 (KÓD TX) néhány másodpercig bekapcsolva marad áll-
andó fénnyel jelezvén, hogy befejezte a programozást;
5. A LED LE3 további 10 másodpercen keresztül ismét villogni fog,
és megvárja az új távirányíto kódot;
6. Miután ez a 10 másodperc eltelt, a LED L3 állandó fénnyel
bekapcsolva marad.
I) A részleged nyitás vagy a gyalogos kód elmentéséhez
1. Helyezkedjen a SELECT gombbal a villogó L3 „CODE TX” LED-
re;
2. Nyomja meg 2-szer egymás után a SET gombot, hogy elmentse
az PPED csatornát;
3. Küldje el az előre kiválaszto kódot a kongurálandó gombot a
kívánt távirányítóval megnyomva;
4. A LED L3 (KÓD TX) néhány Másodpercig bekapcsolva marad
állandó fénnyel jelezvén, hogy a második P.PED csatorna pro-
gramozása befejeződö. A külön 10 másodperc, hogy lehetővé
tegye a további PPED kódok elmentését, akv marad, a fent
említeek szerint.
Az első elmente távirányító szabálya:
A távirányítók programozásánál a következő szabály érvényes: ha az
első távirányító, amelyet elmente rolling kód pusú, akkor a vevő
ezután csak rolling kód pusú távirányítókat fogad el, így biztosítva
a behatolás elleni még nagyobb biztonságot; ha viszont az első táv-
irányító, amelyet elment állandó kódos, akkor a vevő ezután állandó
kódos és rolling kódos távirányítókat is elfogad, de ez utóbbiaknál
csak az állandó részt ellenőrzi.
Az elmente távirányítók törléséhez ajánl-
atos elolvasni a kézikönyvet a teljes folya-
mathoz, vagy megtekinteni az oktató vi-
deót.
L) VISSZAÁLLÍTÁS
Ha helyre kell állítani a gyári kongurációt, akkor egyszerre nyomja
meg a SELECT és a SET gombot, ugyanakkor bekapcsol és gyorsan ki
is kapcsol az összes VÖRÖS jelző LED.
FIGYELEM: ezzel a folyamaal az elmente távirányítókat NEM
törli; ha a távirányító törlő műveletet kell használnia, akkor olvassa el
az előző pontot.
A képernyő megjelenítéséhez internet kapcsolatra van szükség, és saját tabletben vagy okostelefonon telepíteni kell iOS
rendszerekhez az APPLE STORE-ból, Android készülékekhez a GOOGLEY PLAY-ből egy QR kód leolvasót

This secon will provide the essenal informaon for the seng-up
of the control unit.
PROGRAMMING KEYS:
SELECT: this key allows you to select the type of funcon to be
enabled; the selecon is indicated by the LED ashing.
By pressing the key, you can scroll through the menu and posion
yourself on the desired funcon.
SET: this key allows the acvaon of the type of funcon chosen with
the SELECT key.
Programming enabled only in non-acve safees condions.
Before starng the programming, it will be necessary to set up the
automaon.
A) Make sure that the safety inputs N.C. are not open:
1. Photocell input DS1
2. Photocell input DS2
3. Block input STOP
B) OPENING DIRECTION:
If the opening logic must be reversed, plea-
se proceed as follows:
1. By the key SELECT, posion yourself on the blinking LED L1
“DIR”;
2. Press the key SET to reverse the opening direcon.
LED ON: it opens to the le.
LED OFF: it opens to the RIGHT
(default conguraon).
C) TRIMMERS ADJUSTMENTS:
CU 24V 1M
Posion the SPEED trimmer
all turned clockwise and the
SENS trimmer all turned coun-
ter-clockwise.
CU 230V 1M
Posion the FORCE trimmer all
turned clockwise and the SLOW
trimmer at the middle, turning
it counter-clockwise towards the
“ - “.
The trimmer adjustments must be carried out in compliance
with the EN-12453 legislaon, regulang the impact forces.
Aer the preliminary checks, the control unit programming can be
carried out.
D)
MOTOR TIME: regulaon of the stroke and of the deceleraon points.
QUICK START GUIDE FOR INSTALLATION AND PROGRAMMING OF CONTROL UNITS:
CU 24V 1M e CU 230V 1M
Use the QR-CODE opon to watch the “step-by-step” videos tutorials, available on the YouTube channel Comunello TV
Starng condion: gate leaf in closed posion.
M1
1. By the key SELECT, posion yourself on
the blinking LED L5 “MOTOR TIME”;
2. Then press the key SET to start the pro-
cedure.
LEAF IN OPENING PHASE
3. MOTOR 1 starts the opening phase;
4. When the desired deceleraon starng
point is reached press the SET key (the leaf
connues its stroke at a decelerated speed);
5. Press SET key to determinate the ope-
ning end stop.
LEAF IN CLOSING PHASE
6. A MOTOR 1 starts the closing phase;
7. When the desired deceleraon starng
point is reached press the SET key (the leaf
connues its stroke at a decelerated spe-
ed);
8. Press SET key to determinate the closing
end stop;
9. The conguraon is completed.
E) AUTO PROGRAM - automac seng of the stroke and of the
deceleraon points (only available for CU 24V 1M)
With the funcon in LED L7 “AUTO PROGRAM”
it is automacally set the total stroke and the
deceleraon points.
ATTENTION: the use of end stops is mandatory.
Please check the installaon and user manual or the video with the
detailed programming tutorial.
F) STEP-BY-STEP OPERATING LOGIC
This funcon allows to switch the operang logic of input sent from
pushbuons or remote controls from the “Step-by-Step” (enabled
as-shipped) to “Open-Close”:
STEP BY STEP LED ON OPEN-CLOSE LED OFF
1st input --> OPEN
2nd input --> STOP
3rd input --> CLOSE
4th input --> STOP
1st input --> OPEN
2nd input --> CLOSE
3rd input --> OPEN
4th input --> CLOSE
To change the logic, proceed as follow:
1. By the key SELECT, posion yourself on the blinking LED L2
“STEP BY STEP”;
2. Press the key SET;
3. The LED L2 will turn o and programming will be completed.

91300366 - Rev.00 - 15.11.18
Rule of the rst saved Remote control:
When programming remote controls the following rule is applied: if
the rst remote to be saved is a rolling code type, the receiver will
subsequently accept only rolling code remotes (thus ensuring greater
an-intrusion security); if the rst remote to be saved is a xed code
type, the receiver will accept both xed and rolling code remotes,
although only the xed part of the laer will be idened.
For the deleon of remote control codes
please check the installaon and user ma-
nual or the video with the detailed pro-
gramming tutorial.
L) RESET
If it becomes necessary to reset the control unit to restore the factory
sengs, press the SELECT and SET keys together; this will cause all
the indicator LEDs to light simultaneously followed immediately by
the control unit switching o.
WARNING!: by the above menoned procedure the stored re-
mote codes WILL NOT be deleted; where necessary follow the above
menoned procedure of deleon.
G) PAUSE TIME - Automac closing me programming
The automac closing is factory disabled;
to enable it aer a xed period of me
(max. 4 min.) proceed as follow:
1. By the key SELECT, posion yourself on the blinking LED L6
“PAUSE TIME”;
2. Press once the key SET;
3. Wait for a desired me interval;
4. Press the key SET again;
MAX 4 MIN
5. The LED L6 will remain steady on and that period of me would
be set as me interval.
H) Remote control code programming (total opening)
PP CHANNEL gives an input to acvate the total
stroke stored.
PPED CHANNEL gives an input to acvate the pede-
strian or paral stroke the total stroke
Up to 120 remote controls can be memori-
zed in the control unit receiver.
Its programming is performed as follow:
1. By the key SELECT, posion yourself on the blinking LED L3
“CODE TX”;
2. Press key SET once to memorize the PP channel;
3. Send the selected code with your remote control;
4. The LED L3 will remain steady on for a second to indicate that
programming has been completed.
5. The LED L3 starts to blink again to indicate that you have 10
addional sec. to store a new code;
6 On expiry of those 10 sec. the LED L3 will remain steady on.
I) Remote control code programming (paral/pedestrian ope-
ning)
1. By the key SELECT, posion yourself on the blinking LED L3
“CODE TX”;
2. Press key SET twice to memorize the PPED channel;
3. Send the selected code with your remote control;
4. The LED L3 will remain steady on for a second to indicate that
programming has been completed. The extra me of 10 sec. to
store a new PPED channel is then preview as for the PP chan-
nel.
To watch videos you will need to have an internet connecon and to install in your Tablet or Smartphone a QR code
reader, available on APPLESTORE for iOs devices or on GOOGLE PLAY for Android devices.
This manual suits for next models
1
Table of contents
Languages:
Other Comunello Automation Control Unit manuals

Comunello Automation
Comunello Automation CU-230V-1M User manual

Comunello Automation
Comunello Automation QUAD 24V 1M ONE User manual

Comunello Automation
Comunello Automation CU-230V-2M User manual

Comunello Automation
Comunello Automation QUAD-24V-HP User manual

Comunello Automation
Comunello Automation MOWIN User manual