manuals.online logo
Brands
  1. Home
  2. •
  3. Brands
  4. •
  5. Consort
  6. •
  7. Heater
  8. •
  9. Consort CHELSEA WMH3 Manual

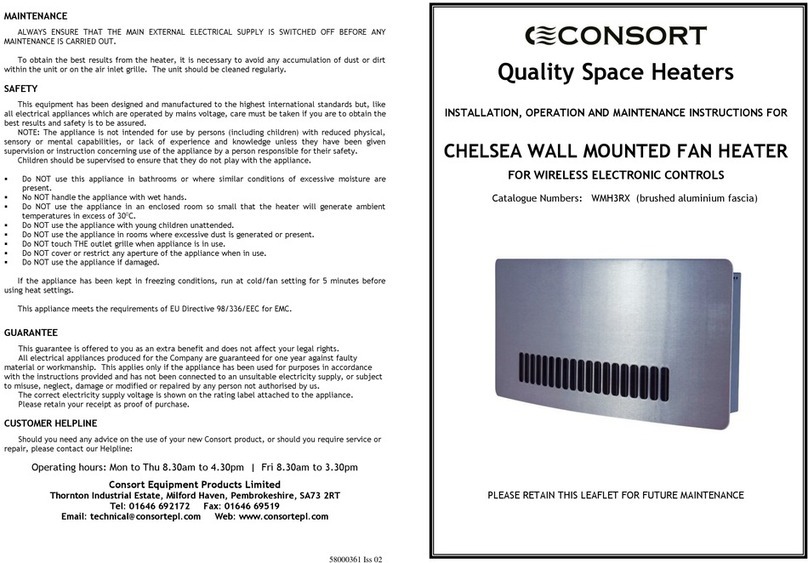
Consort CHELSEA WMH3 Manual

58000306 Iss 4
MAINTENANCE
ALWAYS ENSURE THAT THE MAIN EXTERNAL ELECTRICAL SUPPLY IS SWITCHED OFF BEFORE ANY
MAINTENANCE IS CARRIED OUT.
To obtain the best esults f om the heate , it is necessa y to avoid any accumulation of dust o di t within
the unit o on the ai inlet g ille. The unit should be cleaned egula ly.
PROTECTION (Thermal Cut-out)
The units a e p otected f om ove heating in the event of fan failu e, o an obst uction of the f ee ai flow,
by an auto eset the mal cut-out. If this happens the the mal cut-out effectively switches the appliance off.
The appliance will not ope ate until it has cooled down. If this fault e-occu s, efe to ‘fault conditions’.
FAULT CONDITIONS
If the heate will not ope ate, disconnect it f om the mains and a ange fo a ce tified elect ician to attend
to investigate the eason.
SAFETY
This equipment has been designed and manufactu ed to the highest inte national standa ds but, like all
elect ical appliances which a e ope ated by mains voltage, ca e must be taken if you a e to obtain the best
esults and safety is to be assu ed.
NOTE: The appliance is not intended fo use by pe sons (including child en) with educed physical, senso y
o mental capabilities, o lack of expe ience and knowledge unless they have been given supe vision o
inst uction conce ning use of the appliance by a pe son esponsible fo thei safety.
Child en should be supe vised to ensu e that they do not play with the appliance.
Do NOT use this appliance in bath ooms o whe e simila conditions of excessive moistu e a e p esent.
No NOT handle the appliance with wet hands.
Do NOT use the appliance in an enclosed oom so small that the heate will gene ate ambient
tempe atu es in excess of 30
0
C.
Do NOT use the appliance with young child en unattended.
Do NOT use the appliance in ooms whe e excessive dust is gene ated o p esent.
Do NOT touch THE outlet g ille when appliance is in use.
Do NOT cove o est ict any ape tu e of the appliance when in use.
Do NOT use the appliance if damaged.
If the appliance has been kept in f eezing conditions, un at cold/fan setting fo 5 minutes befo e using heat
settings.
This appliance meets the equi ements of EU Di ective 98/336/EEC fo EMC.
GUARANTEE
This gua antee is offe ed to you as an ext a benefit and does not affect you legal ights.
All elect ical appliances p oduced fo the Company a e gua anteed fo one yea against faulty mate ial o
wo kmanship. This applies only if the appliance has been used fo pu poses in acco dance with the inst uctions
p ovided and has not been connected to an unsuitable elect icity supply, o subject to misuse, neglect, damage
o modified o epai ed by any pe son not autho ised by us.
The co ect elect icity supply voltage is shown on the ating label attached to the appliance.
Please etain you eceipt as p oof of pu chase.
CUSTOMER HELPLINE
Should you need any advice on the use of you new Conso t p oduct, o should you equi e se vice o epai ,
please contact ou Helpline:


 1646 692172 Mon to F i 8.30 am to 3.30 pm
Consort Equipment Products Limited
Thornton Industrial Estate, Milford Haven, Pembrokeshire, SA73 2RT
Fax: 1646 69519 Email: [email protected]om Web: www.consortepl.com
Quality Space Heaters
INSTALLATION, OPERATION AND MAINTENANCE INSTRUCTIONS FOR
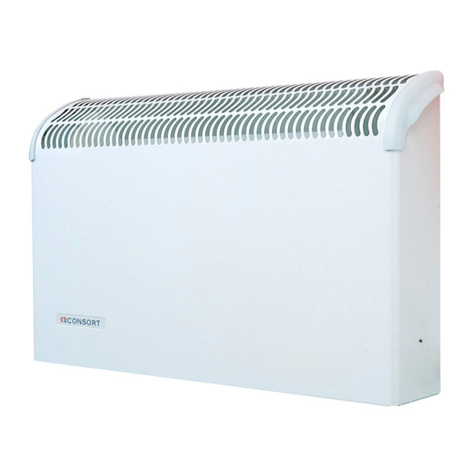
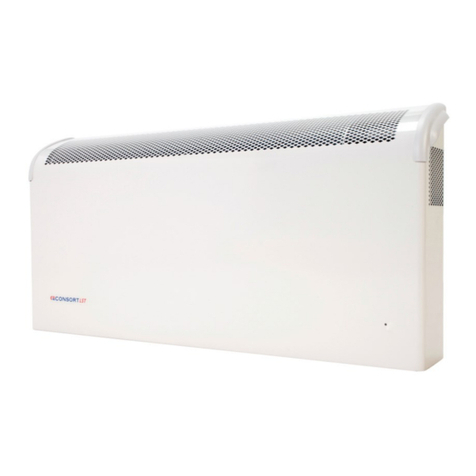
CHELSEA WALL MOUNTED FAN HEATER
Catalogue Numbe s: WMH3 & WMH3T (b ushed aluminium fascia)
PLEASE RETAIN THIS LEAFLET FOR FUTURE MAINTENANCE
58000306 Iss 4 58000306 Iss 4
INSTALLATION
Ensu e the elect icity supply is disconnected f om any elevant fixed wi ing befo e commencing the
installation. The supply ci cuit must be adequate fo the input of the appliance and must be p otected
by a 13 Amp fuse.
The heate must not be located immediately below a fixed socket outlet.
CONNECTION TO THE MAIN SUPPLY
Elect ical installation should be ca ied out by a competent installe , p efe ably egiste ed with
NICEIC (National Inspection Council fo Elect ical Installation Cont acting) in acco dance with the 16
edition of the IEE Wi ing Regulations, (BS.7671: 1992), and any elevant Local Autho ity Bye-Laws.
This heate is fitted with a 3-co e mains supply cable and should be pe manently connected to the
elect icity supply via a double pole switch having 3mm gap on each pole.
A switched Fused Connection unit to BS.1363. Pa t 4 is a ecommended mains supply connection
accesso y to ensu e compliance with safety equi ements applicable to a fixed-wi ing installation.
PROCEDURE
1. Remove the f ont cove (2 sc ews on the side and 2 sc ews on the bottom).
2. Ma k top 2 sc ew fixing positions ‘A’ in acco dance with the dimension shown on the diag am. The
unit must be sc ewed to the wall with 3 sc ews th ough the holes p ovided in the case. D ill 2 holes in
the wall to suit No 10 wood sc ews ( ound Head) and inse t wall plugs. At the top 2 sc ew positions
‘A’ sc ews can now be sc ewed in until the heads a e app oximately 5mm f om the wall. The unit can
now be hung on these two sc ews and the position of the thi d bottom fixing ma ked on the wall.
Remove the unit f om the wall and d ill a thi d fixing hole in the position ma ked and inse t a wall
plug. The unit can now be hung on the wall and the thi d sc ew sc ewed in. Befo e tightening all
th ee sc ews ensu e the unit is ho izontal.
3. Refit f ont cove . Ensu e g ille ba s inte nal/exte nal a e spaced equally.
CONTROLS FOR ALL MODELS
The heate is fitted with 3 switches: fan symbol: fan only (cold blow and
ene gises othe switches), one dot: 1kW, two dots: 2kW and one plus
two dots: 3kW.
The neon light indicates mains powe is available to the appliance.
The heate is fitted with a the mostat. To set the the mostat to the equi ed
tempe atu e otate the cont ol knob fully clockwise to numbe 4. When the desi ed
oom tempe atu e is eached, otate the knob slowly anti-clockwise and when the
the mostat 'clicks' off, leave the cont ol at this setting. The eafte , the heate
cont ols the heat output automatically.
USING THE TIMER, MODEL WMH3T ONLY
The heate must be connected to the mains powe supply in o de fo the time
to ope ate continuously. i.e. the clock will cease to go ound if the powe supply
to the appliance is inte upted. Set the ‘Time ’ to the co ect time of day by
otating the dial clockwise until the 24-Hou time clock matches the time of day.
The ‘datum’ is an a ow on the ‘Time ’ face, also a slot in appliance body, at ‘3’
on a no mal 12-hou clock face.
MANUAL OPERATION
Slide the selecto switch, immediately beneath the time , to the ‘Manual/Hand’ position. The
appliance will now ope ate via the cont ols, heat setting and the mostat, as desc ibed unde
‘CONTROLS FOR ALL MODELS’.
NB: If the time selecto switch is slid to its cent al position at ‘O’, the appliance will not ope ate
via eithe the ‘Manual’ o ‘Time ’ cont ols. The e will be no output f om the appliance. The selecto
switch must be set to eithe ‘Manual’ o ‘Time ’.
AUTOMATIC OPERATION
NB: The appliance heat setting switches and the mostat position must be set before any ‘Time ’
ope ation ie if the appliance is not switched ‘On’ the e will be no output ega dless of ‘Time ’ settings.
1. Slide the selecto switch, immediately beneath the time , to the `Auto/Clock` position.
2. Each segment of the time ep esents 15 minutes. The 24-hou time can be set to give any
combination of On/Off inte vals of 15 minutes. Select the ‘On’ time equi ed by p essing the black
segments (on the ci cumfe ence of the time ) adjacent to the time equi ed, adially outwa ds
away f om the cent e of the dial. This will cause the heate to switch ‘On’ at the selected time fo
15 minutes. Each additional segment p essed outwa ds will give a fu the 15 minutes of ope ation.
In this way you may select the length of time equi ed fo the appliance to be ‘On’ and push
outwa ds the numbe of 15 minute segments necessa y to select the time pe iod equi ed.
3. The time can be set to give as many ‘On’ pe iods as equi ed du ing any 24-hou pe iod.
4. The set p og am will epeat itself eve y 24 hou s until changed.
5. This set p og am may be ove - idden at any time by switching to ‘Manual’ ope ation.
This manual suits for next models

1

Other Consort Heater manuals

Consort CN1LST Guide

Consort

Consort CN1LST Guide

Consort RWH2S Manual

Consort

Consort RWH2S Manual

Consort PVSL050 Use and maintenance manual

Consort

Consort PVSL050 Use and maintenance manual

Consort PLE050 Use and maintenance manual

Consort

Consort PLE050 Use and maintenance manual

Consort CSL2LST Use and maintenance manual

Consort

Consort CSL2LST Use and maintenance manual

Consort PLSTi100RX Use and maintenance manual

Consort

Consort PLSTi100RX Use and maintenance manual

Consort LST500E Use and maintenance manual

Consort

Consort LST500E Use and maintenance manual

Consort PRX050SS Use and maintenance manual

Consort

Consort PRX050SS Use and maintenance manual

Consort PLE200/SS User manual

Consort

Consort PLE200/SS User manual

Consort Frost Fighter User manual

Consort

Consort Frost Fighter User manual

Consort PLSTI050EWIFI Use and maintenance manual

Consort

Consort PLSTI050EWIFI Use and maintenance manual

Consort CN1MLSTFS User manual

Consort

Consort CN1MLSTFS User manual

Consort QZWP30N Manual

Consort

Consort QZWP30N Manual

Consort CN2MLSTiERF Use and maintenance manual

Consort

Consort CN2MLSTiERF Use and maintenance manual

Consort LST500 Manual

Consort

Consort LST500 Manual

Consort WMH3E Use and maintenance manual

Consort

Consort WMH3E Use and maintenance manual

Consort LST500RX Use and maintenance manual

Consort

Consort LST500RX Use and maintenance manual

Consort Heatflow BHM1 User manual

Consort

Consort Heatflow BHM1 User manual

Consort CSL1LST Use and maintenance manual

Consort

Consort CSL1LST Use and maintenance manual

Consort LST500EWIFI Use and maintenance manual

Consort

Consort LST500EWIFI Use and maintenance manual

Consort QZWP15N Manual

Consort

Consort QZWP15N Manual

Consort PLSTi Series Use and maintenance manual

Consort

Consort PLSTi Series Use and maintenance manual

Consort CN1LSTRX Original operating instructions

Consort

Consort CN1LSTRX Original operating instructions

Consort PLE050MWIFI Use and maintenance manual

Consort

Consort PLE050MWIFI Use and maintenance manual

Popular Heater manuals by other brands

RADSON AMIRANTE E - MOUNTING Instruction

RADSON

RADSON AMIRANTE E - MOUNTING Instruction

Stadler Form Anna operating instructions

Stadler Form

Stadler Form Anna operating instructions

Fakir HT 2000 manual

Fakir

Fakir HT 2000 manual

IXL fresco Aurora user guide

IXL

IXL fresco Aurora user guide

STEGO CS 030 quick start guide

STEGO

STEGO CS 030 quick start guide

VEAB CV Series Installation

VEAB

VEAB CV Series Installation

Soleus Air HI1-50-03 user manual

Soleus Air

Soleus Air HI1-50-03 user manual

Dimplex LCM Series quick start guide

Dimplex

Dimplex LCM Series quick start guide

ARDES AR4MK01 Instructions for use

ARDES

ARDES AR4MK01 Instructions for use

swiftech MCR80-F installation guide

swiftech

swiftech MCR80-F installation guide

Sea Clear H Series Installation instructions and owner's manual

Sea Clear

Sea Clear H Series Installation instructions and owner's manual

Neutec sonnEC Series Technical documentation

Neutec

Neutec sonnEC Series Technical documentation

Stelpro DR series user guide

Stelpro

Stelpro DR series user guide

Sinus Jevi THK 18 operating instructions

Sinus Jevi

Sinus Jevi THK 18 operating instructions

Sure Heat SPOFA27NG Installation and operating instructions

Sure Heat

Sure Heat SPOFA27NG Installation and operating instructions

Castelmonte Futura 01 Deluxe quick start guide

Castelmonte

Castelmonte Futura 01 Deluxe quick start guide

Supplies4Heat BEAUFORT Vertical Fitting instructions

Supplies4Heat

Supplies4Heat BEAUFORT Vertical Fitting instructions

Strend Pro PH-08W instruction manual

Strend Pro

Strend Pro PH-08W instruction manual

manuals.online logo
manuals.online logoBrands
  • About & Mission
  • Contact us
  • Privacy Policy
  • Terms and Conditions

Copyright 2025 Manuals.Online. All Rights Reserved.