III
Contents
Contents
Contents
Contents
1Safety
1Safety
1Safety
1Safety ................................................................................................................................
................................................................................................................................
................................................................................................................................
................................................................................................................................ 1
1
1
1
1.1Instructions for safe operations
......................................................................................................................... 1
1.2Warnings
............................................................................................................................................................... 1
1.3Attentions
.............................................................................................................................................................. 1
2Overview
2Overview
2Overview
2Overview ...........................................................................................................................
...........................................................................................................................
...........................................................................................................................
........................................................................................................................... 2
2
2
2
2.1Classification:
...................................................................................................................................................... 2
2.2Features
................................................................................................................................................................. 2
2.3Major applications and scope of application
.................................................................................................. 3
2.4Environment requirements
................................................................................................................................. 3
3Principle
3Principle
3Principle
3Principle and
and
and
and Caution
Caution
Caution
Caution .........................................................................................................
.........................................................................................................
.........................................................................................................
......................................................................................................... 3
3
3
3
3.1Principle of measurement
.................................................................................................................................. 3
3.2Caution
.................................................................................................................................................................. 4
3.3Clinical restrictions
............................................................................................................................................. 4
4Technical
4Technical
4Technical
4Technical specifications
specifications
specifications
specifications .......................................................................................................
.......................................................................................................
.......................................................................................................
....................................................................................................... 4
4
4
4
5Accessories
5Accessories
5Accessories
5Accessories .........................................................................................................................
.........................................................................................................................
.........................................................................................................................
......................................................................................................................... 5
5
5
5
6Installation
6Installation
6Installation
6Installation .........................................................................................................................
.........................................................................................................................
.........................................................................................................................
......................................................................................................................... 5
5
5
5
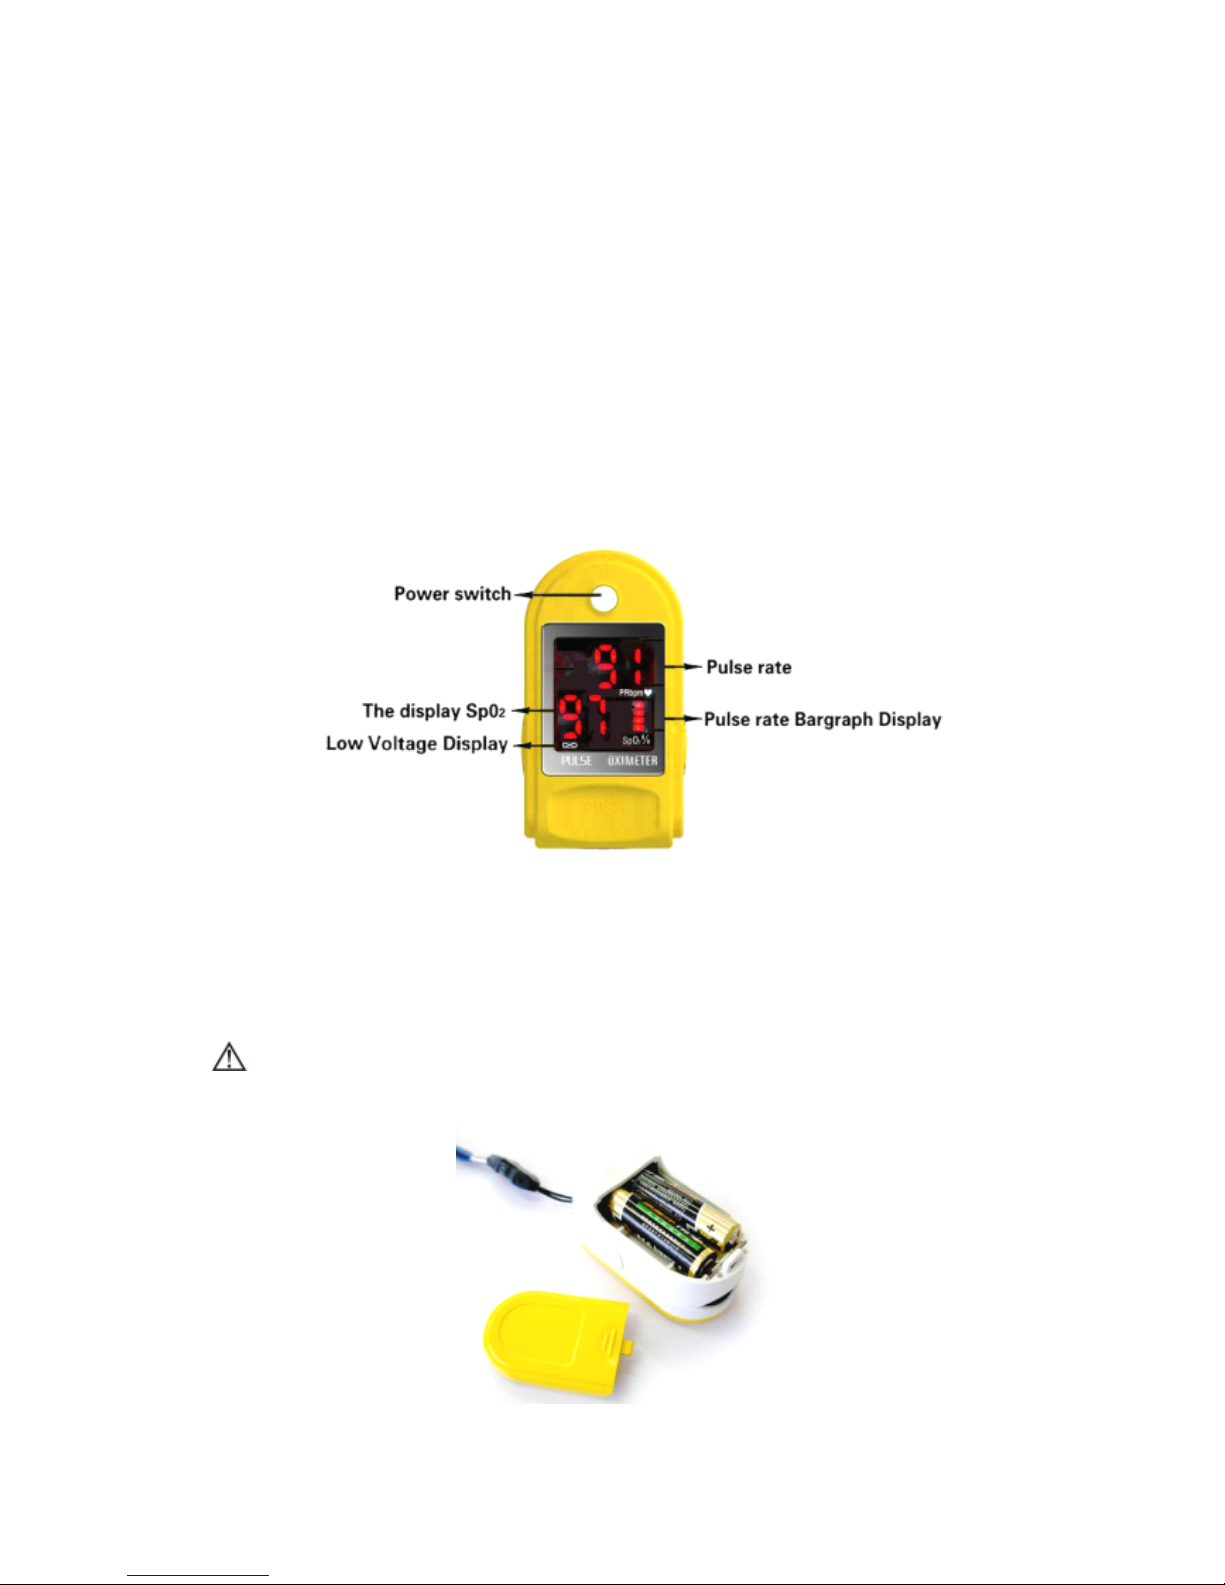
6.1View of the front panel
....................................................................................................................................... 5
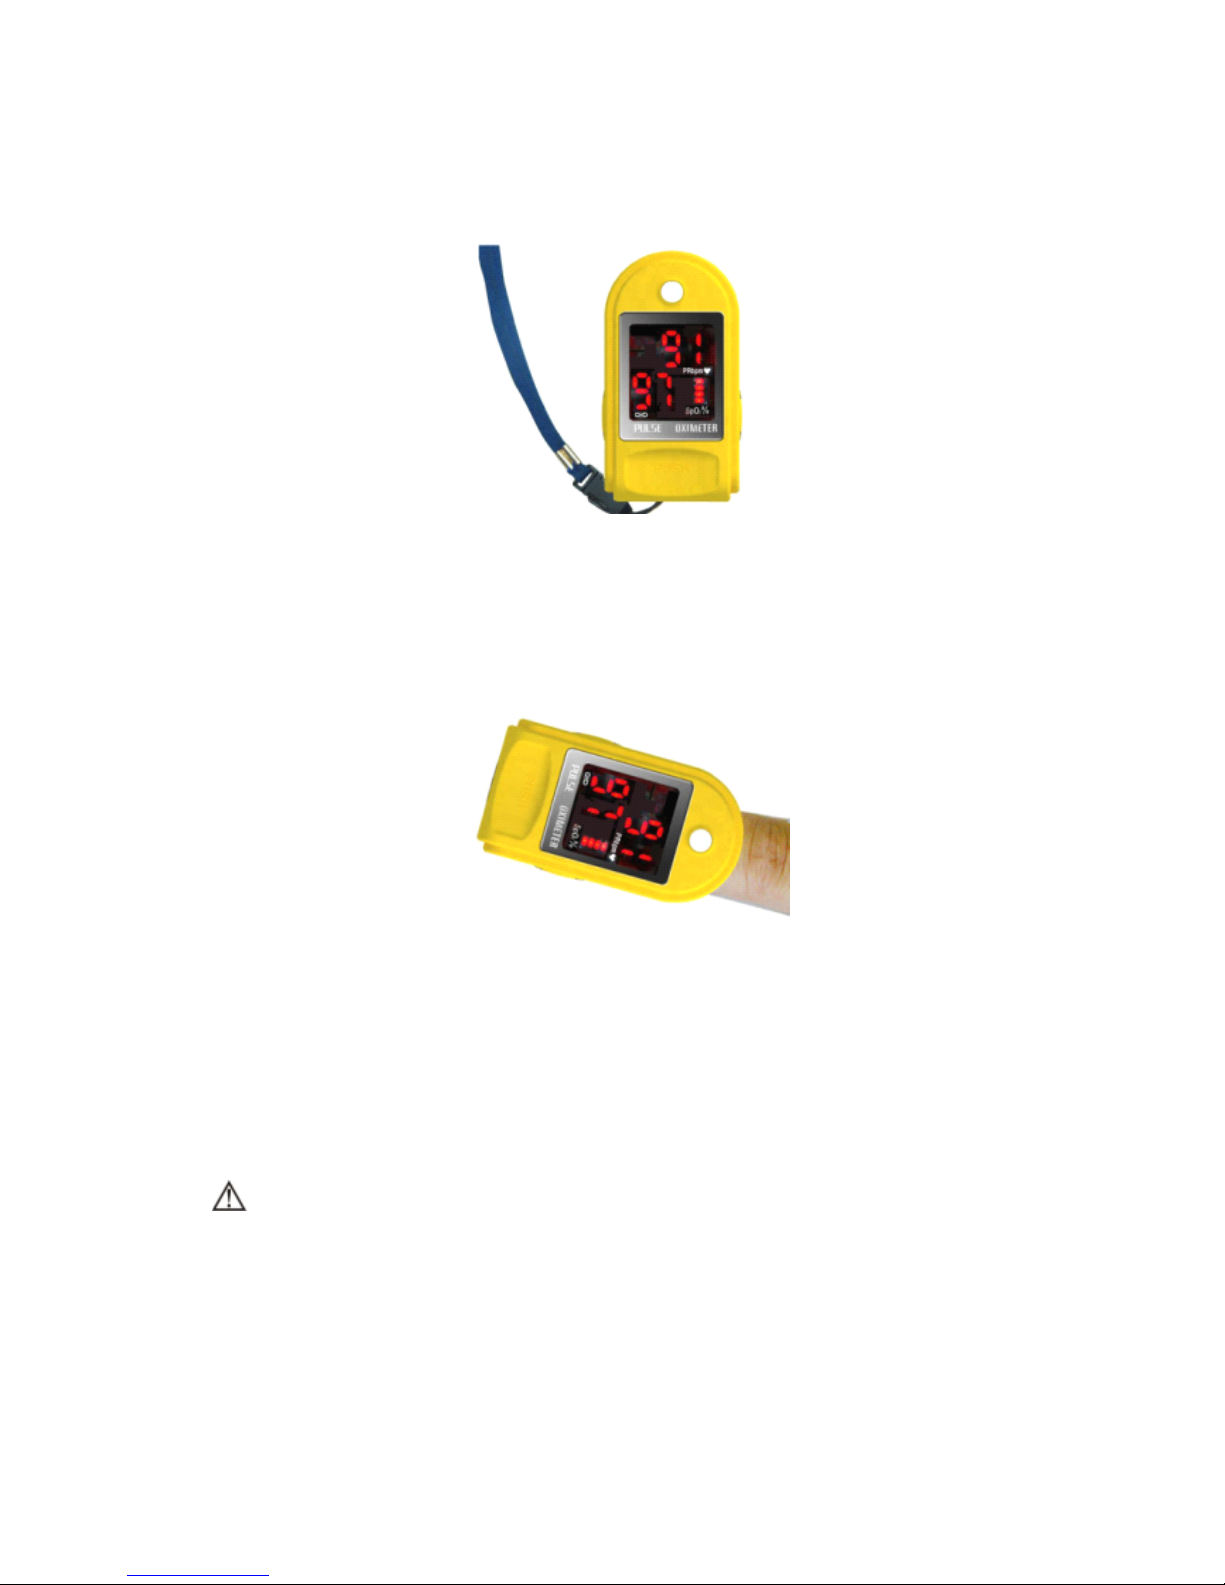
6.2Battery
................................................................................................................................................................... 5
6.3Mounting the hanging rope
................................................................................................................................ 6
7Operating
7Operating
7Operating
7Operating Guide
Guide
Guide
Guide ................................................................................................................
................................................................................................................
................................................................................................................
................................................................................................................ 6
6
6
6
8Repairing
8Repairing
8Repairing
8Repairing and
and
and
and Maintenance
Maintenance
Maintenance
Maintenance ................................................................................................
................................................................................................
................................................................................................
................................................................................................ 6
6
6
6
9Troubleshooting
9Troubleshooting
9Troubleshooting
9Troubleshooting .................................................................................................................
.................................................................................................................
.................................................................................................................
................................................................................................................. 7
7
7
7
10Key
10Key
10Key
10Key of
of
of
of Symbols
Symbols
Symbols
Symbols .................................................................................................................
.................................................................................................................
.................................................................................................................
................................................................................................................. 7
7
7
7
11Function
11Function
11Function
11Function Specification
Specification
Specification
Specification .......................................................................................................
.......................................................................................................
.......................................................................................................
....................................................................................................... 8
8
8
8