manuals.online logo
Brands
  1. Home
  2. •
  3. Brands
  4. •
  5. Cooper Lighting
  6. •
  7. Lighting Equipment
  8. •
  9. Cooper Lighting METALUX HBSPMS User manual

Cooper Lighting METALUX HBSPMS User manual

Step 2b. Rotate fixture to lock other side into slot.
(Be sure both sides of tabs are locked and secured
into slots).
HBSPMS and I5/I8-SPMS Instructions
Step 1. Attach hanger to a
rigid ceiling/structure
using minimum (2) 3/8"
bolts and washers (not
provided). Tighten bolts
until only half the threads
are visible below hanger
bracket. Proceed to Steps
2 thru 4. Step 2a. Lean fixture
to lock one side first into slot.
Step 3. Fasten
hanger to fixture
by inserting
carraige bolt
through hole and
tightening nut.
Step 4. If there is a need to
create an enclosure, Install the
covers provided with the kit.
Finish tightening the 3/8" bolts
until hanger is flush against
ceiling/structure.
METALUX
Customer First Center 1121 Highway 74 South Peachtree City, GA 30269 770.486.4800 FAX 770.486.4801 5/12 0590-F038
ADF120682
Étape 2b. Tournez le luminaire pour fixer l'autre côté
dans la fente. (Vérifiez que les deux côtés des
languettes sont bloqués et fixés dans les fentes.)
Instructions HBSPMS, I5/I8-SPMS
Étape 1. Fixez le dispositif de
suspension sur un plafond/une
structure rigide à l'aide d'au
moins (2) boulons de 3/8 po et
de rondelles (non fournis).
Serrez les boulons jusqu'à ce
que la moitié de leur filetage
dépasse du support de
suspension. Suivez les étapes
2 à 4.
Étape 2a. Inclinez
le luminaire pour fixer d'abord
un côté dans la fente.
Étape 3. Fixez le
dispositif de
suspension sur le
luminaire en
insérant le boulon
de carrosserie dans
le trou et en serrant
l'écrou.
Étape 4. S'il s'avère nécessaire
de créer une enceinte, installez
les couvercles fournis avec
l'ensemble. Finissez de serrer
les boulons de 3/8 po jusqu'à ce
que le dispositif de suspension
soit de niveau avec le plafond/la
structure.
Paso 2b. Gire la lámpara para bloquear el otro lado en la
ranura. (Asegúrese de que ambos lados de las lengüetas
estén bloqueadas y aseguradas en las ranuras.
Instrucciones de HBSPMS, I5/I8-SPMS
Paso 1. Fije el gancho en un
techo interior o estructura
rígida usando un mínimo de
(2) pernos de 3/8" con
arandelas (no se incluyen).
Apriete los pernos hasta que
sólo la mitad de los tornillos
esté visible por debajo del
soporte del gancho. Proceda
a los pasos 2, 3 y 4.
Paso 2a. Incline
la lámpara para bloquear
primero un lado en la ranura.
Paso 3. Fije el
gancho a la lámpara
introduciendo el
perno de carruaje a
través del agujero y
apretando la tuerca.
Paso 4. Si hay la necesidad de
crear un recinto, instale las
cubiertas proporcionadas con
el kit. Termine de apretar los
pernos de 3/8" hasta que el
gancho esté al ras contra el
techo o estructura.
METALUX
AVERTISSEMENT
Risque d’incendie et de choc électrique.
Si vous n’êtes pas qualifié,
consultez un électricien.
ATTENTION
Les bords peuvent être coupants.
À manipuler avec précaution
ATTENTION
Risque de brûlure. Débrancher l’alimentation
et laisser l’appareil refroidir avant de le
manipulter ou de changer l’ampoule
R
E
C
Y
C
L
A
B
L
E
B
I
O
D
É
G
R
A
D
A
B
L
E
R
E
S
S
O
U
R
C
E
R
E
N
O
U
V
E
L
A
B
L
AVIS : LA VIS VERTE DE MISE À LA
TERRE EST FOURNIE AU BON
ENDROIT. NE LA DÉPLACEZ PAS.
NOTICE: LES AMPOULES CONTIENNENT DU MERCURE,
JETEZ-LES CONFORMÉMENT AUX LOIS LOCALES,
PROVINCIALES OU FÉDÉRALES
R
E
C
I
C
L
A
B
L
E
B
I
O
D
E
G
R
A
D
A
B
L
E
R
E
C
U
R
S
O
R
E
N
O
V
A
B
L
E
RISQUE D’INCENDIE, DE CHOC ÉLECTRIQUE,
DE COUPURES OU AUTRES RISQUES
DIVERS. CE PRODUIT DOIT ÊTRE INSTALLÉ
CONFORMÉMENT AU CODE D’INSTALLATION
APPLICABLE PAR UNE PERSONNE
CONNAISSSANT BIEN LA FABRICATION ET LE
FONCTIONNEMENT DU PRODUIT AINSI QUE
LES RISQUES COURRUS. COOPER LIGHTING
N’ASSUME AUCUNE RESPONSABILITÉ POUR
LES RÉCLAMATIONS PROVOQUÉES PAR
UNE MAUVAISE INSTALLATION OU UNE
MANIPULATION DE CE PRODUIT.
MISE EN GARDE :
DÉCRIVEZ CLAIREMENT SUR LE REÇU DE LIVRAISON
TOUTE PIÈCE MANQUANTE OU TOUT DOMMAGE
VISIBLE DU LUMINAIRE. FAITES TOUTE
RÉCLAMATION DE TRANSPORTEUR GÉNÉRAL
(EDC) DIRECTEMENT AUPRÈS DU TRANSPORTEUR.
LES RÉCLAMATIONS CONCERNANT DES DOMMAGES
DISSIMULÉS DOIVENT ÊTRE PRÉSENTÉES DANS LES
15 JOURS SUIVANTS LA LIVRAISON. CONSERVEZ
TOUT ARTICLE ENDOMMAGÉ AVEC SON
EMBALLAGE D’ORIGINE.
ATTENTION: SERVICE DE LA RÉCEPTION
RIESGO DE INCENDIO, DESCARGA
ELÉCTRICA, CORTADAS Y/O OTROS
PELIGROS. ESTE PRODUCTO LO DEBE
INSTALAR UNA PERSONA FAMILIARIZADA
CON CONSTRUCCIÓN Y CON EL
FUNCIONAMIENTO DEL PRODUCTO, ASI
COMO CON LOS PELIGROS IMPLICADOS, Y
SIGUIENDO LOS CÓDIGOS DE INSTALACIÓN
PERTINENTES. COOPER LIGHTING NO
ASUME NINGUNA RESPONSABILIDAD POR
RECLAMACIONES DEBIDAS AL MANEJO O
INSTALACIÓN INADECUADA DEL PRODUCTO.
ADVERTENCIA:
ANOTE EN EL RECIBO DE ENTREGA LA DESCRIPCIÓN
DEL ACCESORIO Y CUALQUIER FALTANTE O DAÑO
VISIBLE. SOMETA SU RECLAMACIÓN (LTL)
DIRECTAMENTE A LA COMPAÑÍA DE MENSAJERÍA.
LAS RECLAMACIONES POR DAÑOS OCULTOS SE
DEBERÁN PRESENTAR DENTRO DELOS 15 DÍAS A
PARTIR DE LA FECHA DE ENTREGA. TODO MATERIAL
DAÑADO JUNTO CON SU EMPAQUE ORIGINAL DEBE
SER RETENIDO.
ATENCIÓN: DEPARTAMENTO DE RECEPCIÓN
ADVERTENCIA
Riesgo de incendio y descarga eléctrica.
Si no está capacitado,
consulte a un electricista.
PRECAUCIÓN
Las orillas pueden cortar.
Manipule con cuidado.
PRECAUCIÓN
Riesgo de quemaduras.
Desconecte el accesorio y deje
que se enfríe antes de cambiar la
bombilla o manipularlo.
AVISO: EL TORNILLO VERDE DE CONEXIÓN
A TIERRA INCLUIDO SE ENCUENTRA
EN SU LUGAR. NO LO REUBIQUE.
AVISO: LAS BOMBILLAS CONTIENEN MERCURIO Y SE DEBEN
DESECHAR DE ACUERDO A LAS LEYES FEDERALES,
ESTATALES O LOCALES
NOTICE: SI LES CÂBLES D'ALIMENTATION SONT SITUÉS
À MOINS DE 8 CM DU BALLAST, UTILISEZ DES CÂBLES
AYANT UNE TEMPÉRATURE NOMINALE D'AU MOINS
90°C (194°F).
AVISO: SI LOS CABLES DE CORRIENTE ESTÁN LOCALIZADOS
DENTRO DE 8 CM DE LA BALASTRA, USE CABLES
CLASIFICADOS PARA AL MENOS 90˚C (194°F).
RISK OF FIRE, ELECTRICAL SHOCK, CUTS
AND OR OTHER CASUALTY HAZARDS.
THIS PRODUCT MUST BE INSTALLED IN
ACCORDANCE WITH THE APPLICABLE
INSTALLATION CODE BY A PERSON
FAMILIAR WITH THE CONSTRUCTION
AND OPERATION OF THE PRODUCT AND
THE HAZARDS INVOLVED. COOPER
LIGHTING ASSUMES NO RESPONSIBILITY
FOR CLAIMS BROUGHT ABOUT BY
IMPROPER OR CARELESS
INSTALLATION
OR HANDLING OF THIS PRODUCT.
WARNING:
NOTE ACTUAL FIXTURE DESCRIPTION OF ANY
SHORTAGE OR NOTICEABLE DAMAGE ON
DELIVERY RECEIPT. FILE CLAIM FOR COMMON
CARRIER (LTL) DIRECTLY WITH CARRIER.
CLAIMS FOR CONCEALED DAMAGE MUST BE
FILED WITHIN 15 DAYS OF DELIVERY. ALL
DAMAGED MATERIAL, COMPLETE WITH ORIGINAL
PACKING MUST BE RETAINED.
ATTENTION: RECEIVING DEPARTMENT
R
E
C
Y
C
L
A
B
L
E
B
I
O
D
E
G
R
A
D
A
B
L
E
R
E
N
E
W
A
B
L
E
R
E
S
O
U
R
C
E
WARNING
Risk of Fire and Electric
Shock. If not qualified,
consult an electrician.
CAUTION
Edges may cut.
Handle with care.
CAUTION
Risk of burn. Disconnect
power and allow fixture to
cool before changing bulb
or handling fixture.
NOTICE:GREEN
GROUND SCREW
PROVIDED IN
PROPER LOCATION.
DO NOT RELOCATE.
NOTICE:LAMPS
CONTAIN MERCURY,
DISPOSE
ACCORDING TO
LOCAL, STATE, OR
FEDERAL LAWS
NOTICE:IF SUPPLY
WIRES ARE LOCATED
WITHIN 3 INCHES OF
BALLAST, USE WIRE
RATED FOR AT LEAST
90°C (194°F).
NOTICE: MINIMUM
90°C SUPPLY
CONDUCTORS.
NOTICE: CÂBLES D’ALIMENTATION DE 90ºC MINIMUM.
AVISO: CONDUCTORES DE ALIMENTACIÓN DE 90˚C MÍNIMO.
Customer First Center 1121 Highway 74 South Peachtree City, GA 30269 770.486.4800 FAX 770.486.4801 5/12 0590-F038
ADF120682

This manual suits for next models

2

Other Cooper Lighting Lighting Equipment manuals

Cooper Lighting RFM300 User manual

Cooper Lighting

Cooper Lighting RFM300 User manual

Cooper Lighting Halo TGS3S401DSRB User manual

Cooper Lighting

Cooper Lighting Halo TGS3S401DSRB User manual

Cooper Lighting WaveLinx Lite Owner's manual

Cooper Lighting

Cooper Lighting WaveLinx Lite Owner's manual

Cooper Lighting Sure-Lites CC10 User manual

Cooper Lighting

Cooper Lighting Sure-Lites CC10 User manual

Cooper Lighting HALO LAZER LZR204 User manual

Cooper Lighting

Cooper Lighting HALO LAZER LZR204 User manual

Cooper Lighting HALO Home MicroEdge HLB6 User manual

Cooper Lighting

Cooper Lighting HALO Home MicroEdge HLB6 User manual

Cooper Lighting Halo Series User manual

Cooper Lighting

Cooper Lighting Halo Series User manual

Cooper Lighting PROfile AR60S User manual

Cooper Lighting

Cooper Lighting PROfile AR60S User manual

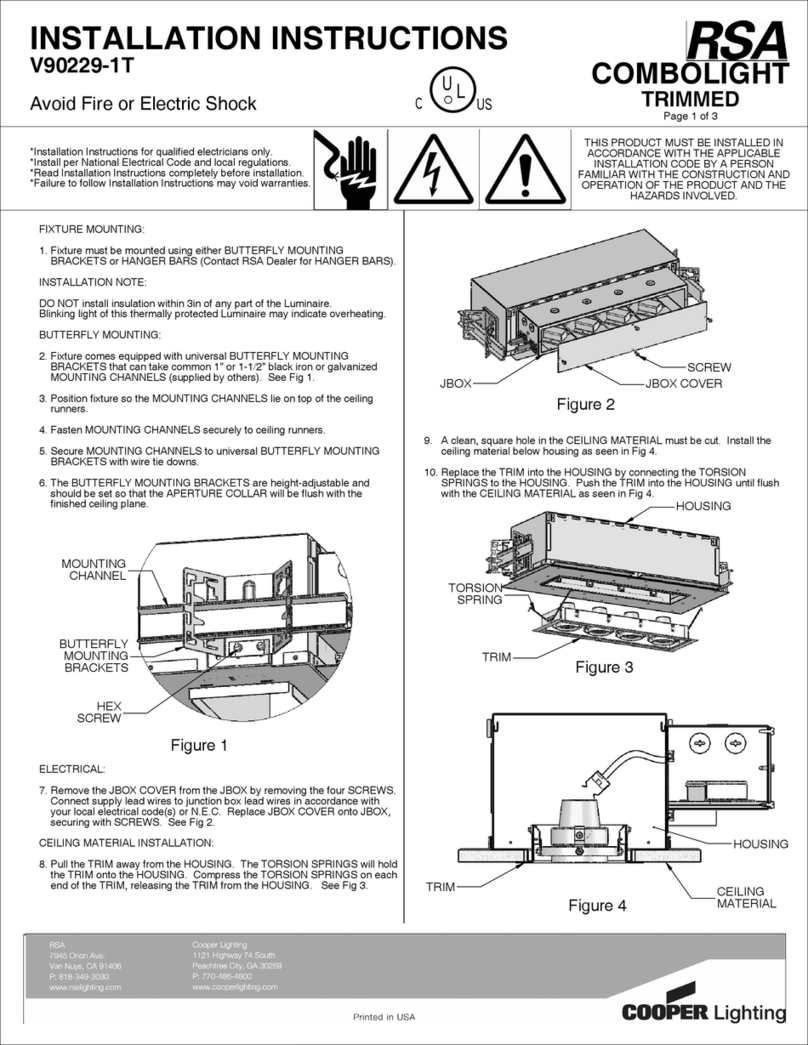
Cooper Lighting Combolight Trimmed V90229-1T User manual

Cooper Lighting

Cooper Lighting Combolight Trimmed V90229-1T User manual

Cooper Lighting MS245R User manual

Cooper Lighting

Cooper Lighting MS245R User manual

Cooper Lighting Halo Lazer LZR330 User manual

Cooper Lighting

Cooper Lighting Halo Lazer LZR330 User manual

Cooper Lighting Halo LF603 User manual

Cooper Lighting

Cooper Lighting Halo LF603 User manual

Cooper Lighting HALO miniLUME LA5300 User manual

Cooper Lighting

Cooper Lighting HALO miniLUME LA5300 User manual

Cooper Lighting ADH080901 User manual

Cooper Lighting

Cooper Lighting ADH080901 User manual

Cooper Lighting Halo Lazer LZR305 User manual

Cooper Lighting

Cooper Lighting Halo Lazer LZR305 User manual

Cooper Lighting HALO ALL-PRO AL3050LPC Series User manual

Cooper Lighting

Cooper Lighting HALO ALL-PRO AL3050LPC Series User manual

Cooper Lighting PORTFOLIO CD61 Series User manual

Cooper Lighting

Cooper Lighting PORTFOLIO CD61 Series User manual

Cooper Lighting HALO RL6 User manual

Cooper Lighting

Cooper Lighting HALO RL6 User manual

Cooper Lighting COMBOLIGHT CR220M70 User manual

Cooper Lighting

Cooper Lighting COMBOLIGHT CR220M70 User manual

Cooper Lighting AMETRIX ADY071480 User manual

Cooper Lighting

Cooper Lighting AMETRIX ADY071480 User manual

Cooper Lighting MS185R User manual

Cooper Lighting

Cooper Lighting MS185R User manual

Cooper Lighting FW Series User manual

Cooper Lighting

Cooper Lighting FW Series User manual

Cooper Lighting Portfolio LD4A User manual

Cooper Lighting

Cooper Lighting Portfolio LD4A User manual

Cooper Lighting W35HPC User manual

Cooper Lighting

Cooper Lighting W35HPC User manual

Popular Lighting Equipment manuals by other brands

Vision & Control LDLF30x360-IR850/UDC Instructions for use

Vision & Control

Vision & Control LDLF30x360-IR850/UDC Instructions for use

Indigo CD123 instructions

Indigo

Indigo CD123 instructions

IKEA PS 2014 instruction manual

IKEA

IKEA PS 2014 instruction manual

ADJ HYDRO WASH X19 user manual

ADJ

ADJ HYDRO WASH X19 user manual

BSi iCELIA installation guide

BSi

BSi iCELIA installation guide

Horticulture Lighting Group 300L R SPEC product manual

Horticulture Lighting Group

Horticulture Lighting Group 300L R SPEC product manual

Godox ML-150 II user manual

Godox

Godox ML-150 II user manual

Jands Stage CL user guide

Jands

Jands Stage CL user guide

involight SlimPAR412 PRO user manual

involight

involight SlimPAR412 PRO user manual

IndoorLED QUANTUM MAX 480/640 instruction manual

IndoorLED

IndoorLED QUANTUM MAX 480/640 instruction manual

Draper 03187 Original instructions

Draper

Draper 03187 Original instructions

ETC Express 24/48 user manual

ETC

ETC Express 24/48 user manual

Beghelli IP42 quick start guide

Beghelli

Beghelli IP42 quick start guide

ProLights FLATPAR6H SUPERSLIM LEDPAR user manual

ProLights

ProLights FLATPAR6H SUPERSLIM LEDPAR user manual

Robus RXZ76L-PSU instruction manual

Robus

Robus RXZ76L-PSU instruction manual

Aihomestyle QS-PLT595X595 Installation and instruction manual

Aihomestyle

Aihomestyle QS-PLT595X595 Installation and instruction manual

Festool SYSLITE STL 450 Original instructions

Festool

Festool SYSLITE STL 450 Original instructions

Beta 1833MW Operation manual and instructions

Beta

Beta 1833MW Operation manual and instructions

manuals.online logo
manuals.online logoBrands
  • About & Mission
  • Contact us
  • Privacy Policy
  • Terms and Conditions

Copyright 2025 Manuals.Online. All Rights Reserved.