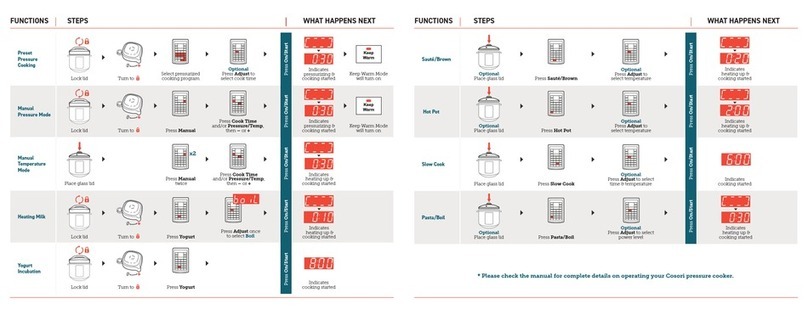
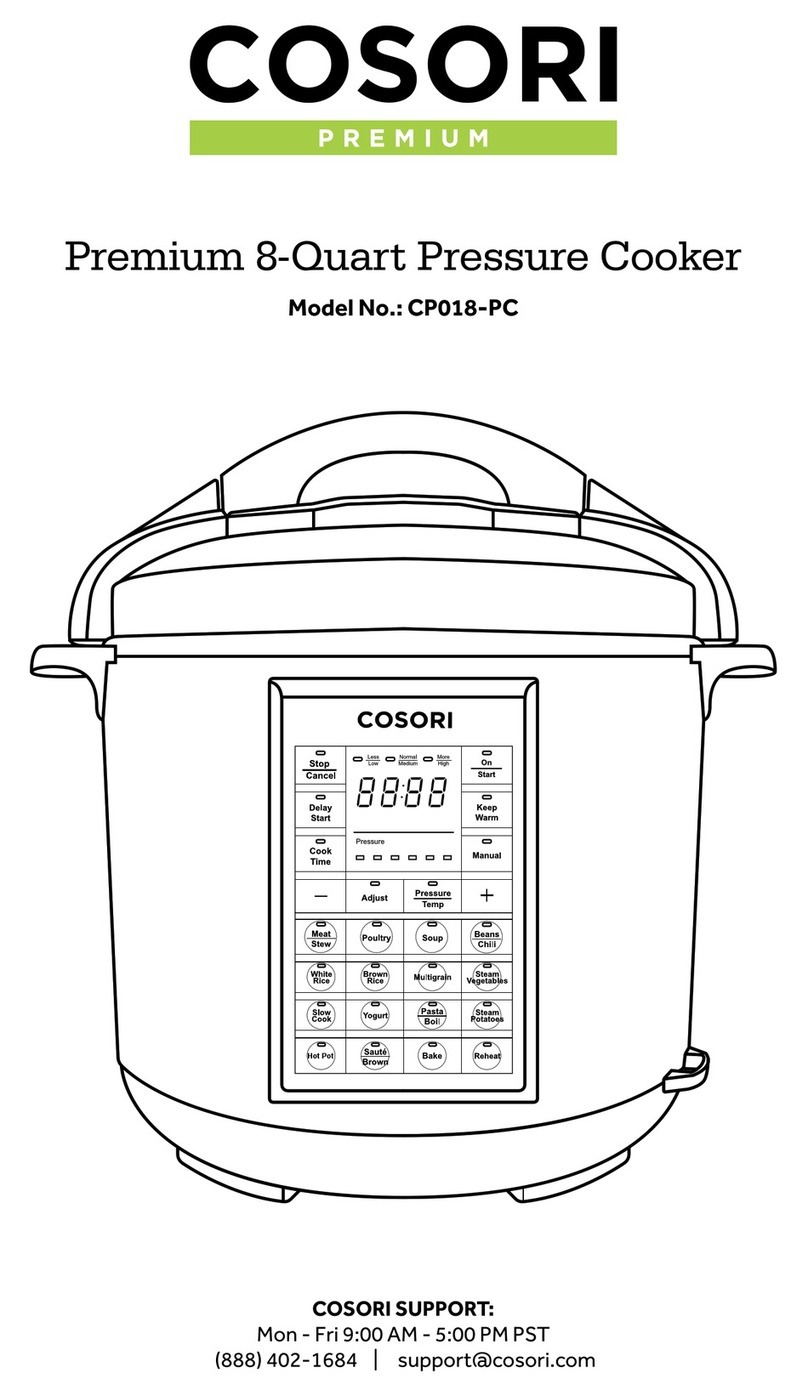
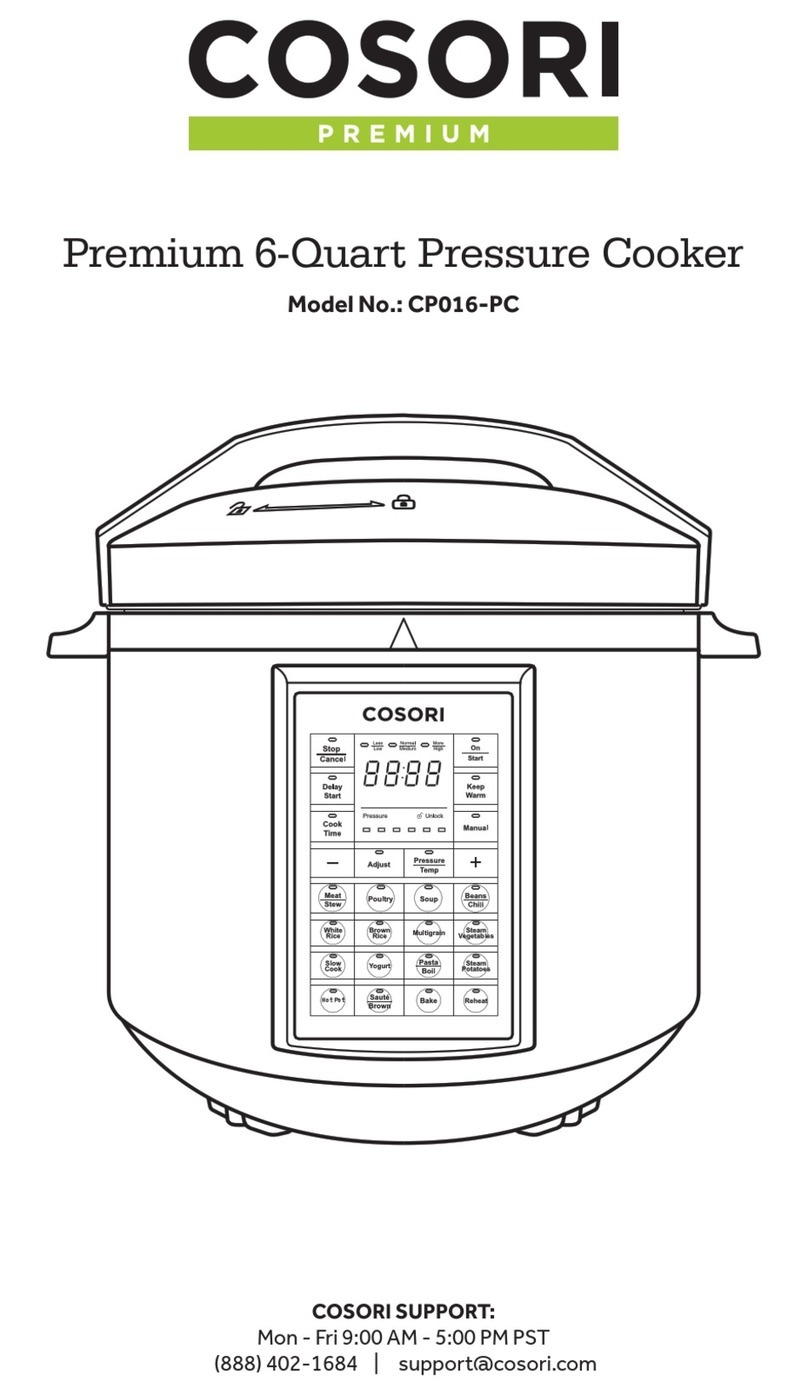
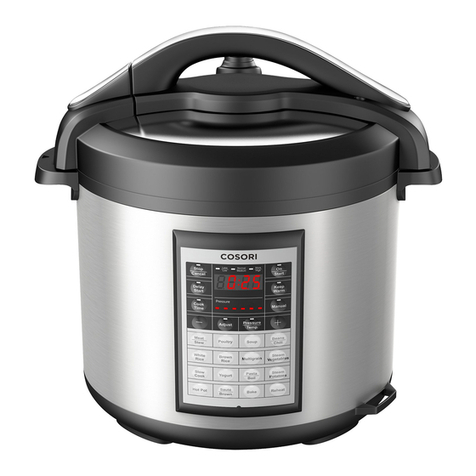
Cosori CP016-PC User manual

Model No.: CP016-PC
Premium 6-Quart Pressure Cooker
Questions or Concerns?
Mon - Fri 9:00 AM - 5:00 PM PT
EN FR ES

2
Table of Contents Table des Matières
Package Contents Contenu du Paquet
Package Contents
Specifications
Important Safeguards
Getting to Know Your Pressure Cooker
·Control Panel
·LCD Display
·Common Display Messages
Before First Use
·Setting Up
·Water Test
Safely Releasing Pressure
Cooking with Your Pressure Cooker
·Preset Pressure Cooking
Programs
·Manual Pressure Cooking
·Non-Pressurized Cooking
Programs
·Other Functions
Care & Maintenance
Troubleshooting
Warranty Information
Customer Support
Contenu du Paquet
Spécifications
Protections Importantes
Apprendre á Connaître Votre
Autocuiseur
·Panneau de Contrôle
·Écran LCD
·Messages d’achage
Communs
Avant la Premiére Utilisation
·Installation
·Test D’eau
Decharge de Pression Sécuritaire
Cuisson Avec Votre Autocuiseur
·Programmes de Cuisson á
Pression Prédéfinie
·Cuisson Sous Pression
Manuelle
·Programmes de Cuisson Non
Pressurisés
·Autres Fonctions
Soin & Maintenance
Dépannge
Information de Garantie
Support Client
2
3
4
5
6
7
7
8
8
9
10
11
11
13
14
17
18
19
21
22
2
3
24
25
26
27
27
28
28
29
30
31
31
33
34
37
38
39
41
42
1 x CP016-PC Premium 6-Quart
Pressure Cooker
1 x Spoon
1 x Ladle
1 x Rice Measuring Cup
1 x Water Collection Cup
1 x Glass Lid
1 x Steamer Rack
1 x Recipe Book
1 x User Manual
1 x CP016-PC Autocuiseur Électrique
de 6-Litre
1 x Cuillère
1 x Louche
1 x Tasse à Mesurer
1 x Couvercle en Verre
1 x Joint d’étanchéité Supplémentaire
1 x Support à Vapeur
1 x Livre de Recettes
1 x Manuel Utilisateur
ENGLISH FRANÇAIS
EN FR

3
Tabla de Contenido
Contenidos del Paquete
Specifications
Spécifications
Especificaciones
Contenidos del Paquete
Especificaciones
Seguridades Importantes
Conocer su Olla a Presión
·Panel de Control
·Pantalla LCD
·Mensajes de Pantalla Común
Antes del Primer Uso
·Configuración
·Prueba de Agua
Presión de Liberación Segura
Cocinar con su Olla a Presión
·Programas Preestablecidos
de Cocción a Presión
·Cocción a Presión Manual
·Cocina No Presurizada
Programas
·Otras Funciones
Cuidado y Mantenimiento
Solución de Problemas
Información de Garantía
Atención al Cliente
3
3
44
45
46
47
47
48
48
49
50
51
51
53
53
57
58
59
61
62
Power Supply AC 120V / 60Hz
Rated Power 1000W
Capacity 6.3 qt (6 L)
Working Pressure 5.8-10 PSI
(40-70 kPa)
Pressurized
Temperature
235°-239°F
(113°-115°C)
Keep Warm
Temperature
140°-176°F
(60°-80°C)
Source de Courant AC 120V / 60Hz
Puissance Nominale 1000W
Capacité 6 L (6.3 qt)
Pression de Travail 40-70 kPa
(5.8-10 PSI)
Pressurisé
Température
113°-115°C
(235°-239°F)
Température de
Garder au Chaud
60°-80°C
(140°-176°F)
Fuente de
Alimentación
AC 120V / 60Hz
Potencia Nominal 1000W
Capacidad 6 L (6.3 qt)
Presión de Trabajo 40-70 kPa
(5.8-10 PSI)
Temperatura
Presurizada
113°-115°C
(235°-239°F)
Temperatura de
Mantener Caliente
60°-80°C
(140°-176°F)
1 x Olla a Presión CP016-PC Premium
de 6-Quarto
1 x Cuchara
1 x Cucharón
1 x Taza Medidora
1 x Copa de recolección de Agua
1 x Tapa de Vidrio
1 x Rejilla Vaporizadora
1 x Libro de Recetas
1 x Manual de Usuario
ESPAÑOL
ES
EN
FR
ES

4
EN
CAUTION!
IMPORTANT SAFEGUARDS
Always follow basic safety precautions when using your pressure cooker.
Read all instructions before using.
• Do not use your cooker outdoors. Not for
commercial use. Use on indoor countertops
only.
• Spilled food can cause serious burns. Your
cooker uses a short cord to avoid being
tangled, tripped over, or grabbed. Keep away
from children. Do not let the power cord hang
over the edge of a table or counter, or touch
hot surfaces. Do not use outlet below counter.
Do not use with an extension cord.
• Do not place your cooker near gas or electric
burners, or in a heated oven.
• Be extremely cautious when moving your
cooker if it contains hot liquids.
• Only use your cooker as directed in this
manual.
• Your cooker has a 3-prong grounding plug,
and should be used with 120V / 60Hz electrical
systems in North America. Always plug in to a
grounded electrical outlet. Do not modify the
plug in any way.
• Do not exceed the maximum fill line.
• Always turn the pressure release valve to
when using pressurized cooking programs.
• Never use your cooker for deep frying or
pressure frying.
• Cooking certain foods with a high starch
content or high liquid content (such as
porridge, soup, and noodles) can create foam
or froth under pressure. This can clog the
pressure release valve, cause steam to sputter,
or cause burns. Only cook these foods as
directed by a Cosori recipe.
Always properly lock and seal the lid before
pressure cooking.
Do not allow children to play with
the cooker. Always closely supervise
children who are near the cooker.
Never place your hands, face, or skin
over the pressure release valve when
cooking or releasing pressure.
Do not force the lid open. Only
open the lid after all pressure has
been released and the float valve has
dropped back down into the lid.
Only use the handles to move the
cooker. Do not touch hot surfaces.
Never move the cooker while it is
operating.
SAVE THESE
INSTRUCTIONS
Key Safety Points
• Do not immerse your cooker or its plug in
water or liquid.
• Unplug when not in use, and before cleaning.
Allow to cool before putting on or taking o
parts.
• Do not use your cooker if it is damaged or
not working correctly (or if the cord or plug is
damaged). Contact Customer Support (page
22).
• Only cook inside the included inner pot. Do
not use third-party parts or accessories, as this
may cause injuries.
EN
English • Premium 6 Quart Pressure Cooker CP016-PC
5
EN
GETTING TO KNOW YOUR PRESSURE COOKER
1. Lid Handle
2. Lid
3. Inner Pot
4. Handles
5. Housing
6. LCD Display
7. Control Panel
8. Sealing Ring
9. Anti-clog Filter
10. Float Valve Sealing Ring
11. Heating Plate
12. Inner Pot Sensor
13. Pressure Release Valve
14. Float Valve
15. Safety Pin
16. Water Collection Cup
17. Power Cord
FRONT
Inside of lid
Inside of cooker
BACK
2
1
3
5
6
7
4
17
15
14
8
10
11
12
9
16
13

6
EN
CONTROL PANEL
Stop
Delay
Start
Cook
Time
Adjust
Poultry Soup Beans
Chili
Pressure
Manual
Keep
Warm
On
Start
Temp
Cancel
P
ressure
U
n
l
oc
k
Mo
r
e
Hi
g
h
No
rm
al
M
ed
i
u
m
Less
Lo
w
Pasta
Boil
Sauté
Brown
Meat
Stew
White
Rice Brown
Rice Multigrain Steam
Vegetables
Slow
Cook Yogurt Steam
Potatoes
Bake
Hot Pot Reheat
Cancel any
cooking program
Start cooking
Change start time
of cooking program
(page 17)
Keep Warm Mode
Change
cooking time
Manual pressure
cooking (page 13)
Select preset
cook time & pressure
level/temperature
Change pressure or
temperature
Decrease value Increase value
Preset cooking
programs
NOTE:
Manually changing the cooking time for the pressure cooking functions
will turn o the
Adjust
Function.

7
EN
LCD DISPLAY
Pressure Unlock
More
High
Normal
Medium
Less
Low
Adjust indicator
Time display
Pressure indicator
(see chart below) Flashes red when lid is
not properly secured to
the housing
Pressure cooker is on
standby.
Display time for non-
pressurized cooking
functions. Time and
temperature switch every
2 seconds.
Yogurt program selected.
Pasteurization program
selected.
Fermentation (Jiu Niang)
program selected.
Cooking program has
been cancelled.
Pressure cooker is
heating up.
Lid is not closed properly.
The pressure cooker will
beep until lid is properly
secured to the housing.
Display time for
pressurized cooking
programs.
Common Display Messages
Number of
indicator bars Pressure Temperature
15.8 psi / 40 kPa 109°C / 228°F
26.5 psi / 45 kPa 110°C / 230°F
37.3 psi / 50 kPa 111°C / 232°F
48.0 psi / 55 kPa 112°C / 234°F
58.7 psi / 60 kPa 113°C / 235°F
69.4-10.2 psi / 65-70 kPa 114°C-115°C / 237°F-239°F

8
EN
BEFORE FIRST USE
Setting Up
1. Remove the pressure cooker from
the packaging. Read all labels on the
pressure cooker.
2. Open the lid by turning the handle
counterclockwise so that the
symbol aligns with at the top of the
control panel. Lift the handle to remove
the lid. [Figure 1.1]
3. Make sure the pressure release valve is
on the lid. The valve is meant to have a
loose fit and will not lock in place.
4. Check the inside of the lid to make sure
the sealing ring is snugly fit inside the
sealing ring rack.
5. Remove the inner pot from the
pressure cooker housing, then take
out all accessories from the inner pot.
Remove the plastic packaging and
check for the following items:
• Rice Spoon
• Ladle
• Rice Measuring Cup
• Water Collection Cup
• Steamer Rack
6. Install the U-shaped water collection
cup onto the back of the pressure
cooker housing. Align the rim of the
collection cup with the built-in guides,
then push the cup into place.
[Figure 1.2]
NOTE: The water collection cup catches
condensation or liquid released from the pot.
7. Wash the inner pot, lid, and included
accessories with warm, soapy water
and dry thoroughly.
Figure 1.1
Figure 1.2

9
EN
Water Test
The water test will help you learn how to
operate the pressure cooker and check if it
is working properly.
1. To remove the lid, grip the lid handle
and turn it counterclockwise so that
the symbol aligns with at the top
of the control panel. Lift the handle.
[Figure 2.1]
2. Place the cleaned inner pot into the
housing, then pour in 4 cups of water.
3. Replace the lid back onto the housing.
Secure it by turning the lid clockwise
so that the symbol aligns with the
symbol. [Figure 2.2]
4. Turn the pressure release valve to .
[Figure 2.3]
5. Press Steam Vegetables, then press
Cook Time. Use the –button to
change the time to 3 minutes.
6. Press On/Start. The display will show
“ “ to indicate that the unit is
pressurizing. It is normal for some
steam to come out from either valve
until the red float valve pops up. Once
your pressure cooker has pressurized,
it will beep once and the display will
begin to count down.
Figure 2.1
Figure 2.2
Figure 2.3

10
EN
There are 2 ways to release the pressure
inside the pot after cooking has finished.
Natural Release
1. Let the pressure cooker rest until the
float valve drops down. This will take
10-40 minutes, or longer depending on
how much food was cooked.
2. Once the float valve has gone down,
open the lid. [Figure 3.1]
CAUTION!
• DO NOT lean over the pressure
cooker or place exposed skin over
the pressure release valve when
releasing the pressure inside the
pot.
• DO NOT open the lid until the
pressure inside the pot has been
completely released. For your
safety, the lid will remain locked
until the float valve drops down.
• NEVER force the float valve down
while it is still up.
NOTE:
Always use the natural release method for
foods that have a large liquid volume or a high starch
content (such as soups, porridge, or fruit jams).
Using the quick release method with these foods
may result in dangerous food splatter.
Quick Release
1. Keep your fingers away from the vent on
the pressure release valve. Carefully turn
the pressure release valve to . Steam
being released will be
hot
. [Figure 3.2]
2. Wait for the float valve to drop down.
Then open the lid. [Figure 3.1]
SAFELY RELEASING PRESSURE
Figure 3.1
Figure 3.2
UP DOWN

11
EN
NOTE:
• Wash the inner pot before each use.
• When cooking, always fill the inner pot up to
the “2” line under “RICE CUP”. [Figure 4.1]
• DO NOT fill the inner pot above the “MAX”
line. If ingredients expand easily in water
(such as dry rice or pasta), do not fill above
the “10” line under “RICE CUP”. [Figure 4.1]
Rice Cup
• The “RICE CUP” guidelines inside the inner
pot are intended for the included rice cup.
When you fill the rice measuring cup twice
with rice and twice with water, this will reach
the “2” line under “RICE CUP”.
• The rice measuring cup holds 160 mL,
which is smaller than the standard US cup (1
rice cup = about 1 adult serving). The “RICE
CUP” guidelines should be used only with
the rice measuring cup, not for standard
measurements.
1. Place the inner pot into the housing.
2. Place ingredients into the inner pot.
3. Make sure the water collection cup,
sealing ring, and pressure release valve
are all properly placed.
4. Replace the lid onto the pressure
cooker and secure it. Turn the pressure
release valve to .
5. Plug in the pressure cooker. Select a
preset pressure cooking program.
COOKING WITH YOUR PRESSURE COOKER
Preset Pressure Cooking Programs
The preset pressure cooking programs are
Meat/Stew, Poultry, Soup, Beans/Chili,
White Rice, Brown Rice, Multigrain, Steam
Vegetables, Steam Potatoes, and Bake.
Figure 4.1
6. (
Optional
) Press Cook Time and
use the +or –buttons to change
the cook time. You can also press
Pressure/Temp and use the +or –
buttons to change the pressure level.
7. Press On/Start to begin cooking. The
display will show “ “, indicating
that the pressure cooker is heating up.
(Preheating will take 5-30 minutes, or
longer depending on how much food
is in the inner pot.)
8. The pressure cooker will beep 1 time
when it finishes preheating. The
cooking program will start, and the
display will begin to count down.
9. The pressure cooker will alert you with
3 beeps when cooking has finished
and will automatically set itself to the
Keep Warm Mode for 6 hours.
10
12
8
6
4
2
3L
4L
2L
1L
0.5L
MAX RICE
CUP

12
EN
Preset Pressure Programs Times
Program Adjust
Setting What You Can Make Cooking Time
Meat/Stew
Less Stewed meat 25 minutes
Normal Tender, juicy meats 30 minutes
More So tender it falls o the bone 45 minutes
Poultry
Less Chicken wings or drumettes 8 minutes
Normal Tender breasts, thighs, and drumsticks 15 minutes
More A whole chicken 25 minutes
Soup
Less Clear, refreshing broth 15 minutes
Normal Vegetable soups 25 minutes
More Hearty soups with meat 35 minutes
Beans/Chili
Less Soaked beans with a bit of a crunch 5 minutes
Normal Soaked beans, slightly firm 11 minutes
More Soft beans (also perfect for cooking
unsoaked beans) 30 minutes
White Rice
Less Jasmine rice 3 minutes
Normal Basmati and white rice 6 minutes
More Soft, fluy rice 8 minutes
Brown Rice
Less Firm brown rice 13 minutes
Normal Perfectly cooked brown rice 15 minutes
More Soft, thoroughly cooked brown rice 20 minutes
Multigrain
Less Great for quinoa 6 minutes
Normal Steel-cut oats 10 minutes
More Steamed dumplings 20 minutes
Bake
Less Fluy and moist cakes 20 minutes
Normal Fudgy brownies 25 minutes
More Thick cheesecakes 30 minutes
Steam
Vegetables
Less Broccoli and cauliflower 2 minutes
Normal Large whole carrots 7 minutes
More Beets, gourds, and pumpkins 12 minutes
Steam Potatoes
Less Cubed potatoes 10 minutes
Normal 2-3 whole potatoes 25 minutes
More Potatoes ready to be mashed 30 minutes

13
EN
Manual Pressure Cooking
Method 1: Pressure
NOTE:
The default setting for the Manual Pressure
Mode is 30 minutes at pressure level 4.
1. Place the inner pot into the housing,
then put your ingredients into the
inner pot. Replace the lid and lock it
onto the housing.
2. Plug in the pressure cooker.
3. Press Manual once to select the
Manual Pressure Mode. The pressure
level indicator will light up to indicate
that the pressure cooker is set to
Manual Pressure Mode.
4. Press Pressure/Temp and use the
+or –buttons to adjust the pressure
level.
5. Press Cook Time, then use the +or –
buttons to select your cooking time.
6. Press On/Start. The display will show
“ “ to indicate that the pressure
cooker is heating up.
7. The pressure cooker will beep 1 time
when it reaches optimal cooking
pressure. The display will begin to
count down.
8. The pressure cooker will alert you with
3 beeps when cooking has finished,
and it will automatically set itself to the
Keep Warm Mode for 6 hours.
NOTE: Low Pressure is 1-3 bars on the pressure
indicator. High Pressure is 4-6 bars (See page 7).
Method 2: Temperature
NOTE:
The default setting for Manual
Temperature Mode is 30 minutes at 100°C (212°F).
1. Place the inner pot into the housing,
then put your ingredients into the
inner pot. Replace the lid and lock it
onto the housing.
2. Plug in the pressure cooker.
3. Press Manual twice to set the pressure
cooker to Manual Temperature Mode.
The display will alternate between
“00:30” and “212°F” to indicate that
the pressure cooker is in Manual
Temperature Mode.
4. Press Pressure/Temp and use the +
button to set the temperature to 220°F,
which is the minimum temperature
needed for the unit to pressurize.
5. Press Cook Time, then use the +or –
buttons to select your cooking time.
NOTE: When the programmed temperature
exceeds 248°F (120°C), the maximum time that
can be set is 30 minutes.
6. Press On/Start to begin cooking. The
display will show “ “ to indicate
that the unit is heating up.
7. The pressure cooker will beep 5 times
when it has reached the programmed
temperature. Carefully add your food
into the inner pot. The display will
begin to count down.
8. The pressure cooker will alert you with
3 beeps when cooking has finished,
and it will automatically set itself to the
Keep Warm Mode for 6 hours.
There are 2 methods for using the manual function: pressure and temperature.

14
EN
Non-Pressurized Cooking Programs
The following cooking programs DO NOT use pressure to cook your food:
Slow Cook,Hot Pot, Sauté/Brown, Reheat, Pasta/Boil, and Yogurt.
Slow Cook, Hot Pot,
Sauté/Brown, and Reheat
1. Place the inner pot into the housing,
then put your ingredients into the
inner pot.
2. Plug in the pressure cooker and select
Slow Cook, Hot Pot, Sauté/Brown, or
Reheat.
3. Press Adjust to select a pre-
programmed cooking time and
temperature.
Optional:
• Press Cook Time, and the +or –buttons to
customize your cooking time.
• Press Pressure/Temp, then use the +or –
buttons to manually change the temperature.
Program Adjust Setting Default Time Default Temperature
Slow Cook
Less/Low 8 hours 89°C (193°F)
Normal/Medium 6 hours 93°C (200°F)
More/High 4 hours 95°C (204°F)
Hot Pot
Less/Low
2 hours
38°C (100°F)
Normal/Medium 54°C (130°F)
More/High 120°C (248°F)
Sauté/Brown
Less/Low
20 minutes
130°C (266°F)
Normal/Medium 140°C (284°F)
More/High 150°C (302°F)
Reheat
Less/Low
10 minutes
74°C (165°F)
Normal/Medium 100°C (212°F)
More/High 120°C (248°F)
4. Press On/Start to start cooking. The
pressure cooker will beep 5 times
when it reaches the programmed
temperature.
NOTE: The pressure cooker will not beep 5 times
when using Slow Cook. Instead, it will start
heating up immediately after pressing On/Start.
5. The pressure cooker will alert you with
3 beeps when cooking has finished.

15
EN
Pasta/Boil
The default temperature is 212°F (100°C) and
cannot be changed.
1. Place the inner pot into the housing,
then pour the desired amount of liquid
into the inner pot.
2. Press Pasta/Boil.
3. (
Optional
) Press Adjust to change the
power level.
NOTE: The pressure cooker will always heat
up liquids using High Power, and will maintain
boiling temperature using the setting that you have
chosen.
Yogurt
i. Heating the Milk
1. Place the inner pot into the
housing, and pour the desired
amount of milk into the inner pot.
2. Press Yogurt.
3. Use the Adjust button to select
“More/High”. The display will
show “ “ to indicate that the
pressure cooker is ready to heat up
the milk.
4. Press On/Start. The pressure
cooker will start heating up, and the
display will show “ “. When
the pressure cooker is finished
heating, the display will show
“00:10”.
Program Adjust Setting Default Time Default Power Mode
Pasta/Boil
Less/Low
30 minutes
Low
Normal/Medium Medium
More/High High
4. (
Optional
) Set up your cooking time
using Cook Time and the +or –
buttons (the default cooking time is 30
minutes).
5. Press On/Start. The pressure cooker
will beep 5 times once it reaches
boiling temperature.
6. The pressure cooker will alert you with
3 beeps when cooking has finished.
Carefully take your ingredients out of
the pot.
5. The pressure cooker will beep
when the process is complete and
will go into standby mode. Allow
the pressure to naturally release
before opening the lid.
6. Allow the milk to cool. Use
a thermometer to check the
temperature of the milk as it
cools. The milk is ready when the
temperature is below 115°F (46°C).

16
EN
ii. Yogurt Incubation
1. Add in yogurt starter or fresh
yogurt.
2. Press Yogurt. The display will show
“ ” to indicate that the yogurt
setting has been selected. You can
press Cook Time, and use the
+or – buttons to select a cooking
time.
3. Press On/Start when you are ready.
The display will show the cooking
time, indicating that the Yogurt
Mode has started.
4. When the Yogurt Mode is complete,
the pressure cooker will alert you
with 3 beeps and go into standby.
Program Adjust Setting Default Time Default Mode
Yogurt
Less/Low 24 hours Fermentation /
Jiu Niang
Normal/Medium 8 hours Incubation
More/High 10 minutes Boil
iii. Serve your yogurt right out of the
pressure cooker, or store in the
refrigerator in smaller containers to eat
later.
Fermentation (Jiu Niang)
Your new pressure cooker can hold foods at
very low heat to ferment them.
1. Thoroughly clean all utensils that you
will be using with warm, soapy water.
Dry with a clean cloth.
2. Place the inner pot into the housing.
3. Place your ingredients into the inner
pot, making sure your liquid covers
your solid ingredients.
4. Replace and secure the lid onto the
housing.
5. Press Yogurt, then press Adjust twice
to select the Fermentation Mode. The
screen will display “ ”.
NOTE: The default time for the Fermentation
Mode is 24 hours. You can press Cook Time, and
use the +or –buttons to select a cooking time.
6. Press On/Start when you are ready
to cook. The screen will immediately
display the programmed cook time.
7. When the Fermentation Mode is
complete, the pressure cooker will alert
you with 3 beeps and go into standby.
Yogurt (cont.)

17
EN
Other Functions
Delay Start
This function will not work with Yogurt,
Pasta/Boil, Hot Pot, Sauté/Brown, Reheat,
and Manual modes.
1. Plug in the pressure cooker and place
the inner pot into the housing.
2. Select a cooking program.
3. Press Delay Start and use the +or –to
set a start time.
4. Place your ingredients into the inner
pot and properly secure the lid onto the
housing.
5. Press On/Start. The display will show
the programmed time and will begin to
count down. Once the countdown has
finished, the pressure cooker will start
the selected cooking program.
Changing Temperature Units
The default temperature unit for the
pressure cooker is in Fahrenheit (“F”), but
can be switched to Celsius (“C”). If desired,
follow the steps below to switch to Celsius.
1. While the pressure cooker is on
standby (“ ”), simultaneously
press the +and – buttons.
2. The display will show “C”, indicating
that the temperature unit has been
switched to Celsius.
3. To switch back to Fahrenheit,
simultaneously press the +and –
buttons again.
Keep Warm
DO NOT cook raw foods using this
function.
1. Plug in the pressure cooker and place
the inner pot into the housing.
2. Place prepared food into the inner pot.
3. Press Keep Warm, then use the +or –
buttons to change the time.
4. Press On/Start. The display will show
the programmed time and will begin to
count down. Once the countdown has
finished, the pressure cooker will go
into standby mode.
NOTE: Your pressure cooker will automatically
switch to this mode when cooking has finished.
This function does not work with Pasta/Boil,
Yogurt, and Hot Pot.

18
EN
CARE & MAINTENANCE
1. Unplug the pressure cooker and allow
it to completely cool before cleaning.
2. Remove the water collection cup and
rinse it out with clean water. Wipe it dry
with a clean cloth, then place it back
onto the side of the pressure cooker.
3. Remove the lid from the housing. Take
the sealing ring out by gently pulling it
while holding the lid down.
4. The inner pot, sealing ring, and
steamer rack are easy to clean and
dishwasher safe. The rice spoon, ladle,
and rice cup can be washed on the top
rack of the dishwasher.
5. Wash the lid in warm soapy water.
Make sure to remove any food debris
from the sealing ring rack and anti-
clog filter.
6. If necessary, the parts inside the lid can
be removed for cleaning. These parts
are small and easy to lose, so be careful.
a. Remove the anti-clog filter by
gripping it from either side,
then pulling it up. [Figure 5.1]
Rinse and dry the anti-clog filter
and replace it inside the lid.
b. Remove the float valve sealing
ring, and the float valve from
the lid. [Figure 5.2] Rinse both
parts with clean water, and
secure the float valve back onto
the lid using the float valve
sealing ring.
7. Wipe the inside and outside of the
base with a clean, damp cloth. Do not
immerse the base in water or spray
water inside the housing. [Figure 5.3]
Figure 5.1
Figure 5.2
Figure 5.3
Inside of lid
Inside of lid

19
EN
TROUBLESHOOTING
Problem Cause Solution
Trouble closing the lid. Sealing ring is not placed
correctly.
Press the sealing ring firmly into place in
the sealing ring rack.
Lid is not properly placed onto the
housing.
Align the mark on the lid with
above the control panel. Turn the lid
clockwise to secure it onto the housing.
Trouble opening the lid. Pot is still under pressure. Set the pressure release valve to the
position to let out any remaining
pressure.
Float valve has not dropped back
down into the lid.
Allow the pressure cooker to completely
cool down. If the float valve remains up
after the cooker has completely cooled,
contact Customer Support (page 22).
Display is blank after
connecting the pressure
cooker to an outlet.
There is a bad power connection
or no power from the outlet.
Inspect the power cord to ensure it has
a good connection. Check if the outlet is
still active.
Pressure cooker has a blown fuse. Immediately stop using the pressure
cooker. Contact Customer Support (page
22).
Steam is leaking from
the lid.
Ingredients are stuck to the
sealing ring.
Clean the sealing ring.
Sealing ring is broken. Replace the sealing ring. If necessary,
purchase a new sealing ring from
Amazon.com (search for “Cosori 6qt
Sealing Ring”).
Steam leaking from float
valve.
Ingredients are stuck to the
anti-clog filter.
Remove and clean the anti-clog filter.
Float valve sealing ring is broken. Contact Customer Support (page 22) to
replace the float valve sealing ring.
Float valve does not rise
up.
There are not enough ingredients
and liquids in the inner pot.
Ingredients and liquids need to be at or
above the “2 RICE CUP” line in the inner
pot.
Steam comes out from
pressure release valve
non-stop.
Pressure release valve is set to . Turn pressure release valve to .
There are not enough ingredients
and liquids in the inner pot.
Ingredients and liquids need to be at or
above the “2 RICE CUP” line in the inner
pot.
Too much pressure has built up
inside the cooker.
Wear oven mitts or use hot pads to briefly
open the pressure release valve. Keep
fingers, face, or exposed skin away from
the vent. Steam released will be
hot
.

20
EN
Problem Cause Solution
Steam comes out from
pressure release valve
non-stop. (cont.)
Pressure control has failed. If the previous 2 steps do not work,
immediately stop using the pressure
cooker and turn it o. Contact Customer
Support (page 22).
Rice is half-cooked, too
hard, or burned.
There is not enough water added. Add more water according to your
recipe.
Pressure cooker was opened too
soon after cooking has finished.
After cooking has finished, leave the lid
on for 5-10 minutes.
Rice is too soft. Too much water was added before
cooking.
Adjust the amount of dry rice and water
according to your recipe.
Burning smell is coming
from the pressure cooker
while it is operating.
There is food debris on the
heating element or on the bottom
of the inner pot.
Turn o the pressure cooker, allow it to
cool down, and clean the heating plate or
bottom of the pot.
There is water on the heating
element or on the bottom of the
pot.
Thoroughly dry the exterior of the inner
pot before each use.
Display shows Error Code
“E1”.
Broken circuit in the pressure
sensor.
Immediately stop using the pressure
cooker. Contact Customer Support (page
22).
Display shows Error Code
“E2”.
Short circuit in the pressure
sensor.
Immediately stop using the pressure
cooker. Contact Customer Support (page
22).
Display shows Error Code
“E3”.
Pressure cooker is overheating
because the inner pot has not
been placed properly, or has not
been placed inside the housing.
Properly place the inner pot into the
housing.
Pressure cooker is overheating
because there is not food or liquid
inside the inner pot.
Stop the pressure cooker and add more
ingredients and liquid. Ingredients and
liquid need to be at or above the “2 RICE
CUP” line.
Display shows Error Code
“E4”.
Broken signal switch. Immediately stop using the pressure
cooker. Contact Customer Support (page
22).
TROUBLESHOOTING (CONT.)
Other manuals for CP016-PC
4
Table of contents
Languages:
Other Cosori Electric Pressure Cooker manuals

Cosori
Cosori C1156-PC User manual

Cosori
Cosori premium pressure cooker User manual

Cosori
Cosori CMC-CO601-SUS User manual

Cosori
Cosori CP016-PC User manual
Cosori
Cosori PREMIUM CP018-PC User manual

Cosori
Cosori CP016-PC User manual
Cosori
Cosori C2126-PC User manual

Cosori
Cosori C2126-PC User manual

Cosori
Cosori C2126-PC User manual

Cosori
Cosori CP016-PC User manual