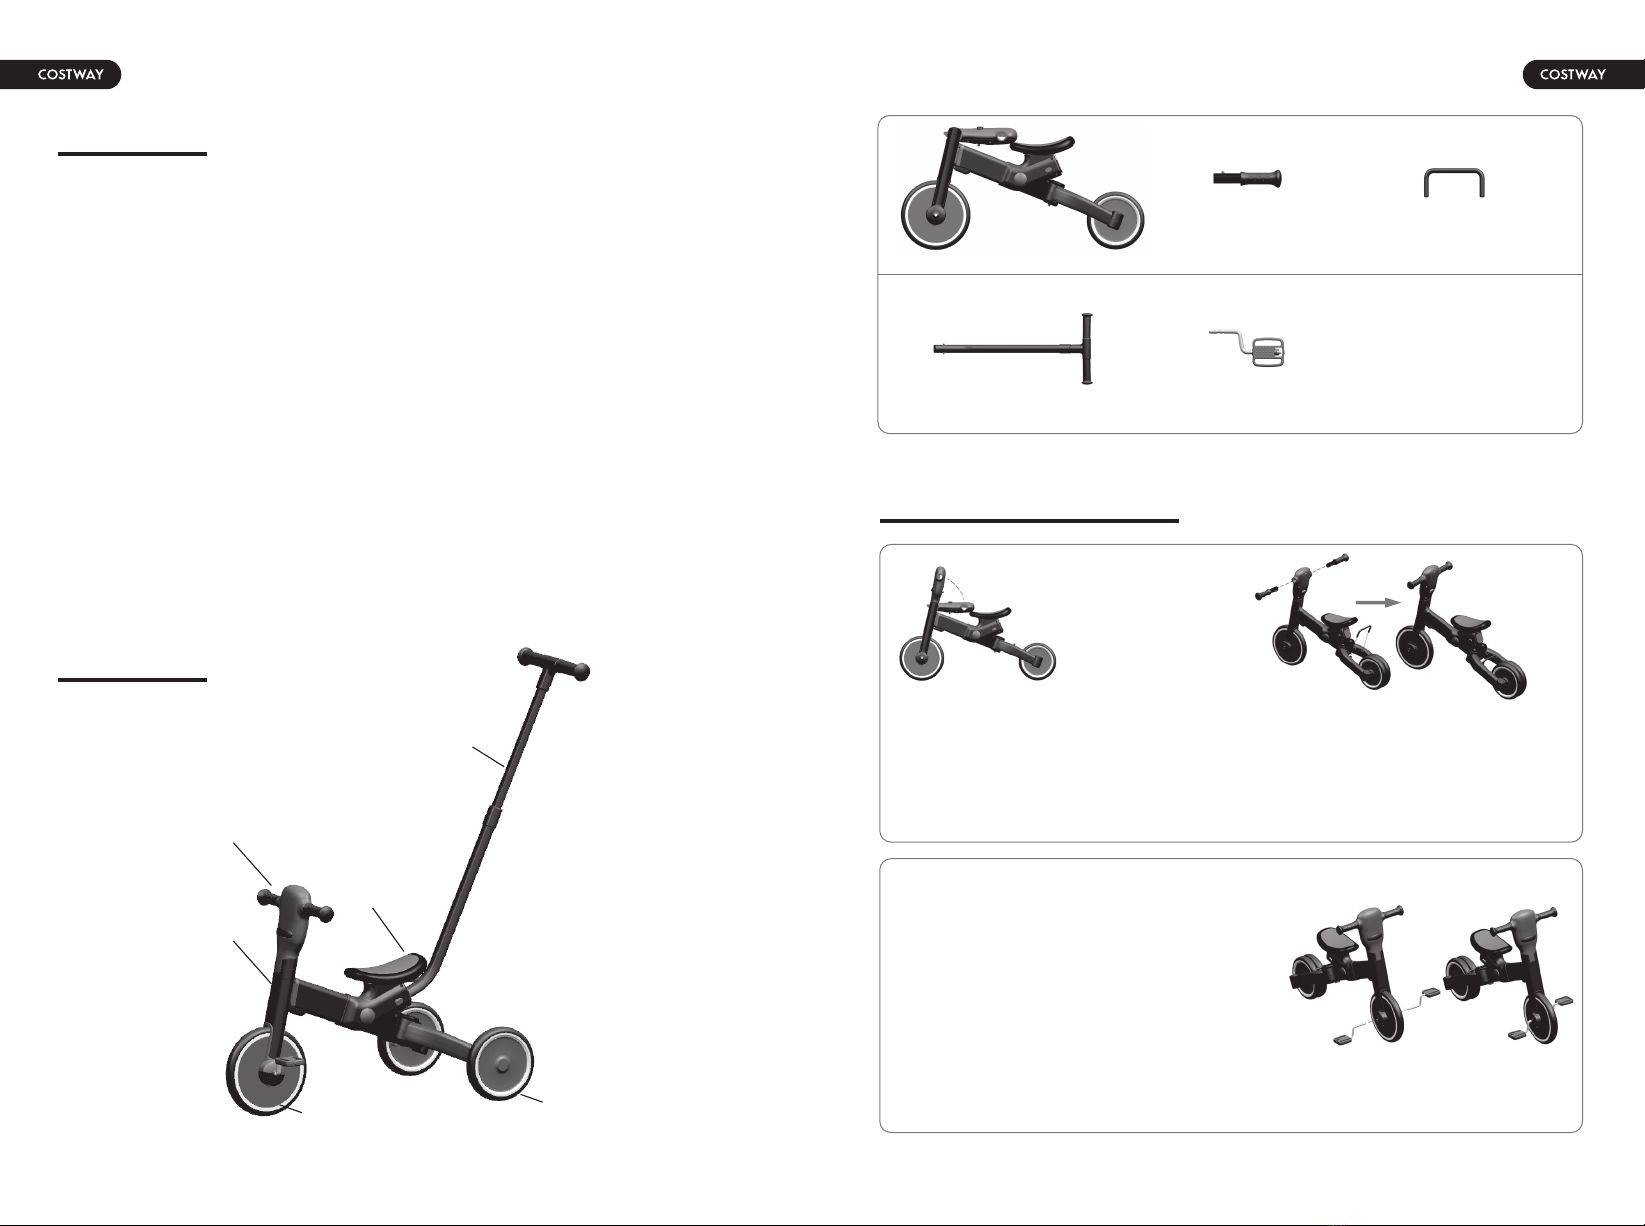
Warnung
Sekundäre Schubstange
Sitz
Hinterrad
Vorderrad
Lenker
Trike-Rahmen
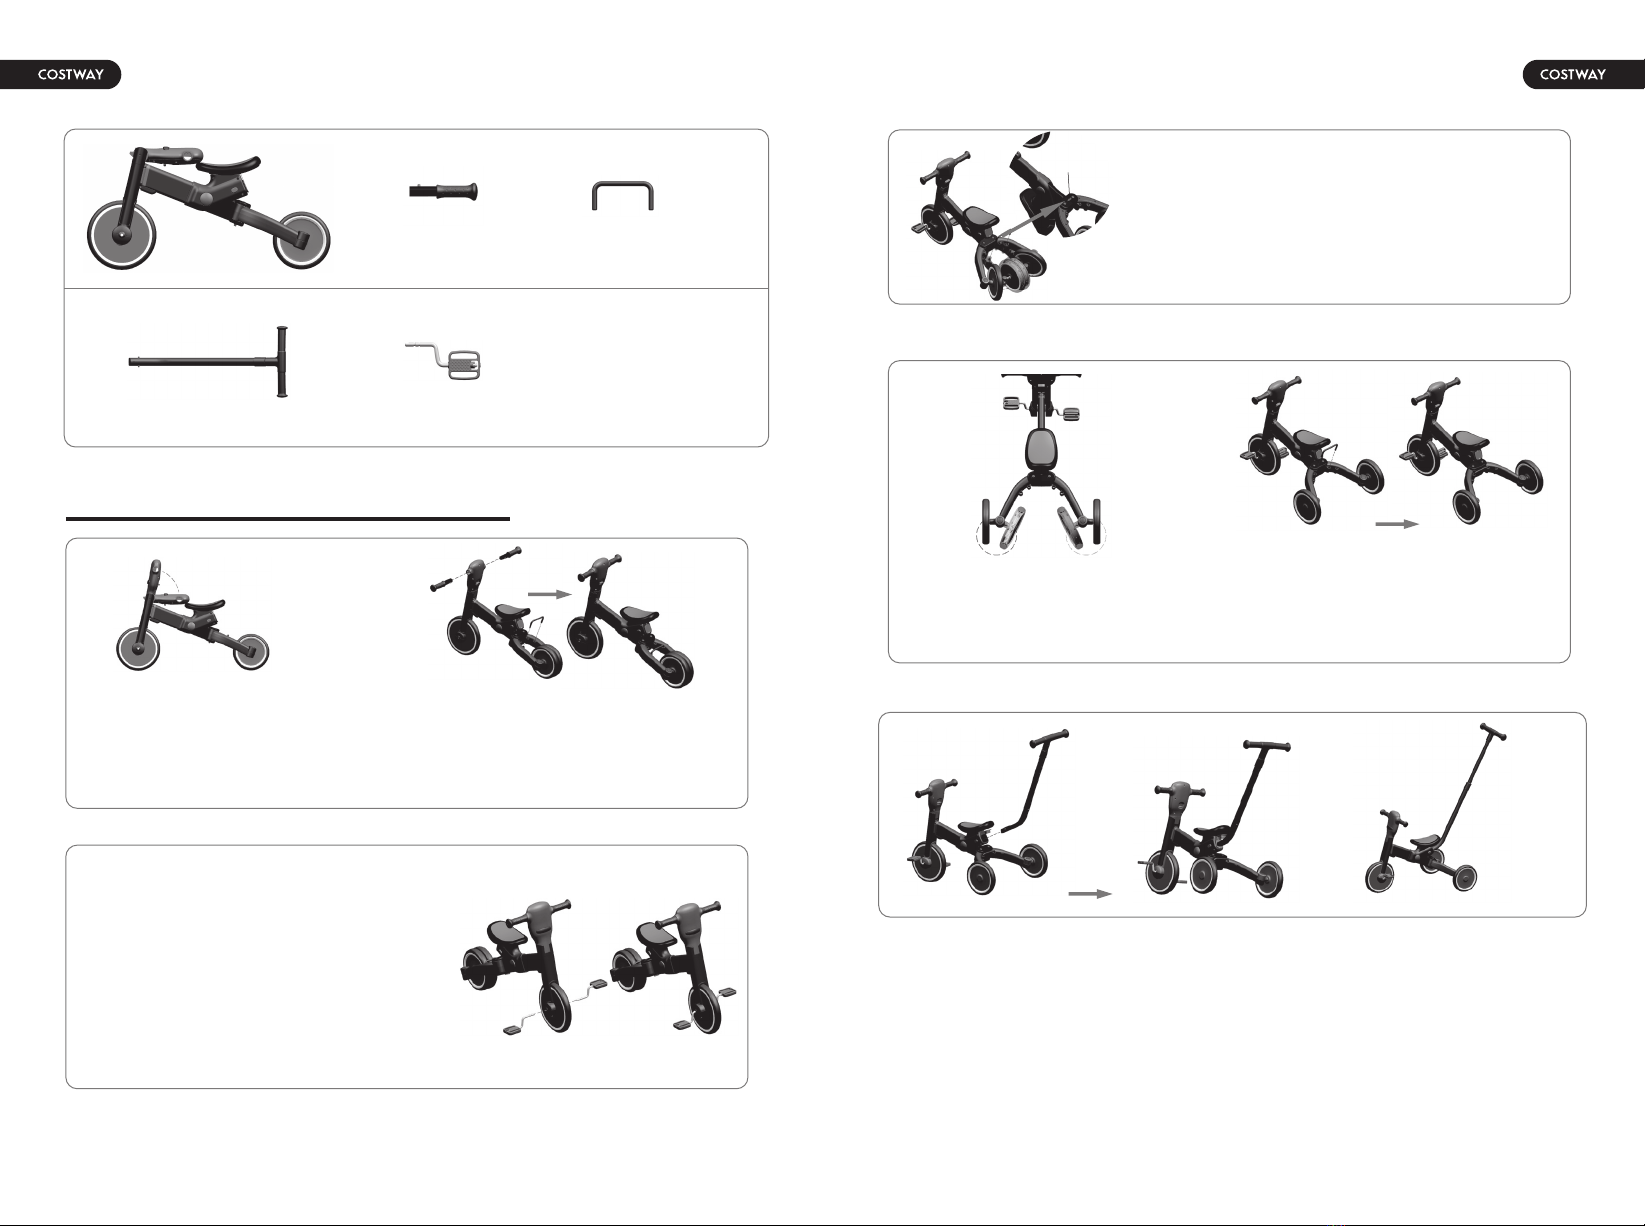
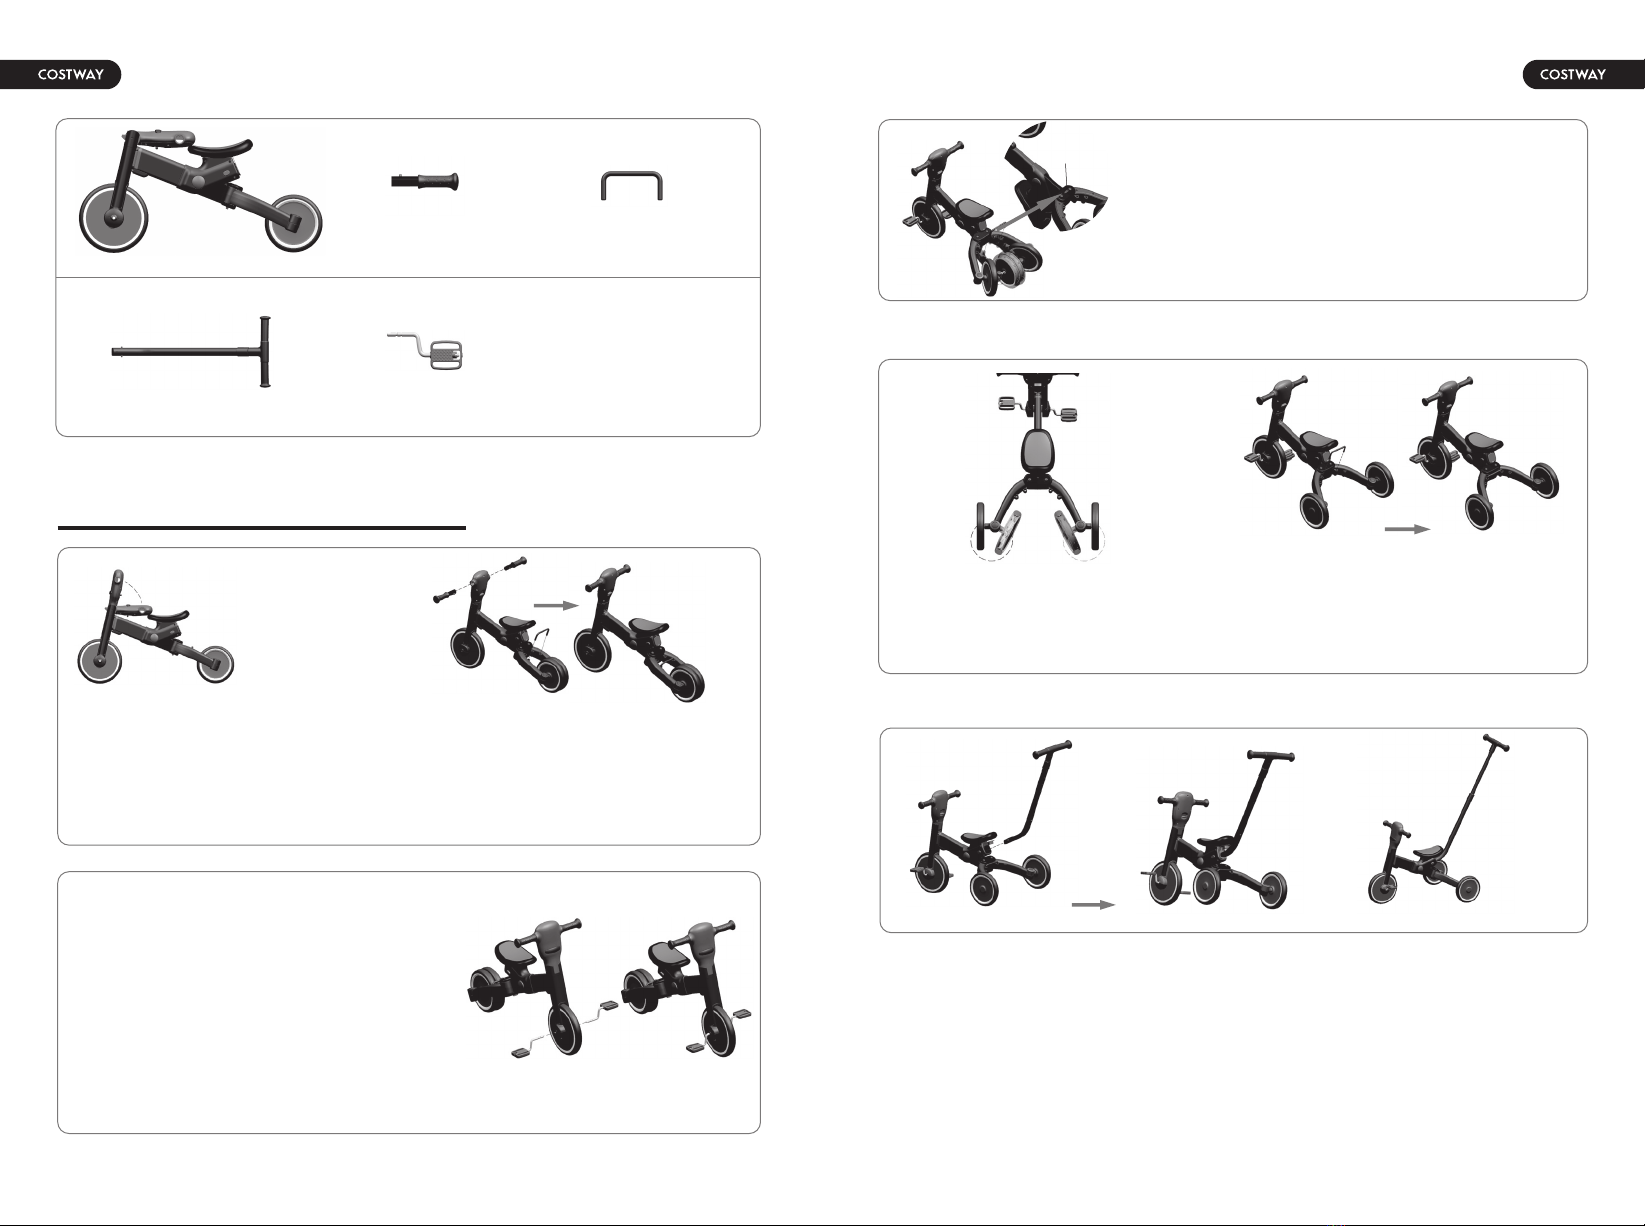
Sekundäre
Schubstange x1
Trike-Rahmen x1
Lenker x2 Hinteres Bein
feste Stange x1
Fuß Pedal x2
Montageanleitung
Teileliste
Abbildung 1 Abbildung 2
Abbildung 3
1. Ziehen Sie, wie in Abbildung 1
dargestellt, den Kopf der
Laufräder nach oben, bis er
eingerastet ist.
2. Stecken Sie, wie in Abbildung 2
gezeigt, die Lenkstange in das linke und
rechte Loch des Kopfes. Stecken Sie die
Beinbefestigungsstange in das Loch, wie
in der Abbildung gezeigt. Dies kann als
Gleichgewichtsfahrrad verwendet werden.
3. Fußpedal Montage und Demontage:
Führen Sie das Fußpedal wie in Abbildung 3
gezeigt in das Loch des Vorderrads ein, bis es
eingerastet ist.
Hinweis: Es gibt zwei Positionen für die
Verbindung des Fußpedals mit dem Vorderrad.
Äußere Position: In dieser Position kann das
Kind seine Füße auf das Fußpedal stellen, so
dass die Eltern die Laufräder anschieben
können.
Innere Position: In dieser Position kann das
Fußpedal das Vorderrad antreiben, so dass das
Kind fahren kann.
1. Wir bitten Sie dringend, vor der Montage oder Inbetriebnahme dieses
Artikels alle Anweisungen sorgfältig zu lesen. Bewahren Sie diese Anleitung
zum späteren Nachschlagen auf.
2. Die Montage durch einen Erwachsenen ist erforderlich.
3. Halten Sie sich von der Straße, dem Weg für Kraftfahrzeuge und dem
Bereich in der Nähe von Flüssen, Schwimmbädern oder Hängen fern. Nicht in
der Nähe des Feuers aufstellen.
4. Tragfähigkeit: 25KG, Geeignetes Alter: 18-72 Monate, nicht überlasten für
die Sicherheit.
5. Muss Ihr Kind lehren, wie man vor der ersten Fahrt zu verwenden.
6. Vor dem Fahren, Kind sollte Schutzausrüstung tragen, und Erwachsene
sollten sorgfältig prüfen, ob der Artikel beschädigt ist.
7. Bitte behalten Sie Ihr Kind im Auge und bitten Sie es, sich während des
Fahrens von anderen Kindern fernzuhalten.
8. Nehmen Sie die Kleinteile nicht in den Mund und legen Sie die Verpackung
weg, um ein Ersticken während der Fahrt zu vermeiden.
9. Es kann nur ein Kind transportiert werden.
10. Das Spielzeug sollte mit Vorsicht verwendet werden, da Geschicklichkeit
erforderlich ist, um Stürze oder Zusammenstöße zu vermeiden, die zu
Verletzungen des Benutzers oder Dritter führen.
08 09