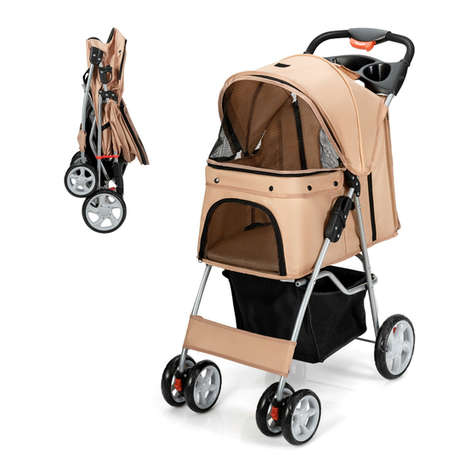
Costway PW10073 User manual

Pet Stroller
Hundebuggy
Poussette pour Animaux de Compagnie
Cochecito para Mascotas
Passeggino per Animali Domestici
Wózek dla zwierząt
If you're having difficulty, our friendly
customer team is always here to help.
AUS:cs.au@costway.com
FRA:cs.fr@costway.com
DEU:cs.de@costway.com
ITA:cs.it@costway.com ESP:cs.es@costway.com
POL:sklep@costway.com
GBR:cs.uk@costway.com
DEU office: FDS GmbH, Neuer Höltigbaum 36, 22143 Hamburg, Deutschland
ITA office: Milano
FRA office: Saint Vigor d'Ymonville
POL office: GdańskGBR office: IpswichAUS office: TruganinaUSA office: Fontana
THIS INSTRUCTION BOOKLET CONTAINS IMPORTANT SAFETY INFORMATION. PLEASE READ AND KEEP FOR FUTURE REFERENCE.
PW10073

Before You Start
Please read all instructions carefully.
Retain instructions for future reference.
Separate and count all parts and hardware.
Read through each step carefully and follow the proper order.
We recommend that, where possible, all items are assembled near to the area in
which they will be placed in use, to avoid moving the product unnecessarily once
assembled.
Always place the product on a flat, steady and stable surface.
Keep all small parts and packaging materials for this product away from babies
and children as they potentially pose a serious choking hazard.
EN
DE
Bitte lesen Sie alle Anweisungen sorgfältig durch.
Bewahren Sie die Anweisungen zum zukünftigen Verwendung auf.
Überprüfen Sie, ob alle Teile und Zubehörteile vorhanden sind.
Lesen Sie jeden Schritt sorgfältig durch und befolgen Sie die richtige Reihenfolge.
Wir empfehlen, alle Teile möglichst in der Nähe des Aufstellungsortes zu
montieren, um unnötige Bewegungen nach der Montage zu vermeiden.
Stellen Sie den Artikel immer auf eine ebene, feste und stabile Fläche.
Halten Sie alle kleinen Teile und Verpackungsmaterialien fern von Babys und
Kindern, ansonsten besteht Erstickungsgefahr.
Vor dem Beginnen
FR
Veuillez lire attentivement toutes les instructions.
Conservez les instructions pour vous y référer ultérieurement.
Vérifiez toutes les pièces et les accessoires.
Lisez attentivement chaque étape et suivez l'ordre correct.
Nous recommandons que, dans la mesure du possible, tous les produits soient
assemblés à proximité de la zone où ils seront utilisés, afin d'éviter tout
déplacement inutile du produit une fois assemblé.
Placez toujours le produit sur une surface plane et stable.
Conservez toutes les petites pièces de ce produit et les matériaux d'emballage
hors de portée des bébés et des enfants, car ils pourraient présenter un risque
d'étouffement.
Lea atentamente todas las instrucciones.
Conserve las instrucciones para futuras consultas.
Separe y cuente todas las piezas y los accesorios.
Lea detenidamente cada paso y siga el orden correcto.
Recomendamos que, siempre que sea posible, todos los elementos se monten
cerca de la zona en la que se van a utilizar, para evitar mover el producto
innecesariamente una vez montado.
Coloque siempre el producto sobre una superficie plana, estable y firme.
Mantenga todas las piezas pequeñas y los materiales de embalaje de este
producto lejos de los bebés y los niños, ya que pueden representar un grave
riesgo de asfixia.
ES
Avant de Commencer
Antes de Empezar
02 03
Si prega di leggere attentamente tutte le istruzioni.
Conservare le istruzioni per riferimento futuro.
Separare e contare tutte le parti e gli accessori.
Leggere attentamente ogni passo e seguire l'ordine corretto.
Si consiglia, ove possibile, di assemblare tutti gli articoli vicino alla zona in cui
verranno posti in uso, per evitare di spostare inutilmente il prodotto una volta
assemblato.
Posizionare sempre il prodotto su una superficie piana, stabile.
Tenere tutte le piccole parti e i materiali di imballaggio di questo prodotto lontano
dalla portata di neonati e bambini, in quanto possono costituire un serio pericolo
di soffocamento.
Zapoznaj się z instrukcją.
Zachowaj instrukcję do wglądu.
Posortuj części i upewnij się, że zestaw jest kompletny.
Zapoznaj się ze sposobem montażu i postępuj zgodnie z instrukcją.
Zalecamy, aby montaż odbywał się możliwie najbliżej miejsca docelowego
położenia produktu, aby uniknąć niepotrzebnego przesuwania.
Upewnij się, że produkt znajdzie się na płaskiej i stabilnej po wierzchni.
Upewnij się, że materiały wykorzystane podczas pakowania produktu oraz jego
elementy znajdują się poza zasięgiem dzieci, gdyż stwarzają potencjalne ryzyko
zadławienia.
IT
PL
Prima di Iniziare
Zanim Zaczniesz
Please read this instruction carefully before use and keep it
properly for future reference. If you do not follow this
instruction, the safety of pets may be affected.
The picture is for reference only,
and the specific object shall prevail.
EN
04 05

Parts
Use of wheels
Unfolding and install pet stroller
Front wheel
stroller frame Rear wheel
Pet carrier
x1 x1 x2 x2
2.Unfolding pet carrier:
Take out the pet carrier, press
the bottom plate with one hand,
and pull the belt on the iron
support with the other hand in
the direction of the arrow 45
degrees until the iron support
on both sides are completely
stuck into the slot.
3.Installing pet carrier:
First put the front seat tube into
the front cloth cover of the
carrier as the direction of the
arrow, and fix the rear end of
the carrier on the back seat
tube with hook and loop
fasteners.
1.Install & disassemble front
wheels :
Insert the front wheel set into
the front wheel seat, it is
installed when hear "Click".
Press the buckle on the front
wheel seat with your hand and
pull it down, then the front
wheel set is removed.
2.Install & disassemble rear
wheels:
Insert the rear wheel set into
the rear wheel seat, it is
installed when the barb on the
rear wheel seat pops out. Hold
the barb on the rear wheel seat
and pull it out, the rear wheel
set can be removed.
slot slot
06 07
1.Unfolding frame:
Hold the handlebar with both
hands and lift it up until a click
is heard which means the frame
is fully open.

Disassemble & fold pet stroller
Maintenance and Care
WARNING
Use of other functions
1.Disassemble the pet carrier:
Release the hook and loop
fasteners on the back end of
the carrier, then remove the
carrier in the direction of the
arrow.
2.Folding pet carrier:
First close the canopy, and then
pull the iron support at 45° in
the direction of the arrow.
Press down the brakes on both sides, the brake
function works. Conversely, it can be released.
For pet safety
belts.
1.Please read this instruction carefully before use and keep it
properly for future reference. If you do not follow this instruction, the
safety of pets may be affected.
2.Do not leave the caregiver while the product is in use.
3.Do not use accessories not provided by the manufacturer.
4.Any load attached to the handle will affect the stability of the pet
stroller.
5.Ensure that all the locking devices are assembled before using the
pet stroller.
6.Pets must use restraints when using.
7.Do not use the pet stroller in rough areas, near stoves and other
dangerous areas.
8.Avoid use or storage in damp, cold or high temperature
environment and keep away from fire or strong heat source.
9.Do not use it to put dangerous animals which are aggressive and
destructive.
Please check and maintain the pet stroller frequently. The cloth
cover cannot be dipped and washed. When the cloth cover is
cleaned, please use a brush and other cleaning instruments to clean
the dirt.
Can be carried
alone.
Keep Away From Fire
Used in a car.
folding hook
08 09
3.Folding frame:
In the braking state, first lift up
the two sides of the folding
buttons, hold the handle to
press down, the frame can be
folded, finally hang the hook.

Teile
Entfalten und installieren Hundebuggy
Vorderrad
Rahmen für Buggy
Hinterrad
Haustierhalterung
x1
x1
x2 x2
1. Aufklappen des Rahmens:
Halten Sie den Lenker mit
beiden Händen und heben Sie
ihn an, bis ein Klicken zu hören
ist, was bedeutet, dass der
Rahmen vollständig geöffnet ist.
2. Entfalten der Haustierkiste:
Nehmen Sie die Haustierkiste
heraus, drücken Sie mit einer
Hand auf die Bodenplatte und
ziehen Sie mit der anderen
Hand den Gurt an der
Bügelhalterung um 45 Grad in
Pfeilrichtung, bis die
Bügelhalterung auf beiden
Seiten vollständig in den Schlitz
eingesteckt ist.
Steckplatz Steckplatz
Bitte lesen Sie diese Anleitung vor dem Gebrauch sorgfältig
durch und bewahren Sie sie zum späteren Nachschlagen
auf. Wenn Sie diese Anweisung nicht befolgen, kann die
Sicherheit von Haustieren beeinträchtigt werden.
Das Bild dient nur als Referenz, und das tatsächliche
Produkt ist ausschlaggebend.
DE
10 11

Verwendung der Räder
Demontage & Faltung des Hundebuggys
Verwendung anderer Funktionen
3. Einbau der Haustierkiste:
Stecken Sie zuerst das vordere
Sitzrohr in die vordere
Stoffabdeckung der
Haustierkiste in Pfeilrichtung
und befestigen Sie das hintere
Ende der Haustierkiste am
hinteren Sitzrohr mit
Klettverschlüssen.
1. Demontieren Sie die
Haustierkiste:
Lösen Sie die Klettverschlüsse
am hinteren Ende der
Haustierkiste und nehmen Sie
die Haustierkiste in Pfeilrichtung
ab.
2. Falten Sie die
Haustierkiste:
Schließen Sie zuerst das
Verdeck, und ziehen Sie dann
die Eisenstütze um 45° in
Pfeilrichtung.
3. Falten Sie den Rahmen:
Im gebremsten Zustand heben
Sie zuerst die beiden Seiten der
Falttasten an, halten Sie den
Griff nach unten gedrückt, der
Rahmen kann gefaltet werden,
hängen Sie schließlich den
Haken.
Drücken Sie die Bremsen auf beiden Seiten
herunter, funktioniert die Bremsfunktion.
Umgekehrt kann sie gelöst werden.
1. Montage & Demontage der
Vorderräder:
Setzen Sie den Vorderradsatz
in den Vorderradsitz ein; er ist
installiert, wenn Sie ein
"Klicken" hören. Drücken Sie
die Schnalle am Vorderradsitz
mit der Hand und ziehen Sie sie
nach unten, dann wird der
Vorderradsatz entfernt.
2. Montage & Demontage der
Hinterräder:
Setzen Sie den Hinterradsatz in
den Hinterradsitz ein. Er ist
eingebaut, wenn der
Widerhaken am Hinterradsitz
herausspringt. Halten Sie den
Widerhaken am Hinterradsitz
fest und ziehen Sie ihn heraus;
der Hinterradsatz kann entfernt
werden.
Klapphaken
12 13

Wartung und Pflege
ACHTUNG
Sicherheitsgurt
für Haustiere.
1. Bitte lesen Sie diese Anleitung vor dem Gebrauch sorgfältig durch
und bewahren Sie sie zum späteren Nachschlagen auf. Wenn Sie
diese Anweisung nicht befolgen, kann die Sicherheit von Haustieren
beeinträchtigt werden.
2. Verlassen Sie die Betreuungsperson nicht, während das Gerät in
Gebrauch ist.
3. Verwenden Sie kein Zubehör, das nicht vom Hersteller geliefert
wurde.
4. Jede Last, die am Griff befestigt wird, beeinträchtigt die Stabilität
des Hundebuggys.
5. Vergewissern Sie sich, dass alle Verriegelungen angebracht sind,
bevor Sie den Hundebuggy benutzen.
6. Haustiere müssen bei der Benutzung gesichert werden.
7. Benutzen Sie den Hundebuggy nicht in rauer Umgebung, in der
Nähe von Öfen oder anderen gefährlichen Bereichen.
8. Vermeiden Sie den Gebrauch oder die Lagerung in feuchter,
kalter oder heißer Umgebung und halten Sie ihn von Feuer oder
starken Wärmequellen fern.
9. Verwenden Sie ihn nicht, um gefährliche Tiere, die aggressiv und
zerstörerisch sind, unterzubringen.
Bitte überprüfen und pflegen Sie den Hundebuggy regelmäßig. Der
Stoffbezug kann nicht getaucht und gewaschen werden. Wenn der
Stoffbezug gereinigt wird, verwenden Sie bitte eine Bürste und
andere Reinigungsinstrumente, um den Schmutz zu entfernen.
Kann allein
getragen werden.
Von Feuer fernhalten
Im Auto
verwendet.
Veuillez lire attentivement ces instructions avant utilisation et
conservez-les soigneusement pour référence future. Si vous
ne suivez pas ces instructions, la sécurité des animaux
domestiques peut être affectée.
L’image est pour référence seulement, et l’objet spécifique
prévaudra.
FR
14 15

Pièces
Utilisation de roues
Déplier et installer la poussette pour animaux de compagnie
1. Dépliez le cadre :
Tenez le guidon avec les deux
mains et soulevez-le jusqu’à ce
qu’un clic se fasse entendre, ce
qui signifie que le cadre est
complètement ouvert.
2. Dépliez le porte-animal :
Sortez la cage de transport,
appuyez sur la plaque inférieure
d’une main et tirez la sangle du
support en fer avec l’autre main
à 45° dans le sens de la flèche
jusqu’à ce que le support en fer
des deux côtés soit entièrement
inséré dans la rainure.
3.Installation de la cage de
transport :
Placez d’abord le tube de siège
avant dans la housse en tissu
avant du transporteur dans le
sens de la flèche, puis fixez
l’extrémité arrière du
transporteur sur le tube de
siège arrière avec des attaches
auto-agrippantes.
1.Installez et démontez les
roues avant :
Insérez le jeu de roues avant
dans le siège de la roue avant,
il est installé lorsque vous
entendez « Clic ». Appuyez sur
la boucle du siège de la roue
avant avec votre main et tirez-la
vers le bas, puis le jeu de roues
avant est retiré.
2.Installez et démontez les
roues arrière :
Insérez le jeu de roues arrière
dans le siège de la roue arrière,
il est installé lorsque la pointe
du siège de la roue arrière
ressort. Tenez l’ardillon sur le
siège de la roue arrière et
tirez-le, le jeu de roues arrière
peut être retiré.
fente fente
Roue avant
Cadre de poussette
Roue arrière
Transporteur pour
animaux de
compagnie
x1
x1
x2 x2
16 17

Démonter & plier la poussette pour animaux de compagnie
Entretien et Soins
AVERTISSEMENT
Utilisation d’autres fonctions
1.Démontez la cage de
transport :
Relâchez les attaches
auto-agrippantes à l’arrière du
porte-animal, puis retirez le
porte-animal dans le sens de la
flèche.
2. Porte-animal pliable :
Fermez d’abord la verrière, puis
tirez le support en fer à 45°
dans le sens de la flèche.
3.Cadre pliant :
En état de freinage, soulevez
d’abord les deux côtés des clés
pliantes, maintenez la poignée
enfoncée, le cadre peut être
plié, enfin accrochez le crochet.
Appuyez sur les freins des deux côtés, la
fonction de freinage fonctionne. À l’inverse, il
peut être libéré.
Pour les ceintures de
sécurité pour animaux
de compagnie.
1.Veuillez lire attentivement ces instructions avant utilisation et
conservez-les correctement pour référence future. Si vous ne suivez
pas ces instructions, la sécurité des animaux domestiques peut être
affectée.
2.Ne laissez pas le soignant pendant que le produit est en cours
d’utilisation.
3. N’utilisez pas d’accessoires non fournis par le fabricant.
4. Toute charge attachée à la poignée affectera la stabilité de la
poussette pour animaux de compagnie.
5. Assurez-vous que tous les dispositifs de verrouillage sont
assemblés avant d’utiliser la poussette pour animaux de compagnie.
6. Les animaux domestiques doivent utiliser des contraintes lors de
l’utilisation.
7. N’utilisez pas la poussette pour animaux de compagnie dans des
zones difficiles, à proximité de poêles et d’autres zones
dangereuses.
8. Évitez l’utilisation ou le stockage dans un environnement humide,
froid ou à haute température et tenez-le à l’écart du feu ou d’une
forte source de chaleur.
9. Ne l’utilisez pas pour mettre des animaux dangereux agressifs et
destructeurs.
Veuillez vérifier et entretenir fréquemment la poussette pour
animaux de compagnie. La housse en tissu ne peut pas être
trempée et lavée. Lorsque la housse en tissu est nettoyée, veuillez
utiliser une brosse et d’autres instruments de nettoyage pour
nettoyer la saleté.
Peut être porté
seul.
Tenez Éloigné du Feu
Utilisé dans une
voiture.
crochet pliant
18 19

Piezas
Desplegar e montar el cochecito
Rueda delantera
Marco del cochecito
Rueda trasera
Transportín
x1
x1
x2 x2
1. Desplegar el marco:
Sujete el manillar con ambas
manos y levántelo hasta que se
oiga un clic que significa que el
marco está completamente
abierto.
2. Desplegar el transportín:
Saque el transportín para
mascotas, presione la placa
inferior con una mano y tire de
la correa del soporte de hierro
con la otra mano a 45° en la
dirección de la flecha hasta que
el soporte de hierro de ambos
lados quede completamente
encajado en la ranura.
ranura ranura
Lea atentamente estas instrucciones antes de utilizar el
producto y consérvelas para futuras consultas. Si no sigue
estas instrucciones, la seguridad de las mascotas puede
verse afectada.
La imagen es sólo de referencia, y prevalecerá el objeto
específico.
ES
20 21

Usar las ruedas
Desmontar y plegar el cochecito
Usar otras funciones
3. Colocar el transportín:
Primero coloque el tubo del
asiento delantero en la cubierta
de tela delantera del transportín
en la dirección de la flecha, y
fije el extremo trasero del
transportín en el tubo del
asiento trasero con cierres de
velcro
1. Desmontar el transportín
para mascotas:
Suelte los cierres de velcro del
extremo posterior del
transportín y, a continuación,
retírelo en la dirección de la
flecha.
2. Plegar el transportín:
Primero cierre la capota y, a
continuación, tire del soporte de
hierro a 45° en la dirección de
la flecha.
3. Plegar el marco:
En el estado de frenado,
primero levante los dos lados
de las teclas de plegado, sujete
el mango para presionar hacia
abajo, el marco se puede
plegar, finalmente cuelgue el
gancho.
Presione los frenos a ambos lados, la función de
frenado funciona.
A la inversa, puede soltarse.
1. Montar y desmontar las
ruedas delanteras:
Inserte el juego de rueda
delantera en el asiento de la
rueda delantera, estará
instalado cuando oiga "Clic".
Presione la hebilla del asiento
de la rueda delantera con la
mano y tire de ella hacia abajo,
entonces se retira el juego de
rueda delantera.
2. Montar y desmontar las
ruedas traseras:
Inserte el juego de rueda
trasera en el asiento de la
rueda trasera; estará instalado
cuando salte la lengüeta del
asiento de la rueda trasera.
Sujete la lengüeta del asiento
de la rueda trasera y tire de ella
para extraer el juego de rueda
trasera.
gancho de plegado
22 23

Mantenimiento y Cuidado
ADVERTENCIA
Para cinturones
de seguridad de
mascotas.
1. Lea atentamente estas instrucciones antes de utilizar el aparato y
consérvelas para futuras consultas. Si no sigue esta instrucción, la
seguridad de las mascotas puede verse afectada.
2. No deje al cuidador mientras el producto esté en uso.
3. No utilice accesorios no suministrados por el fabricante.
4. Cualquier carga fijada al asa afectará a la estabilidad del
cochecito para mascotas.
5. Asegúrese de que todos los dispositivos de bloqueo están
montados antes de utilizar el cochecito para mascotas.
6. Las mascotas deben usar sistemas de sujeción cuando se
utilicen.
7. No utilice el cochecito para mascotas en zonas abruptas, cerca
de estufas y otras zonas peligrosas.
8. Evite el uso o almacenamiento en ambientes húmedos, fríos o
con altas temperaturas y manténgalo alejado del fuego o de fuentes
de calor fuertes.
9. No lo utilice para meter animales peligrosos que sean agresivos y
destructivos.
Compruebe y mantenga el cochecito para mascotas con frecuencia.
La funda de tela no se puede sumergir ni lavar. Cuando limpie la
funda de tela, utilice un cepillo y otros instrumentos de limpieza para
eliminar la suciedad.
Se puede llevar
solo.
Mantenga Alejado del Fuego
Se utiliza en un
coche.
Leggere attentamente le presenti istruzioni prima dell'uso e
conservarle per future consultazioni. La mancata osservanza
di queste istruzioni può compromettere la sicurezza degli
animali domestici.
L'immagine è solo di riferimento e prevale l'oggetto specifico.
IT
24 25

Parti
Uso delle ruote
Svolgimento e installazione del passeggino per animali domestici
1. Aprire il telaio:
Tenere il manubrio con
entrambe le mani e sollevarlo
fino a quando non si sente un
click che significa che il telaio è
completamente aperto.
2. Aprire il trasportino per
animali domestic:
Estrarre il trasportino, premere
la piastra inferiore con una
mano e tirare la cinghia del
supporto in ferro con l'altra
mano in direzione della freccia
a 45 gradi finché il supporto in
ferro su entrambi i lati non è
completamente incastrato nella
scanalatura.
3. Installazione del
trasportino per animali
domestici:
Per primo, inserire il tubo del
sedile anteriore nel rivestimento
anteriore in tessuto del
trasportino, seguendo la
direzione della freccia, e fissare
l'estremità posteriore del
trasportino sul tubo del sedile
posteriore con i ganci e i
passanti.
1. Montare & smontare le
ruote anteriori:
Inserire il set di ruote anteriori
nella sede delle ruote anteriori;
è installato quando si sente
"Click". Premere con la mano la
fibbia sulla sede della ruota
anteriore e tirarla verso il basso,
quindi rimuovere il set di ruote
anteriori.
2. Montare & smontare le
ruote posteriori:
Inserire il set di ruote posteriori
nella sede della ruota
posteriore; è installato quando
la barra sulla sede della ruota
posteriore fuoriesce. Tenendo la
barbetta sulla sede della ruota
posteriore ed estraendola, è
possibile rimuovere il set di
ruote posteriori.
scanalatura scanalatura
Ruota anteriore
Telaio del passeggino
Ruota posteriore
Trasportino per
animali domestici
x1
x1
x2 x2
26 27

Smontare e ripiegare il passeggino per animali domestici
Manutenzione e Cura
AVVERTENZA
Uso di altre funzioni
1.Smontare il trasportino per
animali domestici:
Rilasciare le chiusure a gancio
e ad anello sul retro del
trasportino, quindi rimuovere il
trasportino in direzione della
freccia.
2. Ripiegare il carrello per
animali domestici:
Chiudere il tettuccio, quindi
tirare il supporto in ferro a 45° in
direzione della freccia.
3.Ripiegare il telaio:
In stato di frenata, prima si alza
i due lati dei tasti di piegatura,
tenere la maniglia per premere
verso il basso, il telaio può
essere piegato, infine
appendere il gancio.
Premendo i freni su entrambi i lati, la funzione
del freno funziona. Viceversa, può essere
rilasciata.
Per le cinture di
sicurezza degli animali
domestici.
1.Leggere attentamente le presenti istruzioni prima dell'uso e
conservarle per future consultazioni. Se non si seguono queste
istruzioni, la sicurezza degli animali domestici potrebbe essere
compromessa.
2.Non lasciare l'assistente durante l'uso del prodotto.
3.Non utilizzare accessori non forniti dal produttore.
4.Qualsiasi carico attaccato alla maniglia influisce sulla stabilità del
passeggino.
5.Assicurarsi che tutti i dispositivi di bloccaggio siano montati prima
di utilizzare il passeggino.
6.Gli animali domestici devono essere trattenuti durante l'uso.
7. Non utilizzare il passeggino in zone impervie, vicino a stufe o altre
aree pericolose.
8. Evitare l'uso o lo stoccaggio in ambienti umidi, freddi o ad alta
temperatura e tenere lontano dal fuoco o da forti fonti di calore.
9. Non utilizzarlo per mettere animali pericolosi, aggressivi e
distruttivi.
Si prega di controllare e manutenere frequentemente il passeggino
per animali domestici. Il rivestimento in tessuto non può essere
immerso e lavato. Quando si pulisce il rivestimento in tessuto,
utilizzare una spazzola e altri strumenti di pulizia per eliminare lo
sporco.
Può essere
trasportato da
solo.
Tenere Lontano Dal Fuoco
Utilizzato in
auto.
ripiegiare il gancio
28 29

Części
Rozkładanie i montaż wózka dla zwierząt
Przednie kółka
Rama wózka
Tylne kółka
Transporter
x1
x1
x2 x2
1. Rozkładanie ramy wózka:
Chwyć rączkę wózka obiema
rękami i podnieś ją, aż
usłyszysz kliknięcie. Kliknięcie
oznacza, że rama rozłożyła się.
2. Rozkładanie transportera:
Wyjmij transporter i jedną ręką
dociśnij dolną płytę, a drugą
ręką pociągnij paski na
metalowych wspornikach w
kierunku wskazanym przez
strzałki pod kątem 45 stopni.
Metalowe wsporniki powinny
zablokować się w szczelinach
po obu stronach.
szczelina szczelina
Przed przystąpieniem do użytku zapoznaj się z instrukcją.
Zachowaj instrukcję do wykorzystania w przyszłości.
Nieprzestrzeganie informacji zawartych w instrukcji może
mieć wpływ na bezpieczeństwo twojego czworonoga.
Rysunki mają wyłącznie charakter poglądowy. Zawsze odnoś
się do rzeczywistego produktu.
PL
30 31

Użytkowanie kółek
Demontaż i składanie wózka dla zwierząt
Pozostałe funkcje wózka
3. Montaż transportera dla
zwierząt:
Najpierw wsuń przednią rurkę
siedziska do przedniego
materiałowego pokrowca w
kierunku wskazanym przez
strzałkę. Przymocuj tylną część
transportera do tylnej rurki
siedziska za pomocą pasków
na rzepy.
1. Demontaż transportera dla
zwierząt:
Zwolnij zapięcia na rzepy w
tylnej części transportera, a
następnie zdejmij transporter w
kierunku wskazanym strzałką.
2. Demontaż wózka dla
zwierząt:
Złóż daszek, a następnie
pociągnij metalowe wsporniki o
45° w kierunku wskazanym
przez strzałki.
3.Składanie ramy:
Zablokuj hamulce wózka, a
następnie unieś blokady
składania po obu stronach.
Przytrzymaj i dociśnij rączkę i
złóż ramę wózka. Na koniec
zamocuj haczyk.
Wciśnij hamulce z obu stron, aby zablokować
kółka. Zwolnij hamulce, aby odblokować kółka.
1. Montaż i demontaż
przednich kół:
Włóż przednie koła w gniazda
przednich kół. Kliknięcie
oznacza, że kółka zablokowały
się na swoich miejscach.
Naciśnij ręcznie blokadę na
przednich kołach i pociągnij
kółka w dół, aby je
zdemontować.
2. Montaż i demontaż tylnych
kół:
Włóż tylne koła w gniazda
tylnych kół. Zatrzaski
sprężynowe powinny
zablokować się w otworach.
Naciśnij ręcznie zatrzaski
sprężynowe na kołach i
pociągnij koła w dół, aby je
zdemontować.
Haczyk mocujący
32 33

In case a return is required, the item must be returned in original box. Without this
your return will not be accepted.
DO NOT discard the box / original packaging.
Take a photo of the box markings.
Take a photo of the damaged part (if applicable).
Send us an email with the images requested.
A photo of the markings (text) on the side of the box is required in case a part is
needed for replacement. This helps our staff identify your product number to
ensure you receive the correct parts.
A photo of the damage is always required to file a claim and get your replacement
or refund processed quickly. Please make sure you have the box even if it is
damaged.
Email us directly from marketplace where your item was purchased with the
attached images and a description of your claim.
Falls eine Rücksendung erforderlich ist, muss der Artikel in der
Originalverpackung zurückgeschickt werden. Andernfalls wird Ihre Rücksendung
nicht angenommen.
Werfen Sie den Karton / die Originalverpackung NICHT weg.
Machen Sie ein Foto von der Beschriftung des Kartons.
Machen Sie ein Foto des beschädigten Teils (falls zutreffend).
Schicken Sie uns eine E-Mail mit dem gewünschten Foto.
Für den Fall, dass ein Ersatzteil benötigt wird, benötigen wir ein Foto der
Beschriftung (Text) auf der Seite des Kartons. So können unsere Mitarbeiter Ihre
Artikelnummer identifizieren und sicherstellen, dass Sie die richtigen Teile
erhalten.
Ein Foto des beschädigten Teils ist immer erforderlich, um eine Reklamation
einzureichen und eine schnelle Bearbeitung Ihres Ersatzteils oder Ihrer
Rückerstattung zu gewährleisten. Bitte stellen Sie sicher, dass Sie den Karton
haben, auch wenn er beschädigt ist.
Schicken Sie uns eine E-Mail direkt vom Marktplatz, auf dem Sie den Artikel
gekauft haben, mit den angehängten Fotos und einer Beschreibung Ihrer
Reklamation.
EN
DE
Return / Damage Claim Instructions
Rücksendung / Beschädigung Anweisungen
Czyszczenie i konserwacja
OSTRZEŻENIA
Pasy
bezpieczeństwa dla
twojego pupila.
1.Przed przystąpieniem do użytku zapoznaj się z instrukcją.
Zachowaj instrukcję do wykorzystania w przyszłości.
Nieprzestrzeganie informacji zawartych w instrukcji może mieć
wpływ na bezpieczeństwo twojego czworonoga.
2.Nie zostawiaj zwierzaka bez nadzoru podczas użytkowania
wózka.
3.Nie używaj akcesoriów, które nie są dostarczone przez
producenta.
4.Jakikolwiek ładunek umieszczony na rączce wózka może mieć
wpływ na jego stabilność.
5.Przed przystąpieniem do użytku wózka upewnij się, że wszystkie
elementy blokujące znajdują się na swoich miejscach.
6.Zawsze zapinaj zwierzakowi pasy bezpieczeństwa.
7.Nie używaj wózka w niebezpiecznych miejscach, takich jak
nierówna nawierzchnia lub zbocze.
8.Nie używaj ani nie przechowuj wózka w wilgotnym środowisku ani
w zbyt niskich lub zbyt wysokich temperaturach. Trzymaj wózek z
dala od ognia i źródeł silnego ciepła.
9.Nie używaj produktu do transportu agresywnych i niebezpiecznych
zwierząt.
Zalecamy regularne sprawdzanie i konserwację wózka dla zwierząt.
Nie należy moczyć w wodzie ani prać materiałowego pokrowca. Do
czyszczenia materiałowej tapicerki należy użyć gąbki, szczotki lub
innych przyrządów.
Możliwość użytku
samego
transportera.
Trzymaj z dala od ognia
Możliwość
użytku w
samochodzie.
34 35

Instructions De Retour / Réclamation De Dommages
Dans le cas où un retour est requis, l'article doit être retourné dans sa boîte
d'origine. Sans cela, votre retour ne sera pas accepté.
NE PAS jeter la boîte/l'emballage d'origine.
Prenez une photo des marquages de la boîte.
Prenez une photo des dommages (le cas échéant).
Envoyez-nous un e-mail avec les images demandées.
Une photo des marquages (texte) sur le côté de la boîte est requise au cas où une
pièce serait nécessaire pour le remplacement. Cela aide notre personnel à
identifier votre numéro de produit pour s'assurer que vous recevez les bonnes
pièces.
Une photo des dommages est toujours requise pour déposer une réclamation et
obtenir rapidement votre remplacement ou votre remboursement. Assurez-vous
d'avoir la boîte même si elle est endommagée.
Envoyez-nous un e-mail directement depuis le marché où votre article a été
acheté avec les images ci-jointes et une description de votre réclamation.
Instrucciones de Devolución / Reclamación de Daños
En caso de que se requiera una devolución, el artículo debe ser devuelto en la
caja original. Sin esto su devolución no será aceptada.
NO deseche la caja/embalaje original.
Tome una foto de las marcas de la caja.
Tome una foto de las piezas dañadas (si procede).
Envíenos un correo electrónico con las imágenes solicitadas.
Se requiere una foto de las marcas (texto) en el lado de la caja en caso de que se
necesite una pieza para reemplazarla. Esto ayuda a nuestro personal a identificar
su número de producto para asegurarse de que recibe las piezas correctas.
Una foto de los daños es siempre necesaria para presentar una reclamación y
conseguir que su reemplazo o reembolso sea procesado rápidamente. Por favor,
asegúrese de tener la caja aunque esté dañada.
Envíenos un correo electrónico directamente desde el mercado donde se compró
su artículo con las imágenes adjuntas y una descripción de su reclamación.
FR
ES
Nel caso in cui sia richiesto un reso, l'articolo deve essere restituito nella scatola
originale. Senza la scatola originale il tuo reso non sarà accettato.
NON scartare la scatola / confezione originale.
Fare una foto dei contrassegni sulla scatola.
Fare una foto di Danno (se è applicabile).
Inviarci una mail con le immagini richieste.
È necessaria una foto dei contrassegni (testo) sul lato della scatola nel caso in
cui la parte debba essere sostituita. Questo aiuta il nostro staff a identificare il
numero del tuo prodotto per assicurarti di ricevere le parti corrette.
Una foto del danno è sempre necessaria per presentare un reclamo e ottenere
rapidamente la sostituzione o il rimborso. Assicurati di avere la scatola anche se
è danneggiata.
Inviarci un'e-mail direttamente dal mercato in cui è stato acquistato il tuo articolo
con le immagini allegate e una descrizione del tuo reclamo.
Jeśli chcesz zwrócić produkt, musi znajdować się on w oryginalnym opakowaniu.
Towar zwrócony w nieoryginalnym opakowaniu nie zostanie przyjęty.
Nie wyrzucaj oryginalnego opakowania.
Zrób zdjęcie oznaczeń na opakowaniu.
Zrób zdjęcie uszkodzonej części (jeśli dotyczy).
Skontaktuj się z nami.
Jeśli jakakolwiek część wymaga wymiany, zrób zdjęcie oznaczeń kodu produktu,
który znajduje się na opakowaniu. Pozwoli nam to zidentyfikować produkt i
dostarczyć ci właściwą część.
Jeśli chcesz złożyć reklamację, zrób zdjęcie uszkodzonej części. Pozwoli nam to
zatwierdzić reklamację i zlecić zwrot środków na twoje konto. Do złożenia
reklamacji potrzebne będzie oryginalne opakowanie.
Skontaktuj się z nami telefonicznie, mailowo lub poprzez formularz kontaktowy.
Załącz zdjęcia produktu i opis roszczenia.
IT
PL
Istruzioni Per La Restituzione / Reclamo Per Danni
Zwroty i reklamacje
36 37
Table of contents
Languages:
Other Costway Stroller manuals

Costway
Costway BB5660 User manual

Costway
Costway BC10018 User manual

Costway
Costway BC10092 User manual

Costway
Costway BABYJOY BB4880 User manual

Costway
Costway infans BB5366 User manual

Costway
Costway BC10002 User manual

Costway
Costway BABY JOY BB5347 User manual

Costway
Costway BC10046US User manual

Costway
Costway BC10056 User manual

Costway
Costway PW10048 User manual