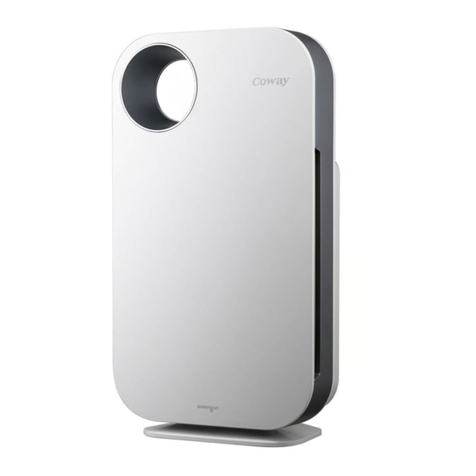
Coway AP-1520C User manual

Coway Air Purier AP-1520C
• This product is for domestic use only. Product voltage does not work overseas.
• For your safety and proper use of the product, please read this User’s Manual before use.
• Warranty card is included in this User’s Manual.

ECO
FEATURES
1
Real-time air quality display
It displays the digitization of ultrane particulate matter (PM2.5) and
gas pollution level, and indicates the indoor air condition in 4 levels
of color.
2
Auto mode
The auto feature adjusts the product’s air speed automatically via
real-time air quality monitoring to operate the product eciently.
3
Eco mode
If the clean air condition is maintained for 10 minutes,
the fan will stop for 30 minutes automatically to save electricity.
4
Silent operation at night (Auto, Eco mode)
When it becomes dark around the product for more than 3 minutes,
the product minimizes air speed to operate in low noise and low
power.
5
6-step ltration process
6-step purifying lter cleans the air.
Pre-lter →Fine dust removal lter →HEPA lter →
RBD plasma lter →Photocatalyst lter →Activated carbon
deodorization lter

2
1
Thank you for using the Coway air purier.
Please read this user manual carefully for correct use and maintenance of the product.
You can refer to the user manual to troubleshoot for product issues while using it.
Please keep this user manual in a safe place as it includes the product warranty.
DEAR CUSTOMERS
CONTENTS
- Please keep the user manual in an accessible area where it can be seen. -
Product Information How to Use
Maintenance Others
| 03 | Safety Information
Danger
Warning
Caution
| 07 | Part Names
| 08 | Air Purication Process
| 09 | Before use
How to Install Filter
| 10 | Indicators and Buttons
| 13 | How to Use
| 14 | Adjust Particle Sensor
| 15 | How to Clean
How to Clean Product
How to Clean Filter
| 18 | How to Replace Filter
| 19 | Troubleshooting
| 20 | Specication
| 21 | Warranty Card
FEATURES / CONTENTS
COWAY

SAFETY INFORMATION
Danger : Failing to follow the precautions below may result in
serious injury or even death.
• Do not use damaged power plugs or loose sockets.
• The power plug must be plugged into 220 V – 240 V~ 50 Hz, 60 Hz.
• Do not pull on the power cord to move the device.
• Do not touch the power plug with wet hands.
• To avoid damaging or warping the power cord, do not use excessive
force to bend the power cord or put heavy objects on top of it.
• Do not repeatedly connect and disconnect the power plug.
• If water enters the power supply, unplug the power and completely
dry before using again.
• Be sure to unplug the power during product repair, maintenance or
part replacement.
• If the power plug's pins or contact area become covered in dust or
water, wipe them thoroughly.
• Do not plug several electric appliances into one socket, and use only
a dedicated socket.
• Unplug the power when not used for a long time.
• Do not carelessly connect or tamper with the power cord.
• If the power cord is damaged, do not replace it yourself. Contact a
service center to have it replaced.
• Do not install near electric heaters.
• Do not put on top of electric products like heaters or televisions.

4
3
• Do not install in places with a lot of humidity or dust or places where
water (rainwater) splashes.
• Do not use or store combustible gases or ammable materials near
this product.
• Do not insert a sharp object such as drill into the pollution sensor.
• If there is a strange sound, burning smell, or smoke from the device,
immediately unplug the power plug and contact a service center.
• Never immerse the product in water.
• Do not spray ammable materials such as insecticides or air
fresheners on the intake.
• Do not open, repair, or modify the device yourself.
• Do not put bowls of water, chemicals, food, small metal objects,
or ammable materials on top of this product.
• Unplug the power before cleaning.
• Do not spray water directly on the device or use benzene, thinners,
etc. to wipe it during cleaning.
SAFETY INFORMATION
Product Information

SAFETY INFORMATION
Warning : Failing to follow the precautions below may result in
considerable physical injury or property damage.
• Do not insert ngers or foreign objects (pin, stick, coin, etc.) into the
air outlet.
• Do not allow children to hang or climb on the product.
• When opening the front cover, be careful not to get a part of your
body or other objects caught on upper of the product.
• This appliance is not intended for use by persons (including
children) with reduced physical, sensory or mental capabilities,
or lack of experience and knowledge, unless they have been given
supervision or instruction concerning use of the appliance by a
person responsible for their safety.
• It is recommended to keep eyes on children to make sure they do
not play with the product.
• This appliance can be used by children from age 8 and above.
• Cleaning and user maintenance shall not be made by children
without supervision.

6
5
Caution : Failing to follow the precautions below may result in
slight physical injury or property damage.
• Do not install on a slope.
• Do not excessively impact or use excessive force on this product.
• Use at least 20 cm away from walls or other objects on each side,
and use at 30 cm to 60 cm above the product.
• Install the purier in a place where it is not blocked on any side so
air can circulate well.
• Use the air purier in places where there is no strong light or direct
sunlight.
• Install at least 2 m away from TVs and other electronic items.
• Do not use in areas where odor, smoke, or oil may occur.
• Do not use in direct sunlight.
• Replace with a new lter depending on the lter replacement cycle.
• Wash the pre-lter with water periodically and dry it suciently for use.
• Do not push or lean on the product. The product may fall.
SAFETY INFORMATION
Product Information

PART NAMES
Top
Front cover
Pollution
sensor
Air outlet
Control panel
Power cord
Air Inlet
Indicators
Front/Rear

8
7
AIR PURIFICATION PROCESS
■ Pre-lter
The pre-lter made of microber uses a mesh trap to catch large particles such as pet fur and human hair.
■ Fine dust removal lter
Eectively captures and reduces small particles such as ne dust and ultrane dust.
■ HEPA lter
The high-performance synthetic HEPA lter is excellent at removing cigarette smoke and ne dust.
■ RBD Plasma lter
Emits radicals into the air sucked into the air purier to reduce pollutants, send it out to clean air and
activate the photocatalyst lter with plasma light for reducing odorous substances.
■ Photocatalyst lter
The photocatalyst lter is applied with inorganic adsorbent that reduces odor and harmful gas
(formaldehyde).
■ Activated carbon deodorization lter
Eectively reduces odor and harmful gas from the surface of activated carbon with micro-pore over
the surface of activated carbon and chemical reaction of specic functional group.
1. Pre-lter
4. RBD Plasma lter
2. Fine dust removal lter
5. Photocatalyst lter
3. HEPA lter
6. Activated carbon
deodorization lter
▶
▶▶
▶
▶
PARTS NAME / AIR PURIFICATION PROCESS
Product Information

BEFORE USE
1. Pull the upper part of the front cover to open.
2. Take out the lter and remove the
plastic packaging by pressing the two
projections at the top of the lter.
3. Assemble the lter in the following order.
Activated carbon deodorization lter →Photocatalyst lter →
RBD Plasma lter →HEPA lter →Fine dust removal lter →
Pre-lter (Pay attention to the direction of lter insertion to assemble
the lter so that the two projections t inside the device.)
4. Attach the front cover.
- Be sure to remove the packaging vinyl before installing the lter.
- Use the lter indoors only.
- Unplug the power cord from the outlet when not using the product.
- Check the front of the lter when installing it.
How to install lter
▶
The product is for 220 V – 240 V~ 50 Hz, 60 Hz only.
Make sure to connect the power plug to a
220 V- 240 V~ 50 Hz, 60 Hz outlet.
Tips
Please check before use!

10
9
1
Mode indicator
By using the Mode button, it is possible to select the operation mode in 4
steps (Auto →Silent →Eco →Turbo).
2
Speed indicator
By using the Speed button, it is possible to select the air speed in 3 steps
(Level 1 →Level 2 →Level 3).
3
Plasma / Ion indicator
By using the Plasma / Ion button, it is possible to select the operation mode.
4
Light sensor
This sensor detects light around the product.
2
Speed indicator
1
Mode indicator
3
Plasma / Ion indicator
4
Light sensor
INDICATORS AND BUTTONS
Indicators
How to Use BEFORE USE / INDICATORS AND BUTTONS

INDICATORS AND BUTTONS
Pollution level indication guide
PM 2.5 (㎍/㎥)Normal
(basic setting) 0 ~ 15 16 ~ 35 36 ~ 75 76 ~
Gas pollution
level Level 1 Level 2 Level 3 Level 4
▶Pollution level color indicator shows the higher level of ne dust pollution level and gas pollution level.
ex) When ne dust pollution level is good and gas pollution level is normal, air pollution level is indicated as normal.
▶For gas, PM2.5 concentration guide and color display criteria, the company's algorithm is applied. The normal is set as
default for the product pollution level, and if the setting is changed to sensitive or insensitive, it is displayed higher or
lower than the default value.
▶The concentration of gas and dust displayed on the product measures the indoor environment real time, so it may
dier depending on the place of use, the measurement method of the environment, etc.
▶The maximum value of dust concentration displayed on the product is 500 ㎍/㎡.
▶The gas concentration displayed on the product is displayed in 1 to 4 spaces depending on the pollution level.
▶As the ultrasonic humidier has large humidifying droplet particles, the dust sensor can recognize them as dust,
thereby causing a malfunction in the dust sensor. So use it away from the purier.
▶If the dust pollution level continues to display the maximum number of 500, the sensor is contaminated. Therefore,
clean the dust sensor, turn o the power of the product and then turn on again so that it can operate normally.
▶The gas, PM 2.5 indication can keep the low indication value in a clean environment.
▶When the Plasma function operates, keep the lighting after dimming 5 times.
Clean
(Blue)
Low
pollution
(Green)
Medium
pollution
(Yellow)
High
pollution
(Red)
Clean
(Blue)
Low
pollution
(Green)
Medium
pollution
(Yellow)
High
pollution
(Red)
Clean
(Blue)
Low
pollution
(Green)
Medium
pollution
(Yellow)
High
pollution
(Red)
Clean
(Blue)
Low
pollution
(Green)
Medium
pollution
(Yellow)
High
pollution
(Red)
1
Pollution level indicator
2
Fine dust digitization
3
Gas pollution level indicator
4
Plasma activation indicator

12
11
1
Power button
2
Mode button
3
Speed button
4
Plasma / Ion button
5
Light button /
Child lock button
1
Power button
Use the button to turn the product
on and o.
3
Speed button
Use it to select the desired air speed.
(Level 1 Level 2 Level 3)
2
Mode button
Use it to select the operation mode
by pushing the mode button.
(Auto Silent Eco Turbo)
4
Plasma / Ion button
Use it to select the operation mode
by pushing the Plasma / Ion button.
(Plasma / Ion →Plasma →Ion →
Function Cancel →Plasma / Ion)
5
Light button / Child Lock button
- Light button : Use it to turn the light on/o.
When the Light button is pressed, only the front display turns on/o.
- Child Lock button : Press for more than 3 seconds to select the Child lock button on/o.
When the Child Lock is set, the rest of buttons do not operate.
Buttons
How to Use INDICATORS AND BUTTONS

HOW TO USE
■How to select the mode
Press the Mode button and choose the
desired mode.
■How to select the air speed
Press the Speed button and choose the
desired air speed.
■How to select Plasma / Ion
Press the Plasma / Ion button and
choose the desired mode.
▶
▶
▶
▶Auto mode
Operates eectively by automatically adjusting the air speed depending on the indoor pollution level detected by the sensor.
This is a convenient operating mode for most users.
Pollution Level Good (blue) Normal (green) Bad (yellow) Very bad (red)
Air speed Auto level 1 Auto level 2 Auto level 3 Auto level 4
▶Silent mode
Minimizes the air speed to create a quiet and comfortable environment.This is an operating mode with low noise and low power consumption.
In the silent mode, the speed indicator is o.
▶Eco mode
Based on the Auto mode, the fan stops operating for up to 30 minutes when it is held for 10 minutes at a dust level of 2 or less and a gas level of 1 or less.
If the indoor pollution level gets worse after continuously detecting the pollution level, the fan is immediately activated to purify the indoor air even when the fan is not in operation.
After the fan re-operates, if the indoor pollution level remains clean for more than 10 minutes, the fan repeats on and o.
▶Turbo mode
Maximizes air speed while operating to create a comfortable environment in a short period of time. The turbo operates at a higher air volume than the level
3 air volume.
※In the Turbo mode, noise may be higher.
▶Silent operation at night (Auto, Eco mode)
When the surroundings become dark for more than 3 minutes, the product is switched to the sleep mode (low speed, low noise, low power operation).
When the surroundings become brighter than more than 5 minutes, the sleep mode is canceled.
▶PLASMA
The antibacterial catalysis lter is activated with plasma light to reduce various odors and harmful gases generated in a room and create a comfortable
environment.
▶ION
Releases ions into the air and inactivates particulate matter oating in the room to reduce it.
- Plug the power cord into an outlet before operating the product.
- When the product is turned on, it is set to the previously operated mode.
Tips

14
13
ADJUST PARTICLE SENSOR
1. Press and hold the speed button and mode button
simultaneously for more than 2 seconds while the purier is
running.
2. Press the speed button to adjust the sensor sensitivity. The air speed
indicator ashes to display sensor sensitivity.
Speed 1 Speed 2 Speed 3
Sensitive Normal Less sensitive
How to adjust the sensitivity of the pollution sensor
2 sec.
2 sec.
2 sec.
2 sec.
When the product is shipped out, the pollution sensor is set to standard sensitivity. If the pollution
level stays at the highest level after 2 hours of operation or stays at the lowest level for more than
1 hour when the air does not seem clean, users can adjust the sensitivity of the pollution sensor
as follows.
3. Press the Speed button and the Mode button at the same time
for more than about 2 seconds, the selected sensitivity will be
inputted and the product will start operating normally.
∗If the Speed button and Mode button are not pressed for 10 seconds after
selecting sensitivity, the selected sensitivity is automatically input.
Pollution
Level
Sensitivity
Good Average Bad Very bad
Sensitive 0 ~ 12 13 ~ 28 29 ~ 60 61 or higher
Normal 0 ~ 15 16 ~ 35 36 ~ 75 76 or higher
Less
sensitive 0 ~ 18 19 ~ 42 43 ~ 90 91 or higher
How to Use HOW TO USE / ADJUST PARTICLE SENSOR

HOW TO CLEAN
■How to Clean Pollution Sensor
(every two months)
1. Open the cover of the pollution sensor on
the left side of the product. Clean the air
inlet, air outlet and the pollution sensor
with a soft brush or vacuum cleaner.
2. Soak a cotton swab in water and wipe o the lens, the dust inlet and
outlet, then wipe it o with dry cotton swab to remove moisture from it.
∗Performance of pollution detection sensor may decrease if not cleaned
regularly.
∗The cleaning cycle varies depending on the use environment. Clean more
often in very dusty environments.
■How to Clean Air Inlet and Outlet (every two months)
Please clean the air inlet and air outlet with a soft brush.
∗Take care that dust does not fall inside the purier while cleaning.
■How to Clean Front Cover
Remove the front cover from the purier and then wipe away dust struck
to the surface with a soft, dry cloth or soft brush.
∗If there is severe contamination, use a damp cloth (do not use abrasives).
■How to Clean Main Body of Product
(every two to four weeks)
Use a dry and soft cloth to wipe it.
∗If there is severe contamination, use a damp cloth (do not use abrasives).
- Always unplug the power plug before cleaning.
- Do not use organic solvents (thinner, etc.), bleach, or detergents containing
chlorine or abrasives to clean the product.
- Do not immerse the product in water or spray water on it.
Tips
Dust outlet
Dust outlet
Dust inlet
Dust inlet
▶
Air Inlet
Air Inlet
Air outlet
Air outlet

16
15
■Pre-lter (every two to four weeks)
1. Pull the top part of the front cover to open it.
2. Press the pre-lter knob and take the lter out.
∗Be careful that dust doesn't fall out during removal.
3. Remove dust with a vacuum cleaner or water depending on the
degree of pollution.
4. Dry the pre-lter completely and install it on the product.
Re-attach the front cover on the product.
∗When installing the pre-lter on the product, x it correctly on the projection.
- Always unplug the power cord before cleaning the lter.
- The pre-lter can be restored by removing dust or washing with water.
-
Failure to clean the pre-lter for a long time may result in poor product performance.
- The HEPA lter cannot be reused after washing.
Never wash these lters with water.
Tips
Maintenance HOW TO CLEAN

■RBD Plasma, photocatalyst lters
1. Pull the upper part of the front cover to open.
2. Take out the RBD Plasma, photocatalyst
lters, and then press both projections
of the lter to separate the lter into
two parts.
▶
3. For the RBD Plasma lter, use a damp cloth to wipe o dirts from
the silicon surface and tungsten wire, and then wipe dry with a
dry cloth.
∗Never spray or immerse in water.
∗Handle the bottom of the tungsten wire carefully.
∗If water enters inside the lter, it must be dried completely.
(If water enters inside, use it after drying for 12 hours or more.)
∗Wash the photocatalyst lter separately using a shower, and use it after it is
completely dried.
If you use it in a wet condition, it can lead to an electric shock.
HOW TO CLEAN

18
17
HOW TO REPLACE FILTER
■How to Replace
■Filter Cleaning and Replacement Cycle
Filter Cleaning/Replacement Time Cleaning/Replacement
Pre-lter Once / 2~4 weeks Clean and wash
Fine dust removal lter Once / 4 months Replacement
HEPA lter Every year Replacement
RBD Plasma lter Once / 2 months Clean and wash
Photocatalyst lter Once / 6 months Clean and wash
1 time / 2 years Replacement
Activated carbon deodorization lter 1 time / 2 years Replacement
Each service cycle is based on 24-hour use in the auto mode.
The lter replacement cycle is the recommended cycle and may vary depending on usage environment.
■How to Replace Filter
1. Pull the upper part of the front cover to open.
2. Separate the lter to be replaced from the lter case.
3. Insert the lter into the device in the
opposite direction, and then replace
the lter and close the cover.
- Be sure to check the front side when installing the lter.
- Use genuine Coway lter to maintain optimal performance of the product.
- Always unplug the power cord before replacing the lter.
▶
Maintenance HOW TO CLEAN / HOW TO REPLACE FILTER

TROUBLESHOOTING
Even when the product is not broken, the air purier may malfunction due to misuse by the user or
other minor causes. Check the following in such a circumstance to resolve the issue easily without
assistance from the service center. If the problem persists after checking the items below, please contact
the service center.
Symptom Check Measures to take
No air is coming out.
• Is the power cord plugged in? Plug the power cord into a
220 V- 240 V~ 50 Hz, 60 Hz outlet.
• Are all the indicators o? Press the Power button and select the
desired function.
• Is there a power outage? Use the product after the electricity is
restored.
• Is it in the Eco mode?
The fan may stop depending on the
pollution level, so select a dierent mode
button.
The air speed does not
change.
• Is it not in the auto mode or silent mode? You can only select air speed in manual
mode (normal).
• Is the surrounding dark? In sleep mode, air speed is xed at the lowest
level.
The air speed
has weakened
considerably.
• Has the lter cleaning or replacement
time passed?
Check your lter cleaning and replacement
cycle and clean or replace lters.
There is a bad smell
coming our of the air
outlet.
• Has the lter cleaning or replacement
time passed?
Check your lter cleaning and replacement
cycle and clean or replace lters.
The pollution level
does not change.
• Is there dust on the particle sensor lens? Clean the particle sensor lens.
• Does the pollution level remain at High? Set your pollution sensitivity to insensitive
or standard.
• Does the pollution level continuously
appear low?
Set your pollution sensitivity to sensitive or
standard.
The plasma indicator
ashes.
• Is the RBD Plasma lter correctly
assembled in the device?
Assemble the RBD Plasma lter correctly
after checking the lter arrangement.
• Is the tungsten wire cut? Request service.
The pollution level
indicator ashes. • Contact the service center.
Other functional
defects • Check the problem, unplug the power cord, and contact the service center.
Table of contents
Other Coway Air Cleaner manuals

Coway
Coway AP-1009CH User manual

Coway
Coway Air Purifier AP-1008DH User manual

Coway
Coway AP-1516D User manual

Coway
Coway AP-1012GH User manual

Coway
Coway Airmega 200M User manual

Coway
Coway Airmega 160 User manual

Coway
Coway AIRMEGA AIM User manual

Coway
Coway Airmega AP-1512HHS User manual

Coway
Coway AP-0509DH User manual

Coway
Coway AP-1018F User manual

Coway
Coway AIRMEGA AP-2015E User manual

Coway
Coway AP-1216L User manual

Coway
Coway AP-1018F User manual

Coway
Coway Airmega 150 User manual

Coway
Coway AP-1005AH User manual

Coway
Coway AIRMEGA 230(W) User manual

Coway
Coway AP-1008BH User manual
Coway
Coway airmega 300 User manual

Coway
Coway Airmega ProX User manual

Coway
Coway AP-1008CH User manual