CONTENTS
Icon conventions
Tip icon to remind users to have a good method or technique.
Note icon, to remind the user must be given adequate attention.
Prohibition icons, prevents users from unauthorized operation.
22/04/ 2020
- 2 -
Notice ················································3
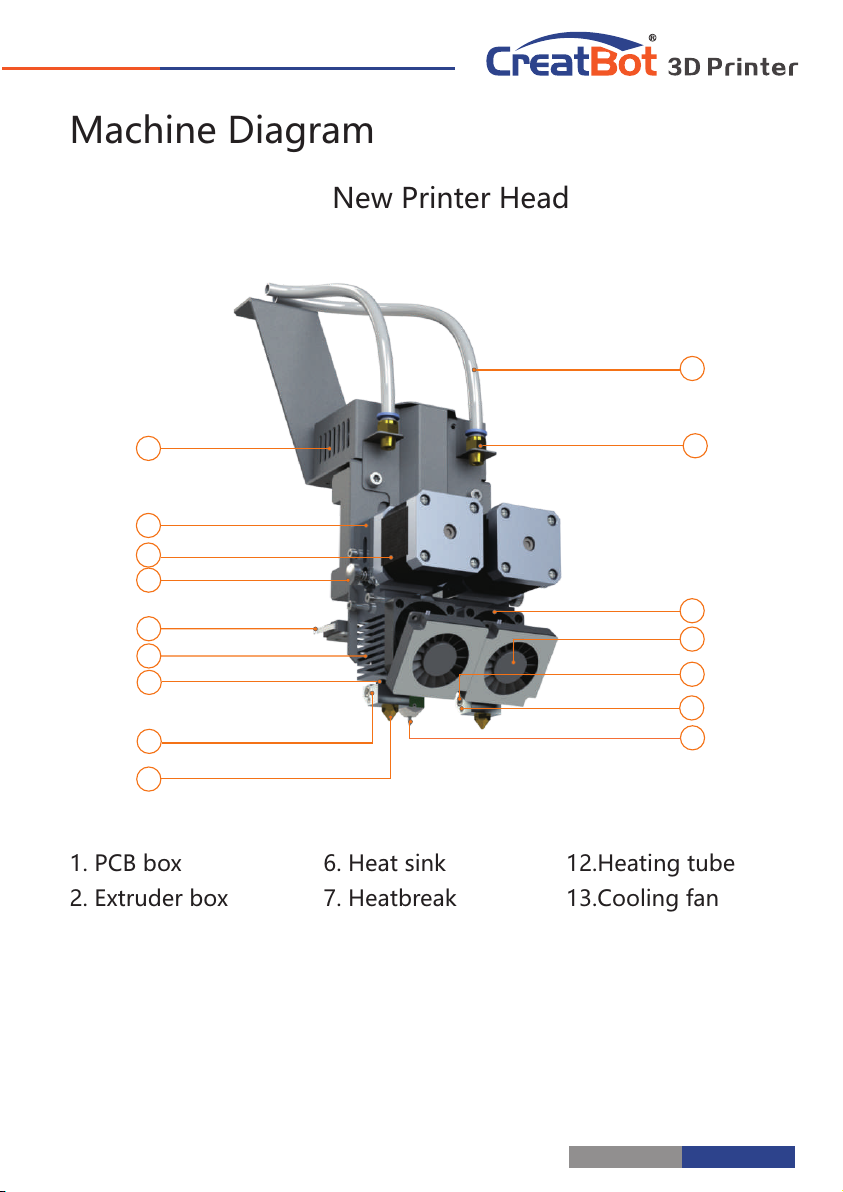
Machine Diagram
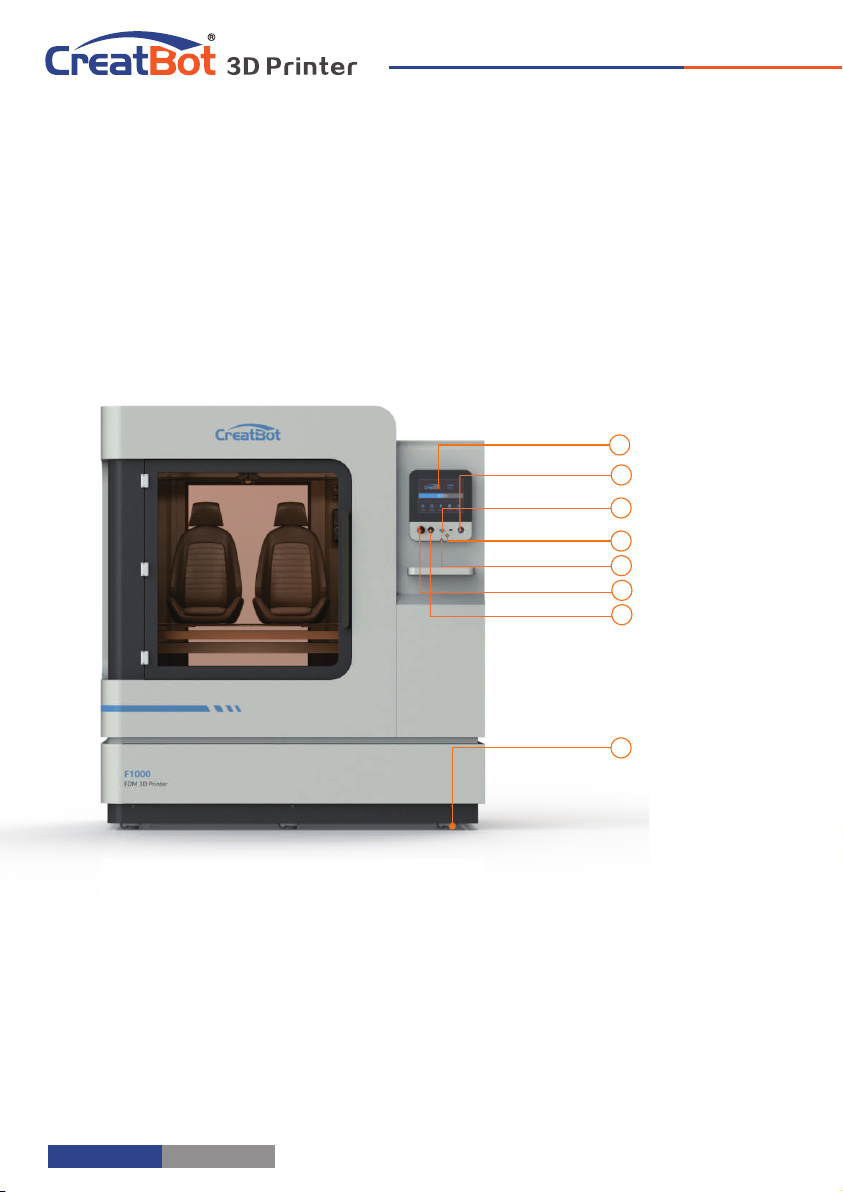
Front ············································4
New Printer Head ··················· 5
Printer Operation
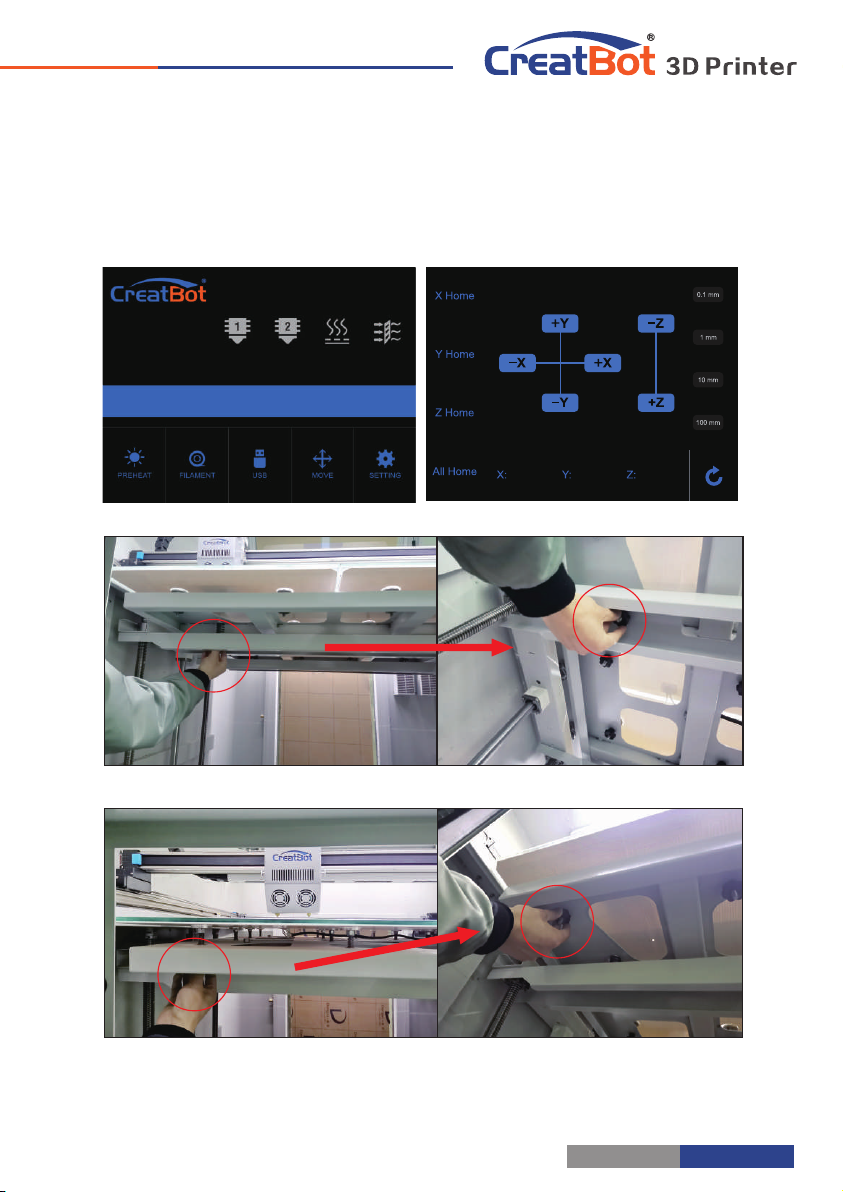
Leveling Platform ··················· 6
Paving Crepe Paper··············· 6
Load Filament ·························· 7
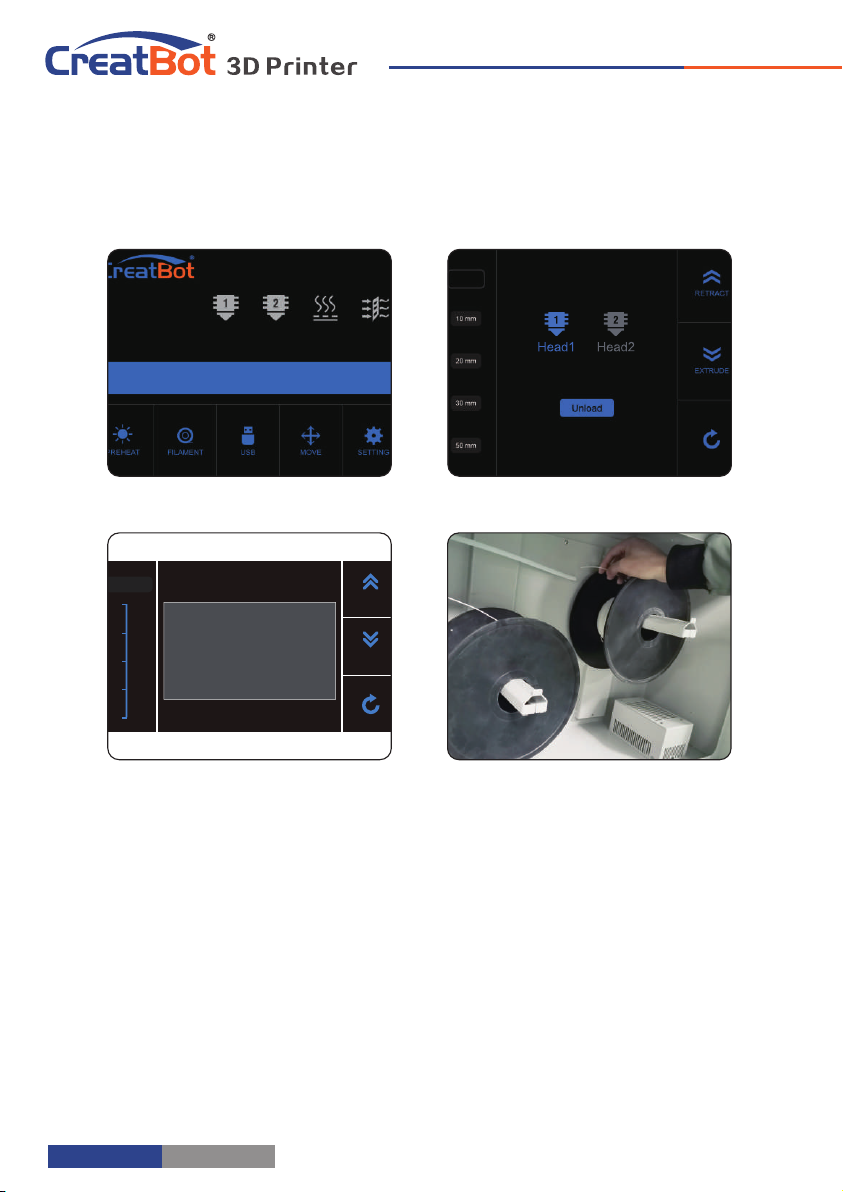
Unload Filament····················· 8
Main menu ······························· 9
Status page ······························ 10
Detail page ······························· 11
Printing page ··························· 12
Axis operation ························· 13
Filament menu ························ 14
SD Card/U-disk ······················· 15
Setting menu ··························· 16
Info. menu ································· 16
Software Operation
CreatWare Setup ·················· 18
Quick Print UI ······················· 19
Print Your First Model ········ 19
Full Setting UI ······················· 20
Mouse Operation ················ 21
Model Rotate/Scale ············ 21
Model Mirror ·························· 22
View Mode ······························ 23
Right Click on Model ··········· 24
Toolpath Structure ················ 24
Basic Setting ··························· 25
Advanced Setting················· 26
Expert Setting ························ 27
Skirt/Brim/Raft······ ······ ······· ··· 28
Plugins ····································· 28
Start/End GCode ·················· 29
Dual Head Printing ·············· 29
Align Dual Head Horizon ··· 30
Align Dual Head Vertical ···· 31
Add Multi Type Printer ······· 31
Using skills
Installation section ·············· 32
Software ·································· 33
Change filament ··················· 33
Frequently Asked Questions
Paving Kapton ······················ 34
Change Fuse ·························· 35
Adjust Z Limit ························ 35
Print PLA and ABS ··············· 35
Specifications ······························ 36
Notice
Read First
Thank you for choosing CreatBot 3D printer!
This manual contains important information about the installation, use,
maintenance and common problems of CreatBot 3D printer. Please read this
manual carefully before using 3D printer. All losses caused by the breach of the
notes and the operation process of the operation process will be borne by the user.
Please use the filament provided by CreatBot, or high quality filament by third
manufacturers. Due to the use of third party inferior material caused by the failure
of the printer, the loss will be borne by the user.
Software running environment, 2G or above processors, at least 1G memory,
compatible with Windows, MAC, or Linux, please use memory as much as possible.
I wish you have fun with CreatBot 3D printer!
Danger Warning
The nozzle's temperature will reach 300 degrees, don't touch.
The platform's temperature will reach 120 degrees, don't touch.
Please make sure that the printer connected to the ground.
Do not attempt to open the case, be careful of electric shock.
Working Environment
The 3D printer can work in the indoor environment of 5 ℃ to 30 ℃.
Long-term not use of the printer, be sure to keep off dust, moisture.
Long-term not use of the filament, please be sealed to prevent deterioration.
- 3 -