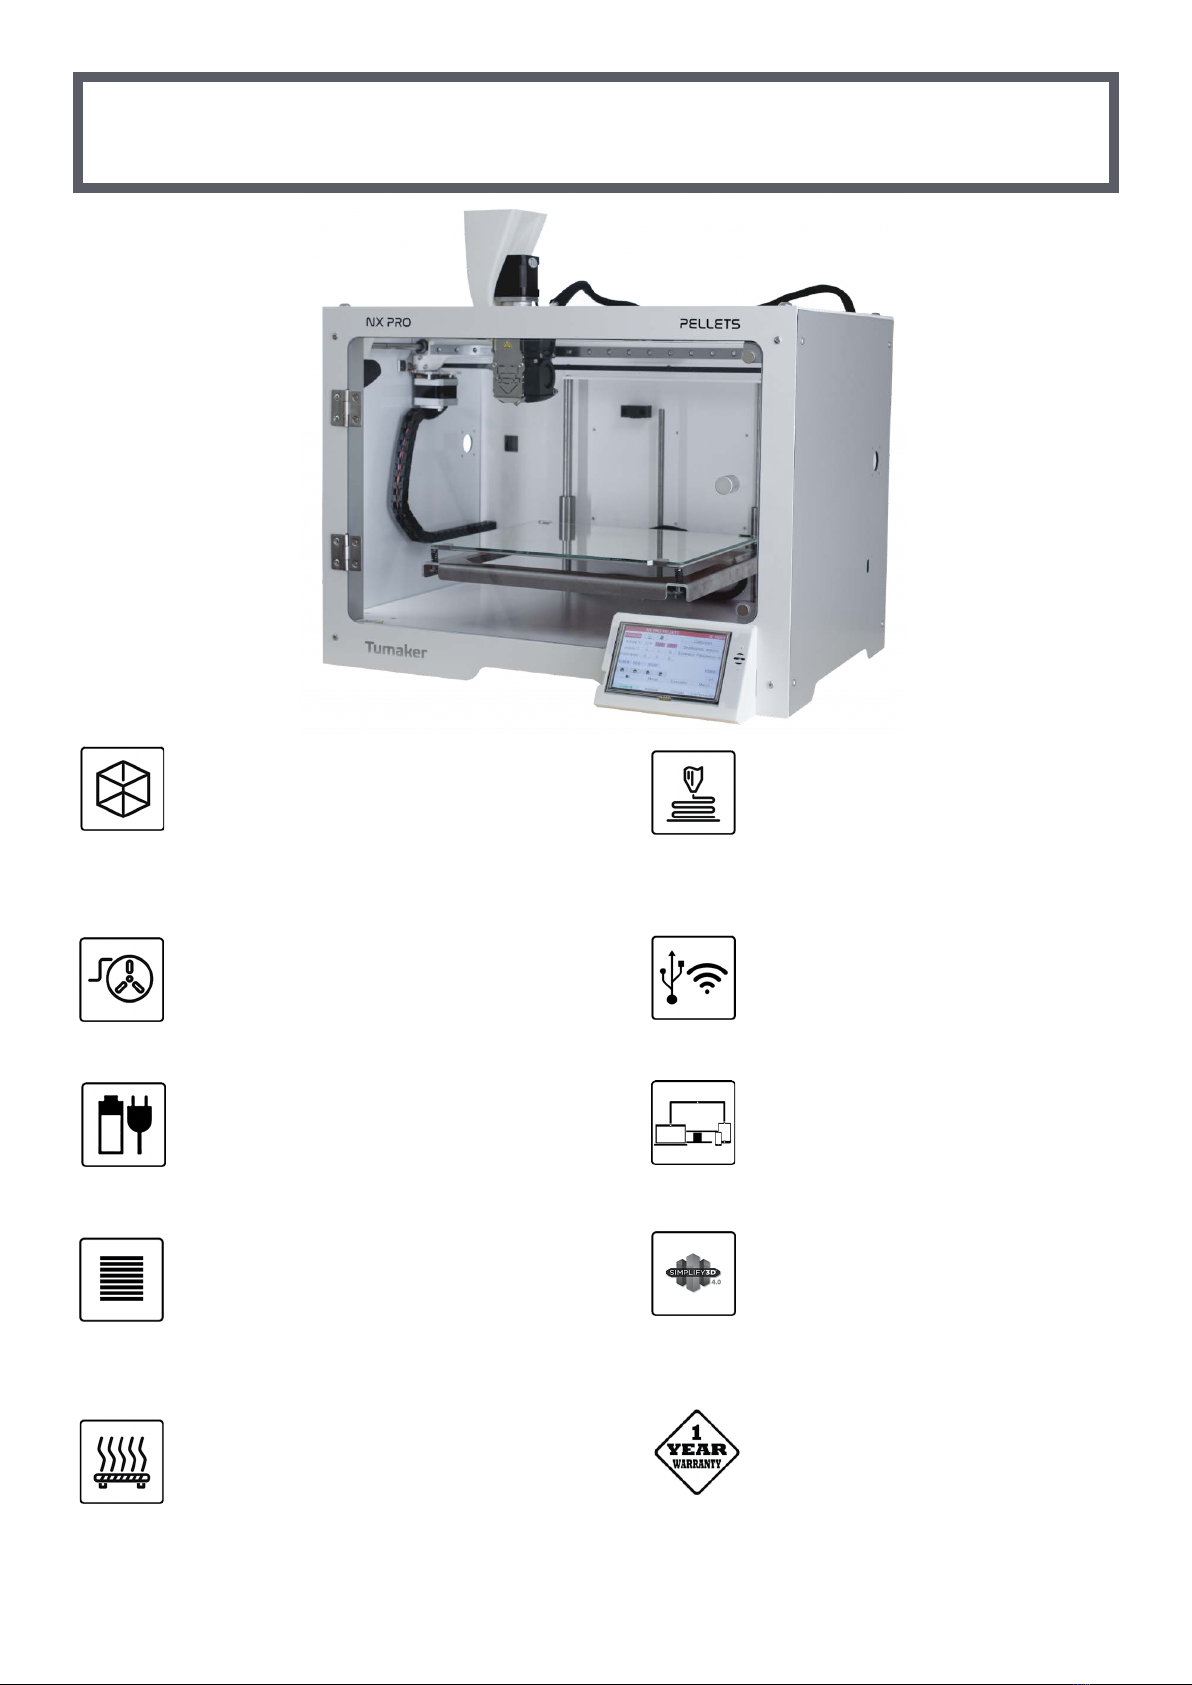
Tumaker NX PRO PelletS User manual

NX PRO PELLETS
USER MANUAL
ÍNDEX
Printer Specications ................................... 2
Main parts of the printer................................ 3
Elements included in the printer.................... 3
Installation and set up ................................... 4
Quick guide ................................................... 6
Adjust the Pellet extrusion.............................7
Head cleaning................................................8
Simplify 3D Printing Software........................ 8
Simplify 3D loading proles............................8
Security .......................................................10
Basic recomendations .................................10
Warranty.......................................................11
2
printer specifications
· Automatic
Printer Volume: 295x185x200 mm
Printer Size: 550x440x460 mm
Package Size: 605x501x500 mm
Package Weight: 24 kg
Printer Weight: 22 kg
Materials: Materials in pellet format.
Recommended Size: circular with 3-5mm diameter
Printing speed: Depends on parameters
Energy Smart Management
Power Rating: 500W
Noise Level: 44 dB (closed door, 40dB)
Layer resolution: 10µm
Maximum Layer Height:
0,8 nozzle: 0.64mm
0,6 nozzle: 0.48mm
0,4 nozzle: 0.3mm
Heated Bed: 100º
Build Plate Leveling:
Display: 5” color touch screen
Control devices: PC, tablet,
Smartphone. Control model: Web
Connected to the Internet
Connectivity: Wifi Micro SD
Optional: Ethernet
Nozzle Diameter: 0.4 - 0.6 - 0.8 - 2.0 - 4.0 - 5.0 mm
Nozzle temperature: 350ºC
Two temperature control points
Files: STL,OBJ, AMF
Simplify3D Professional Software
1 Year Limited Warranty
2.0 nozzle: 1.6 mm
4.0 nozzle: 3.3 mm
5.0 nozzle: 4.1 mm

3
Main parts of the printer
Make sure the following items have been delivered to you with the printer. If not, please contact us.
HOTEND
It moves in the X and Y axes by melting the pellet of material
and depositing it on the platform or heated bed. It has a nozzle
that heats up to the required temperature according to the
corresponding printing material
PLATFORM OR HEATED BED
The printing happens on the surface of the platform; this one
moves along the Z axis. Depending on the printing material, it
must be heated to a different temperature.
NOTE: The distance between the platform and the nozzle has to
be perfectly calibrated for optimum printing.
A
B
Main parts of
the printer
Hotend
Nozzle
Layer fan
Frontal fan
Hopper
1
2
3
4
5
6
Display
Elements includeD in the printer
2
6
4
3
5
MICRO USB
CABLE
A
B
1
4
Installation and set up
DISPLAY WIRING
To start with the installation and set up, connect the
power cable to the slot on the back of the printer
and plug it into the power socket. Switch onthe
printer by pressing the button.
The light indicator will stay on while the printer is on.
DISPLAY SWITCH POWER SUPPLY
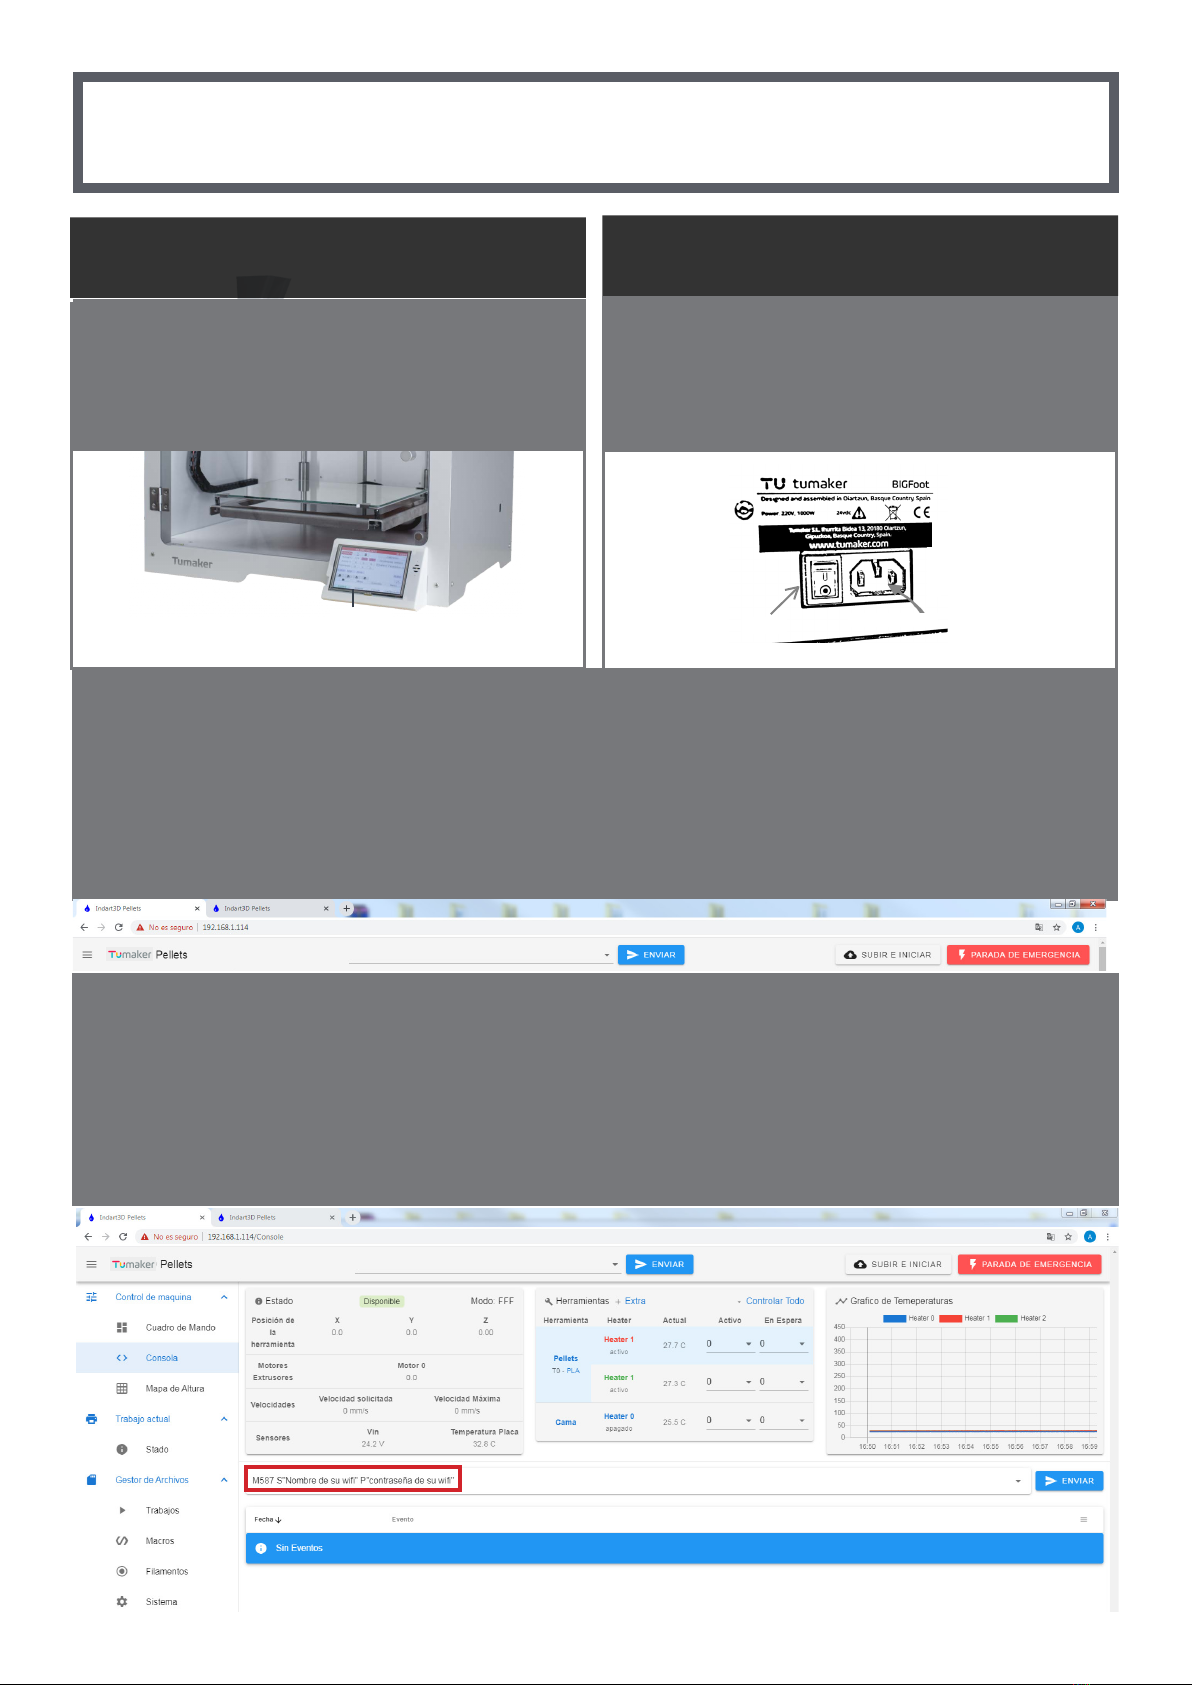
Connect your device to the network of the printer
•WifiSSID:
INDART3D_XXXXXX
•Password: indart3d
•Acces IP: 192.168.1.114
Access the web interface through the access IP in your browser
OPTIONAL: Connect the printer to the local network
If you want to put the printer on the network and access it from any device on the same network, follow the next
step. Go to Console, type and send: M587 S ”Name of your wifi” P ”password of your wifi”
If you know a free IP on your network, you can add the following commands after the password, leaving a space:
Ixxx.xxx.x.xxx otherwise the router will assign a random IP.
5
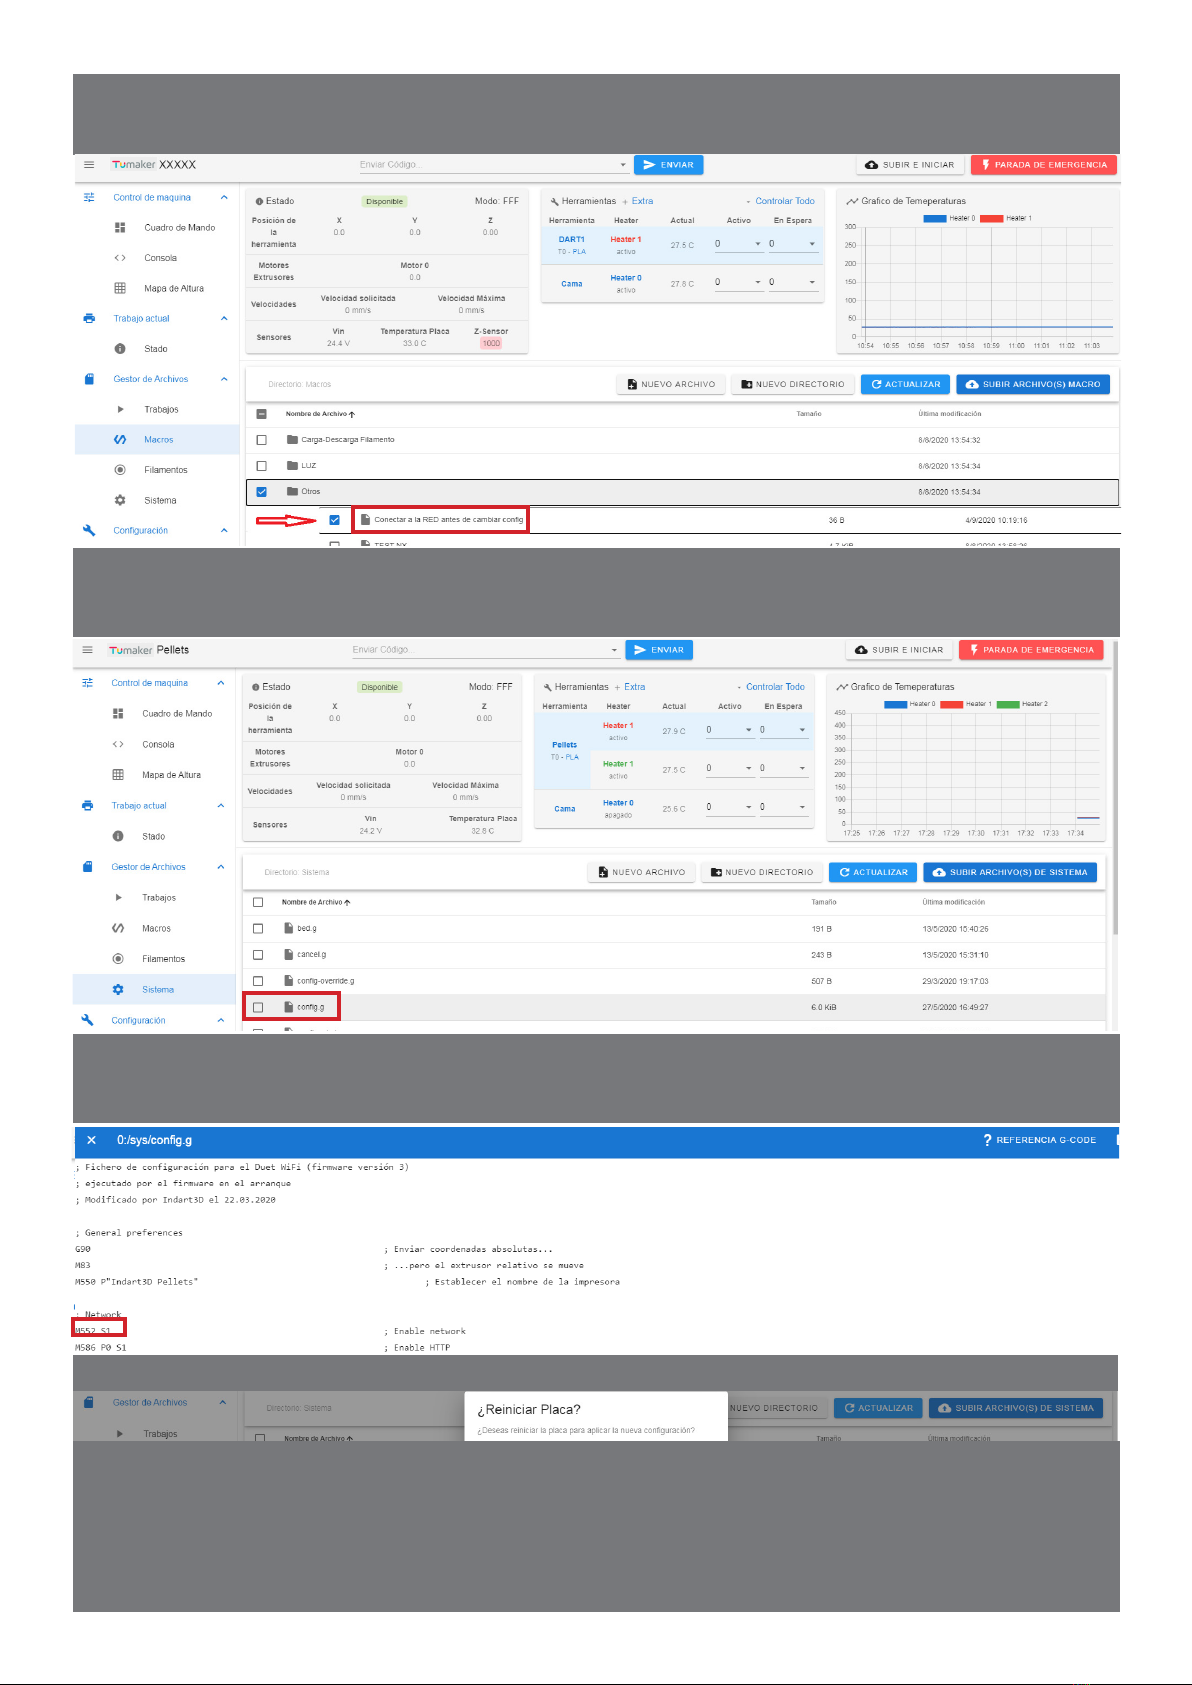
Access the Macros / Others / Connect to the NET section and run it. Next, on the printer screen you will see the assigned IP.
If you already have your IP, access from it, go to System and open the config.g file
ATENTION changing parameters not indicated in this file may imply the malfunction of the machine
In the Network section replace: M552 S2 for M552
S1. Click Save
Press YES to restart the board
I have the IP
•You can now access the printer from any device connected to this network
•If you have not entered the IP by command in the console, it is recommended to do so, so that the router does not change it:
M587 S ”Wifi name ” P ” Password” I192.168.X.XXX
•If you have not obtained the IP or have any other problem, do not hesitate to consult at: https://tumaker.com/tumaker-en/
support/

6
quick guide
Load Filament
The 3D printing of pellets is characterized by being a type of manufacturing different from the printing process with filament spools.
•First, introduce the pellets into the hopper manually.
• The pellets will begin to fall through the hopper and will melt inside the extruder.
•The molten material will be ejected from the nozzle and will begin to adhere to the build platform.
Level the Build Plate
• Heat the base to the temperature you want to print at
• Make sure you have a clean tip
• Execute the calibration process found in the Macros “Calibration” section and follow the
steps
• Use the knurled nuts on the base to fit the Nozzle to the Build Base
• If it was your first calibration you may have to repeat this process
• During printing, fine-tune using Z Babystepping until proper adhesion is achieved
Load G-Code / Print
• In Jobs select: UPLOAD FILE (S) TO G-CODE and upload your
“.gcode” file
• With the left button click on the file you want to print
• With the right button select more options
• You can create folders to organize your files by clicking

7
In config.g you can change the flow rate, the temperature of the two measurement points and the bed
Adjus the Pellet extrusion
Open the material config.g
New Material
Once created, copy the config.g from a previous material and edit the necessary parameters
In file manager / Macros / Extrusion calibration / Select the model you want to print.
Modify the flow until you have an optimal result.
8
Tumaker 3D printing stations include the Simplify3D™
professional manufacturing suite, a software with all the
advanced and optimized characteristics to create the most
complex objects in the highest quality. It includes a powerful
simulator to make you more productive, visualizing the result of
the printing strategy you’re working on before you start
manufacturing.
If you have any questions about the use of the Voladora do not
hesitate to write us to the following email:
https://tumaker.com/tumaker-en/support/
You will be able to repair the imported designs in
Simplify3D itself and you will love the intelligent support
option. Spectacular functionality with which the software will
create the right support for the most complex parts.
If you have any questions about the use of the software,
please consult the following page:
https://www.simplify3d.com/support/
Simplify 3D printing sOFTWARE
Simplify 3D loading profiles
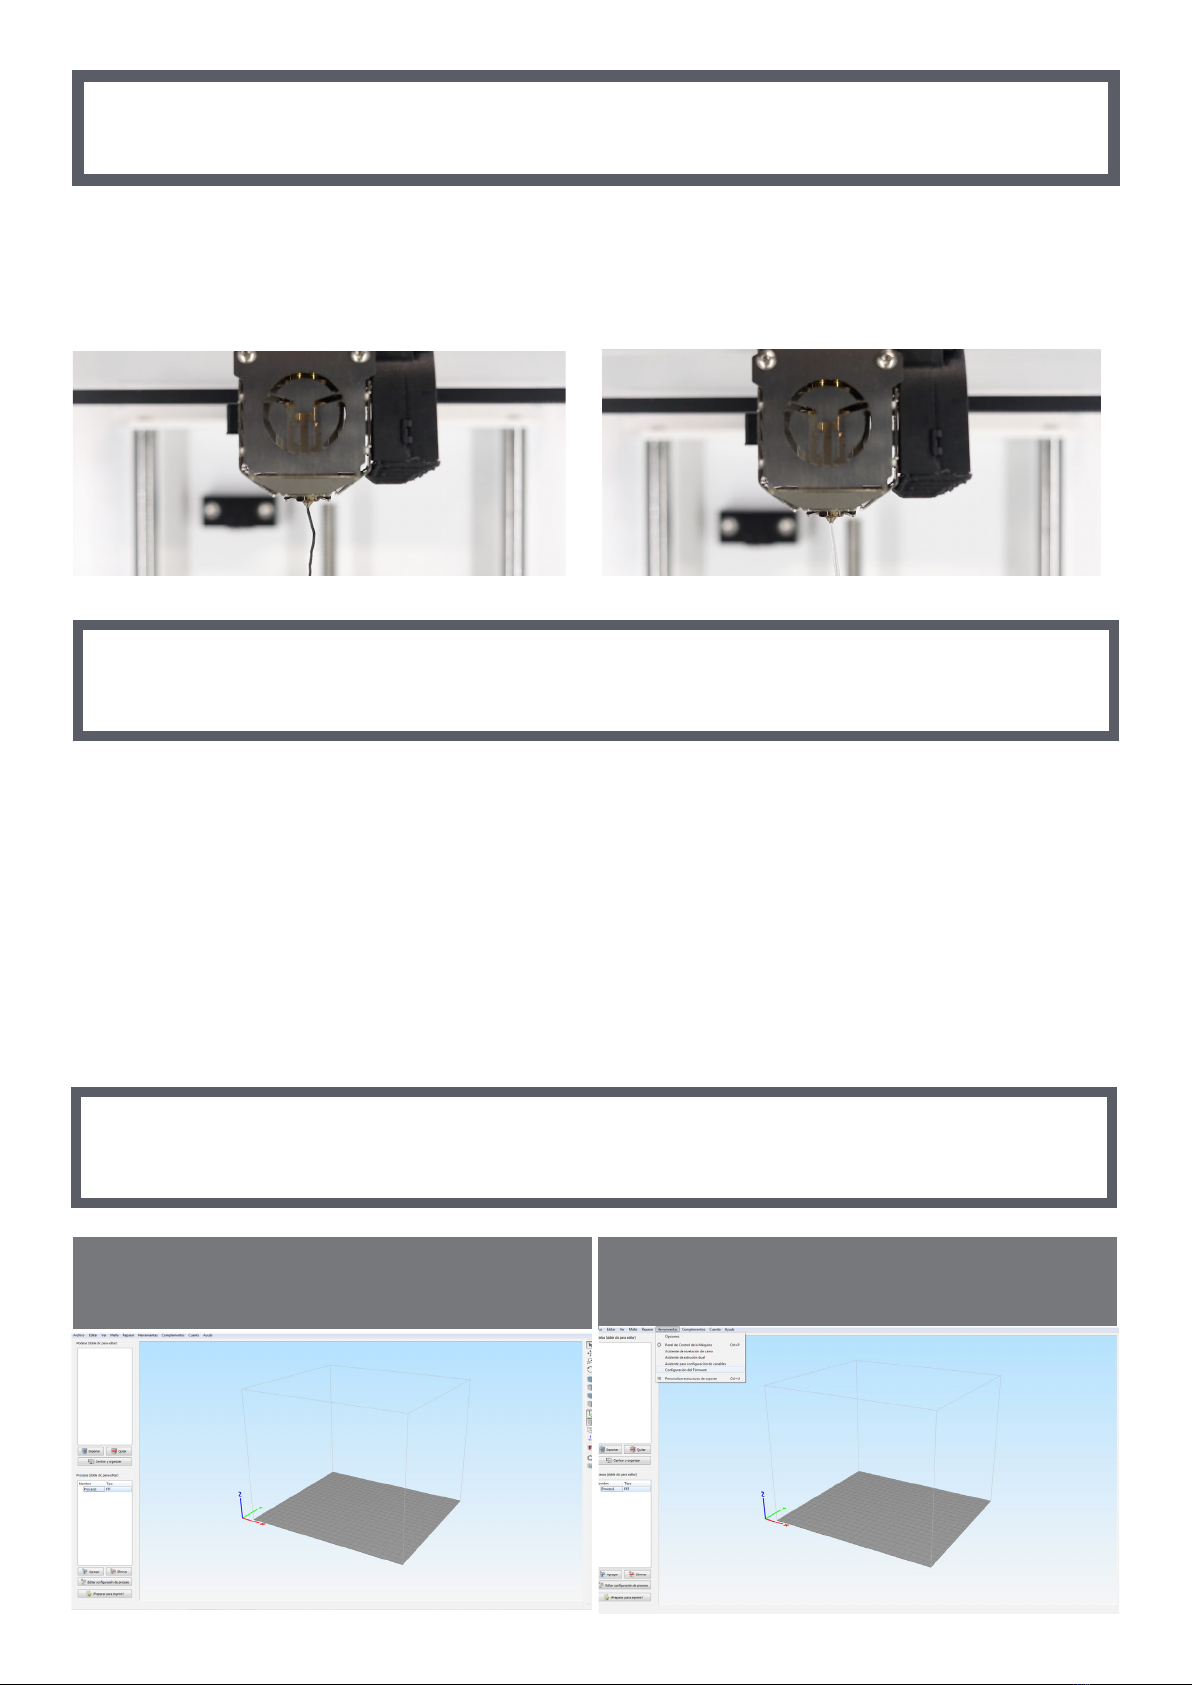
Head cleaning
Open Simplify3d In Tools go to Firmware Configuration
260º: Use ABS or materials with a similar melting temperature
range for materials over 260º. Start extruding until no trace of
the previously used material remains. Once this point is
reached, progressively lower the temperature to 250º.
260º: Use polypropylene for materials less than 260º. Start
extruding until no trace of the previously used material
remains. Once at this point, progressively lower the
temperature to 210º.

9
Click on Import Select the .frm file
Click save In File go to Import FFF prole
Select the .fff file you want to import It will show a message like this
In the Process select the imported profile Make sure that the imported .frm appears in the G-Code tab
10
Basic recomendations
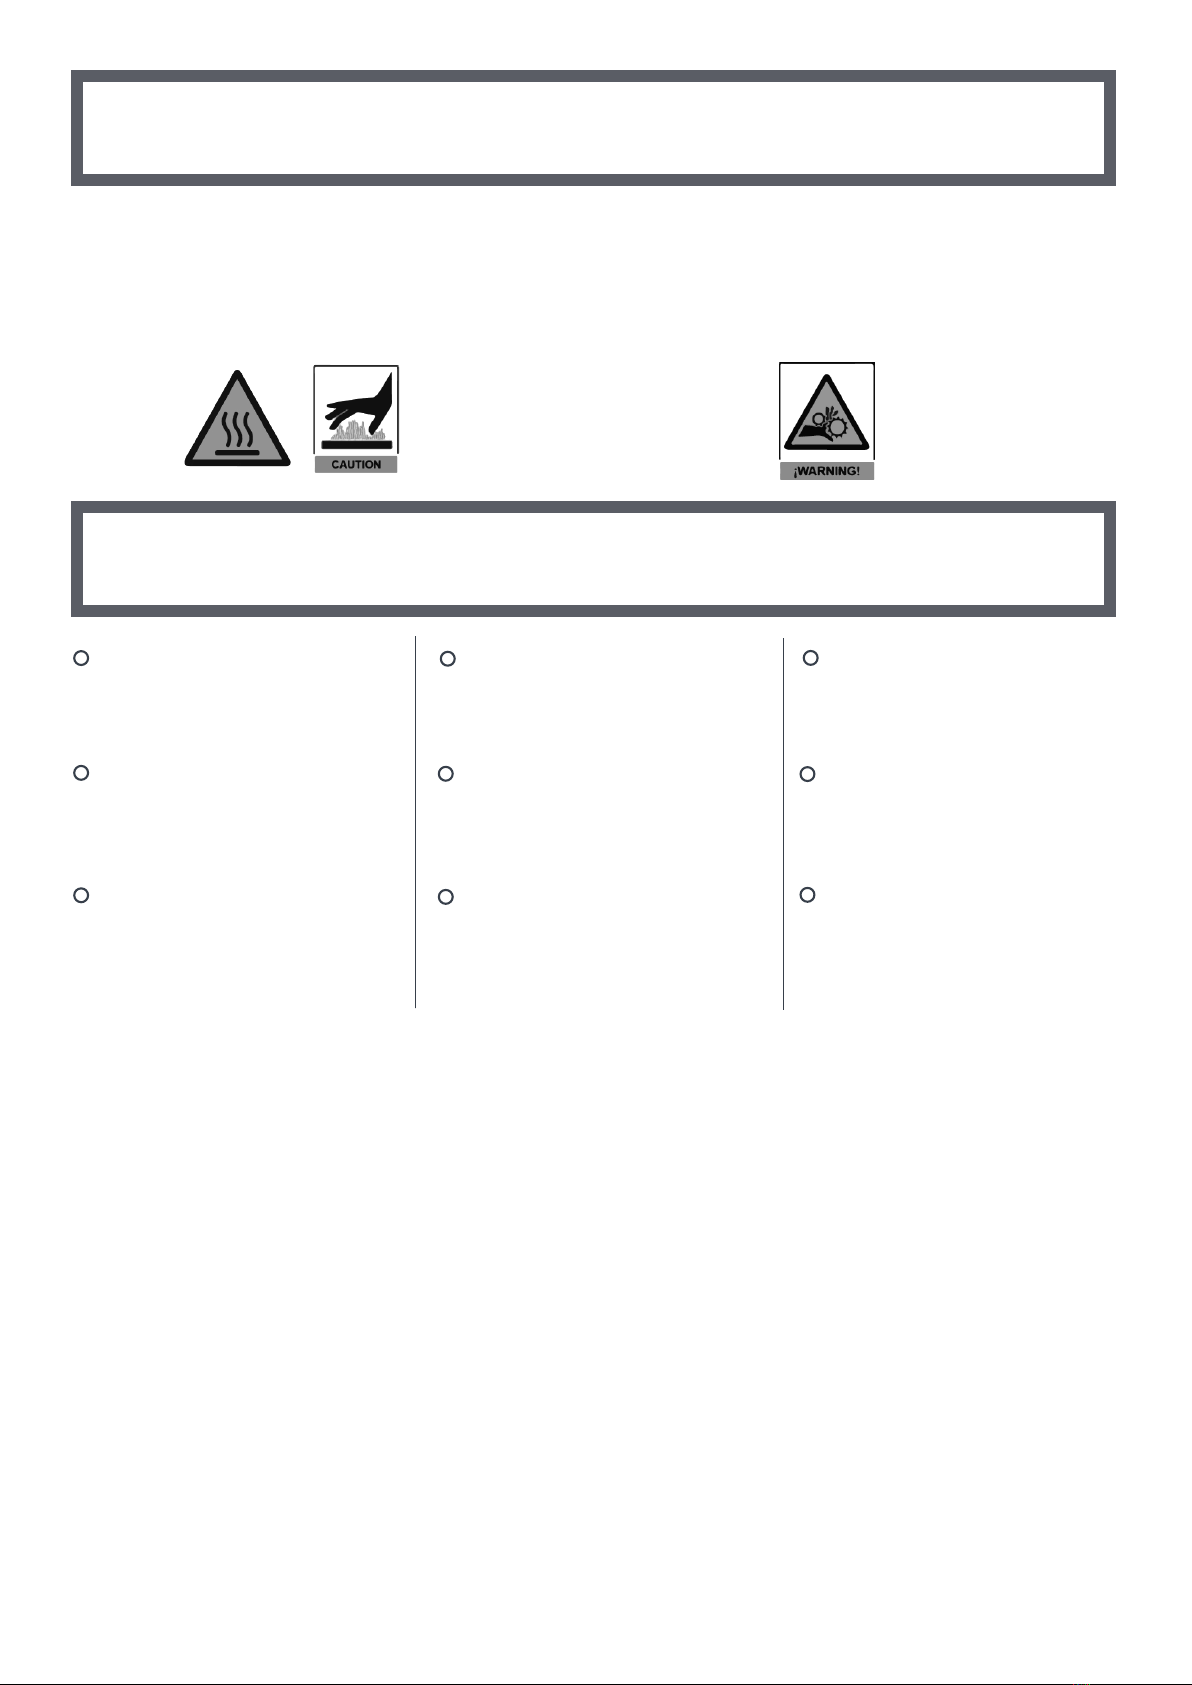
ATTENTION, HOT SURFACE
The platform and nozzle of the head can
be heated up to 120ºC and 300ºC
depending on the printing material,
therefore caution is recommended.
RISK OF ENTRAPMENT
Do not handle any mechanical parts of the
printer while it is in operation.
Security
Place the printer on a firm surface
without vibration.
Place the printer in a draft-free
environment with an ambient
temperature between 15ºC - 25ºC.
Follow the printer installation and
power-up instructions.
Use materials recommended by
Tumaker to ensure proper printer
operation.
General cleaning and greasing of
the printer every 6 months is
recomended.
Cleaning the head
Every 100h of printing.
Depending on the material it
would be advisable to do it more
regularly.
It is advisable to change the nozzle
periodically, every time you change
spools or material. Write us and we
will provide them to you.
Make your prints by following
the recommendations and
parameters given by Tumaker.
Follow the maintenance
recommendations for optimal
printer operation and durability.
Table of contents
Other Tumaker 3D Printer manuals


