SAFETY FIRST
1. Installationof this TV Wall Mountwillbe easier withtwo people.
2. Some images in this guide may vary slightly from the actual
components supplied.
3. Ensure this instruction manual is completely read and
understood before attempting installation.
4. This TV Wall Mount MUST NOT be installed solely in
5. This TV Wall Mount MUST be installed in sound supporting
structures such as those made of timber, steel or masonry
using appropriate fasteners.
6. The supporting structure must be capable of sustaining
the combined weight of the TV Wall Mount and the display
otherwise the structure must be reinforced.
7.
into timber and masonry only. If installing into a supporting
structure made of steel, appropriate fasteners must be used
and sourced from an appropriate supplier.
8. Use appropriate tools and safety equipment and ensure
adequate ventilation during installation.
9. If uncertain about any aspect of installation, contact
The Crest Company or an installation professional.
Please retain these instr uctions for futu re reference.
MFP44T
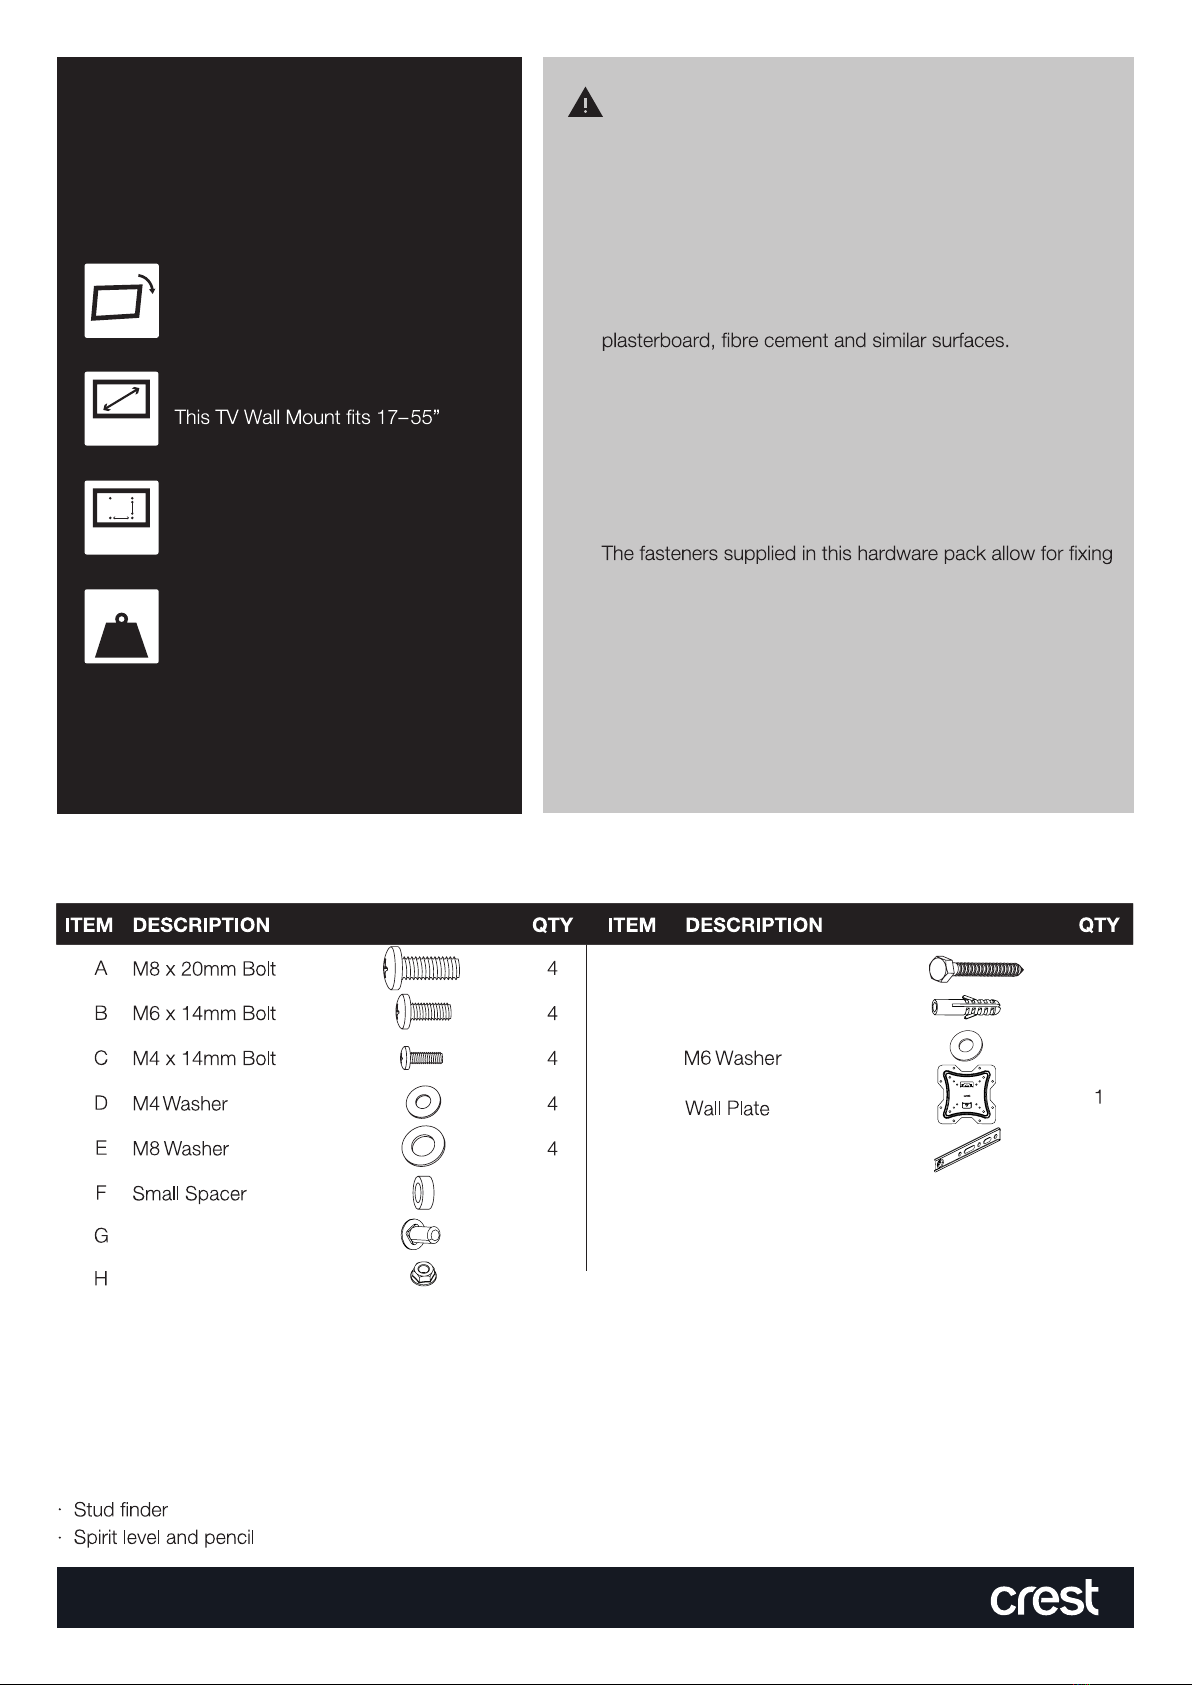
Compatible TV Size
(43–139cm) TV screens
17–55”
Maximum TV Weight
This TV Wall Mount supports TVs
weighing up to 50kg
HOLDS
50kg
Tilt Movement
This TV Wall Mount allows you
to tilt your TV up and down
400x400mm
Maximum Mounting Pattern
This TV Wall Mount has a mounting
hole pattern up to 400x400mm (WxH)
Hardware Kit Contents
Tools Required
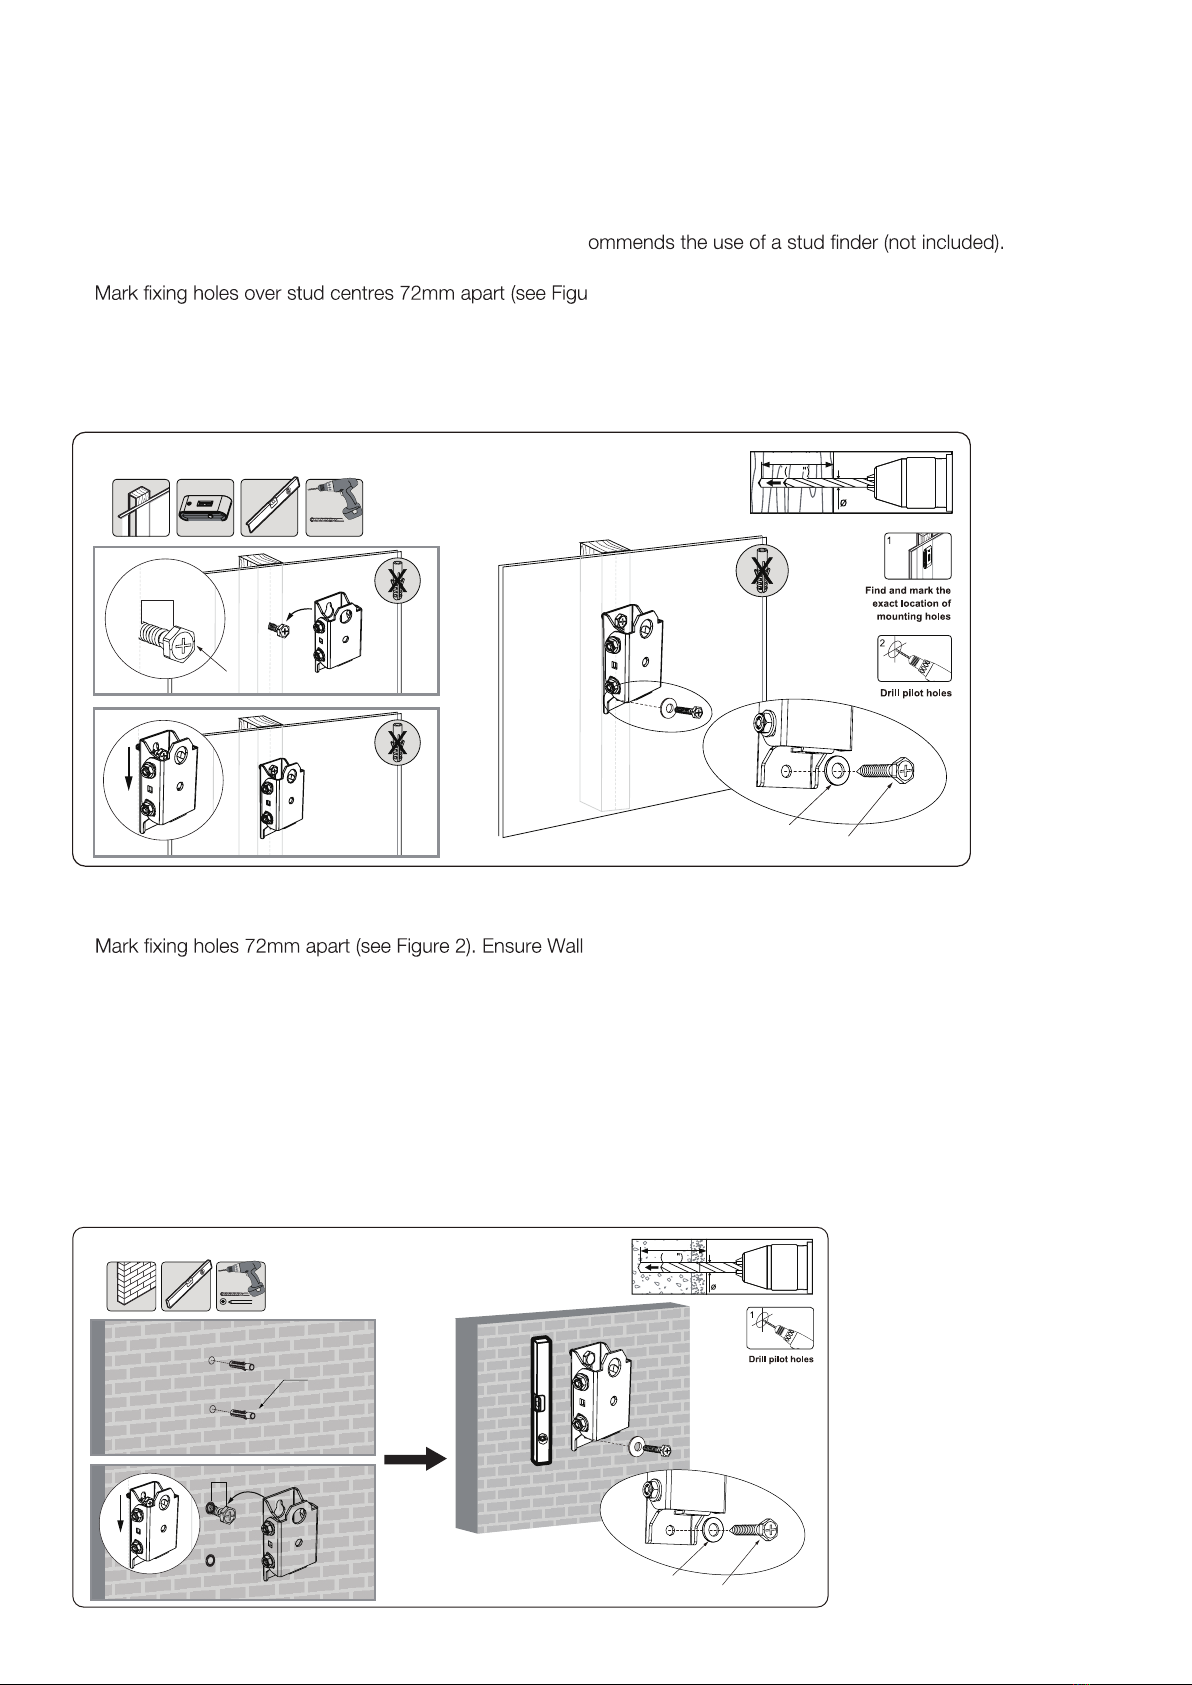
DRYWALL INSTALLATION (TIMBER SUPPORTS):
· Adjustable spanner/socket set
· Long handled philips screwdriver
· Power drill
· High speed 5mm drill bit
MASONRY INSTALLATION:
· Adjustable spanner/socket set
· Long handled philips screwdriver
· Power drill with hammer function
· 8mm Masonry drill bit
· Spirit level and pencil
· Hammer
10.
2
2
6
4
4
4
4
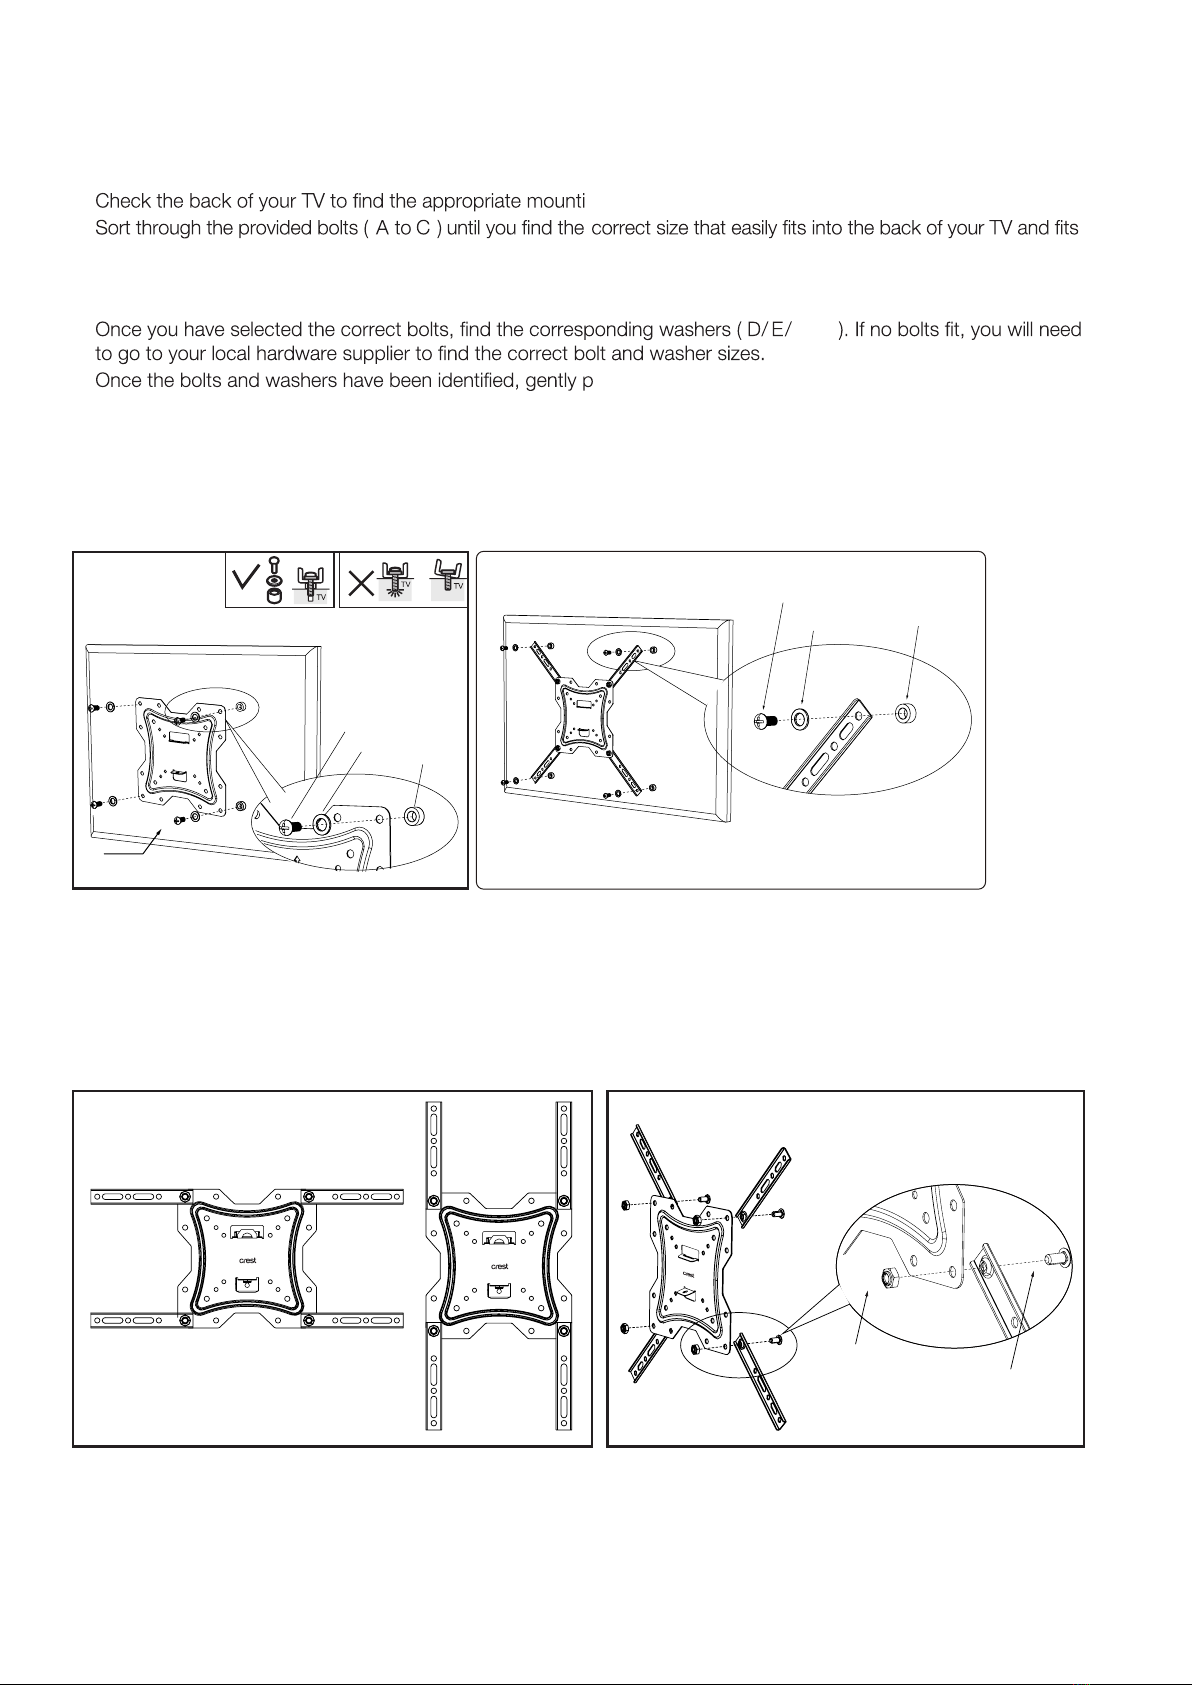
VESA Adaptor Arms
M6 x 60mm Lag Bolt
8 x 40mm Anchor
M6 x 12mm Screws
M6 Nut
W-A
W-B
W-C
W-D
W-E