manuals.online logo
Brands
  1. Home
  2. •
  3. Brands
  4. •
  5. CRH
  6. •
  7. Industrial Equipment
  8. •
  9. CRH Leviat HALFEN HBB User manual

CRH Leviat HALFEN HBB User manual

®
HALFEN HBB INST_HBB 02/23
DE Trittschalldämmelemente
HBB - O - Box
HBB - Rebar - cage - VVH
HBB - Box
HTPL
HTPL
HBB
O
Bo
x
HTPL
Montageanleitung • Assembly Instructions • Montagehandleiding Instrukcja montażu •
Montážní návod
CS Prvky kročejové izolace
PL Elementy z Izolacją
Akustyczną
NL Geluidsisolatie-elementen
EN Impact Sound Insulation
Units
2© 2023 · INST_HBB 02/23 · www.halfen.com
DE Legende | EN Legend | NL Legenda | PL Legenda | CS Legenda
Bitte beachten!
Please note!
Let op!
Uwaga!
Pozor!
Bitte beachten / Sichtprüfung
Please check / Visual inspection
Controleren / visuele inspectie
Sprawdź / kontrola wizualna
Pozor! Proveďte vizuální kontrolu!
Bitte reinigen!
Ensure surfaces are clean!
Oppervlak moet schoon zijn!
Oczyścić powierzchnie!
Zbavte nečistot!
Installation bauseitig
On-site installation
Montage op de bouwplaats
Montaż na budowie
Montáž na stavbě
Fertigteilwerk
Precast plant
Prefab
Prefabrykacja
Panelárna
DE
EN
NL
PL
CS
DE
EN
NL
PL
CS
DE
EN
NL
PL
CS
DE
EN
NL
PL
CS
DE
EN
NL
PL
CS
Nicht bei Regen montieren
Do not assemble in the rain
Niet tijdens regen monteren
Nie montować w deszczu
Nemontujte za deště
DE
EN
NL
PL
CS
HBB, HTPL
3
© 2023 · INST_HBB 02/23 · www.halfen.com
Einbau Fertigteilpodest
Installation precast landing
Montage prefab bordes
Montaż spocznika prefabrykowanego
Instalace prefabrikovaných podest
Einbau Podest in Ortbeton, gemauerte Wand
Installation in-situ poured concrete landing slab, masonry wall
Montage ter plaatse gestorte betonnen bordes, gemetselde wand
Montaż spocznika betonowanego na budowie, ściana murowana
Instalace podest betonovaných na stavbě do zděných stěn
Einbau Podest und Wand in Ortbeton
Installation - in-situ poured concrete landing slab and wall
Montage - ter plaatse gestorte betonnen bordes en wand
Montaż spocznika betonowanego na budowie, ściana żelbetowa
Instalace podest betonovaných na stavbě do monolitických stěn
DE
EN
NL
PL
CS
DE
EN
NL
PL
CS
DE
EN
NL
PL
CS
4–5
6‒9
10‒13
HBB, HTPL
4© 2023 · INST_HBB 02/23 · www.halfen.com
152 160
252
+5C°
4x
4Podest waagrecht auf den
Wänden absetzen.
Zur Sicherung der Lage sind
Druckplatten ( z.B. Stahl,
Abmessungen ca. 250 x 160 mm)
zu verwenden.
Die HBB-Box in der Wand
befestigen.
1Im Fertigteilwerk die HBB -
Bewehrungskörbe-VVH und die
Anschlussbewehrung nach
Statikangaben einbauen.
Podest betonieren.
Die Geometrie der Konsole (mm)
ist zu beachten!
2Auf der Baustelle die HBB-Boxen
auf den Konsolen befestigen.
Einbaurichtung der Box beachten!
3HTPL Matten vertikal an Podest
anbringen. Die Fläche ggf. vom
Staub befreien.
Gesamthöhe der Matte ist die
Podesthöhe h + ca. 30 mm.
Die Mattenstösse mit Klebeband
abkleben.
DE Einbau Fertigteilpodest
1
2
4
3
HBB, HTPL
HTPL
HTPL
∼30 mm
∼250x160 mm
h=200mm
5
© 2023 · INST_HBB 02/23 · www.halfen.com
CS Instalace prefabrikovaných
podest
4Umístěte desku na požadované
místo. Ujistěte se, že deska je v
rovině. Pomocí roznášecích desek
zajistěte polohu dosedacích ploch,
např. ocelový plát, přibližně 250 x
160 mm. Upevněte a zajistěte
HBB-Box ve zdi.
1Nainstalujte HBB-výztužnou-klec-
VVH a výztuž samotného prvku v
souladu se specifikacemi stavby.
Nalijte beton do formy. Je třeba
dodržet rozměry konzol (mm).
2Nasuňte HBB-Boxy do konzol až
na staveništi. Zkontrolujte správ-
nou orientaci krabice!
3Připevněte spárovou desku HTPL
svisle ke stranám desky. Ujistěte
se, že povrchy jsou bez prachu.
Celková (požadovaná) výška HTPL
desek je výška podesty plus cca
30 mm přesah. Utěsněte tupé
spoje u HTPL desek lepicí páskou.
PL Montaż spocznika
prefabrykowanego
4Umieścić płytę spocznika na
ścianie. Upewnić się, że płyta
spocznika jest wypoziomowana.
W tym celu użyć podkładek np.
stalowych płytek (250 x 160 mm).
Zamocować i zabezpieczyć
skrzynkę HBB w ścianie.
1Zamocować zbrojenie HBB-VVH w
szalunku wraz ze zbrojeniem płyty
spocznika zgodnie z wytycznymi
projektu. Zalać formę betonem.
Należy przestrzegać wymiarów
wsporników (mm).
2Na placu budowy nasunąć
skrzynkę HBB na wspornik.
Sprawdzić prawidłową orientację
skrzynki!
3Przymocować maty HTPL pionowo
do czystych i odpylonych
powierzchni bocznych płyty
spocznika. Całkowita (wymagana)
wysokość mat HTPL to wysokość
płyty spocznika plus około 30 mm
zakładku. Uszczelnić połączenia
doczołowe mat HTPL za pomocą
taśmy klejącej.
EN Installation precast landing NL Montage prefab bordes
4Place the landing slab on the wall.
Ensure the slab is level.
Use pressure plates to secure the
position of the landing slab, e.g.
made of steel, approximately
250 x 160mm. Fix and secure the
HBB-Box in the wall.
4Plaats het bordes horizontaal op
de wand. Zorg ervoor dat de plaat
waterpas ligt. Gebruik drukplaten
om de positie van het bordes vast
te zetten (bijv. staal, ca. 250 x
160 mm). Bevestig de HBB Box
aan de muur.
1Install the HBB-Rebar-cage-VVH
and the reinforcement in the
precast factory in accordance with
the structural engineer's specifica-
tions. Pour the concrete for the
landing slab. The dimensions of
the corbels (mm) have to be
observed.
1Monteer de HBB-VVH wapenings-
korf en de aansluitwapening
volgens de specificaties van de
constructeur. Stort het beton van
het bordes. De afmetingen van de
consoles (mm) moeten in acht
worden genomen.
2Attach the HBB-Boxes to the
corbels on the construction site.
Check the correct orientation of
the box!
2Bevestig de HBB-Boxen aan de
consoles op de bouwplaats.
Controleer de juiste inbouwrich-
ting van de box!
3Attach HTPL Mats vertically to the
sides of the landing slab. Ensure
the surfaces are dust free.
The total (required) height of the
HTPL Mats is the height of the
landing slab plus approximately
30 mm. Seal the butt joints in the
HTPL Mats with adhesive tape.
3Bevestig HTPL-matten verticaal
aan de zijkanten van het bordes.
Zorg ervoor dat de oppervlakken
stofvrij zijn. De totale (vereiste)
hoogte van de HTPL-matten is de
hoogte van het bordes, plus circa
30 mm. Dicht de stootvoegen in
de HTPL-matten af met plakband.
HBB, HTPL
6© 2023 · INST_HBB 02/23 · www.halfen.com
DE Einbau –Podest in Ortbeton, gemauerte Wand
HBB, HTPL
1Die Einbauhöhe der HBB-Box
ermitteln.
Die Dicke der HBB-Box unten
beträgt 25 mm.
2Die HBB-Box im Mauerwerk
befestigen.
Auf die waagrechte Position
achten!
3Schalung für Podest einbringen.
Die Podesthöhe nach Statikanga-
ben ermitteln.
4Die HTPL Matten für die vertikale
Trennung zwischen Podest und
Wand vorbereiten: Gesamthöhe
der Matte ist die Podesthöhe h +
ca. 30 mm.
4
3
2
1
+5C°
25 mm
1 2 3 4 5 6
160mm
h =160mm
h >160mm
25mm
7
© 2023 · INST_HBB 02/23 · www.halfen.com
Připravte HTPL desky pro svislou
spáru mezi podestou a stěnou:
Celková (požadovaná) výška HTPL
desky je výška podesty plus cca
30 mm přesah.
CS Instalace podest
betonovaných na stavbě
do zděných stěn
1Zkontrolujte požadovanou
instalační výšku HBB-Boxu.
Tloušťka HBB-Boxu ve spodní
části je 25 mm.
2Upevněte HBB-Box ke zdivu.
Ujistěte se, že je HBB-Box ve vo-
dorovné poloze!
3Připravte bednění pro desku.
Výška podesty je určena v soula-
du se specifikacemi stavby.
PL Montaż spocznika
betonowanego na
budowie, ściana
murowana
1Sprawdzić wymaganą wysokość/
poziom montażu skrzynki HBB.
Grubość skrzynki HBB na dole
wynosi 25 mm.
2Zamocować skrzynkę HBB w
murze. Upewnić się, że skrzynka
HBB jest wypoziomowana!
3Zamontować szalunek płyty
spocznika. Wysokość płyty
spocznika określić zgodnie z
wytycznymi projektu.
Przygotować maty HTPL do
pionowego połączenia między
płytą spocznika a ścianą:
Całkowita (wymagana) wysokość
maty HTPL to wysokość płyty
spocznika plus około 30 mm
zakładu.
4
EN Installation in-situ poured
landing slab, masonry wall
NL Montage ter plaatse
gestorte betonnen
bordes, gemetselde muur
1Check the required installation
height of the HBB-Box.
The thickness of the HBB-Box at
the bottom is 25mm.
1Controleer de vereiste montage-
hoogte van de HBB-Box. De dikte
van de HBB-Box aan de onderkant
is 25 mm.
2Secure the HBB-Box to the
masonry. Ensure the HBB-Box is
level! 2Bevestig de HBB-Box aan het
metselwerk. Zorg ervoor dat de
HBB-Box in horizontale positie en
waterpas staat!
3Install the formwork for the
landing slab.
The height of the landing slab is
determined in accordance with
the engineer's specifications.
3Monteer de bekisting voor het
bordes. De hoogte van het bordes
wordt bepaald volgens de
specificaties van de constructeur.
HBB, HTPL
Prepare the HTPL Mats for the
vertical joint between the landing
slab and the wall: The total
(required) height of the HTPL Mat
is the height of the landing slab
plus approximately 30mm.
Bereid de HTPL-matten voor op de
verticale voeg tussen het bordes
en de wand: De totale (vereiste)
hoogte van de HTPL-matten is de
hoogte van het bordes plus
ongeveer 30 mm.
4
4
4
8© 2023 · INST_HBB 02/23 · www.halfen.com
HBB, HTPL
DE Einbau –Podest in Ortbeton, gemauerte Wand
5Die HTPL Matten bündig an die
Wand anbringen. Die Wand
gegebenenfalls vom Staub
befreien.
Die HTPL Matte über der Box
anbringen.
Mattenstöße mit Klebeband abkle-
ben.
6Füllkörper entfernen und den
HBB-Bewehrungskorb-VVH
einsetzen, Anschlussbewehrung
nach Statikangaben einbauen.
7Podest betonieren. Eingebrachten
Beton gut verrüteln.
7
6
5
l0
l0
9
© 2023 · INST_HBB 02/23 · www.halfen.com
EN Installation in-situ poured
concrete landing slab,
masonry wall
PL Montaż spocznika
betonowanego na budowie,
ściana murowana
NL Montage ter plaatse gestorte
betonnen bordes,
gemetselde muur
CS Instalace podest
betonovaných na stavbě do
zděných stěn
5Attach the HTPL Mats to the wall.
Ensure the wall is clean and dust-
free.
Place the HTPL Mat over the box.
Seal the butt joints in the HTPL
Mats with adhesive tape.
5Przymocować maty HTPL pionowo
do czystej i odpylonej ściany.
Przymocować maty HTPL także nad
skrzynką HBB. Uszczelnić
połączenia doczołowe mat HTPL za
pomocą taśmy klejącej.
5Bevestig de HTPL-matten aan de
wand. Zorg ervoor dat de muur
schoon en stofvrij is. Plaats de
HTPL-mat over de box. Dicht de
stootvoegen in de HTPL-matten af
met plakband.
5Připevněte desky HTPL na zeď.
Ujistěte se, že stěna je čistá a bez
prachu. Umístěte HTPL desku i
nad box. Utěsněte tupé spoje v
HTPL deskách lepicí páskou.
6Remove the blockout element.
Install the HBB-Rebar-cage-VVH
and the connecting reinforcement
in accordance with the structural
engineer's specifications.
6Usunąć element blokujący.
Zamocować zbrojenie HBB-VVH w
szalunku wraz ze zbrojeniem płyty
spocznika zgodnie z wytycznymi
projektu.
6Verwijder het vul-element. Instal-
leer de HBB-VVH wapeningskorf
en monteer de aansluitwapening
volgens de specificaties van de
constructeur.
6Odstraňte montážní výplň. Nain-
stalujte HBB-výztužnou-klec-VVH a
výztuž v souladu se specifikacemi
stavby.
7Pour the concrete for the landing
slab and compact using a suitable
vibrator.
7Zalać formę betonem i zagęścić
odpowiednim wibratorem.
7Stort het beton voor het bordes
en verdicht met een geschikt
trilnaald.
7Vybetonujte desku a zhutněte po-
mocí vhodného vibrátoru.
HBB, HTPL
10 © 2023 · INST_HBB 02/23 · www.halfen.com
1Die Einbauhöhe der HBB-Boxen
ermitteln. Füllkörper an Schalung
befestigen. Die Dicke der
HBB-Box unten beträgt 25mm.
Korrekte Position beachten!
2HBB-Boxen befestigen, Wand
betonieren.
3Schalung für Podest einbringen.
Achtung: Die Podesthöhe nach
Planungsangaben ermitteln
4Die HTPL Matten für die vertikale
Trennung zwischen Podest und
Wand vorbereiten: Gesamthöhe
der Matte ist die Podesthöhe h +
ca. 30 mm.
DE Einbau –Podest und Wand in Ortbeton
4
3
2
1
HBB, HTPL
+5C°
h =
160mm
h >160mm
25mm
25 mm
160mm
160mm
11
© 2023 · INST_HBB 02/23 · www.halfen.com
EN Installation - in-situ poured
concrete landing slab and
wall
NL Montage - ter plaatse
gestorte betonnen bordes
en wand
PL Montaż spocznika
betonowanego na budowie,
ściana żelbetowa
CS Instalace podest
betonovaných na stavbě do
monolitických stěn
1Determine the correct installation
height for the HBB-Boxes. Attach
the blockout element to the
formwork. Check the correct ori-
entation of the boxes! The bottom
side of the HBB-Box is thicker
(25mm).
1Bepaal de juiste montagehoogte
voor de HBB-Boxen. Bevestig het
vul-element aan de bekisting.
Controleer de juiste montageposi-
tie van de boxen! De onderkant
van de HBB-Box is 25 mm.
1Określić prawidłową wysokość/
poziom montażu skrzynek HBB.
Przymocować element blokujący
do szalunku. Sprawdzić
prawidłową orientację skrzynek!
Spód skrzynki HBB jest grubszy
(25 mm).
1Určete správnou instalační výšku
pro HBB-Boxy. Upevněte montážní
prvek k bednění. Zkontrolujte
správnou orientaci prvků! Spodní
strana HBB-Boxu je silnější (25
mm).
2Fix the HBB-Boxes.
Pour the concrete for the wall.
2Bevestig de HBB-Boxen. Stort het
beton voor de wand.
2Zamocować skrzynki HBB. Zalać
ścianę betonem.
2Nasuňte HBB-Boxy. Vybetonujte
stěnu.
3Install the formwork for the
landing slab. Please note: The
height of the landing slab is
determined in accordance with
the engineer's specification.
3Plaats de bekisting voor het
bordes. Let op: De hoogte van het
bordes wordt bepaald volgens de
specificatie van de constructeur.
3Zamontować szalunek płyty
spocznika. Wysokość płyty
spocznika określić zgodnie z
wytycznymi projektu.
3Nainstalujte bednění pro desku.
Upozornění: Výška podesty se
určuje podle specifikace stavby.
4Prepare the HTPL Mats for the
vertical gap between the landing
and the wall. The total height of
the mat is the landing height
h + approximately 30mm.
4Bereid de HTPL-matten voor op de
verticale opening tussen het
bordes en de muur. De totale
hoogte van de mat is
bordeshoogte h + ongeveer
30 mm.
4Przygotować maty HTPL do
pionowego połączenia między
płytą spocznika a ścianą:
Całkowita (wymagana) wysokość
maty HTPL to wysokość płyty
spocznika plus około 30 mm
zakładu.
4Připravte desky HTPL na svislou
mezeru mezi podestou a stěnou.
Celková výška podložky je výška
desky h + přibližně 30 mm.
HBB, HTPL
12 © 2023 · INST_HBB 02/23 · www.halfen.com
DE Einbau –Podest und Wand in Ortbeton
5Die HTPL Matten bündig an die
Wand anbringen. Die Wand
gegebenenfalls vom Staub
befreien.
Die HTPL Matte über der Box
anbringen.
Mattenstöße mit Klebeband abkle-
ben.
6Füllkörper entfernen und den
HBB-Bewehrungskorb-VVH einset-
zen, Anschlussbewehrung nach
Statikangaben einbauen!
7Podest betonieren. Eingebrachten
Beton gut verrüteln.
HBB, HTPL
5
6
7
l0
l0
13
© 2023 · INST_HBB 02/23 · www.halfen.com
EN Installation - in-situ poured
concrete landing slab and
wall
NL Montage - ter plaatse
gestorte betonnen bordes
en wand
PL Montaż spocznika
betonowanego na budowie,
ściana żelbetowa
CS Instalace podest
betonovaných na stavbě do
monolitických stěn
5Attach the HTPL Mats to the wall.
Ensure the wall is clean and dust-
free.
Place the HTPL Mat over the box.
Seal the butt joints in the HTPL
Mats with adhesive tape.
5Bevestig de HTPL-matten aan de
wand. Zorg ervoor dat de wand
schoon en stofvrij is. Plaats de
HTPL-mat over de Box. Dicht de
stootvoegen in de HTPL-matten af
met plakband.
5Przymocować maty HTPL pionowo
do czystej i odpylonej ściany.
Przymocować maty HTPL także nad
skrzynką HBB. Uszczelnić
połączenia doczołowe mat HTPL za
pomocą taśmy klejącej.
5Připevněte desky HTPL na zeď.
Ujistěte se, že stěna je čistá a bez
prachu. Umístěte HTPL desku i
nad krabici. Utěsněte tupé spoje v
HTPL deskách lepicí páskou.
6Remove the blockout element.
Install the HBB-Rebar-cage-VVH
and the connecting reinforcement
in accordance with the structural
engineer's specifications.
6Verwijder het vul-element. Mon-
teer de HBB-VVH wapeningskorf
en de aansluitwapening volgens
de specificaties van de
constructeur.
6Usunąć element blokujący.
Zamocować zbrojenie HBB-VVH w
szalunku wraz ze zbrojeniem płyty
spocznika zgodnie z wytycznymi
projektu.
6Odstraňte montážní výplň. Nain-
stalujte HBB-výztužnou-klec-VVH a
výztuž v souladu se specifikacemi
stavby.
7Pour the concrete for the landing
slab and compact using a suitable
vibrator.
7Stort het beton voor het bordes
en verdicht het met een geschikt
trilnaald.
7Zalać formę betonem i zagęścić
odpowiednim wibratorem.
7Vybetonujte desku a zhutněte po-
mocí vhodného vibrátoru.
HBB, HTPL
14 © 2023 · INST_HBB 02/23 · www.halfen.com
For more information on the products featured here, please contact Leviat:
Notes regarding this document
© Protected by copyright. The information in this publication is based on state-of-the-art technology
at the time of publication. In every case, project working details should be entrusted to appropriately
qualified and experienced persons. Leviat shall not accept liability for the accuracy of the information
in this document or for any printing errors. We reserve the right to make technical and design changes
at any time. With a policy of continuous product development, Leviat reserves the right to modify
product design and specification at any time.
Leviat.com
For information on certified management systems and standards, see www.halfen.com
Australia
Leviat
98 Kurrajong Avenue,
Mount Druitt, Sydney, NSW 2770
Tel: +61 - 2 8808 3100
Email: info[email protected]
Austria
Leviat
Leonard-Bernstein-Str. 10
Saturn Tower, 1220 Wien
Tel: +43 - 1 - 259 6770
Email: info[email protected]
Belgium
Leviat
Borkelstraat 131
2900 Schoten
Tel: +32 - 3 - 658 07 20
Email: info[email protected]
China
Leviat
Room 601 Tower D,
Vantone Centre
No. A6 Chao Yang Men Wai Street
Chaoyang District
Beijing · P.R. China 100020
Tel: +86 - 10 5907 3200
Email: info.cn@leviat.com
Czech Republic
Leviat
Business Center Šafránkova
Šafránkova 1238/1
155 00 Praha 5
Tel: +420 - 311 - 690 060
Email: info.cz@leviat.com
Finland
Leviat
Vädursgatan 5
412 50 Göteborg / Sweden
Tel: +358 (0)10 6338781
Email: info[email protected]
France
Leviat
18, rue Goubet
75019 Paris
Tel: +33 - 1 - 44 52 31 00
Email: info[email protected]
Germany
Leviat
Liebigstrasse 14
40764 Langenfeld
Tel: +49 - 2173 - 970 - 0
Email: info.de@leviat.com
India
Leviat
309, 3rd Floor, Orion Business Park
Ghodbunder Road, Kapurbawdi,
Thane West, Thane,
Maharashtra 400607
Tel: +91 - 22 2589 2032
Email: info[email protected]
Italy
Leviat
Via F.lli Bronzetti 28
24124 Bergamo
Tel: +39 - 035 - 0760711
Email: info[email protected]
Malaysia
Leviat
28 Jalan Anggerik Mokara 31/59
Kota Kemuning,
40460 Shah Alam Selangor
Tel: +603 - 5122 4182
Email: info.my@leviat.com
Netherlands
Leviat
Oostermaat 3
7623 CS Borne
Tel: +31 - 74 - 267 14 49
Email: info[email protected]
New Zealand
Leviat
2/19 Nuttall Drive, Hillsborough,
Christchurch 8022
Tel: +64 - 3 376 5205
Email: info[email protected]
Norway
Leviat
Vestre Svanholmen 5
4313 Sandnes
Tel: +47 - 51 82 34 00
Email: info[email protected]
Philippines
Leviat
2933 Regus, Joy Nostalg,
ADB Avenue, Ortigas Center
Pasig City
Tel: +63 - 2 7957 6381
Email: info[email protected]
Poland
Leviat
Ul. Obornicka 287
60-691 Poznań
Tel: +48 - 61 - 622 14 14
Email: info[email protected]
Singapore
Leviat
14 Benoi Crescent
Singapore 629977
Tel: +65 - 6266 6802
Email: info[email protected]
Spain
Leviat
Polígono Industrial Santa Ana
c/ Ignacio Zuloaga, 20
28522 Rivas-Vaciamadrid
Tel: +34 - 91 632 18 40
Email: info.es@leviat.com
Sweden
Leviat
Vädursgatan 5
412 50 Göteborg
Tel: +46 - 31 - 98 58 00
Email: info[email protected]
Switzerland
Leviat
Hertistrasse 25
8304 Wallisellen
Tel: +41 (0) 800 22 66 00
Email: info.ch@leviat.com
United Arab Emirates
Leviat
RA08 TB02, PO Box 17225
JAFZA, Jebel Ali, Dubai
Tel: +971 (0)4 883 4346
Email: info[email protected]
United Kingdom
Leviat
A1/A2 Portland Close
Houghton Regis LU5 5AW
Tel: +44 - 1582 - 470 300
Email: info[email protected]
USA / Canada
Leviat
6467 S Falkenburg Road
Riverview, FL 33578
Tel: (800) 423-9140
Email: info[email protected]
For countries not listed
Email: info@leviat.com
Halfen.com
Imagine. Model. Make. Leviat.com
© 2023 U-339 – 02/23 PDF 03/23

This manual suits for next models

4

Other CRH Industrial Equipment manuals

CRH Leviat HALFEN PSA User manual

CRH

CRH Leviat HALFEN PSA User manual

CRH Leviat HALFEN MBT User manual

CRH

CRH Leviat HALFEN MBT User manual

CRH Leviat HALFEN HEK3 User manual

CRH

CRH Leviat HALFEN HEK3 User manual

CRH Leviat Ancon 2000 User manual

CRH

CRH Leviat Ancon 2000 User manual

CRH Leviat HALFEN HDB-Z User manual

CRH

CRH Leviat HALFEN HDB-Z User manual

CRH Leviat Halfen HCC User manual

CRH

CRH Leviat Halfen HCC User manual

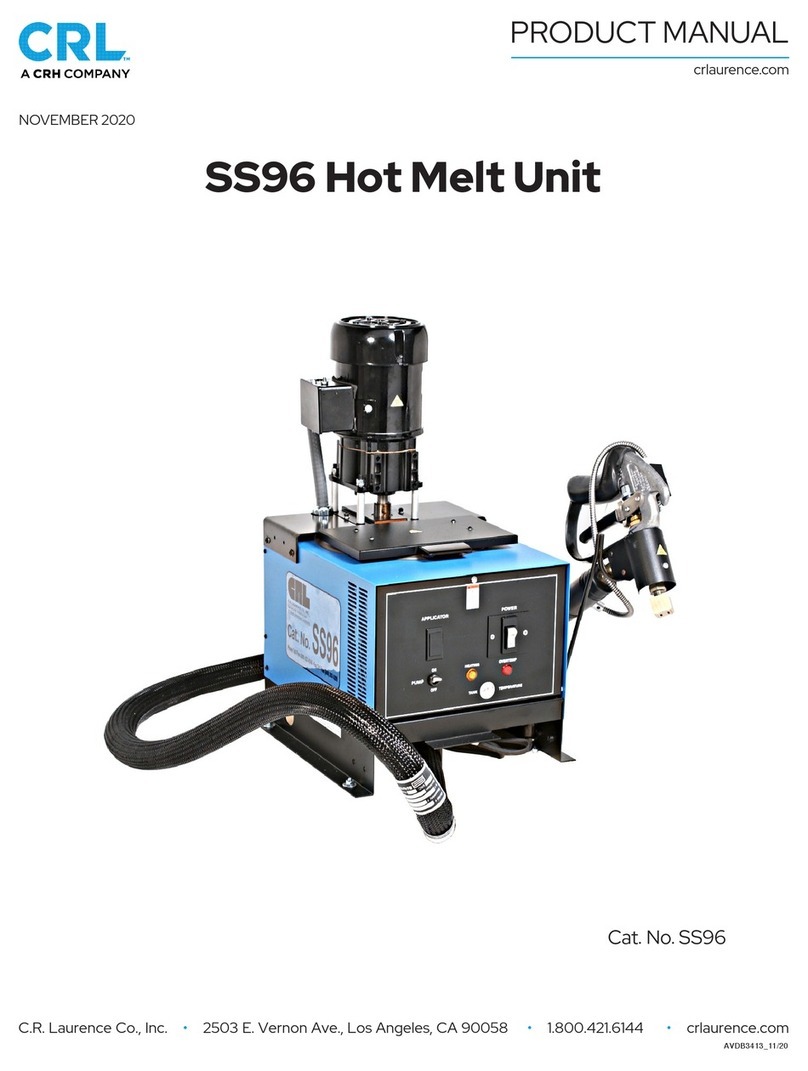
CRH CRL SS96 User manual

CRH

CRH CRL SS96 User manual

CRH Leviat HALFEN DETAN-S User manual

CRH

CRH Leviat HALFEN DETAN-S User manual

CRH Leviat HALFEN DEHA HA-N User manual

CRH

CRH Leviat HALFEN DEHA HA-N User manual

CRH Leviat HALFEN DEHA 6003 User manual

CRH

CRH Leviat HALFEN DEHA 6003 User manual

Popular Industrial Equipment manuals by other brands

UnionSpecial BCE300PD Original instructions

UnionSpecial

UnionSpecial BCE300PD Original instructions

RITE-HITE Dok-Lok STR-4000 owner's manual

RITE-HITE

RITE-HITE Dok-Lok STR-4000 owner's manual

morse 285SX-NT Operator's manual

morse

morse 285SX-NT Operator's manual

Wieland SNA 4043K operating instructions

Wieland

Wieland SNA 4043K operating instructions

SixCase SmartCase SC1230 manual

SixCase

SixCase SmartCase SC1230 manual

IFM Electronic AL1300 operating instructions

IFM Electronic

IFM Electronic AL1300 operating instructions

EXPO D760-ET MiniPurge manual

EXPO

EXPO D760-ET MiniPurge manual

REMS E-Push 2 instruction manual

REMS

REMS E-Push 2 instruction manual

PLX Technology PEX 8624-AA RDK Hardware reference manual

PLX Technology

PLX Technology PEX 8624-AA RDK Hardware reference manual

ABB HT604877 Operation manual

ABB

ABB HT604877 Operation manual

Jäger Z62-H370.01 S5W2 manual

Jäger

Jäger Z62-H370.01 S5W2 manual

Parker PCO2 user guide

Parker

Parker PCO2 user guide

ITOH DENKI POWER MOLLER IB-P03 Technical documentation

ITOH DENKI

ITOH DENKI POWER MOLLER IB-P03 Technical documentation

ABB HT563322 Operation manual

ABB

ABB HT563322 Operation manual

Compac WD1500 instruction manual

Compac

Compac WD1500 instruction manual

ABB Power2 845-M46 Operation manual

ABB

ABB Power2 845-M46 Operation manual

Tokyo Keiki KRG-10 user guide

Tokyo Keiki

Tokyo Keiki KRG-10 user guide

iOptron iPolar Operation manual

iOptron

iOptron iPolar Operation manual

manuals.online logo
manuals.online logoBrands
  • About & Mission
  • Contact us
  • Privacy Policy
  • Terms and Conditions

Copyright 2025 Manuals.Online. All Rights Reserved.