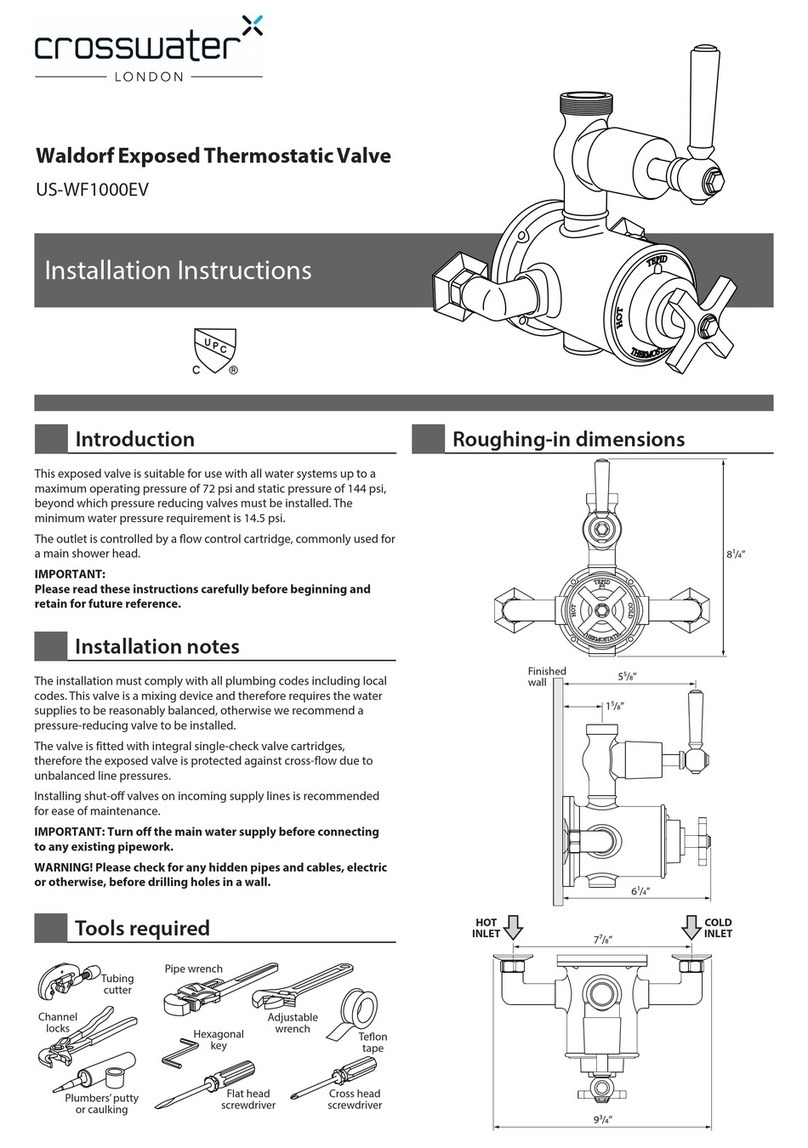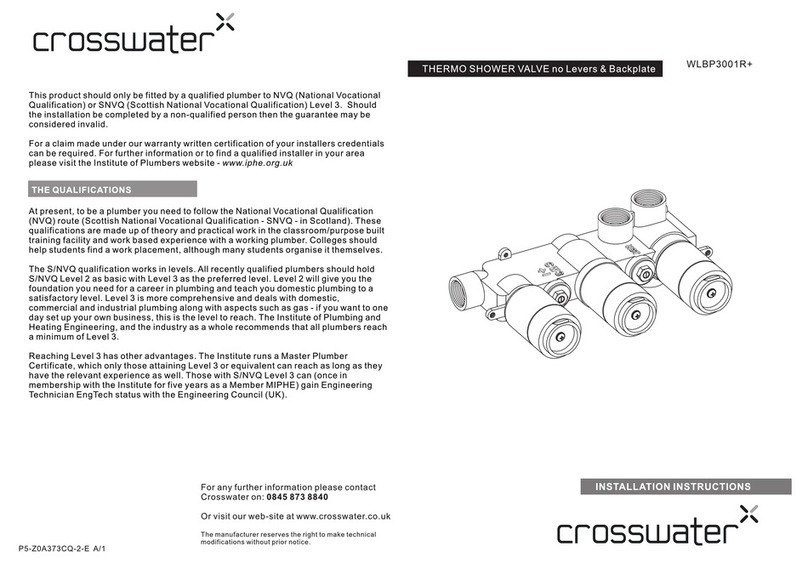
2
12a 2
12b 2
12c 2
12d
Temperature Adjustment:
a:Remove the stem assembly.
b:Remove the spacing collar.
c:Rotate the spacing collar to adjust hottest temperature.Rotate clockwise to
reduce temperature.
d:Rotate counterclockwise to increase temperature.
e:Reinstall the stem assembly.
12e
11
Pressure test and check for
leaks.
Cap
PBS-RGH
Installation Instructions
23
15121422-D 2 15121422-D 3
3
8VLQJPRXQWLQJKROHVVHFXUHWKH
YDOYHPDNLQJVXUHWKH³83´ODEHO
outlet is on top.
If you are making a back-to-back
installation (hot on right and cold on
the left) install the back valve body
as described in steps #5 – #6.
If not, go to step #7. NOTE: Notice
that the back valve has hot and cold
indicators that will be opposite of the
incoming supply lines.
45
Remove the cartridge and stem
assembly. Notice that the pin is at
WKHWRS5RWDWHWKHFDUWULGJH
The pin should be on the bottom.
This valve is designed to fit into a
wall that is -ʾto -ʾfrom
finished wall to the back of the
valve. Extensions are available
separately if necessary.
1-ʾ-ʾ2
Turn off the water supplies.Install the
valve so the finished wall will fit
between the markers on the mud
guard.
2-ʾ-ʾ
6
Align the pins on the bottom of the
cartridge and push the cartridge into
the valve. Make sure the cartridge is
firmly installed into the valve body.
Reinstall stem assembly with mud
guard.
7
Connect valve body to water supplies using the proper fittings .
Warning: avoid soldering at high temperature. Exposure to high
temperature may damage the cartridge. Be sure stops and pressure balance
cartridge are removed before soldering.
8
Stops
Pressure Balance
Cartridge
Warning
Mounting
hole
Mounting hole
Hot
Left Right
Back valve Back valve
Cold Cartridge
5RWDWH
Pin
Pin
Pin
Valve Cartridge
Red
Red
Red Blue Blue
Blue
Flush the system
9
Connect the valve body to the shower
outlet with the proper fitting. Note: it is
suggested that you anchor all water
lines and reinstall stops and cap.
10
Reinstall cartridge assembly
and stop assembly to the valve
body.
2
Installation completed.
13
For further information contact:Crosswater London, 393 Fortune Blvd., Milford, MA 01757 Toll
free number: 844-XWATER-1 (844-992-8371) tel: 508-381-6062 fax: 508-381-6068
www.crosswaterlondon.com
email: technical@crosswaterlondon.com
WarrantyWarranty - - This Crosswater London product is covered by a limited lifetime warranty. For full details, terms and conditions please visit our website.
For further information contact:Crosswater London, 393 Fortune Blvd., Milford, MA 01757 Toll
free number: 844-XWATER-1 (844-992-8371) tel: 508-381-6062 fax: 508-381-6068
www.crosswaterlondon.com
email: technical@crosswaterlondon.com
PBS-RGH
Issue date: 15092019
