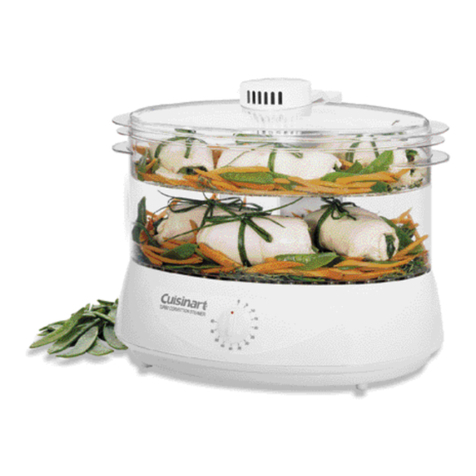
Cuisinart Cook & Steam User manual

Cook & Steam
CRC800U


3
Congratulations on your purchase of the Cuisinart Cook & Steam.
For over 30 years Cuisinart’s aim has been to produce the very nest kitchen equipment
so that cooks at home as well as professional chefs have the tools to express their
creativity.
All Cuisinart products are engineered for exceptionally long life, and designed to be
easy to use as well as to give excellent performance day after day.That is why they have
come to be regarded as the dening machines in their eld by chefs across the world.
Whatever you cook, cook it better with Cuisinart.

4
Contents
Product Description . . . . . . . . . . . . . . . . . . . . . . . . . . . . . . . . . . . 3
Safety Caution . . . . . . . . . . . . . . . . . . . . . . . . . . . . . . . . . . . . . . 6
Important Guidelines . . . . . . . . . . . . . . . . . . . . . . . . . . . . . . . . . . 8
Instructions for Use . . . . . . . . . . . . . . . . . . . . . . . . . . . . . . . . . . . 9
A Cooking Rice. . . . . . . . . . . . . . . . . . . . . . . . . . . . . . . . . . . . . . . . 9
B Cooking Rice and Steaming . . . . . . . . . . . . . . . . . . . . . . . . . . . . . . . . 10
C Steaming only . . . . . . . . . . . . . . . . . . . . . . . . . . . . . . . . . . . . . . . 11
D Reheating rice . . . . . . . . . . . . . . . . . . . . . . . . . . . . . . . . . . . . . . . 11
E Hints & tips. . . . . . . . . . . . . . . . . . . . . . . . . . . . . . . . . . . . . . . . . 12
F Cooking tables . . . . . . . . . . . . . . . . . . . . . . . . . . . . . . . . . . . . . . . 14
ßCooking Rice . . . . . . . . . . . . . . . . . . . . . . . . . . . . . . . . . . . . . . . 14
ßQuantities tables . . . . . . . . . . . . . . . . . . . . . . . . . . . . . . . . . . . . . 16
ßSteaming Vegetables Poultry, Seafood and Egg. . . . . . . . . . . . . . . . . . . . . . . 17
Cleaning & Maintenance . . . . . . . . . . . . . . . . . . . . . . . . . . . . . . . . 19
Guarantee . . . . . . . . . . . . . . . . . . . . . . . . . . . . . . . . . . . . . . . . 20
UK Wiring Instructions . . . . . . . . . . . . . . . . . . . . . . . . . . . . . . . . . 21
After sales Service . . . . . . . . . . . . . . . . . . . . . . . . . . . . . . . . . . . . 22
Recipes . . . . . . . . . . . . . . . . . . . . . . . . . . . . . . . . . . . . . . . . . . 23

5
Product Description
Steam Tray
Glass Lid
‘‘COOK’’ and ‘‘HOLD’’ Indicator
Non-stick Rice Pot
Power Switch
Stainless Steel Housing

6
Carefully read all the instructions before using the appliance and keep in a safe place for future
reference.
Safety Caution
Always follow these safety cautions when using this applance to avoid personal injury or damage to the appliance.
This appliance should be used only as described within this instruction book.
ßThe lid and bowl can be removed for washing manually or within a dishwasher.
ßDo not immerse the housing base in water or any other liquids, or put it in a dishwasher. Disconnect from the
mains and allow to cool. Clean using a damp cloth. Allow to dry thoroughly before re-use.
ßAlways disconnect the appliance immediately after use.
ßNever disconnect the plug by pulling on the mains lead.
ßDo not allow the lead to overhang the edge of the table or work surface.
ßThis appliance should not be used by adults or children whose lack of experience, product knowledge or
disability might cause a hazard, unless they have been correctly instructed and are adequately supervised.
ßChildren should always be supervised to ensure that they do not play with this product.
ßDo not use this appliance if the lead is damaged. In the event of damage the lead must be replaced by a special
lead available from the manufacturer or its service agent. (See “UK After Sales Service” section).

7
ßDo not use the appliance if it has fallen or shows signs of damage. Discontinue use immediately. Contact
Cuisinart (See ‘UK After Sales Service’ section).
ßNo repair can be carried out by the user. Return the appliance to the ‘Cuisinart Service Centre’ for inspection
or repair or replacement. (See ‘UK After Sales Service’ section).
ßUse this appliance for cooking only as described within these instructions for use. Retain these for future
reference.
ßThis appliance is equipped with a safety thermostat which protects it from over heating. In the event of
overheating, the appliance will stop automatically. Should this happen, switch the appliance off from the mains,
unplug and allow to cool for 15 minutes. Plug in and switch on, if the appliance continues to over heat switch
off, unplug and allow to cool for a further 60 minutes.
ßIf the appliance still fails to work, contact the Cuisinart Customer Care Line (refer to After Sales Service
Section section)
ßAlways ensure that the voltage to be used corresponds with the voltage on the appliance, which is indicated
on the bottom of the base unit.
ßThis appliance complies with the basic requirements of Directives 04/108/EEC (Electromagnetic Compatibility)
and 06/95/EEC (Safety of domestic electrical appliances) amended by Directive 93/68/EEC (CE Marking).
ßWARNING: A cut off plug inserted into a 13 amp outlet is a serious safety (shock) hazard. Ensure the cut
off plug is disposed of safely.
ßWARNING: Polythene bags over the product or packaging may be dangerous. To avoid danger of
suffocation, keep away from babies and children. These bags are not toys.
ßThe symbol on the product or on its packaging indicates that this product may not be
treated as household waste. Instead it should be handed over to an appropriate collection point for the
recycling of electrical and electronic equipment. By ensuring this product is disposed of
correctly, you will help prevent potential negative consequences for the environment and human health,
which could otherwise be caused by inappropriate waste handling of this product. For more detailed
information about the recycling of this product, please contact your local council office or your
household waste disposal service.
8
Important Guidelines
ßWARNING: This appliance generates steam. Do not operate uncovered.
ßDo not use your Rice cooker under wall hanging cabinet; the escaping steam could cause damage.
ßDo not use metal utensils. Metal utensils will damage the non-stick nish on rice pot.
ßDo not plug in the Rice Cooker before rice and water have been added. Because most Rice Cookers do not
have an ‘Off’ setting, the appliance will automatically be in ‘HOLD’ mode immediately after the appliance is
plugged in.

9
Instructions for Use
Before using this appliance, ensure the rice pot and steam tray are thoroughly cleaned and dried.
A Cooking Rice
ßMake sure the appliance is unplugged.
ßPlace the rice pot into the stainless steel housing.
ßMeasure the desired amount of dry rice with the measuring cup provided. Rinse if necessary and place in the
rice pot. (See table for recommended quantities).
ßUsing the water line marked inside the rice pot, add water to the rice up to the appropriate water line, (refer
to section ‘F 1 Cooking Rice’).
ßCover the rice pot with the lid, making sure that the steam vent is facing toward the back of the appliance.
ßPlug the appliance into a suitable mains outlet.
ßPress the power switch down to ‘COOK’. The red ‘COOK’ light will turn on to indicate the appliance is in
‘COOK’ mode.
ßCooking time will vary, depending on the amount and type of rice or grain being cooked. (Refer to section ‘F.
Cooking Tables’ for approximate cooking times).
ßOnce the rice is cooked, the appliance will automatically switch to the ‘HOLD’ setting and the ‘HOLD’ light
will turn on. The appliance will stay in ‘HOLD’ mode until the appliance is unplugged from the mains.
ßOnce you are ready to serve the rice, remove the lid, lifting it away from you.
ßFluff rice with paddle or utensil suitable for nonstick cookware.
ßLift and remove rice pot from the housing.

10
B Cooking Rice and Steaming
ßClean and prepare your vegetables, seafood, sh or poultry.
ßPlace the rice and water into the cook pot and begin the ‘COOK’ process (refer to section A, Cooking
Rice).
ßFill the steam tray with your prepared food, with the open end facing up. Using the ‘SteamingVegetables’ chart
for guidance, at the appropriate time during rice cooking, remove the lid and place the lled steam tray on top
of the rice pot, place the lid on top of the steaming tray.
ßWhen the rice is cooked the appliance will automatically switch to ‘HOLD’, unplug the appliance and serve.

11
C Steaming Only
ßEnsure the appliance is unplugged.
ßFill the rice pot with the suggested amount of water based on the ‘Steaming Vegetables’ chart.
ßFill the steam tray and place on top of the rice pot.
ßPlace lid on top of the steam tray. Press the power switch down to start cooking. The red light will illuminate
to indicate the appliance is in ‘COOK’ mode.
ßWhen water is completely evaporated, the appliance will automatically switch to the ‘HOLD’ setting and the
‘HOLD’ light will illuminate. The appliance will stay in ‘HOLD’ mode until it is unplugged from the mains.
D Reheating Rice
ßEnsure the appliance is unplugged
ßTo reheat rice, add 4 tbsp cold water per cup of cooked rice to the rice in the rice pot.
ßStir well to mix.
ßPlace the lid on top of the rice pot.
ßPlug the appliance in and press the power switch down to ‘COOK’ position. The red ‘COOK’ light will turn
on.
ßOnce the rice is cooked, the appliance will automatically switch to the ‘HOLD’ setting and the ‘HOLD’ light
will turn on. The appliance will stay in ‘HOLD’ mode until it is unplugged from the mains.

12
E Hints and Tips
ßGenerally it is best to wash rice before cooking, this removes starches and reduces stickiness. To wash, place
in a bowl and cover with water, swirl around until water appears chalky/cloudy and drain. Repeat until water
is clear. Do not wash the rice in the rice pot, if the pot is wet on the outside when cooking, it may cause
damage to your appliance.
ßSome rice may require a soaking period, this can be done in the rice pot prior to cooking.
ßWe recommend experimenting to determine the right cooking and steaming times for different types of rice
and foods.
ßFor best texture, allow cooked rice to rest in ‘HOLD’ mode for 5 – 10 minutes before serving. After rice
‘rests’ for 5-10 minutes, remove the lid and stir gently with the rice paddle or a wooden spoon. If rice is not
ready to serve, re-cover and stand on ‘HOLD’ mode until ready.
ßThe rice cooker will automatically switch to the ‘HOLD’ setting when it has nished cooking. At this time, you
may stir in chopped raw vegetables such as spring onions, peas, shredded carrot or cherry tomatoes, they will
warm while the rice is ‘resting’, retaining their texture.
ßThis appliance can be used to prepare pre-packed rice, pilaf or grain mixes. Follow the packaging instructions
to cook, if sautéing is required, this can be done in the rice pot. Plug in the appliance, and switch to ‘COOK’
mode. Add the required butter or oil to the rice pot,add the vegetables/rice/meat and sauté according to pack
instructions with the lid on. Add the required liquid and continue to cook. If the rice is too wet, allow it to
remain on ‘HOLD’ for 15-20 minutes before serving. If it is too ‘chewy’, add up to 1/2 measuring cup of water
and leave to stand on ‘HOLD’ until the liquid is absorbed (approximately 15-20 minutes)
ßWhen measuring rice with the measuring cup, level it off with a table knife.

13
ßWhen rice is placed into the rice pot, level it off to a at layer that covers the entire bottom of the bowl, to
insure that it cooks evenly.
ßThe water you use for Cooking Rice should be the same that you drink. The taste of water will affect the taste
of the cooked rice.
ßFor best results use cold water. The cooking time will vary depending on the temperature of the water being
used.
ßStock can be used in place of water to cook rice.
ß1-2 tsp of butter or oil will help grains of rice to separate during cooking.
ßThis appliance can be used to steam vegetables, seafood and some meats while Cooking Rice. Use our recipes
as a guide, or create your own combinations.
ßWhen steaming vegetables, clean them and trim to a similar size. Follow the ‘Vegetable Steaming Guide’ for
steaming vegetables alone. To steam vegetables while preparing rice, use the ‘Vegetable Steaming Guide’ to add
vegetables in steam tray to the rice cooker at the appropriate time. Most vegetables can be added 10 minutes
before rice has nished cooking. Always steam foods with the lid on the steam tray.
ßWhen steaming meats such as poultry or sausage, cut all into similar sized pieces. Arrange in a single layer in
the steaming tray that has been sprayed with cooking spray.
ßWhen steaming prawns, scallops and other seafood, arrange in a single layer in the steam tray that has been
sprayed with cooking spray.
ßYou can use your rice cooker to cook a combination of rice, grains and legumes at the same time. Follow our
recipe ideas and suggestions.

14
F Cooking Tables
ßCooking times will vary according to amount and temperature of cooking liquid.
ßThe simplest method of cooking long grain white rice, is to place the rice in the rice pot using the measuring
cup and add liquid to the appropriate marking on the pot. For example, using the measuring cup ll the rice
pot with 2 cups rice and then add water to the 2 cup water mark inside the pot. If using 3 cups of rice, add
water to the 3 cup mark, and repeat this with 4-8 cups of rice.
N.B. Preparing less than 2 cups of rice is not recommended.
ßFor grains or brown and speciality rice, use the quantities of liquid recommended by the manufacturer.
1. Quantities Table
The following table provide a guide to cooking rice for the desired number of people.

15
Rice / Grain Serves Amount of Rice Amount of liquid Approximate cooking time
(cup water mark) (mins)
Basmati 2 2 2 15
4 3 3 20
6 4 4 22
8 5 5 24
10 6 6 27
16 8 8 30
Long Grain 2 2 2 15
4 3 3 20
8 4 4 22
10 5 5 24
12 6 6 27
16 8 8 30

16
Quantities Table (part 2)
Rice / Grain Serves Amount of Rice Amount of liquid
(cup water mark)
Brown Rice 2 1 2
4 2 3
Couscous 6 2 follow manufacturer’s guideline
8 5 5
Black Rice 4 1 2
8 2 3
1/2
Arborio 4 1 3
1/2
Rolled oats 4 2 follow manufacturer’s guideline
8 4 follow manufacturer’s guideline

17
2. Steaming Vegetables Poultry, Seafood and Egg
ßPlace the required amount of water in the rice pot.Arrange food in a single layer in the steam tray, cut to
the size indicated in the table below.
ßCooking times are approximate, and will cook vegetables until just tender. For a softer/more tender re-
sult, add more time and for a rmer vegetable, reduce steaming time.
ßUnplug the appliance immediately after vegetables have been steamed for the appropriate time to prevent
overcooking. If steaming vegetables over rice, use the chart to determine approximately when to add the
steam tray on to the rice pot (placing the lid back on top).
ßServe steamed vegetables immediately or plunge into ice water to stop cooking, to use in salads and
other cold preparations.
Food Amount Preparation Water level Approximate cooking time
in rice pot (mins)
Asparagus 225g Cut to 8cm 2 9-10
Broccoli 225g 3-4cm orets 2 11
Carrots - baby 225g Whole 2 15
Carrots - sliced 225g 1/2 cm slices 2 15
Cod Up to 450g 6 cut in an even size 10-15 depending on size
and arranged on
parchment in the
steam stray
Eggs, Large 16 8 8 30
Mange Tout 2 2 2 15
Vegetable Steaming

18
Food Amount Preparation Water level Approximate cooking time
in rice pot (mins)
Peas 110g Whole 2 11
Potatoes, new 8 Quartered 2 23-24
4cm diameter
Potatoes 350g 3-4cm cubes 2 18-19
Poultry, chicken 225g - 450g Cut to similar size 2 15
or turkey pieces, 5-6 cm long 2 15-20
Prawns Up to 450g Whole, peeled 2 12-15
or unpeeled. depending on size
Steam stray sprayed
with cooking spray
Salmon Up to 450g Cut to an even 2 10-15
size and arranged
on parchment in
the steam tray
Scallops Up to 450g Seasoned, steam 2 10-15
tray sprayed,
cooking spray
Sweet potato 450g Peeled, 1cm cubes 2 25

19
Cleaning & Maintenance
ßUnplug your appliance and allow it to cool before cleaning.
ßPlace non-stick rice pot, steam tray and lid in the dishwasher or wash with warm soapy water. If food
sticks to the surface, ll with warm, soapy water and allow to soak before cleaning.
ßIf scouring is necessary, use a non abrasive cleanser or liquid detergent with a nylon pad or brush.
ßNever immerse the stainless steel housing in water or other liquids.To clean, simply wipe with a clean
damp cloth and dry thoroughly before storing. Apply any cleaning agents to the cloth before cleaning, not
the housing.
ßMake sure all parts are clean and dry before storing. Store appliance in a clean, dry place.

20
Guarantee
ßThis Cuisinart appliance is guaranteed for domestic consumer use for 5 years.
ßThe guarantee covers defects under normal use from date of purchase and ceases to be valid in the event
of alteration or repair by unauthorized persons.
ßIf the appliance does not perform satisfactorily due to defects of material or manufacture, it will be repai-
red or replaced by the manufacturer (see UK after sales service for details).
ßThis guarantee is only valid in the United Kingdom (including Northern Ireland, Republic of Ireland, the
Channel Islands and the Isle of Man).
ßNo responsibility will be accepted for any damage caused in transit.
ßA charge may be made if goods are returned outside the relevant guarantee period or if the product is
returned unnecessarily.
ßThe manufacturer reserves the right to amend terms and specications without prior notice.
ßThis guarantee in no way affects your statutory rights.
Other manuals for Cook & Steam
2
This manual suits for next models
1
Table of contents
Other Cuisinart Electric Steamer manuals

Cuisinart
Cuisinart TCS-60C User manual

Cuisinart
Cuisinart Cook & Steam User manual

Cuisinart
Cuisinart COOKFRESH STM1000E User manual

Cuisinart
Cuisinart FP-2207A User manual

Cuisinart
Cuisinart TCS-60 Service manual

Cuisinart
Cuisinart STM1000U User manual

Cuisinart
Cuisinart CookFresh STM-1000 Quick guide

Cuisinart
Cuisinart TCS-60E User manual

Cuisinart
Cuisinart STM-1000A Series Service manual

Cuisinart
Cuisinart Cook & Steam User manual