STEAMING GUIDE
PROTEINS
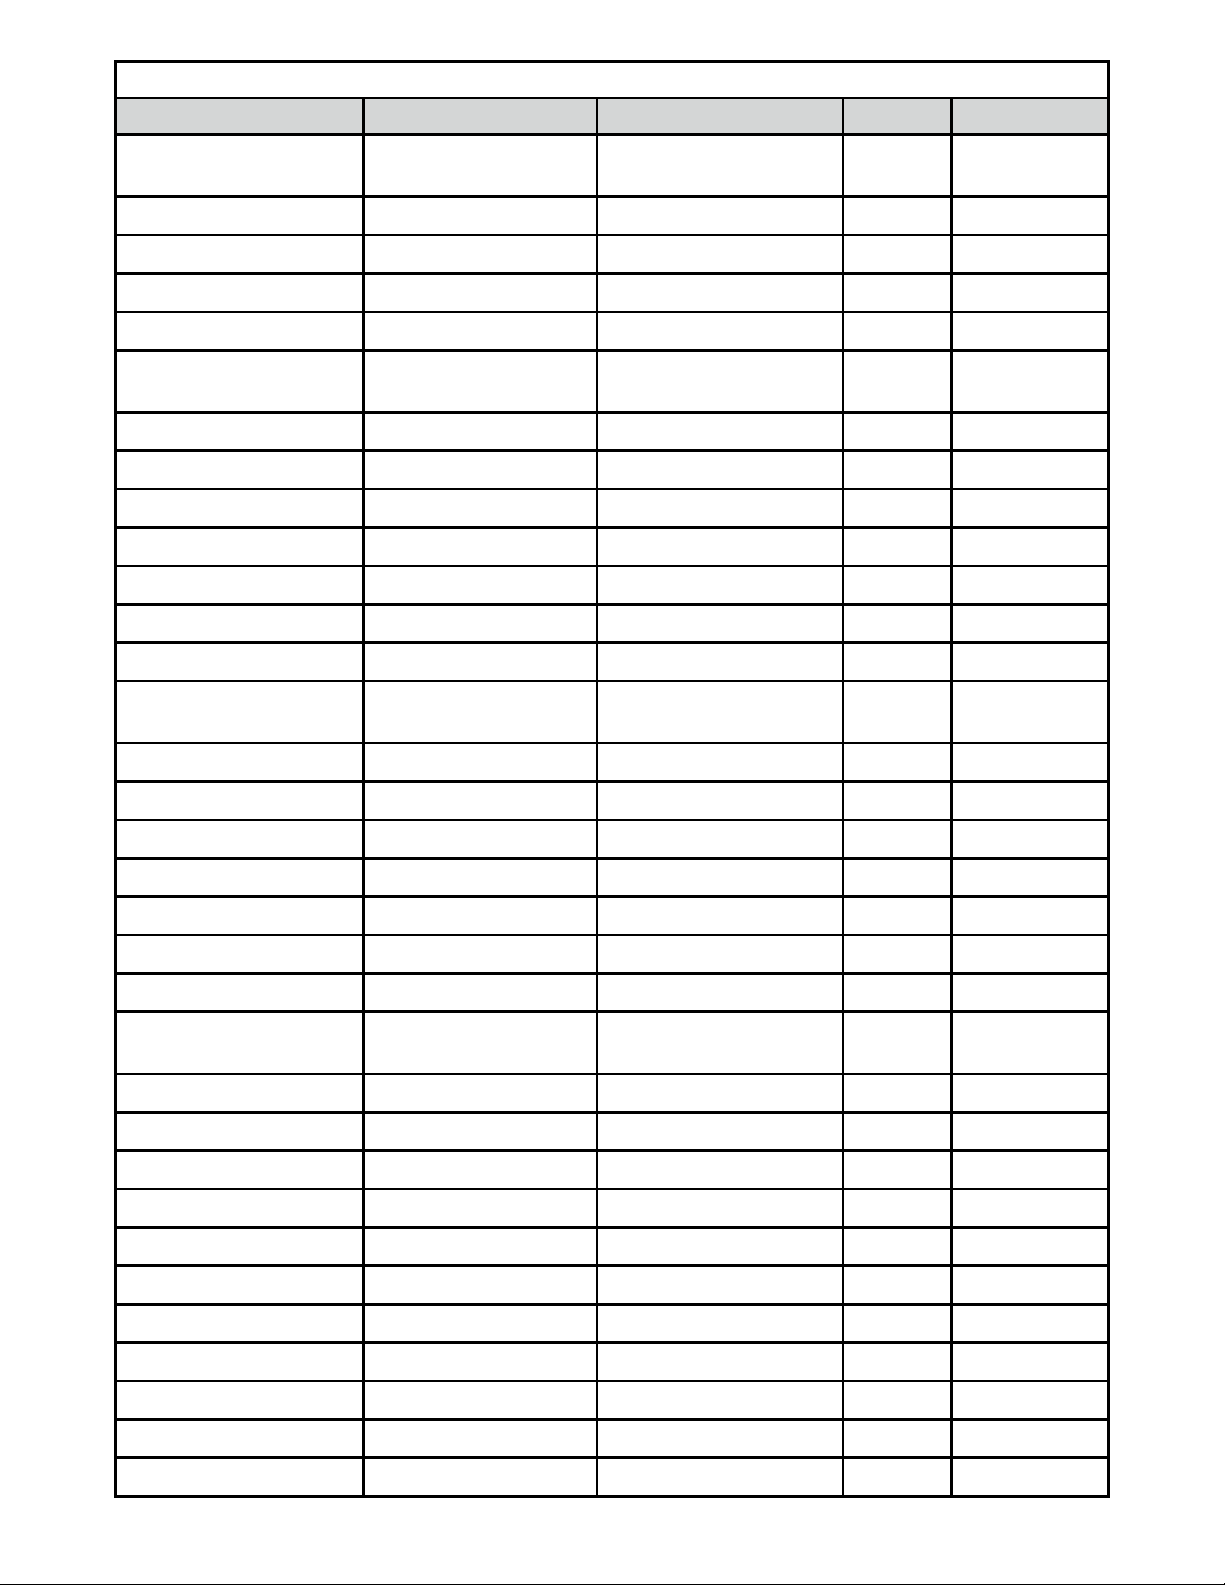
Food Amount Preparation Function Time
Chicken breast 4 chicken breasts, about
700 gr total; yields 4 cups
cubed
Trimmed of any excess fat Poultry 15 to 20 minutes
Clams 1 dozen Scrubbed Seafood 6 to 8 minutes
Crab legs, fresh 500 gr Rinsed Seafood 8 minutes
Crab legs, frozen 500 gr Rinsed Seafood 10 minutes
Fish fillet, thick, e.g., salmon 350 gr Rinsed Seafood 15 minutes
Fish fillet, thin, e.g.,
flounder/sole
250 gr Rinsed Seafood 6 to 8 minutes
Fish, whole 900 gr Cleaned and rinsed Seafood 20 minutes
Fish, whole 450 gr to 700 gr Cleaned and rinsed Seafood 15 minutes
Lobster tail 4 lobster tails Rinsed Seafood 10 minutes
Mussels 900 gr Scrubbed and debearded Seafood 6 to 8 minutes
Prawn 500 gr Peeled and deveined Seafood 6 minutes
Prawn, frozen 500 gr N/A Seafood 10 minutes
HELPFUL HINTS
• Steaming times stated in the Steaming Guide and
Recipes are only to be used as a guide. Times may
vary depending on the quantity, size of pieces,
spacing and placement of food on the steaming
tray, and personal preference.
• For the most consistent results, food pieces should
be similar in size.
•
Steaming times will vary according to size,
temperature, freshness of foods and personal taste.
• Meat, poultry and seafood should be thawed
completely before steaming.
• Never add seasonings, broth or herbs to the water
reservoir.
• No liquids other than water should be used in the
water reservoir.
• When using recipes, follow quantities as closely as
possible for best results.
• Some foods, such as grains and rice, can be
steamed in ovenproof dishes and covered with
aluminum foil. See the recipe section for examples.
• For high altitude cooking, steaming times may need
to be increased.
• For optimum results, do not overll steaming tray;
distribute evenly in a single layer.
•
Ready-to-Eat Cues: Vegetables and fruits will be easy
to pierce with by the tip of a knife or tines of a fork.
Their colors will also brighten. For meats and chicken,
check the internal temperature. The recommended
temperature for chicken breast is 74°C. The
recommended temperature for sh is 63°C.
• To check on food during the steam cycle, always
press the PAUSE button to stop ow of steam.
Wait a second before lifting the lid.
• Always lift the side of lid farthest away from you
rst, to allow steam to escape away from you.
• Times indicated are based upon use of fresh
vegetables, meats and seafood (frozen chicken or
meat are not recommended). Steaming times will
vary according to size, temperature, freshness of
foods and personal taste.
•
Preset times are a good guide, but as you use your
steamer, you may want to adjust the time to get the
exact results you want. Less time will produce a “crisp-
tender” vegetable; more will give you a softer texture.
• Be sure to cover foods placed into steamer in
dishes to avoid steam condensing in bottom of
dish. We suggest using aluminum foil.
• Always use tongs to remove food from the steamer.
Use mitts or potholders to lift tray out of steamer
before removing food.
• Use the REHEAT button for bringing food up to
serving temperature. The recommended serving
temperature for food is at least 74ºC.
• Steaming is the best cooking method when it
comes to making baby food: Steam food until
very tender. Process in either a blender or food
processor, adding breast milk or ltered water,
1 tablespoon at a time, to desired consistency.
• The recipes in this book include steaming times.
These times are approximate and were tested to
produce a medium result. This may not suit your
taste. You may prefer to steam for a shorter or
longer time. As you begin to familiarise yourself
with the Cuisinart Steamer you will quickly
determine exact timings which will achieve the
desired results.
8