Curtiss-Wright DuraCOR 310 User manual

USER MANUAL
DuraCOR 310
i.MX6 ARM Modular Mission Computer

DuraCOR 310
Page 2 of 51 MNL-0666-01 Rev A3 ECO-5479 Effective: 26 Apr 18
Disclaimer
Although the information contained herein has been carefully verified, Curtiss-Wright assumes no responsibility for errors that might
appear in this document or for damage to property or persons resulting from improper use of this manual or related software.
Curtiss-Wright reserves the right to change the contents and form of this document, as well as the features and specifications of its
products, at any time without notice. The information in this publication does not represent a commitment on the part of Curtiss-
Wright. This document contains proprietary information that is protected by copyright. All rights are reserved. No part of this
document may be photocopied, reproduced, or translated into another language without the prior written consent of Curtiss-Wright.
Contact Information
Curtiss-Wright
Defense Solutions Division
3222 S. Washington St.
Salt Lake City, Utah, USA 84115
T: +1.801.483.1533
Toll-Free: +1.800.483.3152
F: +1.801.483.1523
Email:
Sales: slp_sales@curtisswright.com
Web-site: www.curtisswrightds.com
Send us your comments and feedback: [email protected]
Trademarks
Parvus is a brand of Curtiss-Wright Corporation.
All trademarks, both marked and not marked, appearing in this document are the property of their respective owners.
Copyright
© 2016 Curtiss-Wright
WEEE
The information below is issued in compliance with the regulations as set out by the 2002/96/CE directive, subsequently superseded
by 2003/108/CE. It refers to electrical and electronic equipment and the waste management of such products. When disposing of a
device, including all of its components, subassemblies, and materials that are an integral part of the product, you should consider
the WEEE directive.
This symbol has been attached to the equipment or, if that was not possible, on the packaging,
instruction literature, and/or the guarantee sheet. Using this symbol states that the device has been
marketed after August 13th 2005, and implies that you must separate all of its components when
possible, and dispose of them in accordance with local waste disposal legislation.
Because of the substances present in the equipment, an improper use or disposal of the refuse can cause damage to human
health and to the environment.
With reference to WEEE, it is compulsory not to dispose of the equipment with normal urban refuse. Arrangements should be
instigated for separate collection and disposal.
Contact your local waste collection body for more detailed recycling information.
In case of illicit disposal, sanctions may be levied on transgressors.
RoHS
This device, including all its components, subassemblies, and the consumable materials that are an integral part of the product, has
been manufactured in compliance with the European directive 2002/95/EC known as the RoHS directive (Restrictions on the use of
certain Hazardous Substances). This directive targets the reduction of certain hazardous substances previously used in electrical
and electronic equipment (EEE).

DuraCOR 310 Table of Contents
MNL-0666-01 Rev A3 ECO-5479 Effective: 26 Apr 18 Page 3 of 51
Table of Contents
Table of Contents ........................................................................................................................ 3
List of Figures ............................................................................................................................. 6
List of Tables ............................................................................................................................... 7
Chapter 1 Introduction .............................................................................................................. 8
About This Document .................................................................................................................................... 8
Manual Organization .............................................................................................................................. 8
Definitions ............................................................................................................................................... 8
Description of Safety Symbols ................................................................................................................ 8
Functional Description ................................................................................................................................... 9
Features .................................................................................................................................................. 9
Configurations ....................................................................................................................................... 10
Base System..................................................................................................................................10
Base System with Removable Storage Bay Option.......................................................................11
System Block Diagram ......................................................................................................................... 12
Shared Resources and Connectors Location ....................................................................................... 13
Chapter 2 Operational Description ......................................................................................... 14
Mini-PCIe Expansion ................................................................................................................................... 14
Installing Mini-PCIe Cards into the DuraCOR 310 Mission Computer ................................................. 14
Integrating Mini-PCIe Cards ................................................................................................................. 15
Storage Options .......................................................................................................................................... 15
mSATA ................................................................................................................................................. 16
2.5” SSD Expansion ............................................................................................................................. 16
Installing the Device.......................................................................................................................16
Removing the Device.....................................................................................................................16
Accessories....................................................................................................................................16
MicroSD Card Expansion ..................................................................................................................... 17
Installation......................................................................................................................................17
Removal.........................................................................................................................................18
Audio ........................................................................................................................................................... 19
Microphone ........................................................................................................................................... 19
Serial Configuration ..................................................................................................................................... 19
GPIO ........................................................................................................................................................... 19
CAN ............................................................................................................................................................. 20
Built-In Test (BIT) ........................................................................................................................................ 20
Zeroization................................................................................................................................................... 20
Remote Off .................................................................................................................................................. 20
Implementing Remote Off ..................................................................................................................... 20
Write Protect ............................................................................................................................................... 20
Power Hold Up ............................................................................................................................................ 21
Chapter 3 Quick Start Guide ................................................................................................... 22
Recommended Equipment .......................................................................................................................... 22
Breakout Cable Set .............................................................................................................................. 22
Power-on Sequence .................................................................................................................................... 22

DuraCOR 310 Table of Contents
Page 4 of 51 MNL-0666-01 Rev A3 ECO-5479 Effective: 26 Apr 18
Chapter 4 Linux BSP ............................................................................................................... 24
Required Host Equipment ........................................................................................................................... 24
Building and Installing the BSP ................................................................................................................... 24
Installing Required Software Repositories ........................................................................................... 24
Setting up the Environment .................................................................................................................. 24
Executing the Build ............................................................................................................................... 25
Initial Boot ............................................................................................................................................. 25
Partition the Internal Storage ................................................................................................................ 26
Installing the RootFS ............................................................................................................................ 26
Configure the bootloader ...................................................................................................................... 26
Chapter 5 Connector Description ........................................................................................... 28
Connector Identification .............................................................................................................................. 28
Connector Pinouts ....................................................................................................................................... 29
J1 Power Connector ............................................................................................................................. 29
J2 I/O Connector................................................................................................................................... 30
J3 I/O Connector................................................................................................................................... 32
J4 Configurable I/O Connector ............................................................................................................. 34
Configurable I/O Internal Connectors ................................................................................................... 36
Test Cable Set – CBL-C31X-01 ........................................................................................................... 37
Chapter 6 Specifications ......................................................................................................... 38
Technical Specifications .............................................................................................................................. 38
Energy Efficient CPU/GPU ................................................................................................................... 38
Storage ................................................................................................................................................. 38
Modular/Expandable ............................................................................................................................. 38
Target Applications ............................................................................................................................... 38
Standard I/O Interfaces ........................................................................................................................ 38
Related Products .................................................................................................................................. 39
Mechanical Specifications ........................................................................................................................... 39
Physical ................................................................................................................................................ 39
Dimensions ........................................................................................................................................... 39
Mounting the System ............................................................................................................................ 42
Power .................................................................................................................................................... 42
Environmental Specifications ...................................................................................................................... 42
Temperature ......................................................................................................................................... 42
Shock/Vibration ..................................................................................................................................... 42
EMI/EMC .............................................................................................................................................. 43
Operating Conditions ............................................................................................................................ 43
Other Specifications .................................................................................................................................... 43
Reliability .............................................................................................................................................. 43
Export Jurisdiction ................................................................................................................................ 44
CE Marking ........................................................................................................................................... 44
Chapter 7 Troubleshooting ..................................................................................................... 45
Product Identification ................................................................................................................................... 45
Technical Assistance .................................................................................................................................. 45
Returning for Service .................................................................................................................................. 45
Chapter 8 Contact Info ............................................................................................................ 46
Appendix A Onboard Microcontroller Functions .................................................................. 47
USB Serial Communication Protocol .................................................................................................... 47
DuraCOR 310 Table of Contents
MNL-0666-01 Rev A3 ECO-5479 Effective: 26 Apr 18 Page 5 of 51
Protocol Buffers .................................................................................................................................... 47
BIT Status via Protocol Buffers ............................................................................................................. 47
Serial Configuration via Protocol Buffers .............................................................................................. 48
Apendix B GPIO Configuration ............................................................................................... 49
GPIO ........................................................................................................................................................... 49
GPIO Example Code ............................................................................................................................ 50
Building Example Code ........................................................................................................................ 50
Glossary ..................................................................................................................................... 51

DuraCOR 310 List of Figures
Page 6 of 51 MNL-0666-01 Rev A3 ECO-5479 Effective: 26 Apr 18
List of Figures
Figure 1: Base Unit ..................................................................................................................................... 10
Figure 2: Base System with Removable Storage Bay ................................................................................ 11
Figure 3: DuraCOR 310 Block Diagram ...................................................................................................... 12
Figure 4: SATA Expansion .......................................................................................................................... 13
Figure 5: Mini-PCIe Cards from various Manufactureres ........................................................................... 14
Figure 6: Card Slot Identification ................................................................................................................. 15
Figure 7: SSD Removable Tray .................................................................................................................. 16
Figure 8: MicroSD Card Slot ....................................................................................................................... 17
Figure 9: MicroSD Card Removal ............................................................................................................... 17
Figure 10: DuraCOR 310 Connector Identification ..................................................................................... 28
Figure 11: DuraCOR 310 J1 Front Pinout ................................................................................................... 29
Figure 12: DuraCOR 310 J2 Front Pinout ................................................................................................... 30
Figure 13: DuraCOR 310 J3 Front Pinout ................................................................................................... 32
Figure 14: DuraCOR 310 J4 Front Pinout ................................................................................................... 34
Figure 15: P2 – Audio Connector ................................................................................................................ 36
Figure 16: P4-P6 – Configurable I/O ........................................................................................................... 36
Figure 17: CBL-C31X-01 Starter Cable Set ................................................................................................ 37
Figure 18: DuraCOR 310 Top View Dimensions ........................................................................................ 40
Figure 19: DuraCOR 310 Front View Dimensions ...................................................................................... 40
Figure 20: DuraCOR 310 Side View Dimensions ....................................................................................... 41
Figure 21: DuraCOR 310 with Removable SATA SSD Option Front View ................................................ 41
Figure 22: DuraCOR 310 with Removable SATA SSD Option Side View .................................................. 41
Figure 23: DuraCOR 310 Mounting Hole Locations ................................................................................... 42
Figure 24: GPIO Connection to CPU .......................................................................................................... 49

DuraCOR 310 List of Tables
MNL-0666-01 Rev A3 ECO-5479 Effective: 26 Apr 18 Page 7 of 51
List of Tables
Table 1: DuraCOR 310 Configurations ....................................................................................................... 10
Table 2: DuraCOR 310 Peripheral Chip List ............................................................................................... 12
Table 3: Stereo Connector Pinout ............................................................................................................... 19
Table 4: DuraCOR 310 Connector IdentificationTable ............................................................................... 28
Table 5: J1 Connector Information .............................................................................................................. 29
Table 6: J1 Pinout ....................................................................................................................................... 29
Table 7: J2 Connector Information .............................................................................................................. 30
Table 8: J2 Pinout ....................................................................................................................................... 30
Table 9: J3 Connector Information .............................................................................................................. 32
Table 10: J3 Pinout ..................................................................................................................................... 32
Table 11: J4 Connector Information ........................................................................................................... 34
Table 12: J4 Pinout ..................................................................................................................................... 34
Table 13: Configurable I/O Internal Connector Part Numbers .................................................................... 36
Table 14: CBL-C31X-01 .............................................................................................................................. 37
Table 15: USB Serial Protocol .................................................................................................................... 47
DuraCOR 310 Chapter 1 Introduction
Page 8 of 51 MNL-0666-01 Rev A3 ECO-5479 Effective: 26 Apr 18
Chapter 1 Introduction
The DuraCOR 310 is an ultra-small form factor (SFF) tactical mission computer based on a low-power;
four-core NXP i.MX6 Quad Arm processor equipped with a rugged Flash disk and PCIe-Mini Card I/O
expansion slots. It contains a MIL-STD-1275/704 power supply in an IP67 (dust/water proof) sealed
aluminum chassis with micro-miniature MIL-DTL-38999 like connectors.
About This Document
This manual provides the technical information necessary to take advantage of all features and integrate
the mission computer in diverse platforms and applications.
Manual Organization
This manual provides functional and technical descriptions of the DuraCOR 310 hardware, instructions on
connecting the system to test equipment, connector descriptions and pinouts, and specifications.
Chapter 1 provides an introduction and function description of the DuraCOR 310
Chapter 2 explains how to operate the DuraCOR 310. It describes the system connectors and
cables, and includes procedures for starting the system, installing and using mini-PCIe IO cards,
and using zeroization capabilities.
Chapter 3 provides a Quick Start guide
Chapter 4 contains the Linux BSP information
Chapter 5 contains connector pinouts for all connectors (external and internal).
Chapter 6 provides chassis specifications, dimensions, and mounting instructions. In addition, it
provides the technical and environmental specifications for the DuraCOR 310.
Chapter 7 provides troubleshooting instructions and technical support contact information
Chapter 8 provides additional contact information.
Definitions
Please refer to the Glossary at the end of this document for an explanation of terms.
Description of Safety Symbols
The following symbols are used in this manual to indicate important information and potentially dangerous
situations.
Warning! Danger, electrical shock hazard!
Personal injury or death could occur. Also damage to the system, connected peripheral devices, or
software could occur if the warnings are not followed carefully.
Caution! Hazard to individuals, environment, devices, or data!
If you do not adhere to the safety advice next to this symbol, there is obvious hazard to individuals, to
environment, to materials, or to data.

DuraCOR 310 Chapter 1 Introduction
MNL-0666-01 Rev A3 ECO-5479 Effective: 26 Apr 18 Page 9 of 51
Note: This symbol highlights important information or instructions that should be observed.
Functional Description
The Parvus DuraCOR 310 is an ultra-small form factor (SFF) tactical mission computer based on a low-
power; four-core NXP i.MX6 Quad ARM processor equipped with a rugged Flash disk and PCIe-Mini
Card I/O expansion slots. At less than 40 in3 in volume, 1.5 lbs. in weight, and 10W power, this miniature
multi-core rugged Commercial-Off-the-Shelf (COTS) processor is an ideal solution for size, weight, power
and cost (SWaP-C) sensitive mobile, airborne, ground, manned and unmanned vehicle and sensor
applications. Optimized for high performance energy efficient processing, the unit boasts a quad-core
CPU with HD-class video acceleration, including OpenGL, OpenCL, and OpenVG accelerators
The ultra-reliable and modular design of the DuraCOR 310 features high mechanical robustness and I/O
flexibility to meet the needs of civil and military and aerospace platforms. The unit features an industrial-
grade ARM-based Computer-on-Module (COM) tightly integrated with a Flash SSD and system carrier
board, which provides a full complement of standard vetronics I/O interfaces (including CANbus, USB,
Ethernet, Serial, DIO, Video, and Audio), as well as up to two slots for optional add-on Mini- PCIe I/O
modules. In addition to internal mSATA and microSD card slots, the system offers an optional removable
2.5” SATA SSD storage option for high capacity storage and information assurance requirements. Like
other DuraCOR models, the 310 leverages both an ecosystem of rugged COTS Mini-PCIe modules
(including MIL-STD-1553 and ARINC429 avionics databus interfaces) and Curtiss-Wright’s responsive,
cost-competitive application engineering services to deliver Modified COTS (MCOTS) variants quickly and
without a traditional NRE fee.
The unique combination of small size, low-power multi-core processing, and flexible I/O of the DuraCOR
310 delivers new capabilities for Command, Control, Communications, Computers, Intelligence,
Surveillance and Reconnaissance (C4ISR) applications. This compact system supports a wide operating
temperature range of -40 to +71°C (-40 to +160ºF) without fans or active cooling requirements. It thrives
in extreme shock/vibration conditions, high altitude, and humidity, making it well suited for mobile, tactical,
aerospace, and ground vehicle applications. Reliably designed for use on-board aircraft and vehicle
platforms, the unit will undergo comprehensive qualification testing to MIL-STD-810G, MIL-STD-461F,
MIL-STD-1275D, MIL-STD-704F and RTCA/DO-160G test conditions for environmental, power and EMI
(thermal, shock, vibration, dust, water, humidity, altitude, power spikes/surges, conducted/radiated
emissions and susceptibility).
Housed in a rugged sealed IP67-rated (dust and water proof) aluminum chassis with MIL-performance
circular connectors, the DuraCOR 310 features advanced EMI filtering and power conditioning to protect
against input vehicle/aircraft voltage surges, spikes and transients. In addition, optional 50ms power hold-
up capabilities are supported for MIL-STD- 704F aircraft power switch-over requirements.
Features
Miniature SWaP-optimized quad-core NXP i.MX6 ARM processor system:
Size: ~40 in³ volume
Weight: < 1.5 lbs. (< 0.68 kgs)
Power: < 10W (estimated)
Rugged IP67 chassis with micro-mini MIL-performance circular connectors
Modular I/O architecture: up to two slots for PCIe Mini-Cards (for add-on I/O)
Rugged Flash storage (mSATA / microSD card / removable 2.5” SATA SSD)

DuraCOR 310 Chapter 1 Introduction
Page 10 of 51 MNL-0666-01 Rev A3 ECO-5479 Effective: 26 Apr 18
28 VDC MIL-1275/704/DO-160 power supply for aircraft and ground vehicles; optional 50 ms
power hold-up
Qual testing pending for extreme MIL-STD-810G/DO-160 thermal, shock, vibration, altitude,
humidity; also MIL-STD-461F/DO-160G EMI/EMC
Designed and manufactured using AS9100 Aerospace Grade/ISO 90001:2000 certified Quality
Program.
CE Marking
Configurations
Due to the modularity of the DuraCOR 310 (mSATA/microSD/Removable SSD, and pre-integrated Mini-
PCIe cards), numerous configuration variants are possible. Please consult with your sales representative
and application engineer to assess your technical requirements and recommended system configuration.
Table 1: DuraCOR 310 Configurations
Product Number Description
System w/ mSATA
C310-01 DuraCOR 310, i.MX6 Quad, 1 GB RAM, 16 GB mSATA SSD mSATA, Linux
C310-02 DuraCOR 310, i.MX6 Quad, 1 GB RAM, 32 GB mSATA SSD mSATA, Linux
C310-03 DuraCOR 310, i.MX6 Quad, 1 GB RAM, 64 GB mSATA SSD mSATA, Linux
C310-04 DuraCOR 310, i.MX6 Quad, 1 GB RAM, 128 GB mSATA SSD mSATA, Linux
C310-05 DuraCOR 310, i.MX6 Quad, 1 GB RAM, 256 GB mSATA SSD mSATA, Linux
SYSTEM with 2.5" REMOVABLE STORAGE BAY (Disk sold separately)
C310-00R DuraCOR 310, i.MX6Quad, 1 GB RAM, no mSATA, Removable 2.5" SATA SSD
Storage Bay (disk sold separately)
Base System
The base system contains a SMARC form factor processor card and a pre-installed storage loaded with
Linux.
Example ordering code:
C310-01: DuraCOR 310, i.MX6 Quad, 1 GB RAM, 16 GB mSATA, Linux
Figure 1: Base Unit

DuraCOR 310 Chapter 1 Introduction
MNL-0666-01 Rev A3 ECO-5479 Effective: 26 Apr 18 Page 11 of 51
Base System with Removable Storage Bay Option
Example ordering code
C310-00R: DuraCOR 310, i.MX6Quad, 1 GB RAM, no mSATA, Removable 2.5" SATA SSD
Storage Bay (disk sold separately)
SSD31X-064S-L: 64 GB 2.5" SATA SSD, Industrial SLC NAND Flash -40/+85C, Mounting
Tray, Linux (compatible with DuraCOR 31X)
Figure 2: Base System with Removable Storage Bay

DuraCOR 310 Chapter 1 Introduction
Page 12 of 51 MNL-0666-01 Rev A3 ECO-5479 Effective: 26 Apr 18
System Block Diagram
The block diagram shows the DuraCOR 310 interfaces.
Figure 3: DuraCOR 310 Block Diagram
Table 2: DuraCOR 310 Peripheral Chip List
Interface Description MFG MFG Part Number
Processor Freescale i.MX6 Arm – On SMARC Freescale
Ethernet Broadcom - On SMARC Broadcom
I210 - On Motherboard Intel WGI210IT
Serial
Dual TXRX RS232/422/485 Multiprotocol
Transceiver Linear Technologies LTC2872
TXRX RS-232 Transceiver Analog Devices ADM3222A
PCIe PCIe Switch Broadcom/Avago PEX8605
PCIe Gen 3 Mux/Dmux NXP Semiconductors CBTL02043A
USB 7-port USB 2.0 HUB Microchip Technology USB2517
Audio Audio CODEC NXP/Freescale SGLT5000
Microcontroller ARM Microcontroller NXP/Freescale MK60DN512

DuraCOR 310 Chapter 1 Introduction
MNL-0666-01 Rev A3 ECO-5479 Effective: 26 Apr 18 Page 13 of 51
Shared Resources and Connectors Location
To accommodate different configurations, the following shared resources are explained below:
SATA / mSATA: P6 on the motherboard allows an add-on SATA drive to be attached to the system via
an add-on ring if larger capacities or removable storage is desired. If an added SATA device is attached
the mSATA socket can no longer be used for storage.
Figure 4: SATA Expansion
P6

DuraCOR 310 Chapter 2 Operational Description
Page 14 of 51 MNL-0666-01 Rev A3 ECO-5479 Effective: 26 Apr 18
Chapter 2 Operational Description
Mini-PCIe Expansion
The DuraCOR 310 Mission Computer provides a powerful and flexible platform to integrate a variety of
devices based on Mini-PCIe.
Without increasing the height of the base unit the DuraCOR 310 can support up to two (2) Mini-PCIe
cards.
Typical devices offered in the Mini-PCIe form factor that can be easily integrated into a DuraCOR 310
include:
Gigabit Ethernet
MIL STD 1553
ARINC 429
CAN Bus
Frame Grabbers - TBD
GPS
Wi-Fi
Serial ports
Analog/digital data acquisition cards
GPIO
SATA
Figure 5: Mini-PCIe Cards from various Manufactureres
Installing Mini-PCIe Cards into the DuraCOR 310 Mission
Computer
Caution! ESD Sensitive Components
Follow standard ESD and FOD controls to avoid damage to the internal components.

DuraCOR 310 Chapter 2 Operational Description
MNL-0666-01 Rev A3 ECO-5479 Effective: 26 Apr 18 Page 15 of 51
1. Remove the 15x 2-56 bolts using a #1 Philips screwdriver and remove base.
2. Insert a mini-PCIe card into slot 1 or 2. Use 2x 2mm screw with thread-locker, such as Loctite
222, to secure card to motherboard.
3. Connect the corresponding cable from the mini-PCIe card to the expansion pins of the DuraCOR
310 I/O Board as required
a. A custom cable is required. See Integrating mini-PCIe Cards and Chapter 5 for available
I/O pins.
4. Close the unit and tighten screws to 34.4 in. oz. [0.24 Nm]. Use a thread-locker, such as Loctite
222.
Integrating Mini-PCIe Cards
To create a cable to bring out the I/O from the mini-PCIe cards through the circular connectors (J2-J4)
use the information in Chapter 5 for the available I/O. The below table contains the mating connectors for
the expansion I/O and the corresponding circular connector pins. See Chapter 5; section Configurable
I/O Internal Connectors for manufacturer part number, mating connector, locations and pinouts. The
configurable IO lines do not contain any ESD protection.
Figure 6: Card Slot Identification
Storage Options
The DuraCOR 310 has a number of options for data storage. The system has ability to use either an
mSATA or a 2.5” removable SSD. The DuraCOR 310 also has a microSD card slot. Support for an
mSATA SSD and a microSD card within the base unit, and a 2.5” SSD on an expansion segment provide
flexibility and many possible storage configurations.
Mini-PCIe
mSATA
SMARC
Mini-PCIe

DuraCOR 310 Chapter 2 Operational Description
Page 16 of 51 MNL-0666-01 Rev A3 ECO-5479 Effective: 26 Apr 18
mSATA
The default storage for the DuraCOR 310 base system is an mSATA card. Typically, this will be installed
at the factory. All drives loaded are rated to the same or greater environmental specifications as the
system. See Figure 5.
2.5” SSD Expansion
With the addition of a separate ring or housing, the DuraCOR 310 has the ability to incorporate a 2.5”
SSD. The capacities will be limited to what is available in the industrial market. If an mSATA storage
device is loaded in the system, when a 2.5” SSD is attached the system will automatically select the 2.5”
drive as the storage device. The removable SATA drive is hot swappable, therefore, there is no need to
turn system off prior to installing or removing the drive. Hot swappable activation or deactivation can be
selected in BIOS, see BIOS Settings below.
Installing the Device
Below are the basic steps to install a 2.5” SATA drive in the system.
Ensure the SATA drive is securely attach to the SSD tray using 4x M3 flat head screws and a
thread locker (i.e. Loctite 222).
Remove the door and place the drive and tray assembly on the door.
Slide the assembly into the system with the words and symbols toward the top of the unit. The
removable storage device can only be inserted in to the system in one direction.
Tighten the thumb screws. Ensure both thumb screws are tight; otherwise the system may not be
watertight.
Removing the Device
Loosen the thumb screws completely.
Pull on the door to disconnect and remove the drive.
Remove the drive tray from the door. Replace the door on the system to maintain environmental
seal.
If desired, remove the drive from the tray. Take care not to lose the screws.
Accessories
Drive tray
4x M3x0.5x4mm flat head screw
Figure 7: SSD Removable Tray

DuraCOR 310 Chapter 2 Operational Description
MNL-0666-01 Rev A3 ECO-5479 Effective: 26 Apr 18 Page 17 of 51
MicroSD Card Expansion
The DuraCOR 310 also has the ability to use a microSD card for storage. A microSD card may be used
in conjunction with another storage device. All drives loaded are rated to the same or greater
environmental specifications as the system.
Figure 8: MicroSD Card Slot
Caution! ESD Sensitive Components
Follow standard ESD and FOD controls to avoid damage to the internal components.
Installation
Power off system and remove the bottom cover
Slide the microSD cage cover toward the pins
Figure 9: MicroSD Card Removal
SD
CARD

DuraCOR 310 Chapter 2 Operational Description
Page 18 of 51 MNL-0666-01 Rev A3 ECO-5479 Effective: 26 Apr 18
Lift cage
Place the microSD card into the socket
Lower the cage and slide it away from the board edge to lock it in place. There will be an audible
click when cage is secured.
Replace the bottom cover and secure the screws to 34.4 in-oz., using thread-locker (i.e. Loctite
222).
Removal
Power off system and remove the bottom cover
Slide the microSD cage cover toward the board edge (Figure 9)
Lift cage
Remove the microSD card
Lower the cage and slide it away from the board edge to lock it in place. There will be an audible
click when cage is secured.
Replace the bottom cover and secure the screws to 34.4 in-oz. [0.24 Nm], using thread-locker
(i.e. Loctite 222)

DuraCOR 310 Chapter 2 Operational Description
MNL-0666-01 Rev A3 ECO-5479 Effective: 26 Apr 18 Page 19 of 51
Audio
The DuraCOR 310 supports stereo audio. Audio can be used without any modification through the HDMI
port. If audio, this includes microphone, line in, line out, and headphone, is required these signals can be
accessed using the configurable I/O pins. A cable with the P2 connector pinout below will allow the
system to breakout these signals. The second termination on the cable can be any combination of the
configurable I/O which best suits the implementation needs. See Chapter 5, section Configurable I/O
Internal Connectors for manufacturer part number, mating connector, locations and pinouts.
Caution! ESD Sensitive Components
Follow standard ESD and FOD controls to avoid damage to the internal components.
Microphone
Microphone is mono only.
Table 3: Stereo Connector Pinout
P2 Signals
1 HeadphoneRight
2 LineOutRight
3 HeadphoneLeft
4 LineOutLeft
5 HeadphoneGND
6 AudioGND
7 AudioGND
8 LineInRight
9 Microphone
10 LineInLeft
Serial Configuration
The DuraCOR 310 has two integrated serial ports that are capable of RS232, RS422, and RS485. By
default, both of these serial ports are configured as RS232. The onboard microcontroller manages the
mode of the serial interfaces, and can be configured via USB. See Appendix A for more information on
configuring the serial interfaces via the onboard microcontroller.
The DuraCOR 310 also has a RS232 console port for remote communication.
GPIO
The DuraCOR 310 has support for 6x GPIO lines on the J3 connector (See Chapter 5, J3 for pins). The
signals may be configured as any combination of input or output lines. Each output drives to a 3.3V level,
inputs are 5V tolerant. See Appendix B for configuring the GPIO signals.

DuraCOR 310 Chapter 2 Operational Description
Page 20 of 51 MNL-0666-01 Rev A3 ECO-5479 Effective: 26 Apr 18
CAN
The DuraCOR 310 has two integrated non-isolated CAN ports. The CAN ports are not terminated
internally. The customer is responsible for port termination. An mPCIe card can be inserted to obtain
isolated ports.
Built-In Test (BIT)
The onboard microcontroller monitors many status lines and voltages on the system for the purposes of
BIT. The microcontroller runs these tests continuously, and logs their results to non-volatile memory.
See Appendix A for more information on accessing BIT information.
Zeroization
For data security, the DuraCOR 310 provides zeroization connection to the ARM processor and the BIT
microcontroller. The user has the ability implement the appropriate software for the system application.
The zeroization pins can be accessed from J2_28 and J2_36, see Chapter 5.
Remote Off
Remote Off may be used to hold the DuraCOR 310 in a powered off state until the user desires the unit to
be powered on. When Remote Off is enabled, no power is delivered to the system. Remote Off must be
disabled in order for the system to draw power.
Warning! The remote off signal will immediately power down the processor when it is asserted. Make
sure your system software is capable of handling hard power faults.
Implementing Remote Off
To implement Remote Off using the Test Cable Set (CBL-C31X-01), connect the red hermaphroditic
Power Pole connectors together. Disable Remote Off by separating the connectors.
To implement Remote Off using a custom cable connect J2_2 (Remote Off) to J2_13
(Remote_Off_Return) through a mechanical switch, relay, or transistor switch powered by the 28V supply.
Refer to Chapter 5 for more connector information.
Write Protect
For configuration control, the DuraCOR 311 provides a write protect connection to the mSATA, BIT
microcontroller, and the PCIe Ethernet MAC/PHY. Asserting this signal causes the mSATA and PCIe
MAC/PHY devices to be unwritable. The write protect connection to the BIT microcontroller is for
monitoring purposes. The write protect lines are accessed from J2_30 and J2_37, see Chapter 5.
Table of contents
Other Curtiss-Wright Computer Hardware manuals

Curtiss-Wright
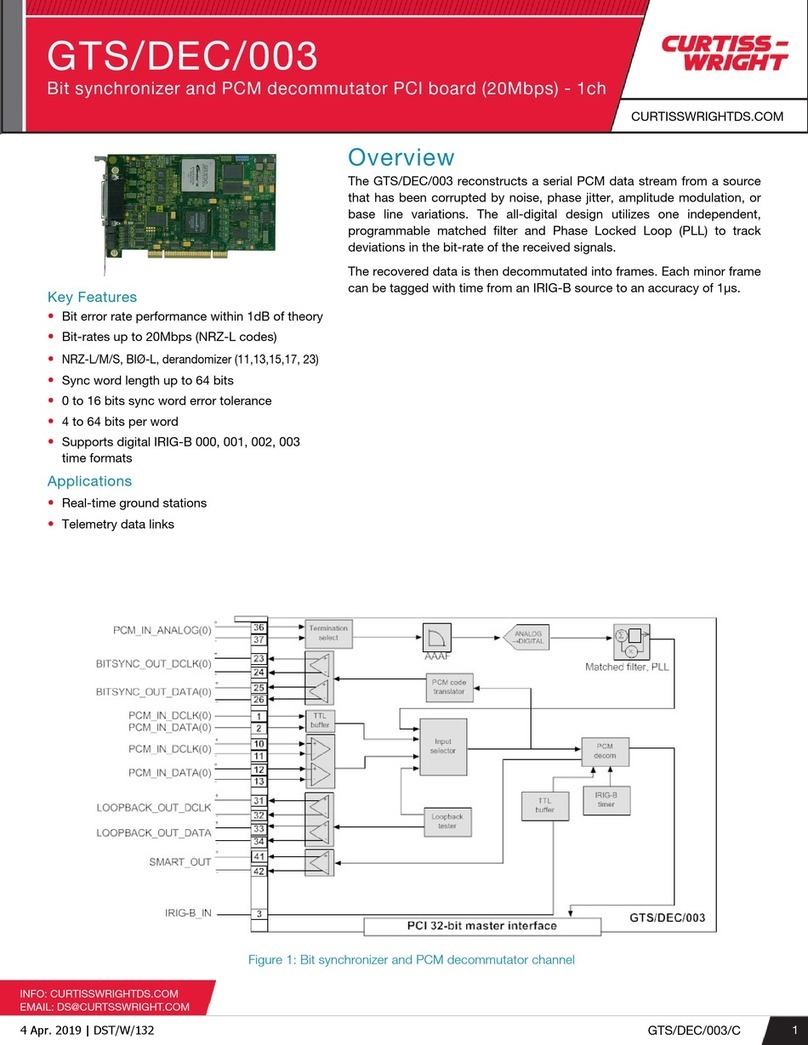
Curtiss-Wright GTS/DEC/006 User manual

Curtiss-Wright
Curtiss-Wright GT200 VME Application guide

Curtiss-Wright
Curtiss-Wright KAD/UBM/105 User manual

Curtiss-Wright
Curtiss-Wright DuraCOR 80-40 User manual

Curtiss-Wright
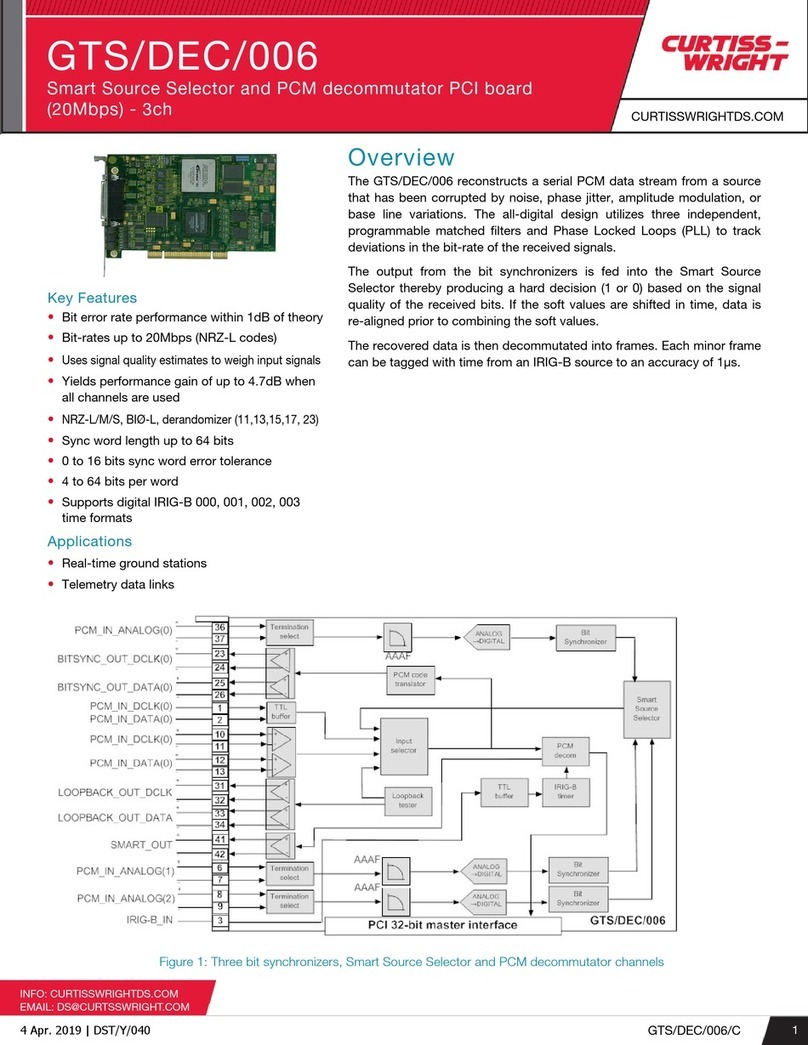
Curtiss-Wright GTS/DEC/003 User manual

Curtiss-Wright
Curtiss-Wright DTI-VME/S User manual

Curtiss-Wright
Curtiss-Wright SCRAMNet+ SC150 VME6U Application guide

Curtiss-Wright
Curtiss-Wright DuraDBH-672 User manual