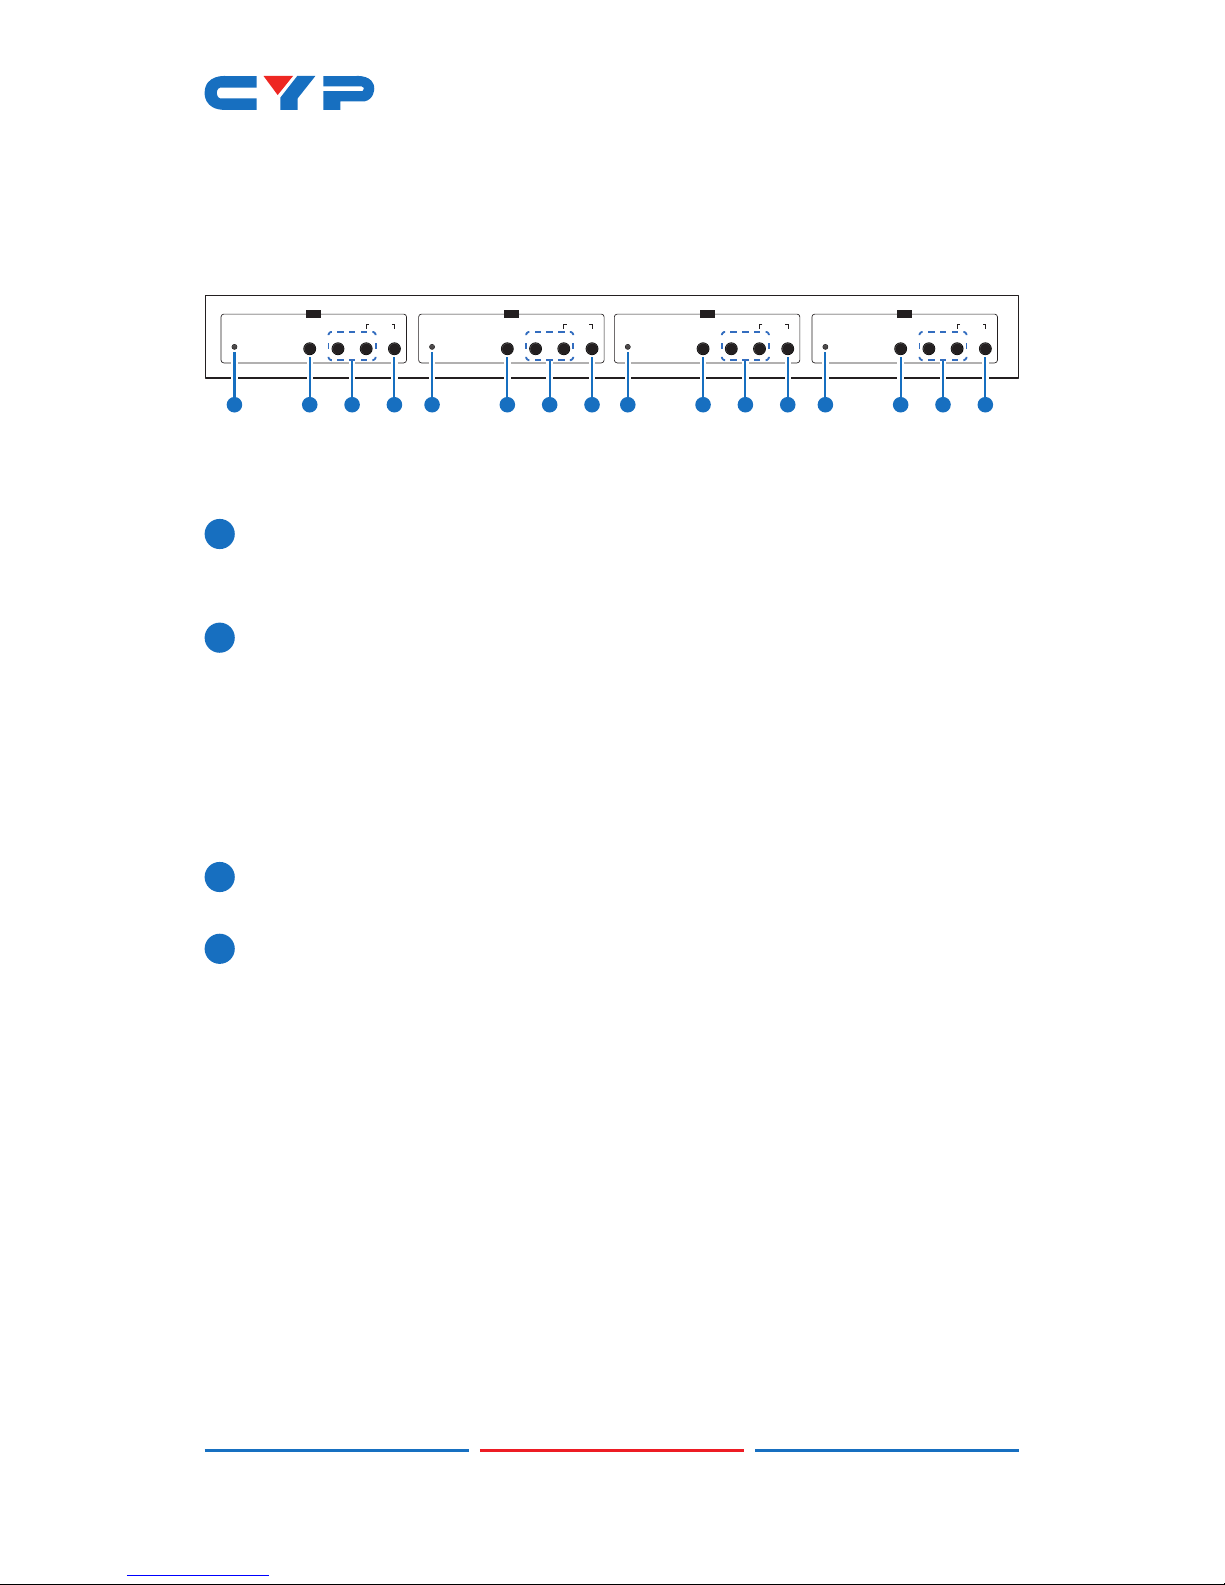
Note: The functionality of scaling units A, B, C, and D is identical,
however each unit is controlled, and operates, independently.
1POWER LED: This LED will illuminate when the unit is receiving power.
When a valid HDMI source is detected the LED will be green, if
there is no valid HDMI source, the LED will be red.
2MENU: Press to enter the OSD menu, or to back out from menu
items.
Note: Press and hold the “MENU” button for 3 seconds while
connecting the power supply to reset all settings to the factory
defaults. Pressing “MENU” and “−” together will reset the output
resolution to 720p@60Hz. Pressing “MENU” and “+” together will
reset the output resolution to XGA (1024×768@60Hz).
3 − & +: Press to move up and down or adjust selections within OSD
menus.
4ENTER: Press to conrm a selection within the OSD or to go deeper
into a menu item.
LOCK: Pressing and holding the “ENTER” and “+” buttons for 3
seconds activates the front panel Lock Mode. The power LED
will blink red multiple times to indicate that Lock Mode has been
activated. To deactivate the front panel Lock Mode, press and
hold the “ENTER” and “+” buttons again. The power LED will
blink green multiple times to indicate that Lock Mode has been
deactivated.
Note: When Lock Mode is active the OSD menu will be disabled,
however OSD signal info will still display normally. If a button is
pressed while Lock Mode is active the power LED will blink red 3
times.